- Posts: 2491
- Thank you received: 55

Pictures, videos, questions and/or comments about MGB products. Share your builds and feedback.
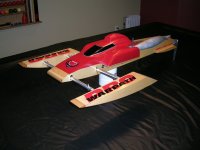
New Warpath build... this one is for Chris "Juice" Rupley
- marc
-
 Topic Author
- Away
Less
More
15 years 5 months ago - 15 years 5 months ago #15465
by marc
"
New Warpath build... this one is for Chris "Juice" Rupley was created by marc
I will post pics as I progress.. Moving along nicely so far. 
This is a kit build... using parts identical to what everyone will receive if they order a kit.
Gluing bulkheads in between tub sides.
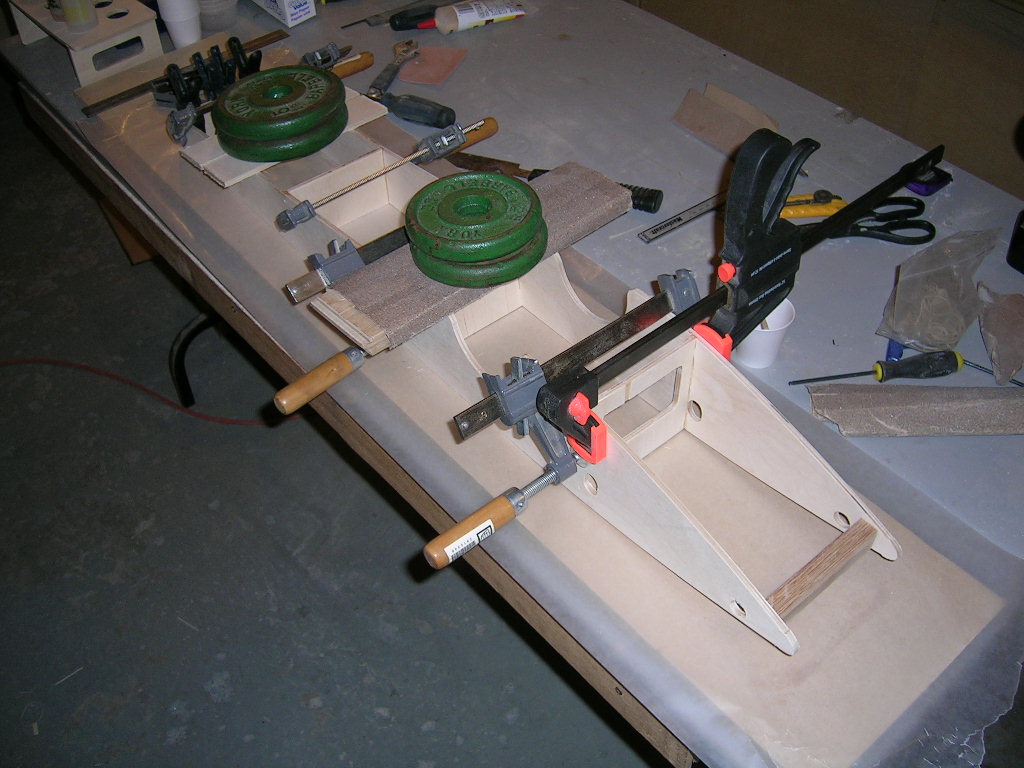
Gluing bottom sheeting to tub frame. Notice the sraight edge clamped to side to keep everything straight.
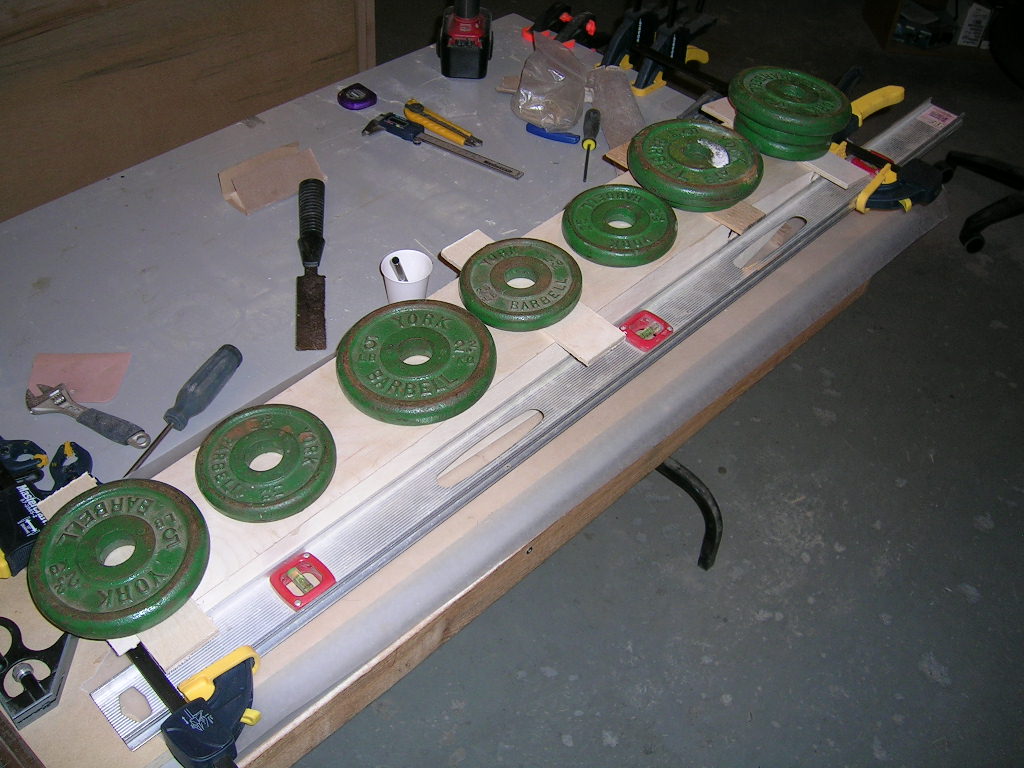
This picture just shows the 4.5" oak block used as a spacer at the front while installing the sheeting to ensure proper spacing of the sides at the front. This block is actually the block that will support the rear boom tube later on, so it's NOT glued in at this point! The reason I'm using a temporary spacer block here is because I'm doing the nose of this tub differently, and will use the full width nosepiece instead of 4.5" sandwiched between sides. It will be installed later on.
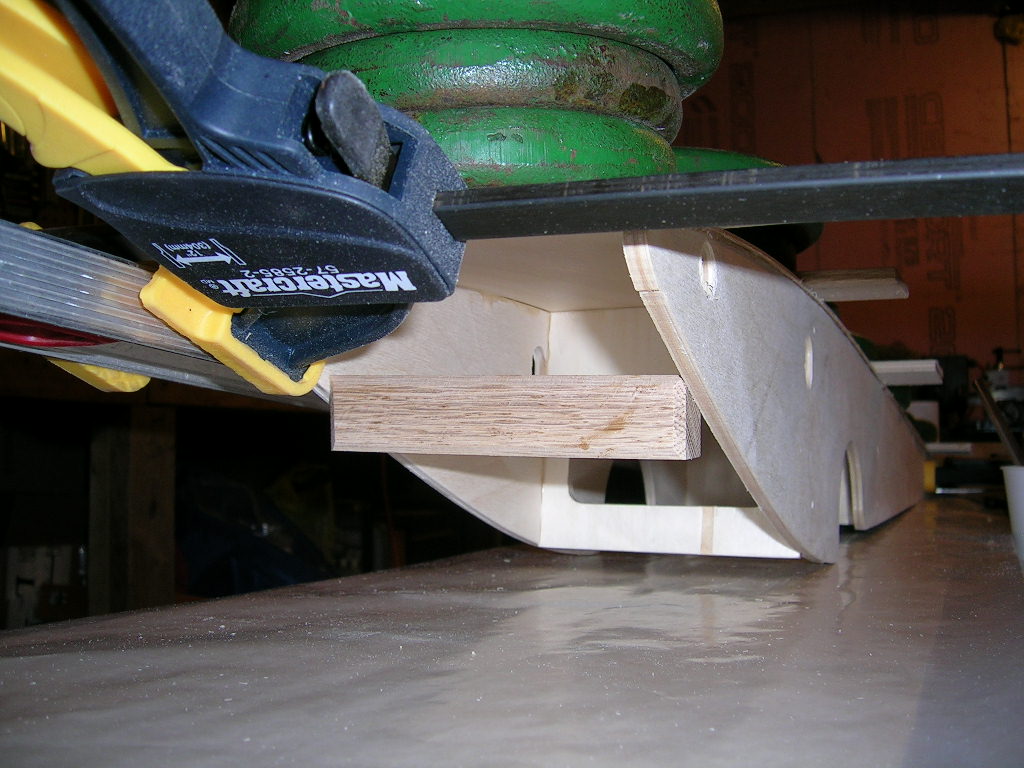
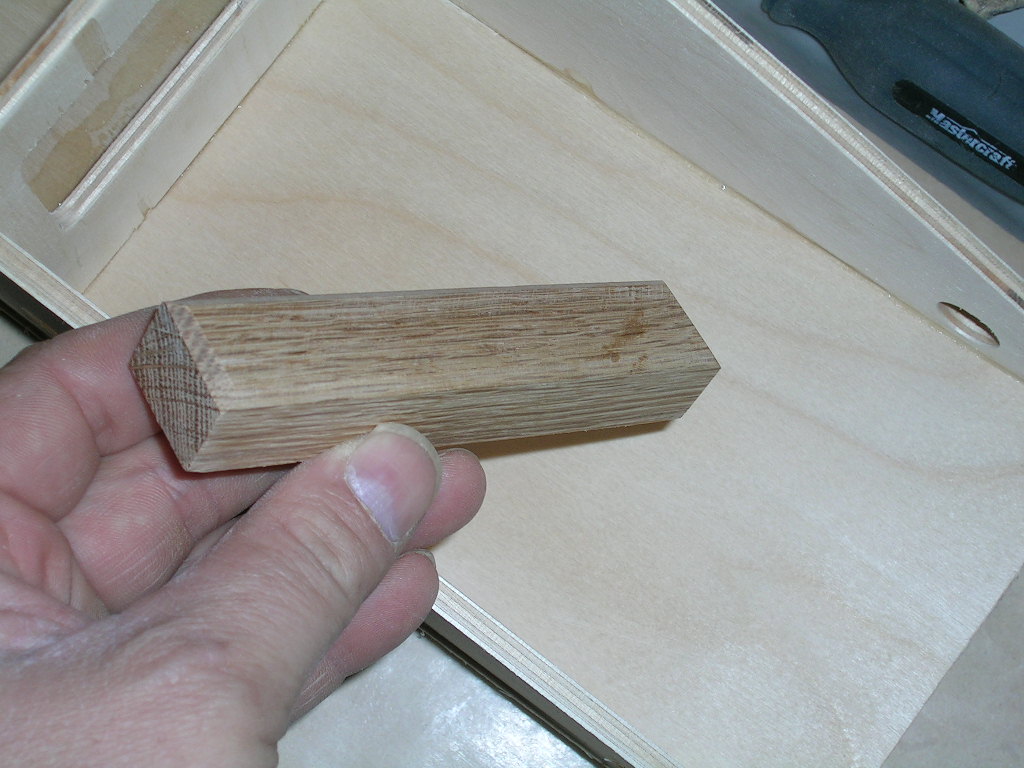
Now the 4.5" piece of oak actually gets installed where it really goes, to support the rear boom tube. Notice the bevelled bottom edges. This is to make room for a nice epoxy fillet when you push the piece flat into position. So any excess epoxy will fill this bevel...a little bit of extra glue isn't a bad thing here!
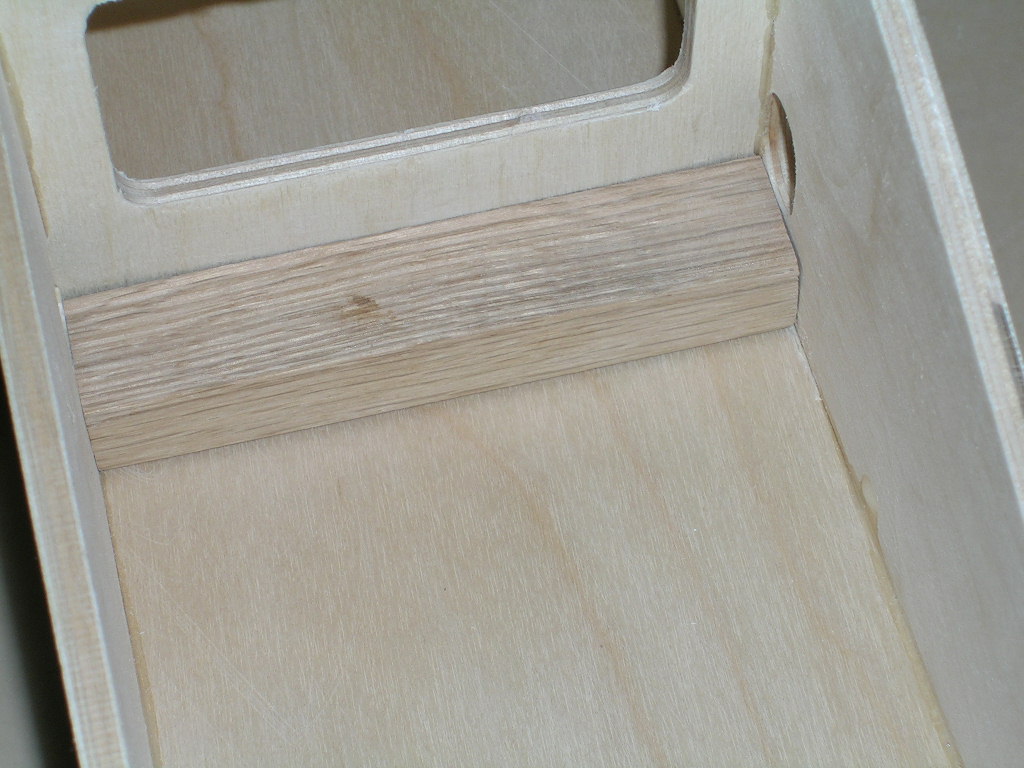
Test fit before actual gluing.
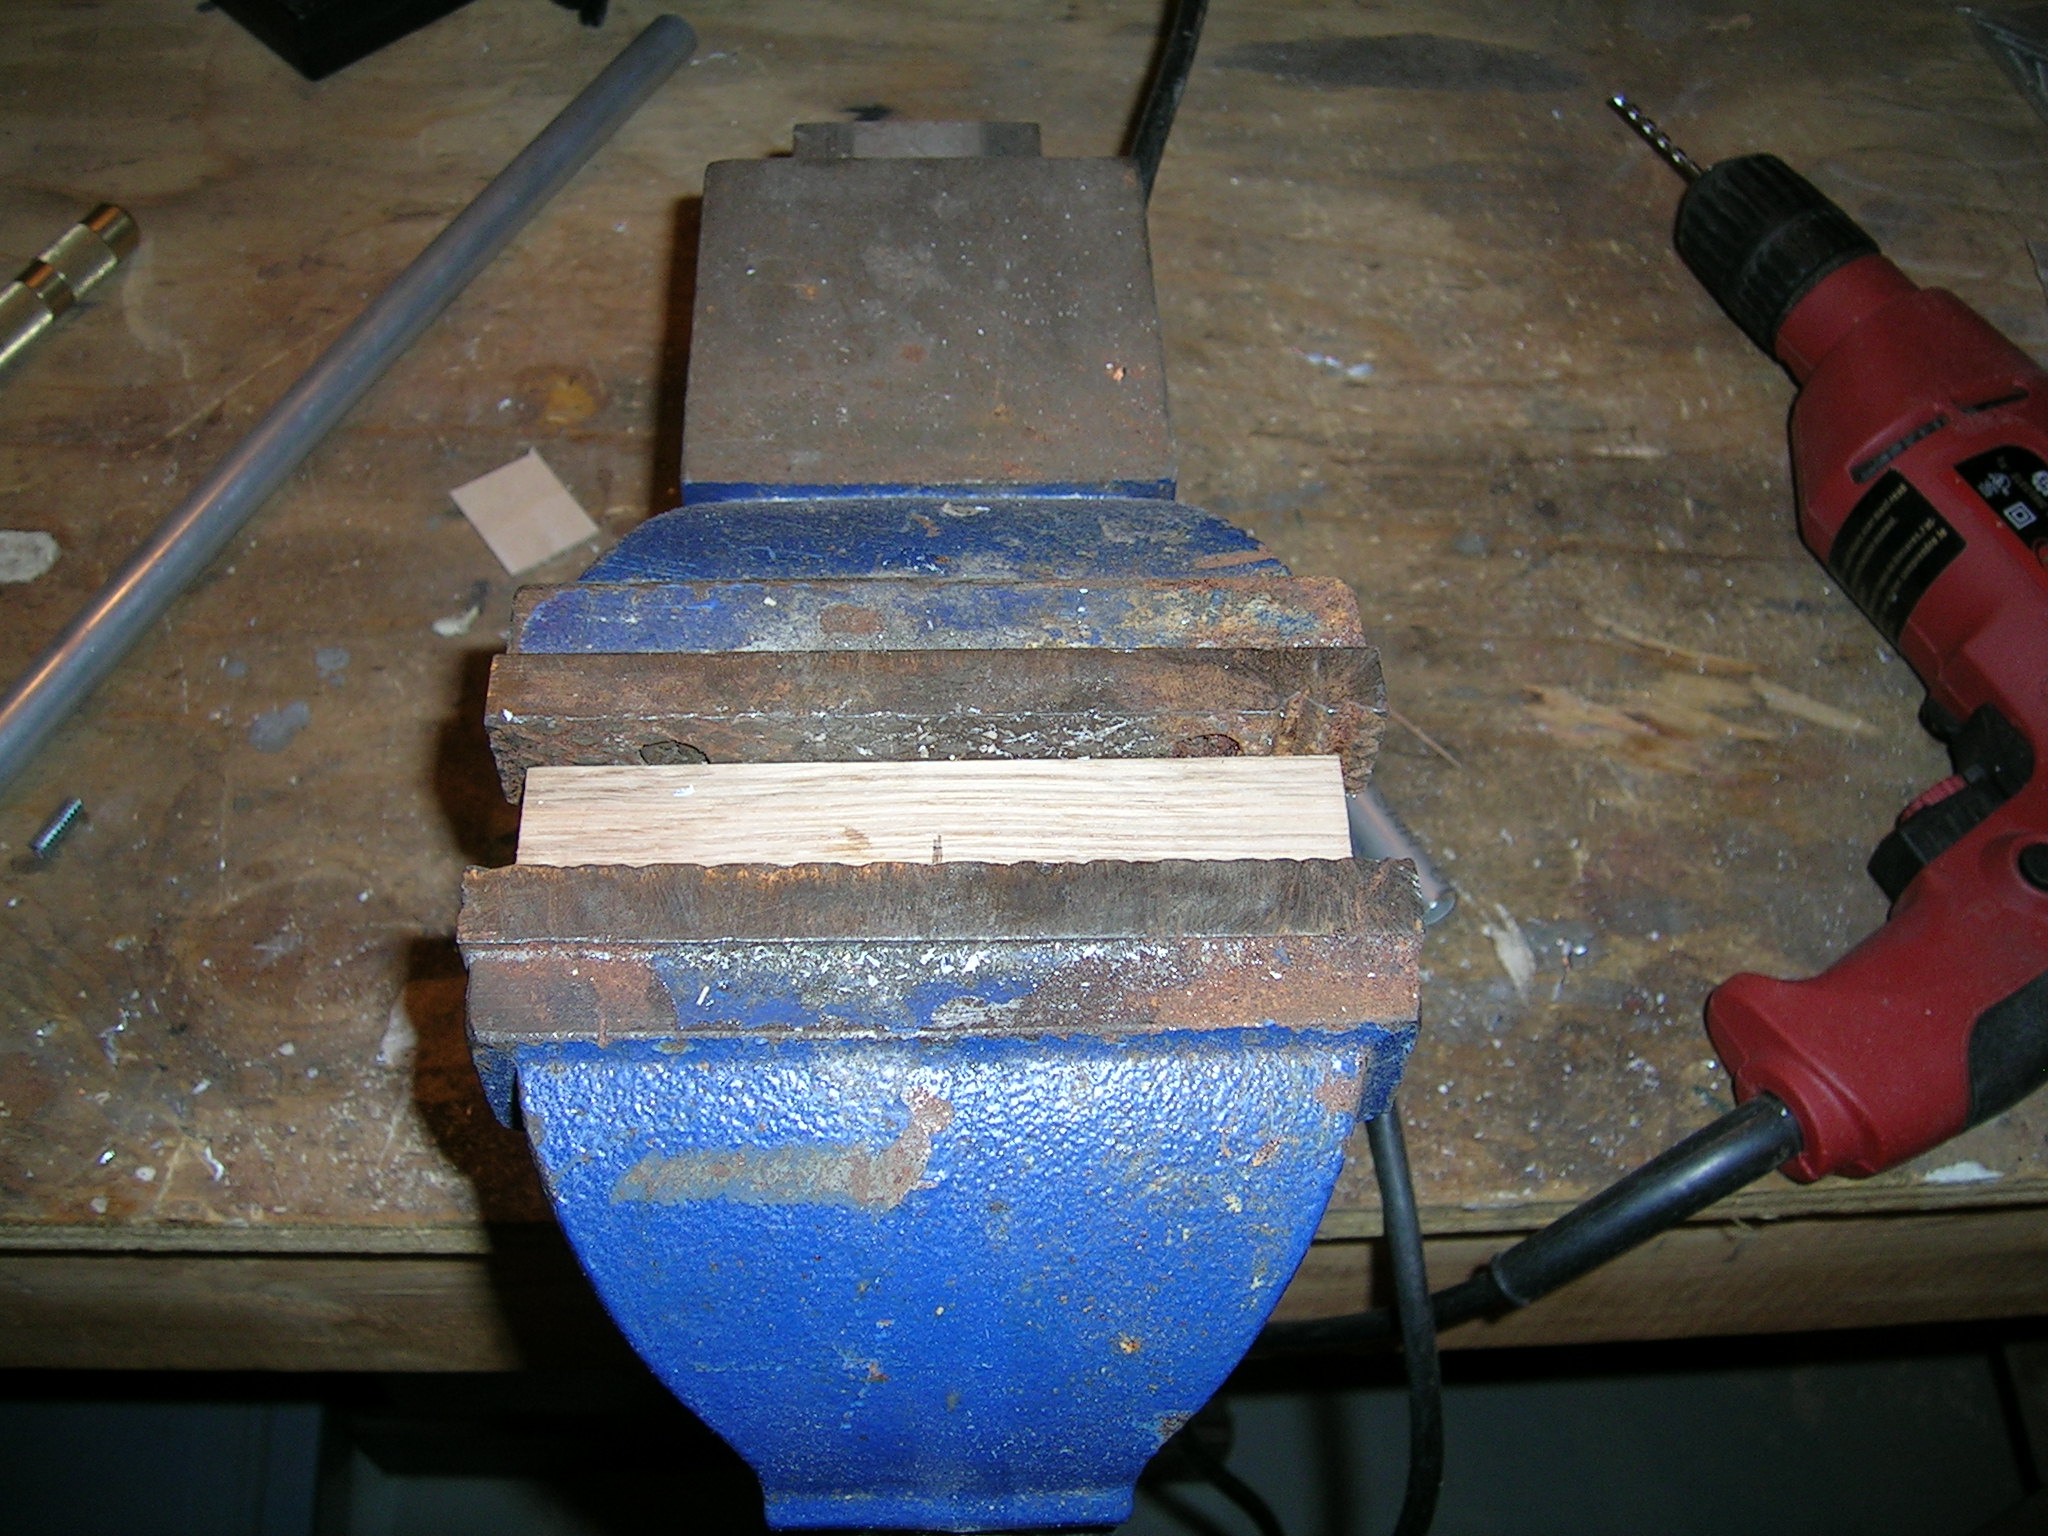
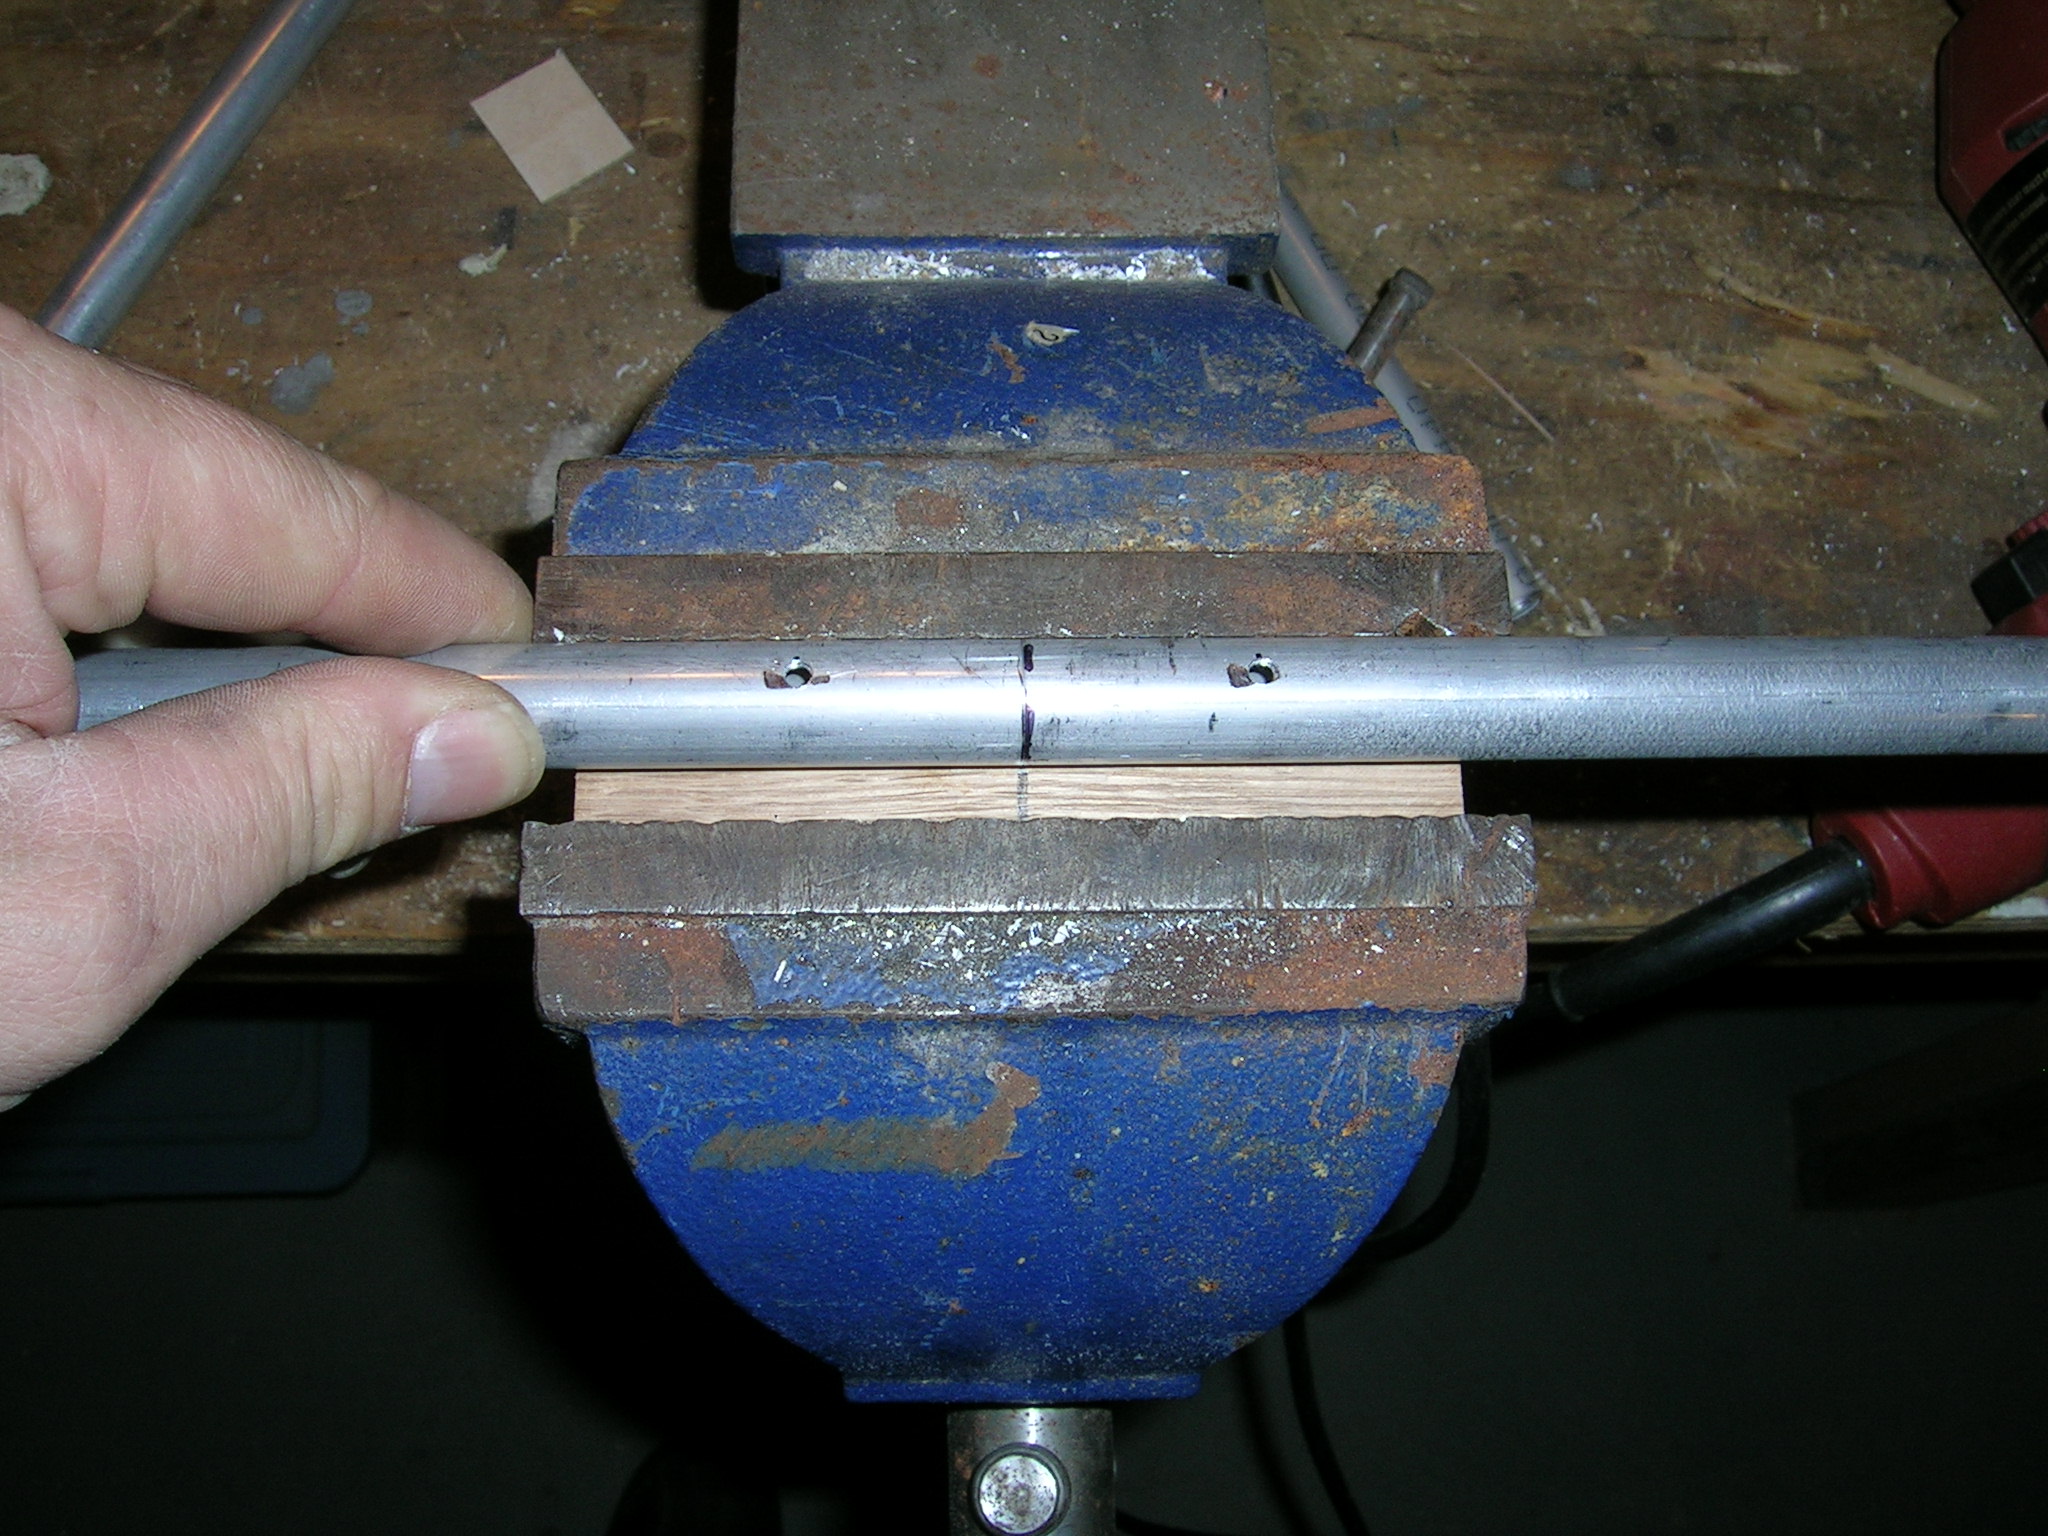
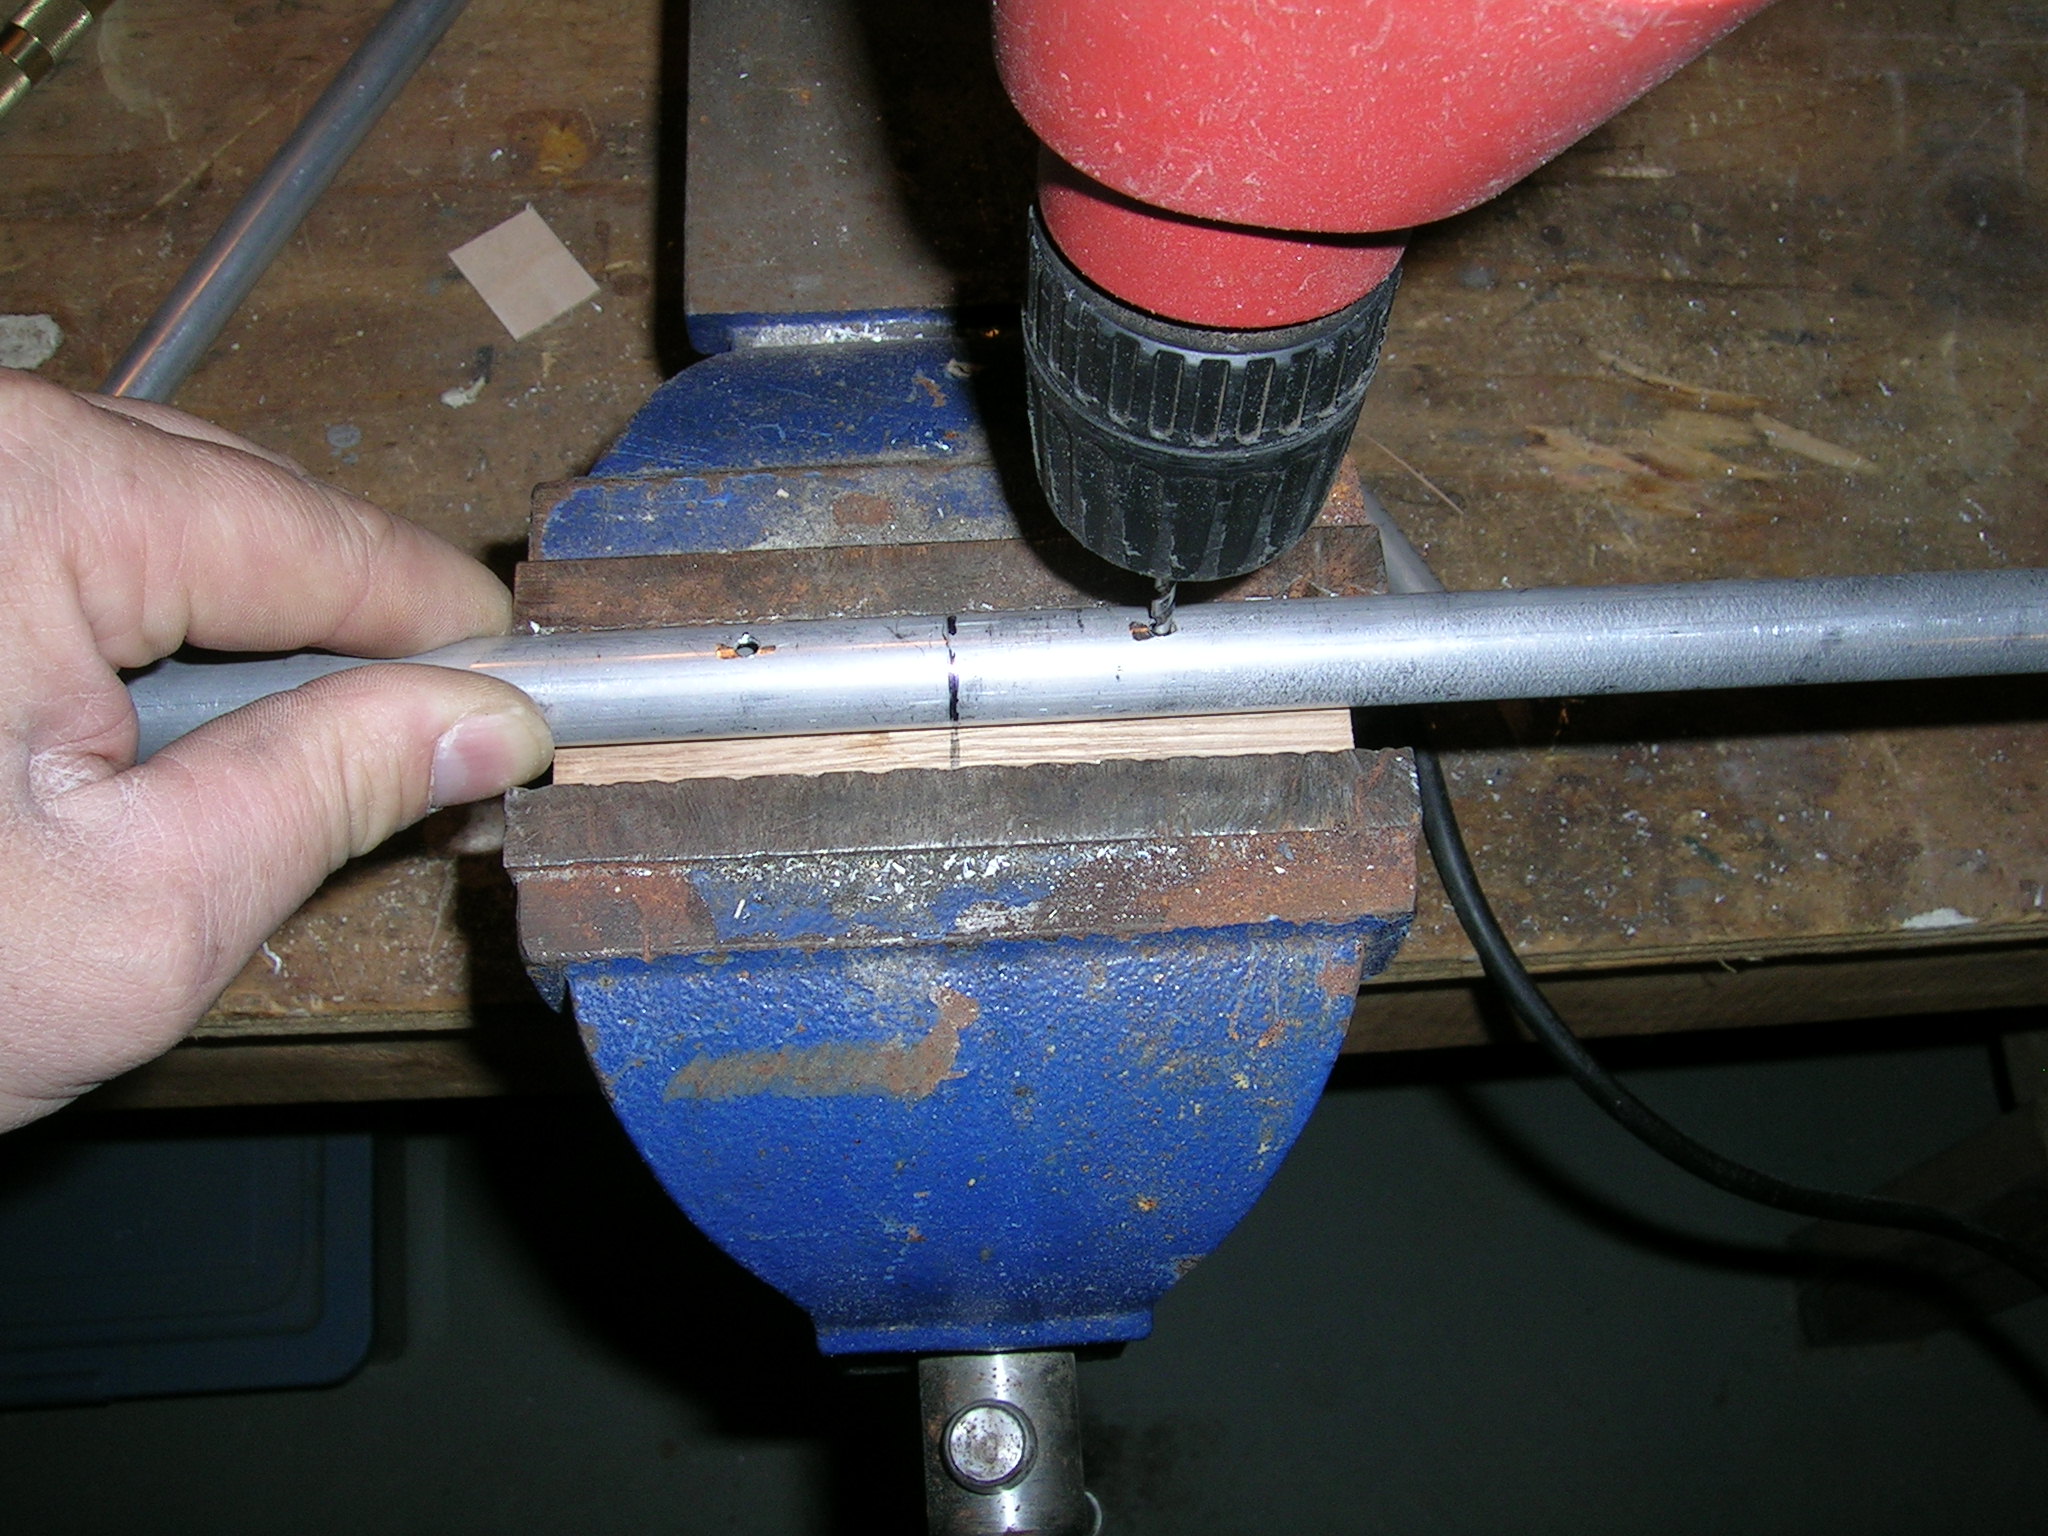
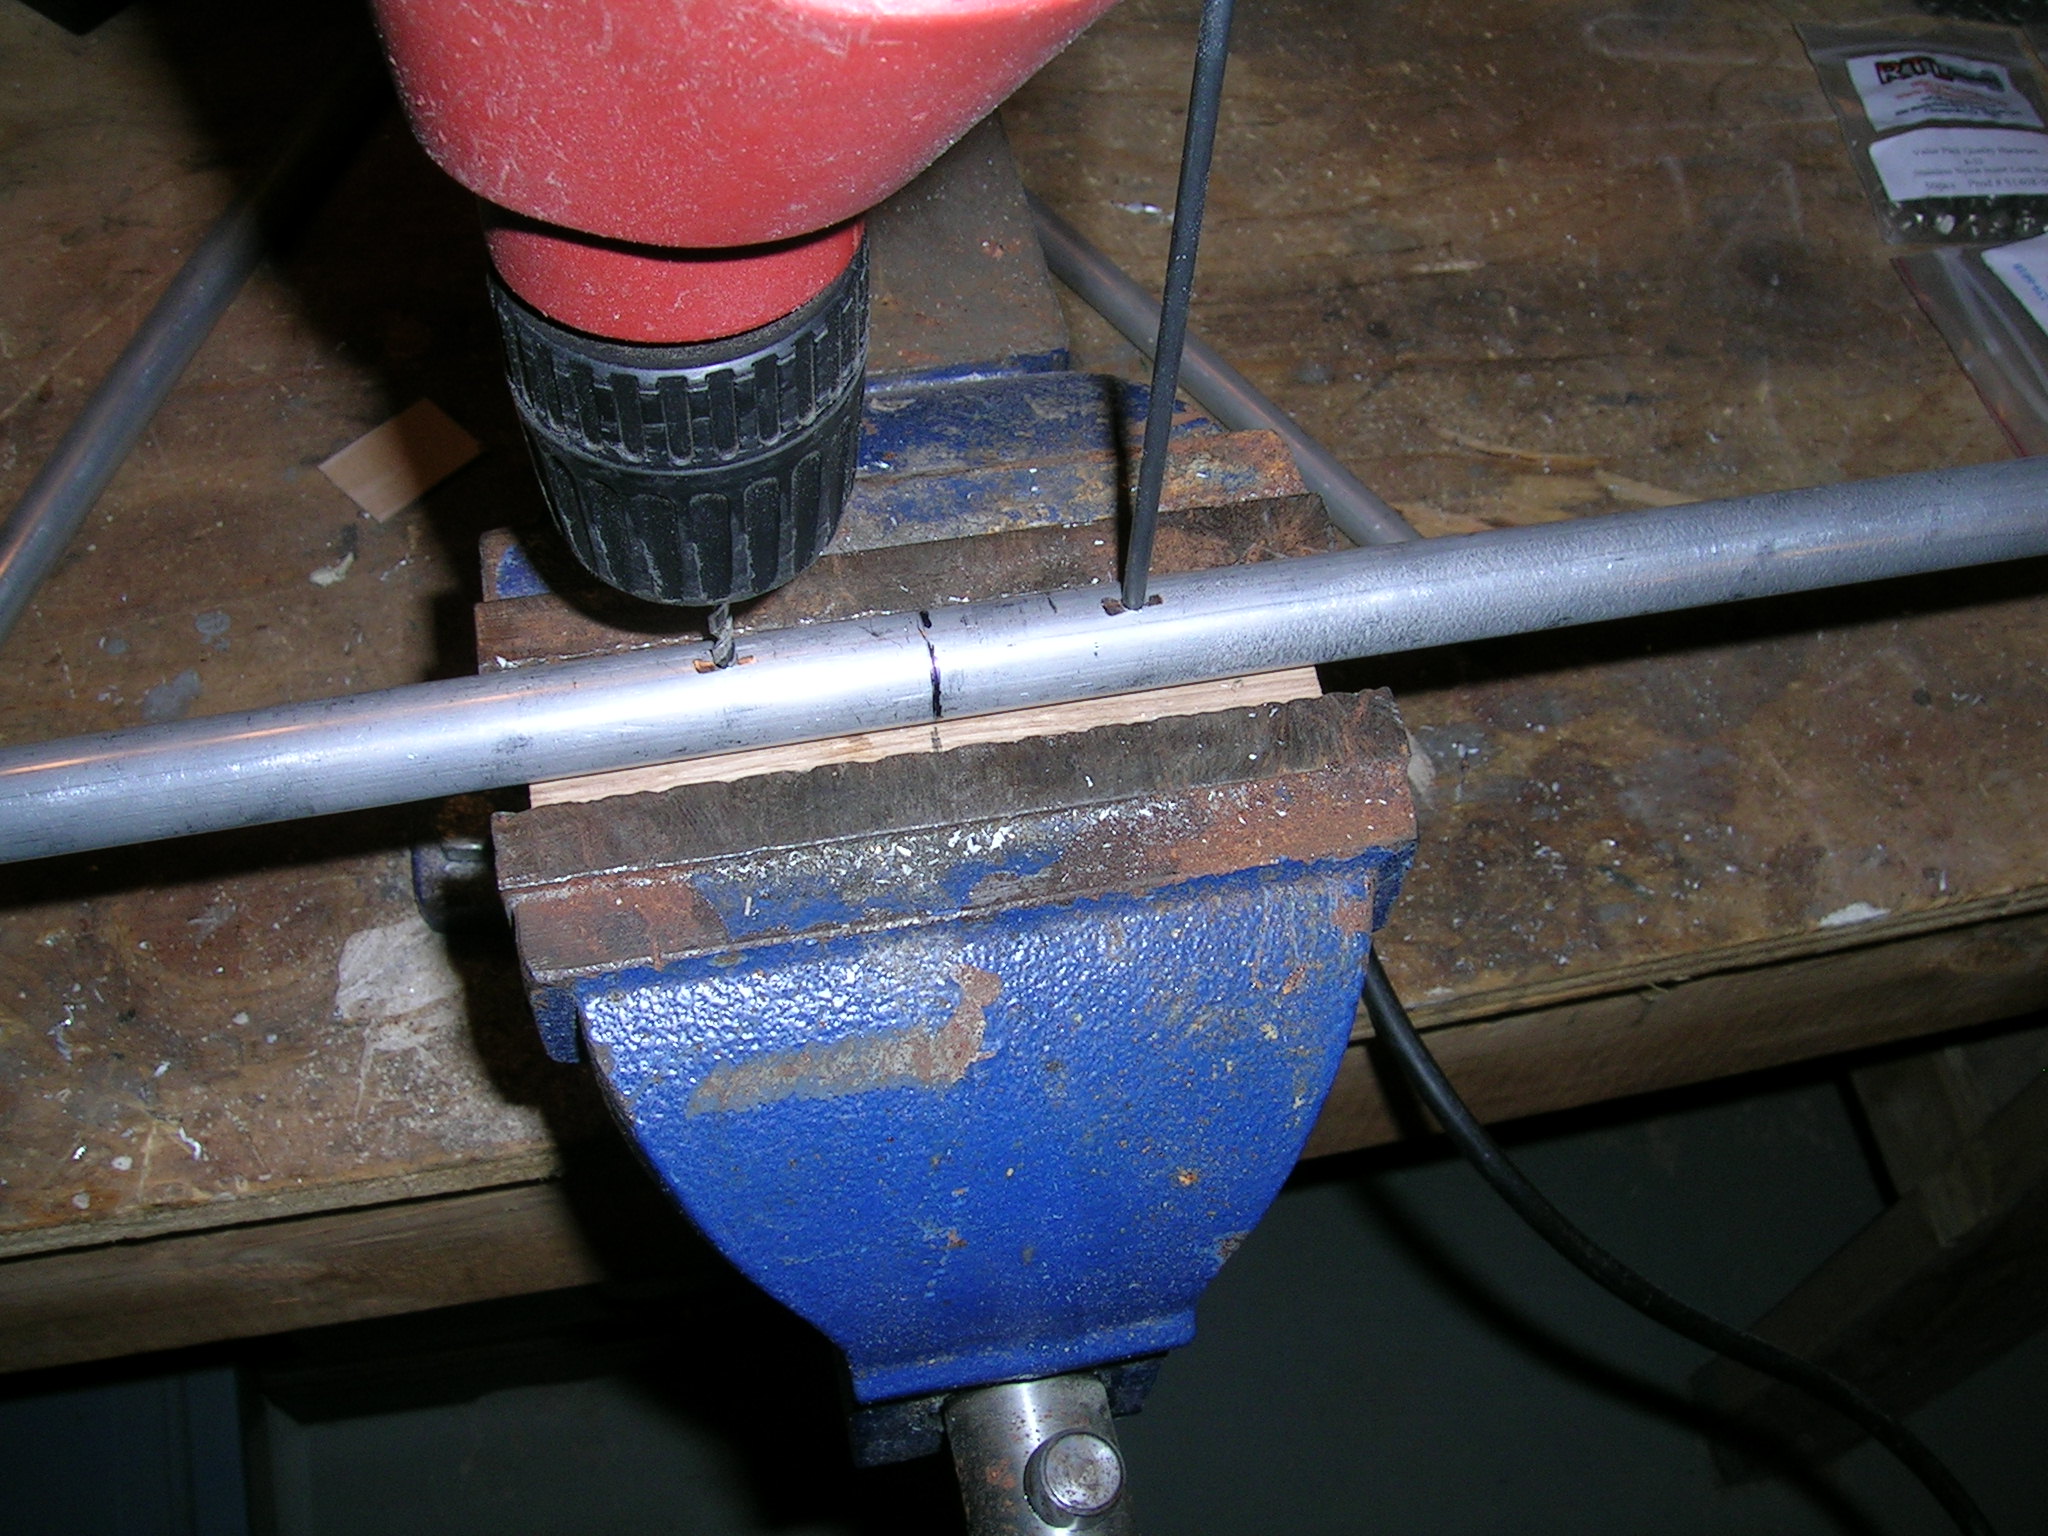
You can pre-drill the block for the screws before putting it into the tub. Here's how I do it. Set the block (bevelled edge down) deep into the vise. Mark the center of the block. Take boom tube. Mark center and drill 1/8" pilot holes in tube then line up center marks of tube and block and transfer 1/8" holes into the block. Doing it now before installing in the hull, you don't have to worry about drilling through the bottom of the tub!
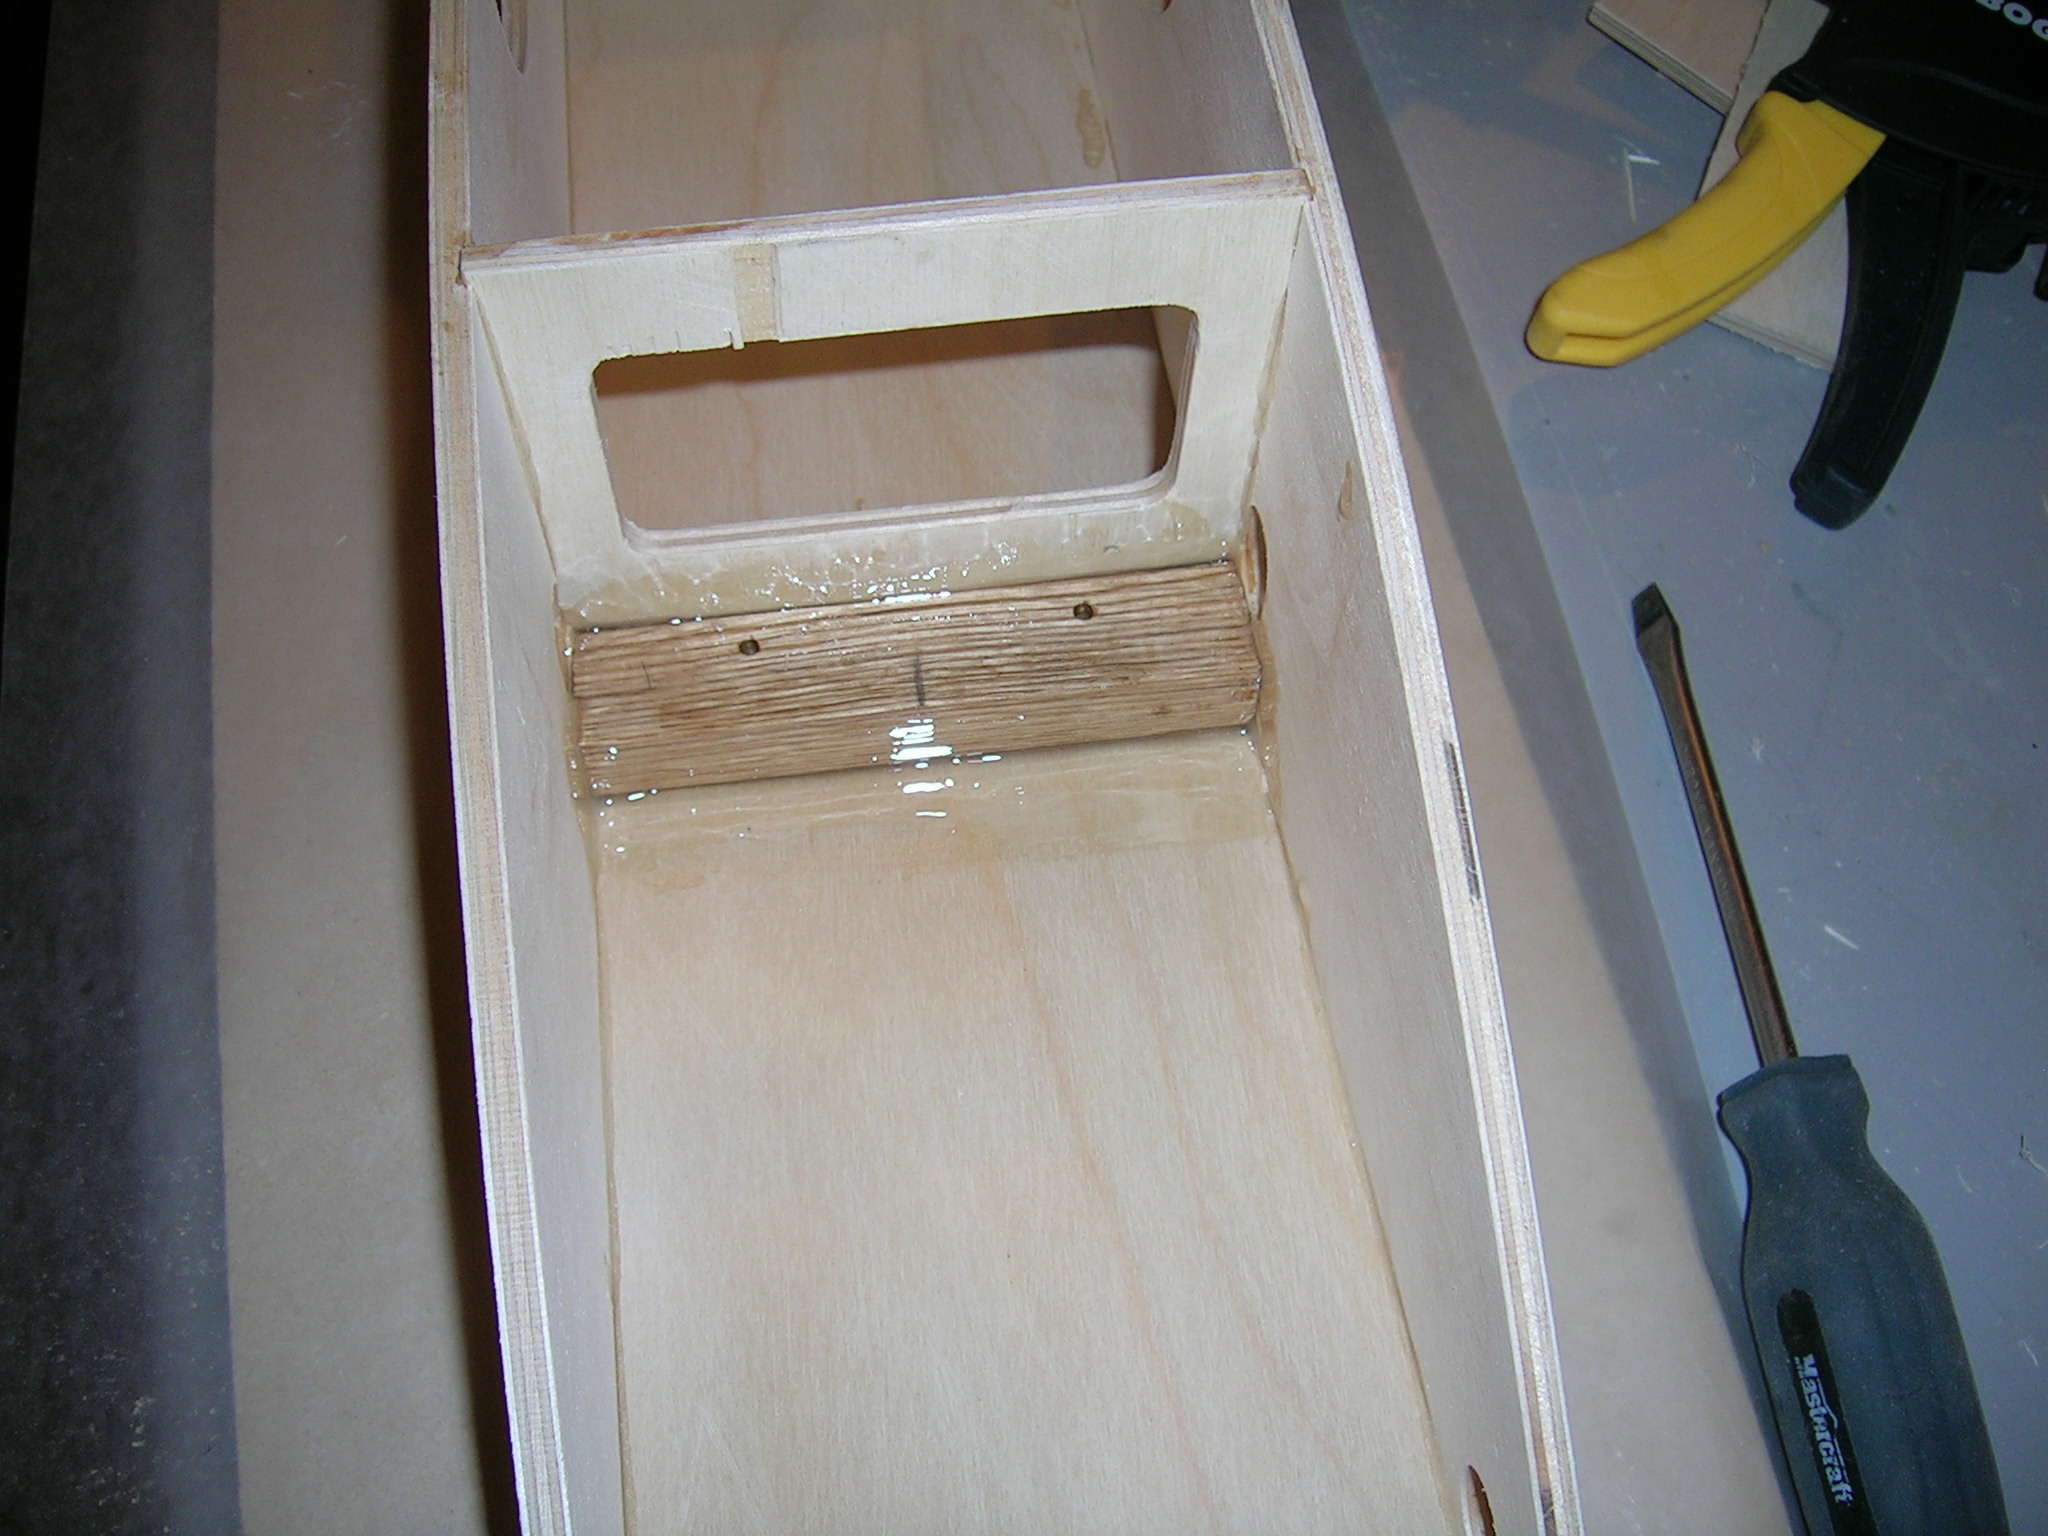
Block glued into final position.
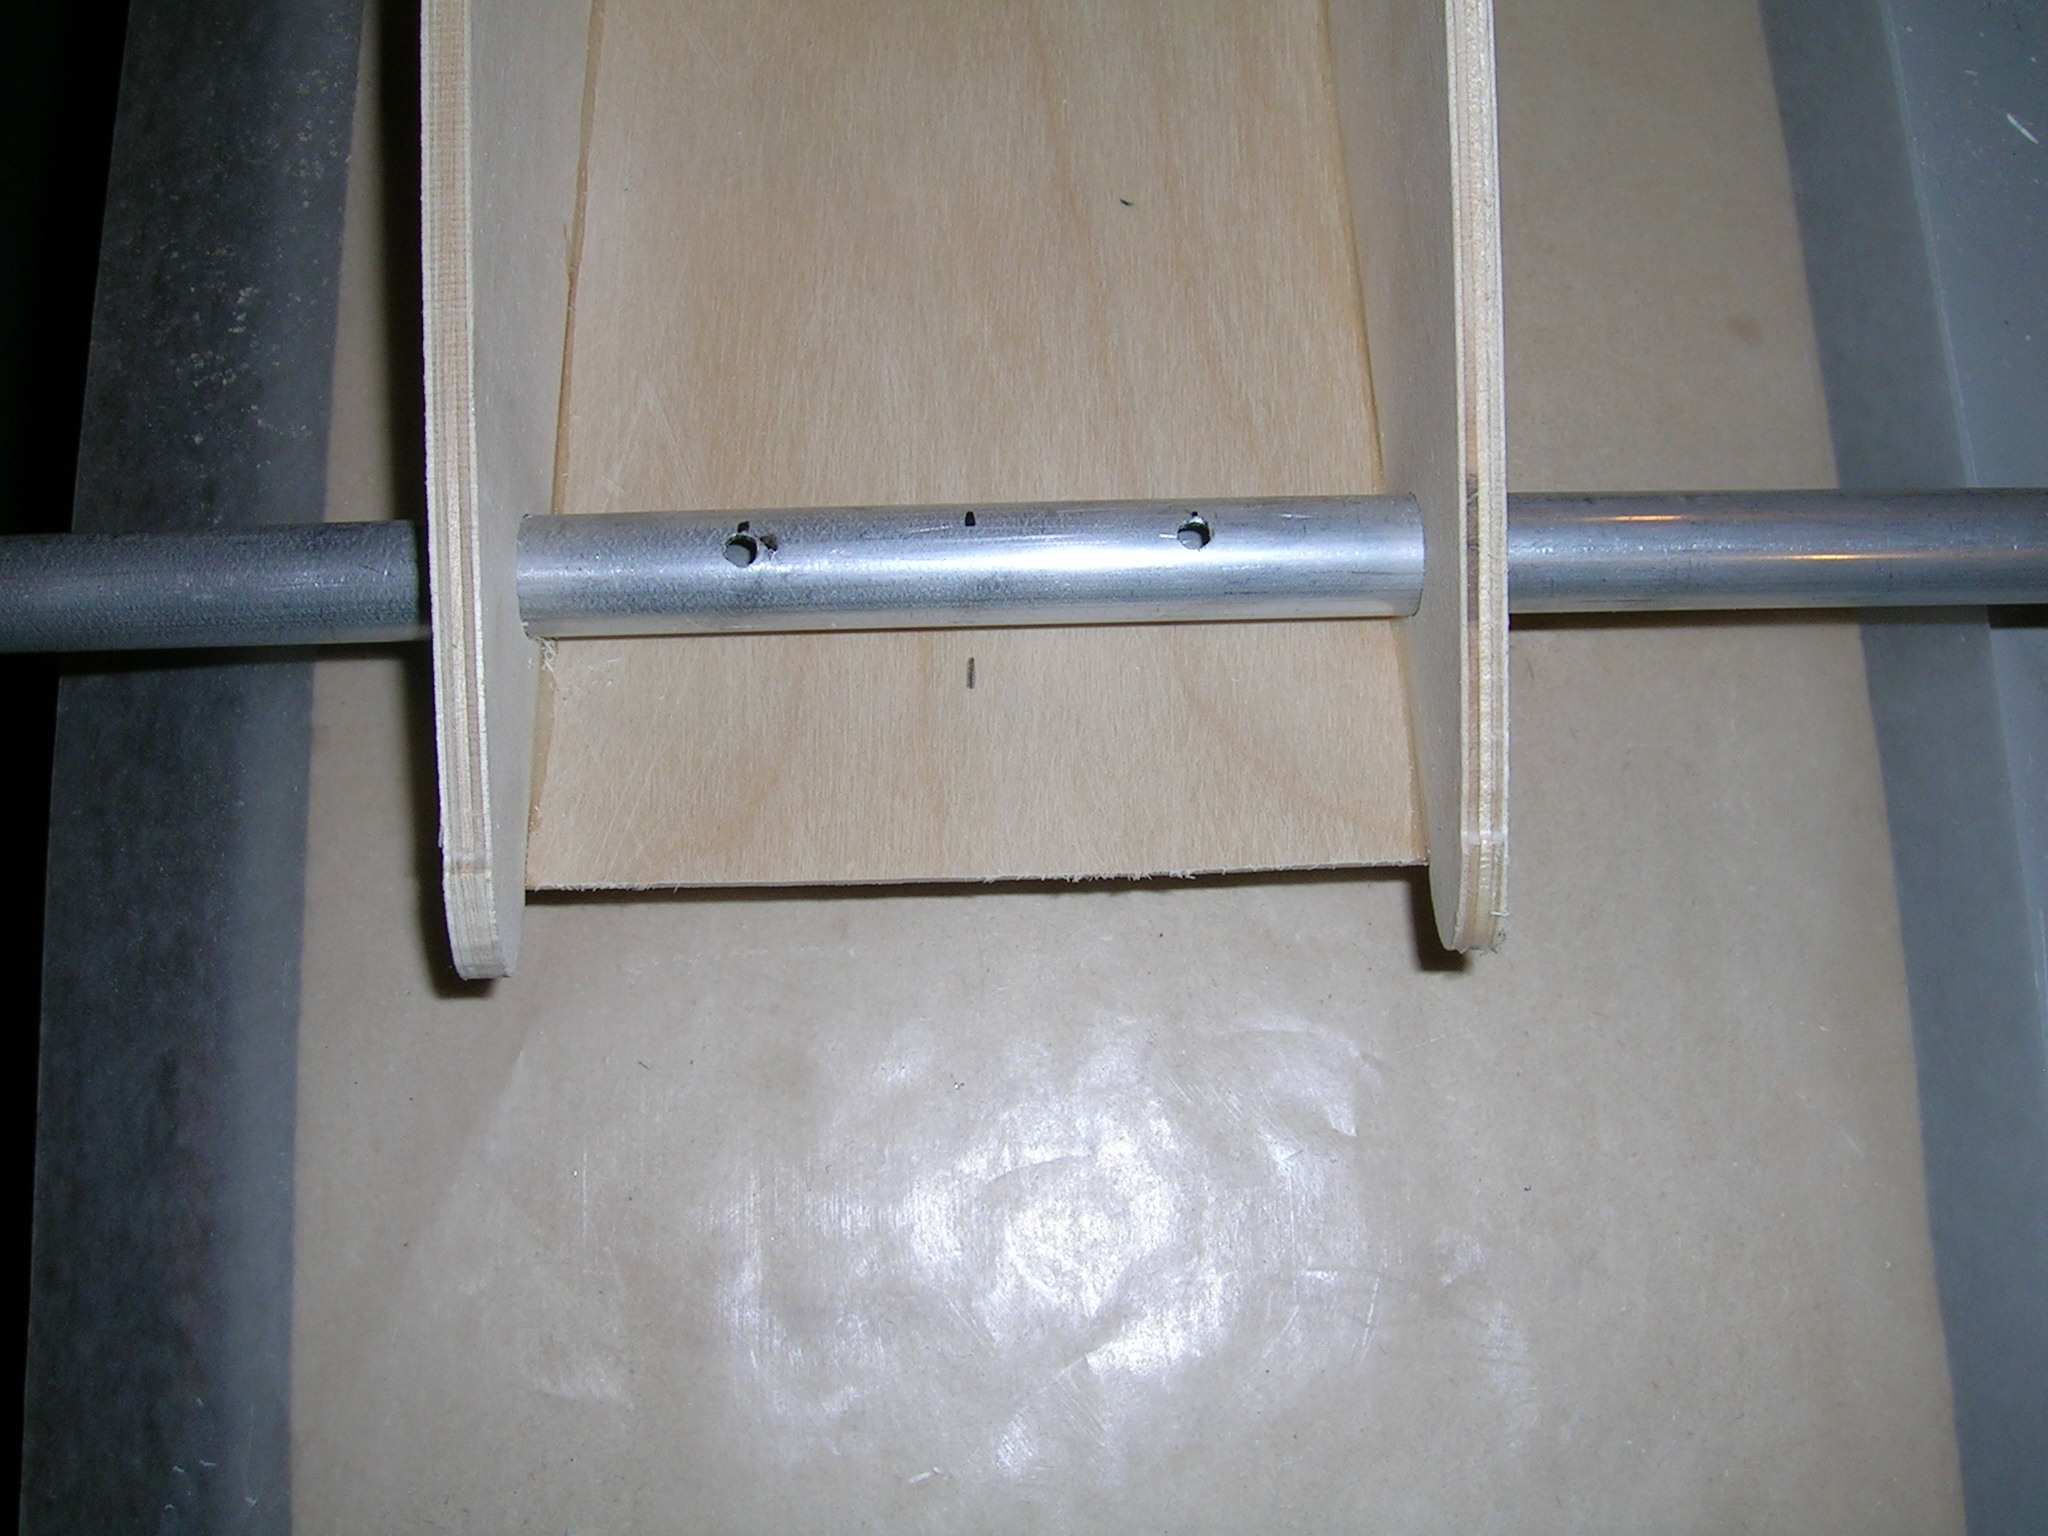
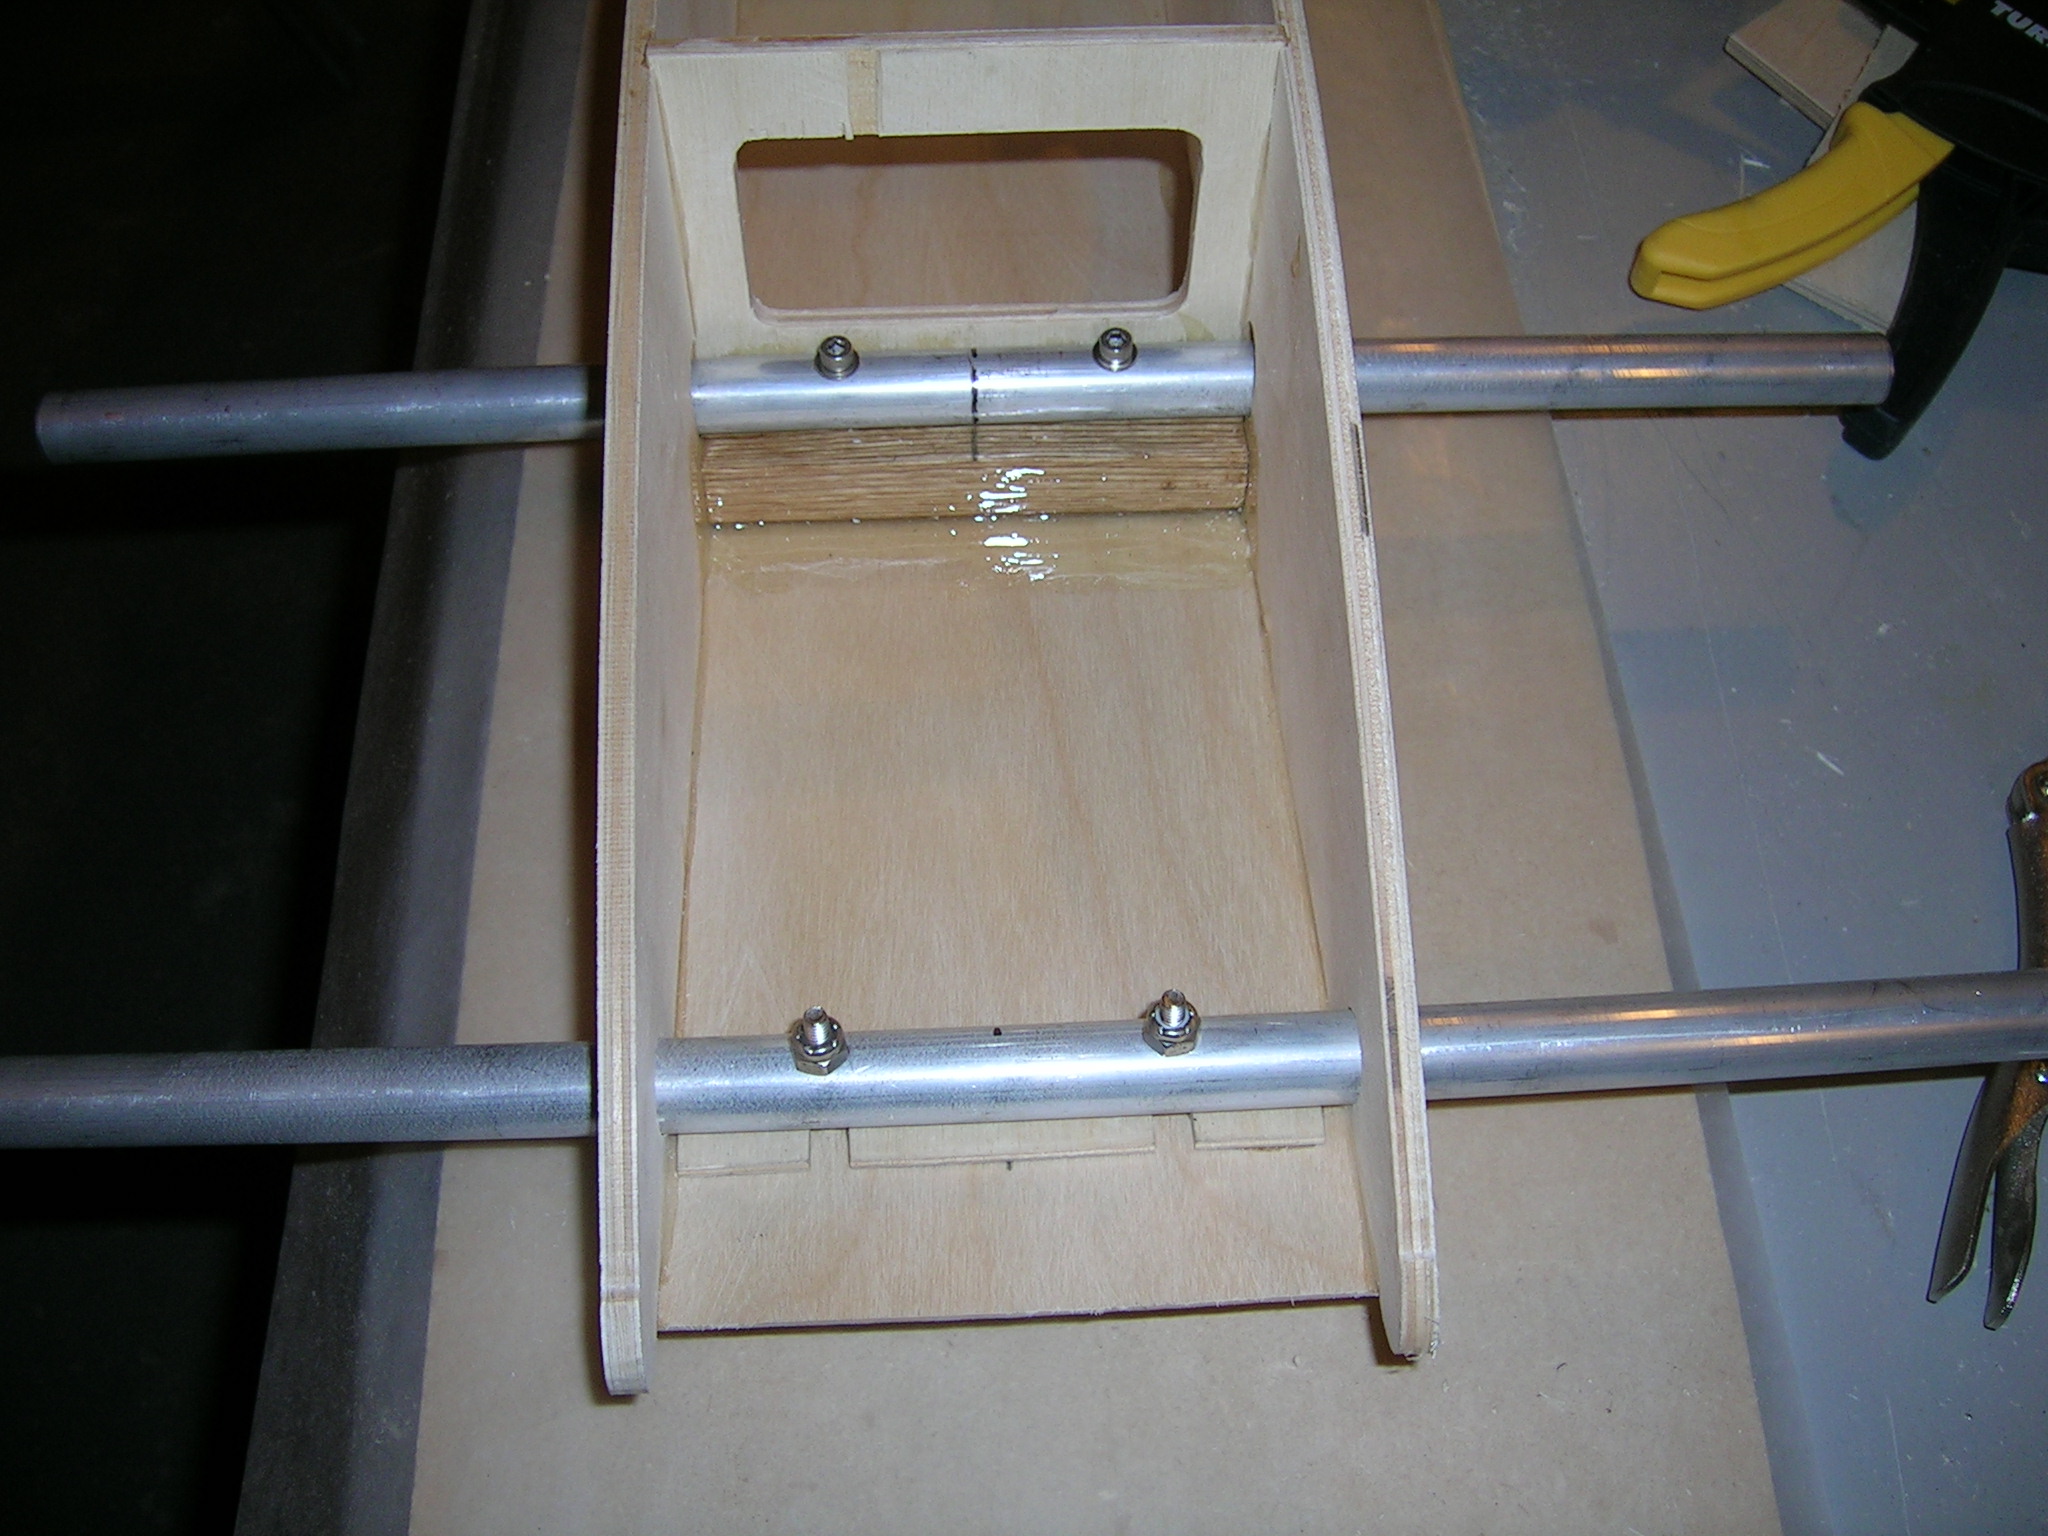
Front boom tube installation. Center marked on tube and tub bottom. 5/32 holes drilled in tube. 8-32 bolts used to mount. Supplied 1/8" spacer shim glued between tube and tub bottom to prevent flex of thin ply bottom. The sides are actually doing all the hard work of holding the tube.

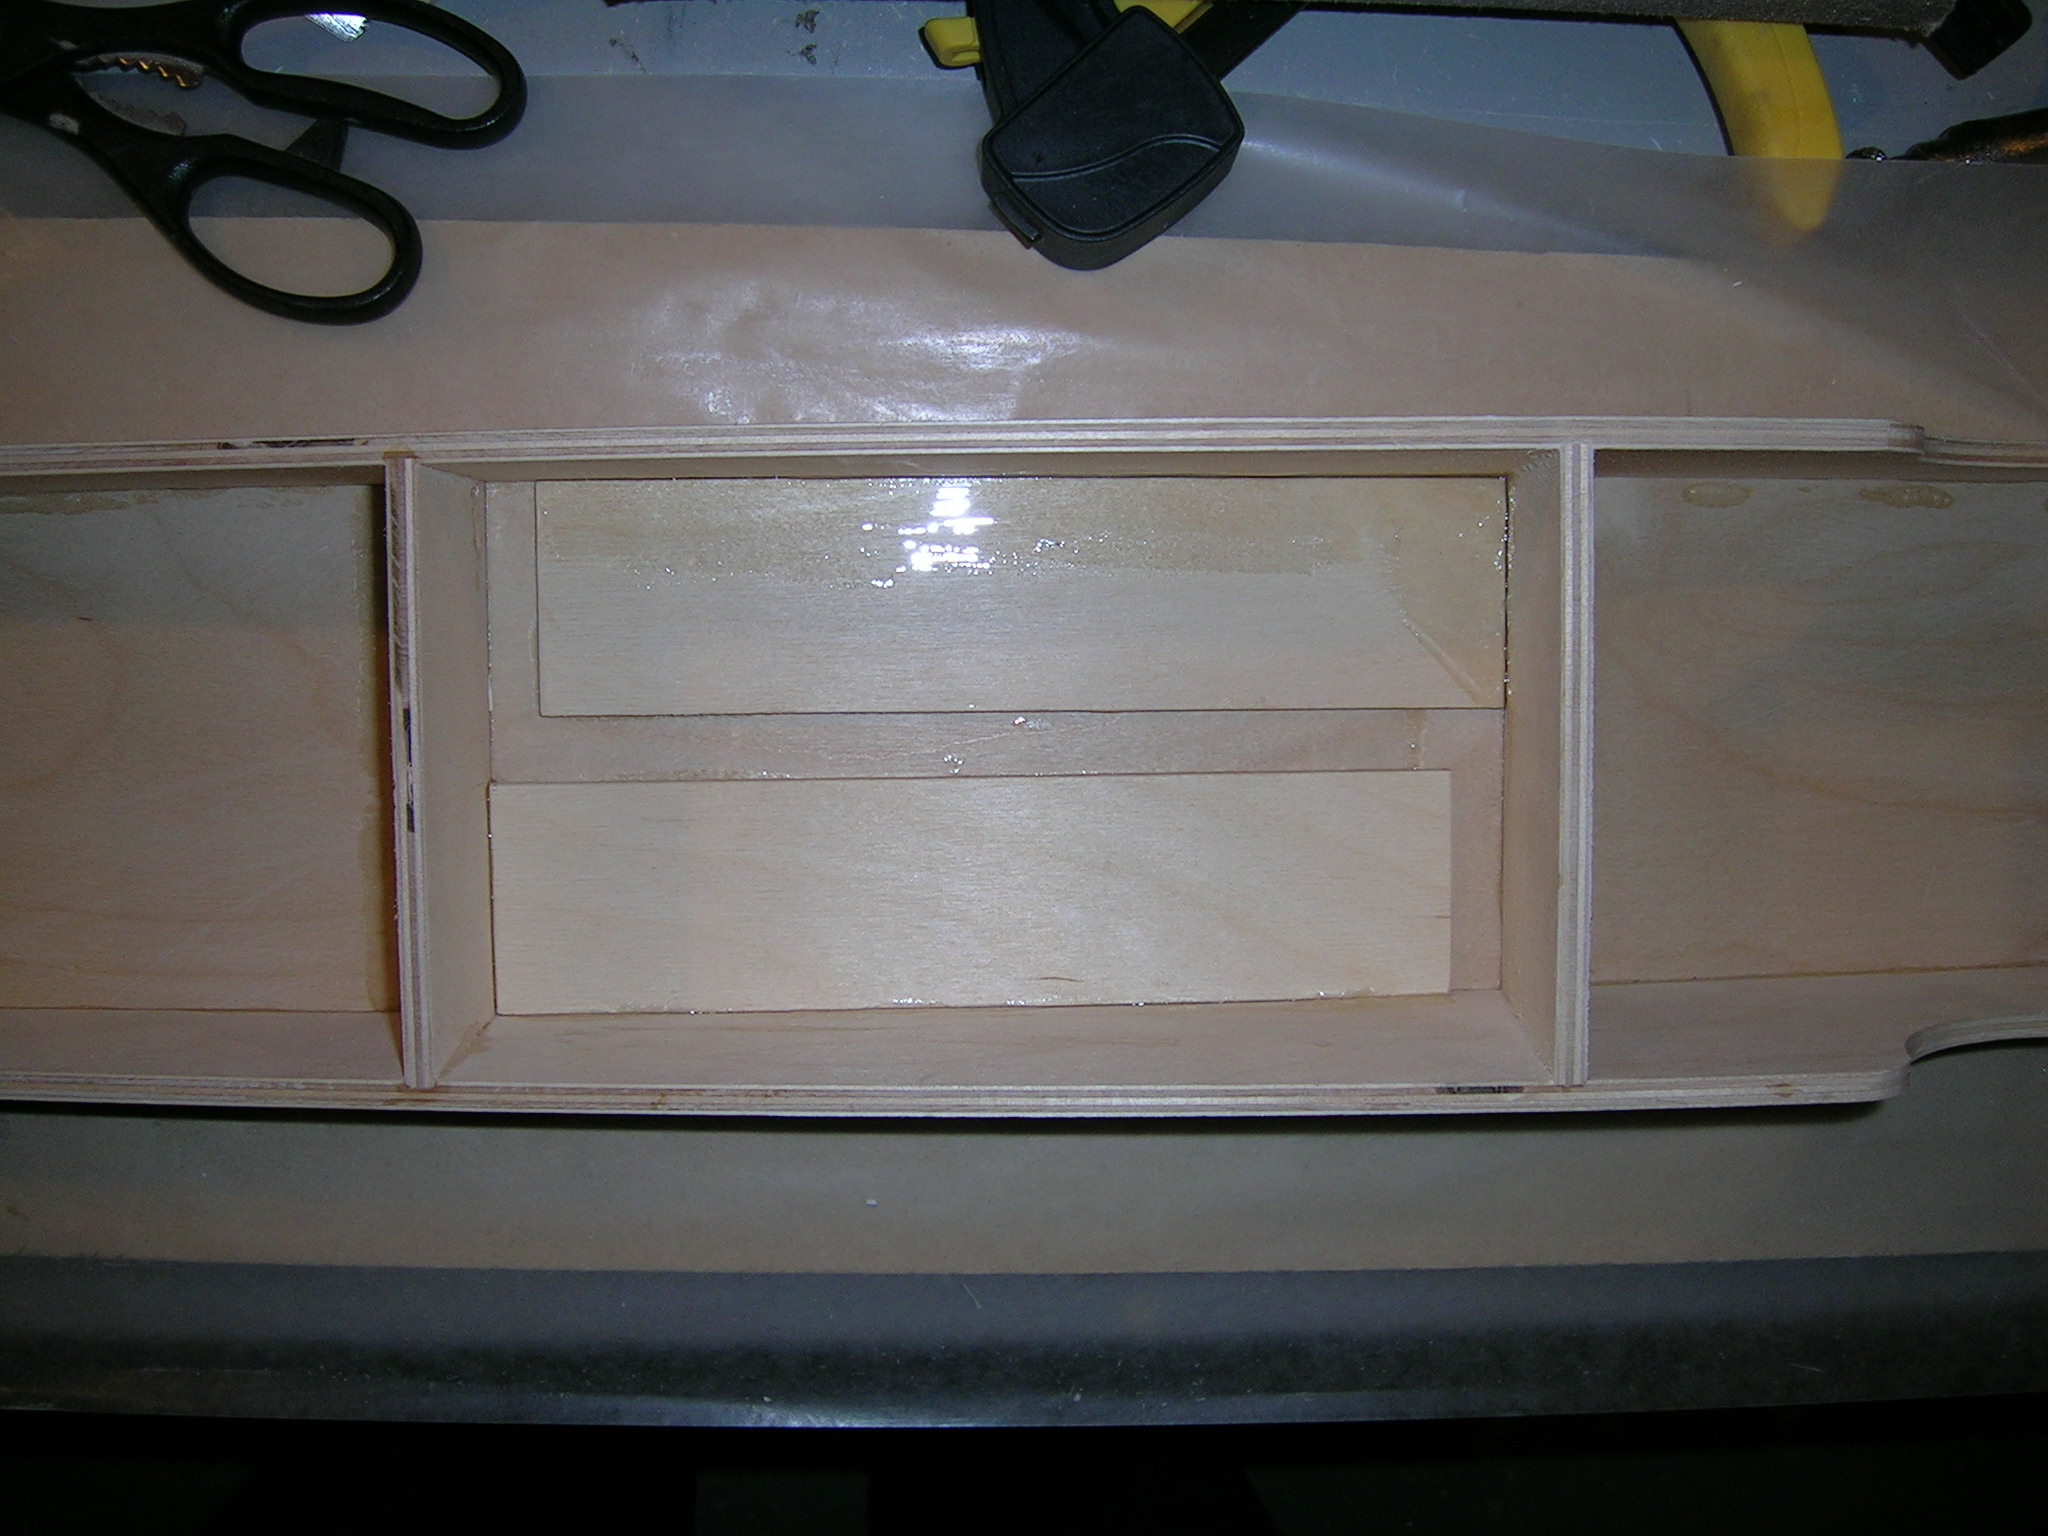
Gluing in the radio box doublers in the bottom. These are 1/4" ply making is easy to mount servo brackets to.
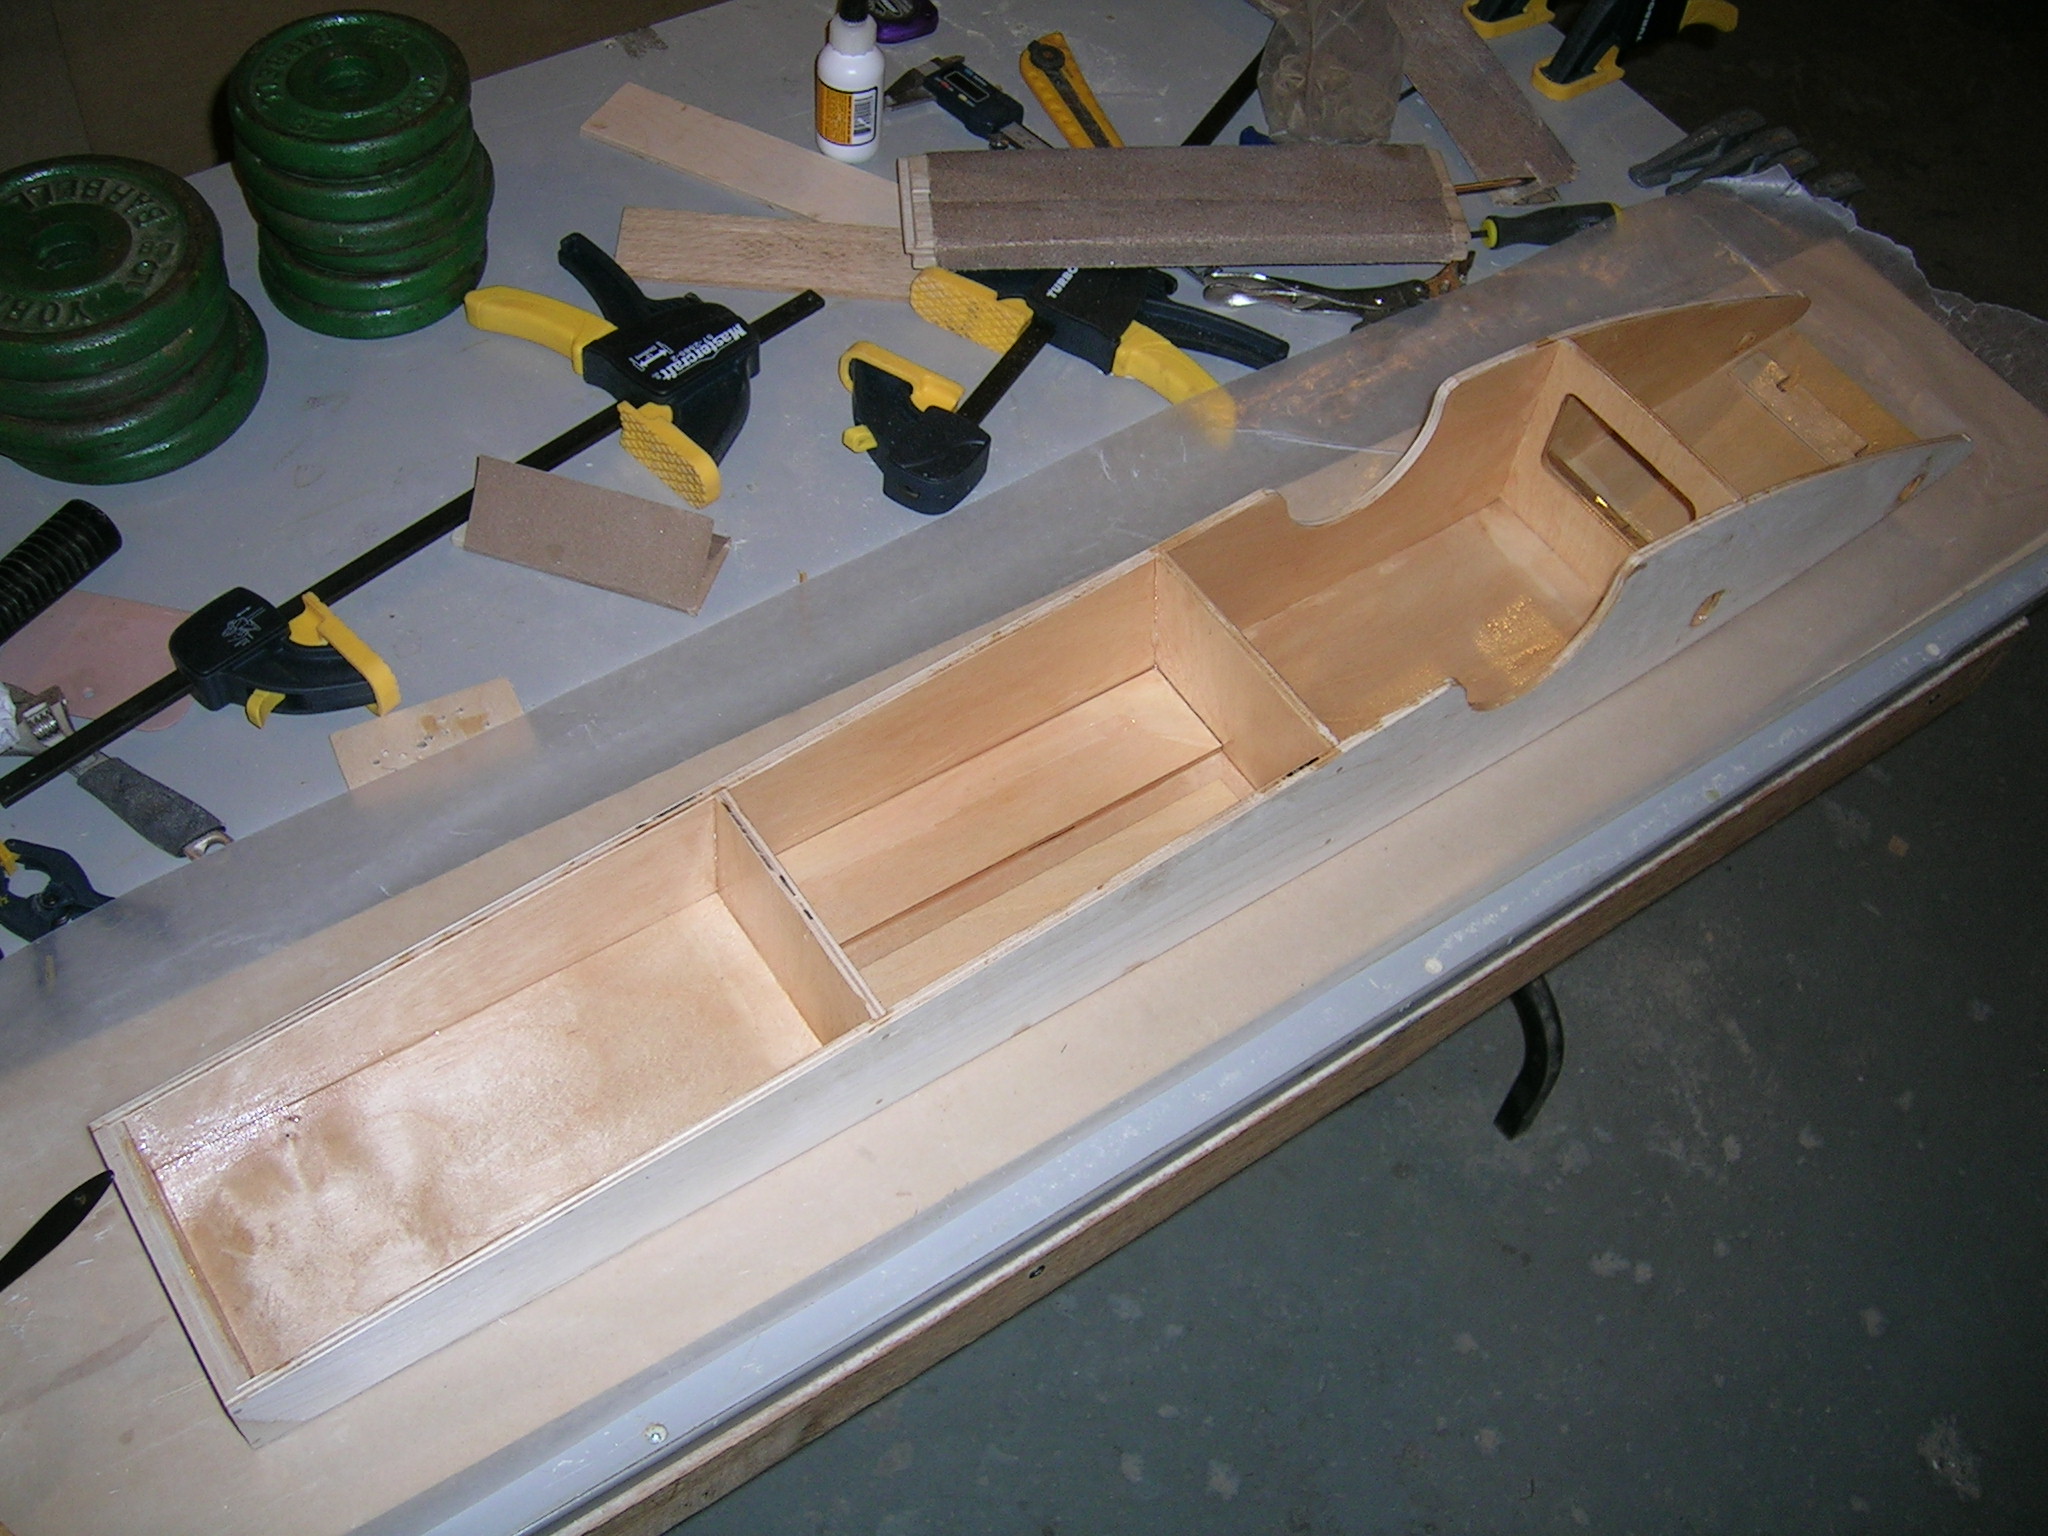
Entire inside of tub sealed (1rst coat) with West Systems Epoxy.
This is a kit build... using parts identical to what everyone will receive if they order a kit.
Gluing bulkheads in between tub sides.
Gluing bottom sheeting to tub frame. Notice the sraight edge clamped to side to keep everything straight.
This picture just shows the 4.5" oak block used as a spacer at the front while installing the sheeting to ensure proper spacing of the sides at the front. This block is actually the block that will support the rear boom tube later on, so it's NOT glued in at this point! The reason I'm using a temporary spacer block here is because I'm doing the nose of this tub differently, and will use the full width nosepiece instead of 4.5" sandwiched between sides. It will be installed later on.
Now the 4.5" piece of oak actually gets installed where it really goes, to support the rear boom tube. Notice the bevelled bottom edges. This is to make room for a nice epoxy fillet when you push the piece flat into position. So any excess epoxy will fill this bevel...a little bit of extra glue isn't a bad thing here!
Test fit before actual gluing.
You can pre-drill the block for the screws before putting it into the tub. Here's how I do it. Set the block (bevelled edge down) deep into the vise. Mark the center of the block. Take boom tube. Mark center and drill 1/8" pilot holes in tube then line up center marks of tube and block and transfer 1/8" holes into the block. Doing it now before installing in the hull, you don't have to worry about drilling through the bottom of the tub!
Block glued into final position.
Front boom tube installation. Center marked on tube and tub bottom. 5/32 holes drilled in tube. 8-32 bolts used to mount. Supplied 1/8" spacer shim glued between tube and tub bottom to prevent flex of thin ply bottom. The sides are actually doing all the hard work of holding the tube.
Gluing in the radio box doublers in the bottom. These are 1/4" ply making is easy to mount servo brackets to.
Entire inside of tub sealed (1rst coat) with West Systems Epoxy.
"


Last edit: 15 years 5 months ago by marc.
Please Log in or Create an account to join the conversation.
- marc
-
Topic Author
- Away
Less
More
- Posts: 2491
- Thank you received: 55
15 years 5 months ago - 15 years 5 months ago #15466
by marc
"
Replied by marc on topic Re: New Warpath build... this one is for Chris "Juice" Rupley
Did a little bit more this afternoon... sanded first coat of epoxy and glassed the seams while putting in second sealer coat in the tub. Will be ready for top sheeting tonight.
A piece of glass before it's wetted in.
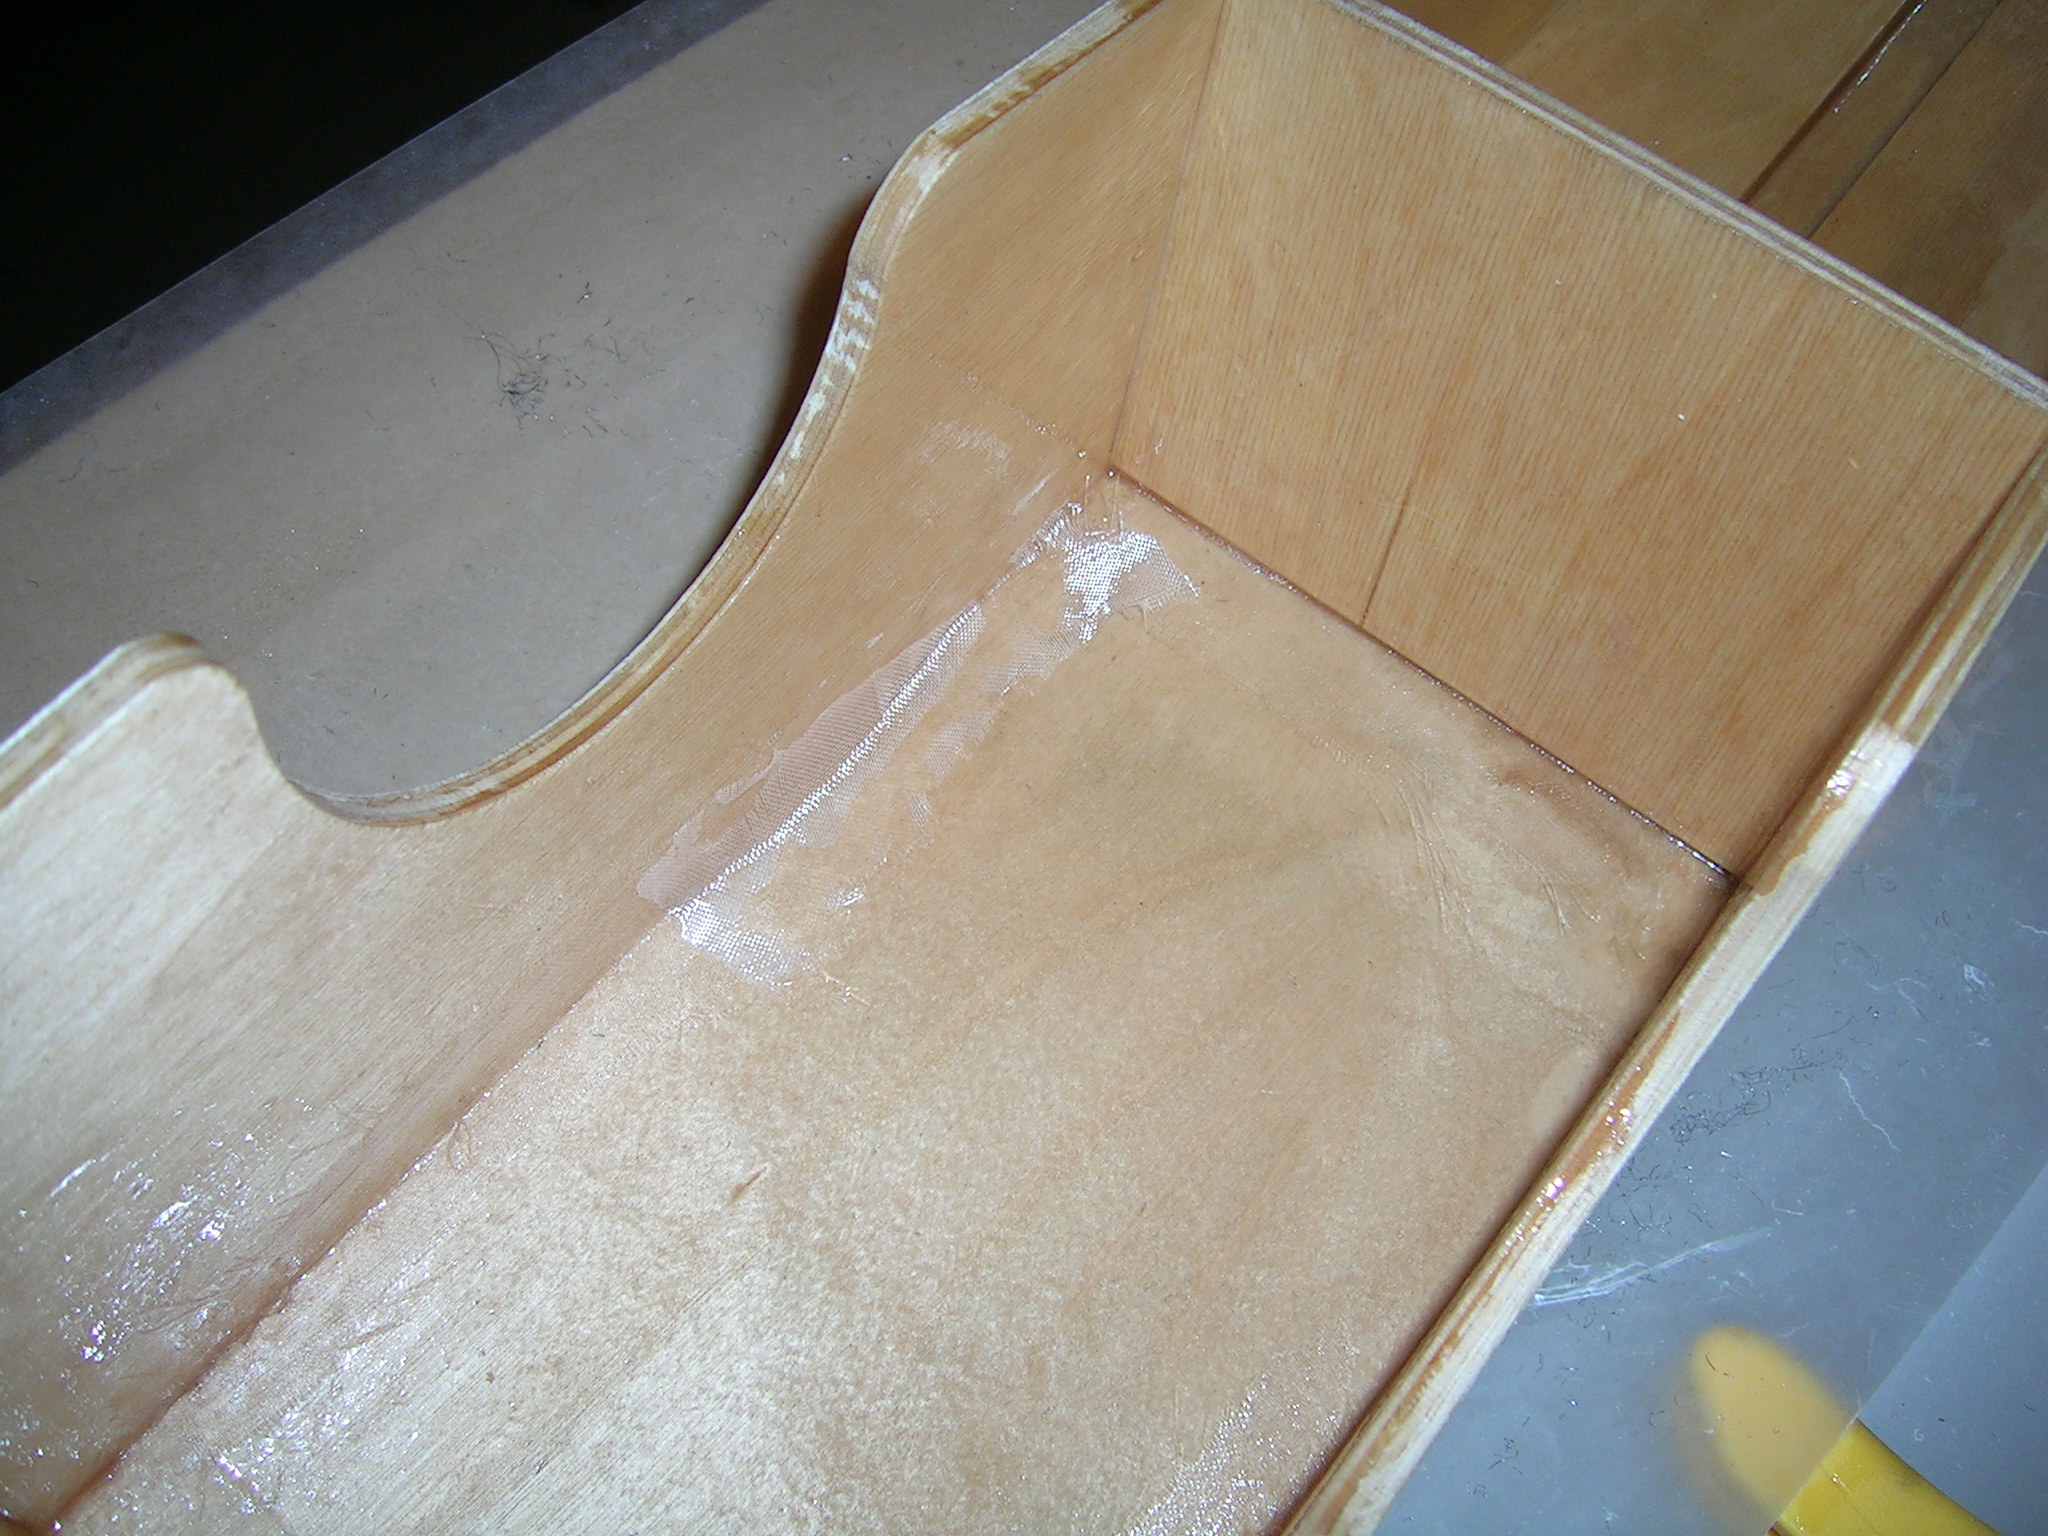
After it's wetted it's almost invisible.
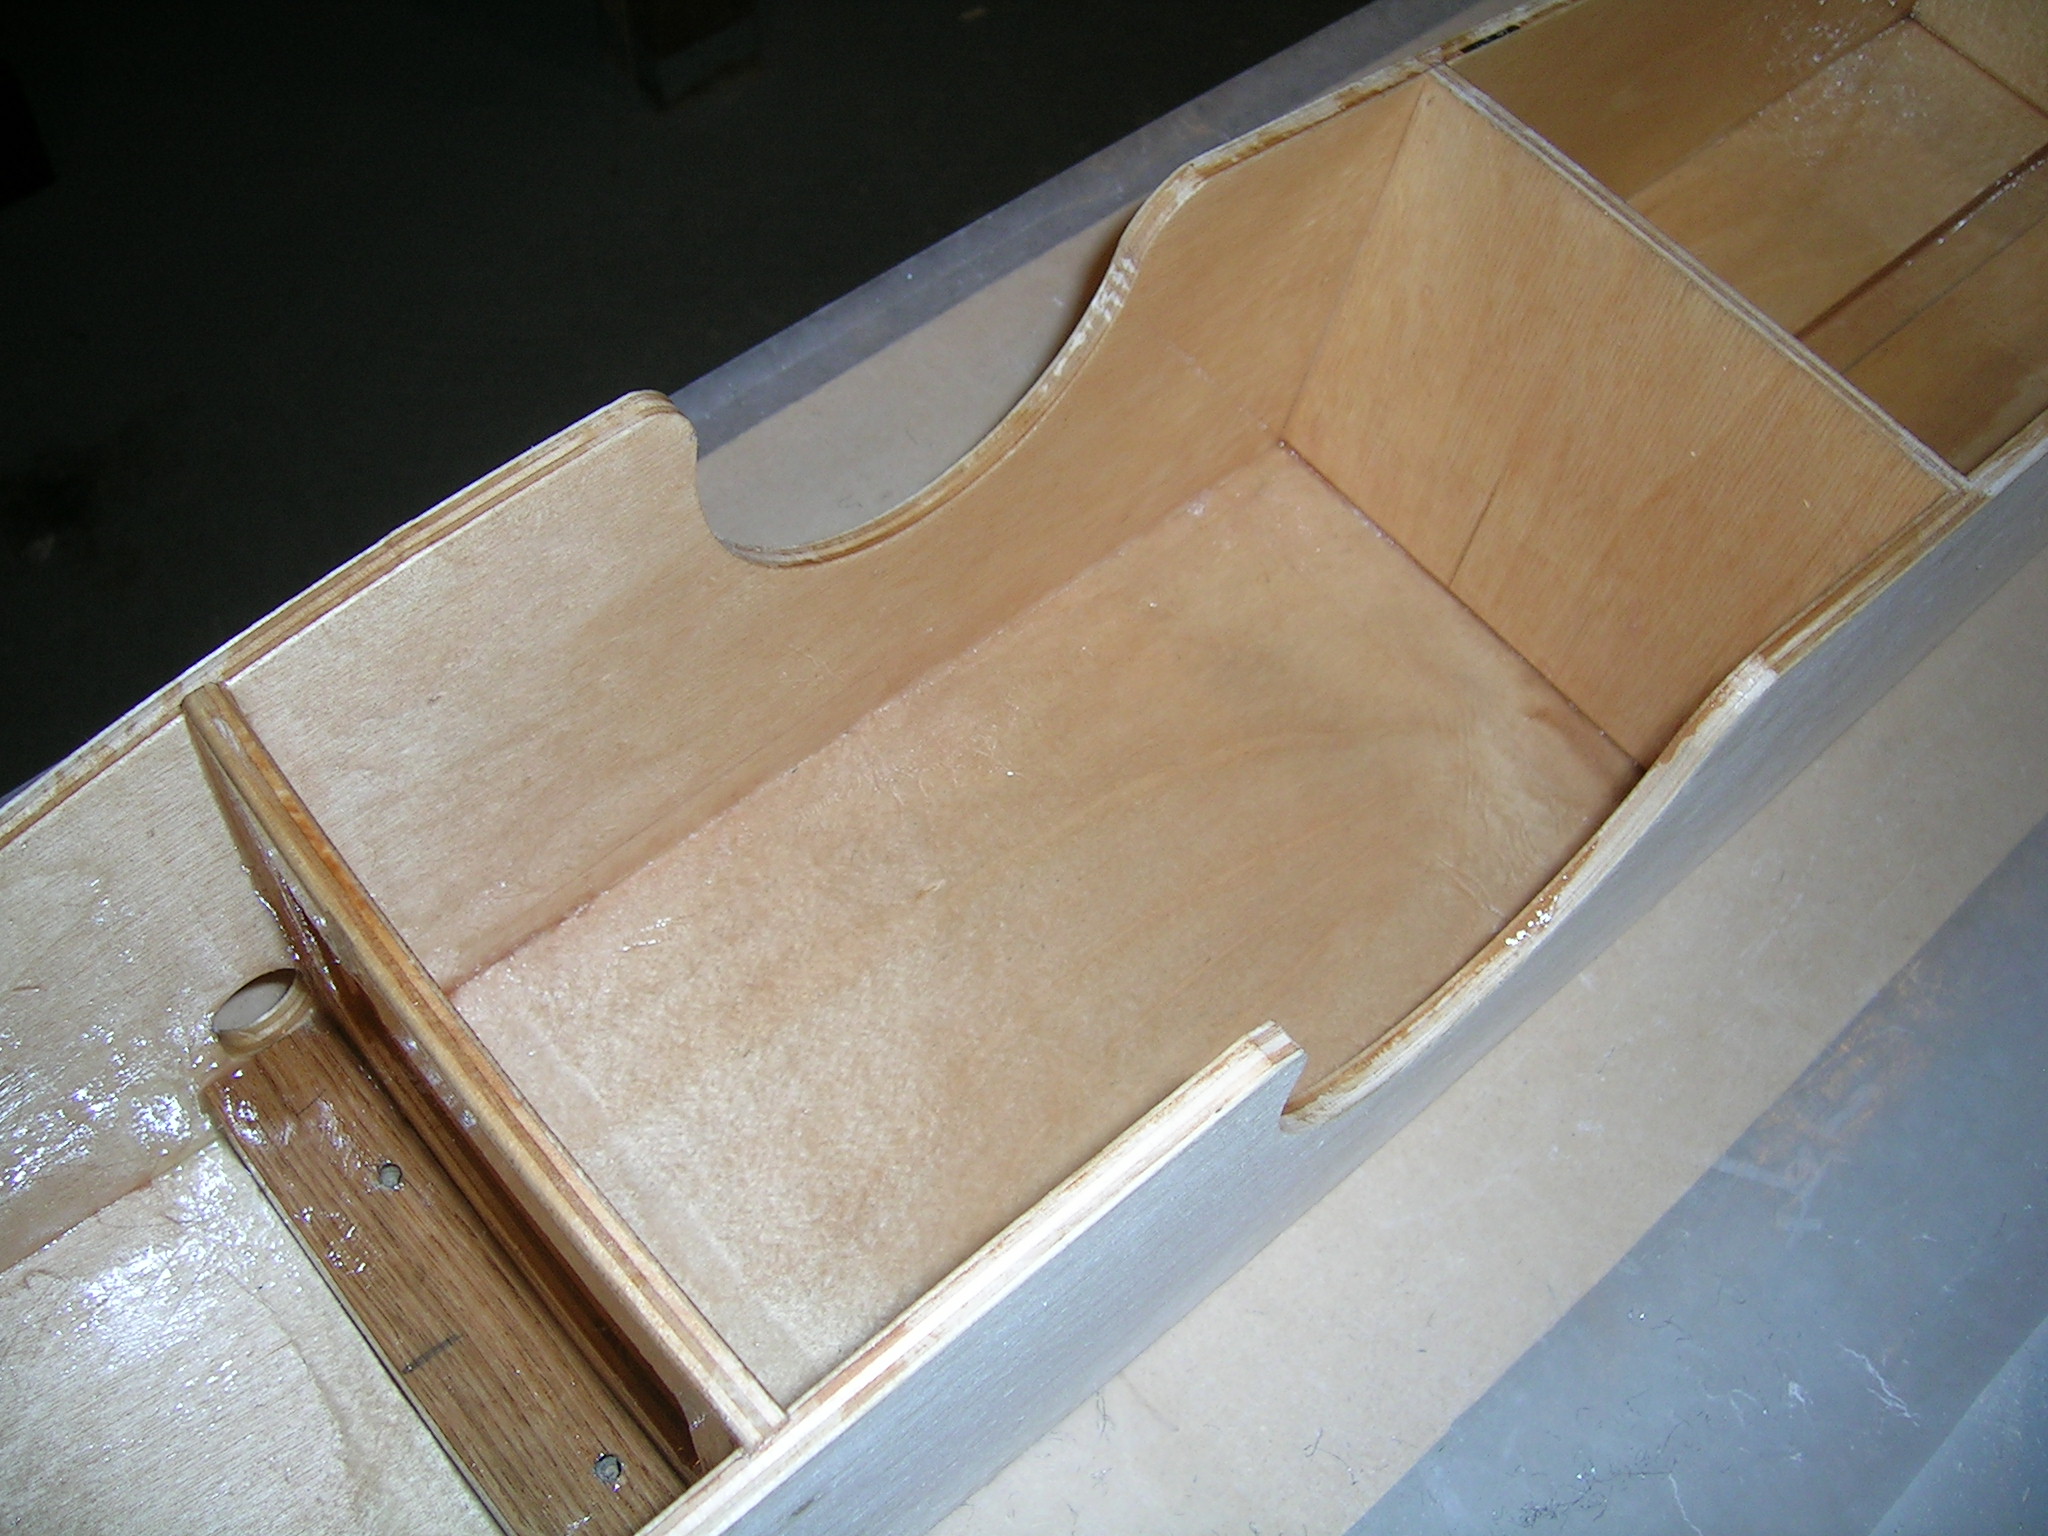
Second coat applied to entire inside of tub.
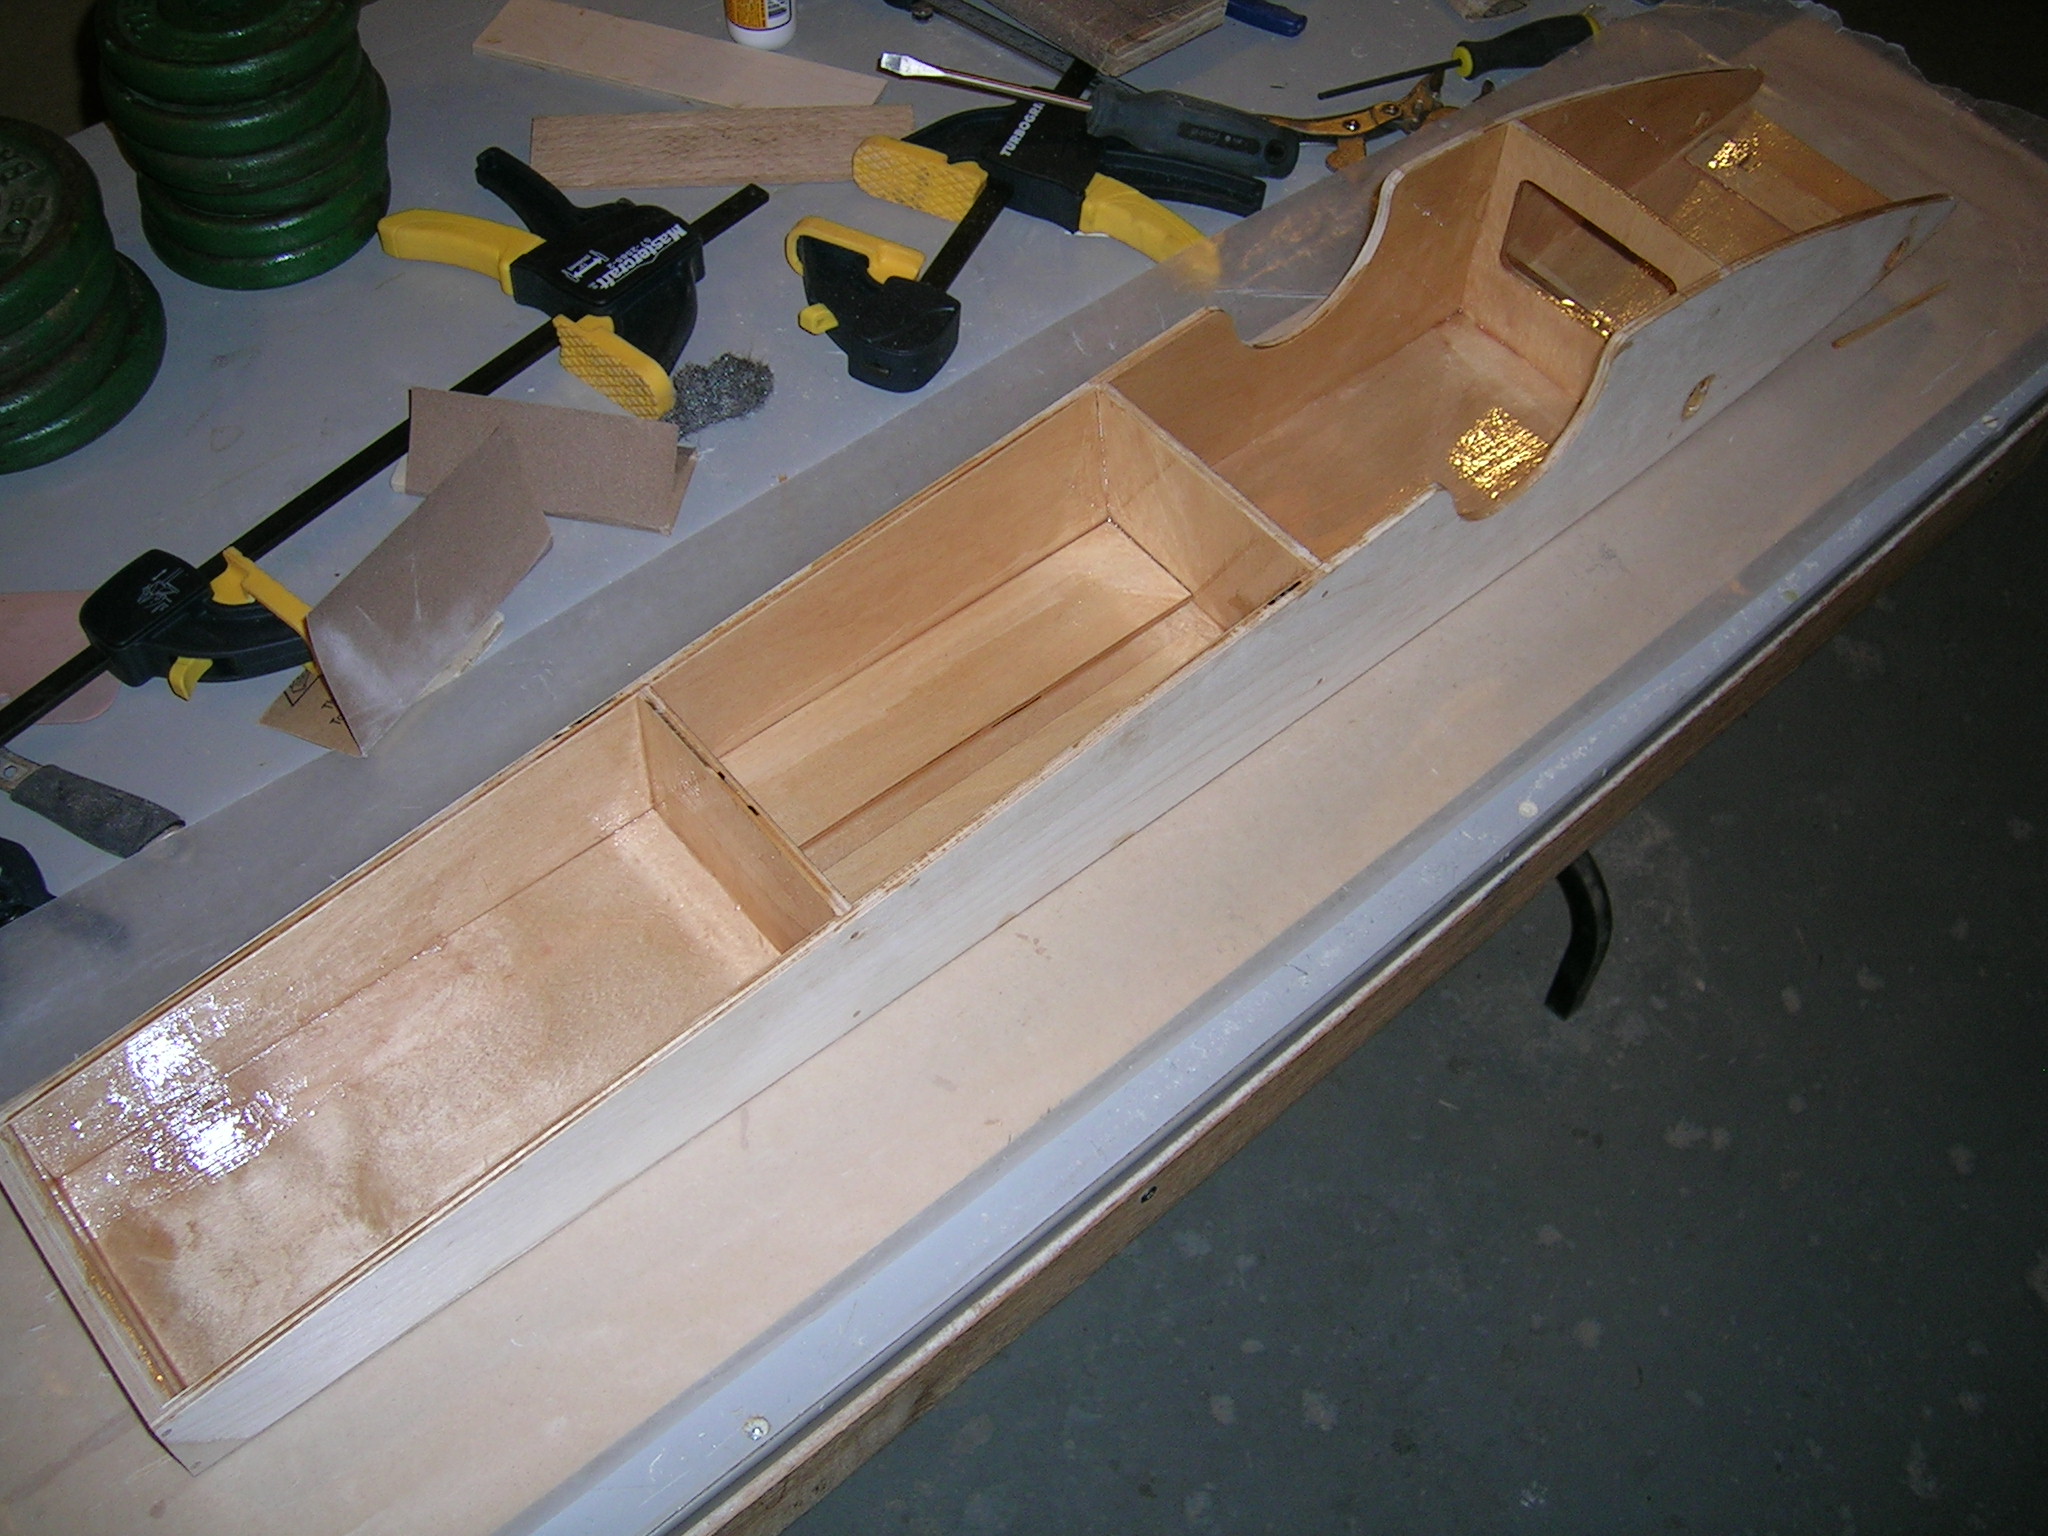
A piece of glass before it's wetted in.
After it's wetted it's almost invisible.
Second coat applied to entire inside of tub.
"


Last edit: 15 years 5 months ago by marc.
Please Log in or Create an account to join the conversation.
Less
More
- Thank you received: 0
15 years 5 months ago - 15 years 5 months ago #15467
by
Replied by on topic Re: New Warpath build... this one is for Chris "Juice" Rupley
Hi Marc.
Looks really nice.
I am about to do almost the same on my boat, as the engine rails are ready to be glued in place.
I have some 1 inch and some 2 inch woven glass bands / 80 grams per sqm. Will that be sufficient for the job?
And how about applying it? Do you just use a brush, or are other tools nessecary?
Cheers!
Woodie.
Looks really nice.
I am about to do almost the same on my boat, as the engine rails are ready to be glued in place.
I have some 1 inch and some 2 inch woven glass bands / 80 grams per sqm. Will that be sufficient for the job?
And how about applying it? Do you just use a brush, or are other tools nessecary?
Cheers!
Woodie.
Last edit: 15 years 5 months ago by .
Please Log in or Create an account to join the conversation.
- marc
-
Topic Author
- Away
Less
More
- Posts: 2491
- Thank you received: 55
15 years 5 months ago #15470
by marc
"
Replied by marc on topic Re: New Warpath build... this one is for Chris "Juice" Rupley
The cloth I'm using for this is VERY lightweight. It's 3/4 ounce tight weave cloth. This is commonly used for aircraft wing coverings and such. It's almost invisible once impregnated with resin. Very easy to apply and conforms well to corners and curves. I apply it in short strips to make it easier. The first ones I did weren't as pretty, but I'm getting better every time I use it! What I do is apply the epoxy coat in the hull sealing the interior completely, then I fold the strips of cloth lengthwise in my hands and apply to the inside seems of the hull. Just the lite coat of resin that is already in the hull is enough to completely wet this stuff! Just press it down and remove air bubbles with the brush. Don't stroke, just dab.
What I do is apply the epoxy coat in the hull sealing the interior completely, then I fold the strips of cloth lengthwise in my hands and apply to the inside seems of the hull. Just the lite coat of resin that is already in the hull is enough to completely wet this stuff! Just press it down and remove air bubbles with the brush. Don't stroke, just dab. "
Please Log in or Create an account to join the conversation.
- INEEDSPOTS
-

- Offline
- GO SLOW... TURN LEFT
Less
More
- Posts: 204
- Thank you received: 2
15 years 5 months ago #15472
by INEEDSPOTS
Team COR-TROL Racing - The NETWORK
IMPBA Twin LSG Rigger 1/3 Mile 2-Lap National Record Holder
IMPBA OFFICIAL 12 sec lap 1/3 mile Gas Cat
IMPBA OFFICIAL 75+mph SAW Gas Cat
CC Racing Engines.. Shocker Propworks
Replied by INEEDSPOTS on topic Re: New Warpath build... this one is for Chris "Juice" Rupley
yup that stuff is almost invisible. At first i didnt even notice it...and was wondering why Marc didnt glass the seams on mine like he said he was gonna... until i looked closer :laugh:
Can probably almost do this with your eyes closed now eh Marc? :laugh:
Can probably almost do this with your eyes closed now eh Marc? :laugh:
Team COR-TROL Racing - The NETWORK
IMPBA Twin LSG Rigger 1/3 Mile 2-Lap National Record Holder
IMPBA OFFICIAL 12 sec lap 1/3 mile Gas Cat
IMPBA OFFICIAL 75+mph SAW Gas Cat
CC Racing Engines.. Shocker Propworks
Please Log in or Create an account to join the conversation.
- marc
-
Topic Author
- Away
Less
More
- Posts: 2491
- Thank you received: 55
15 years 5 months ago - 15 years 5 months ago #15474
by marc
"
Replied by marc on topic Re: New Warpath build... this one is for Chris "Juice" Rupley
Yeah, definitely getting better at it as I go! :laugh:
Installing the access cover lips on underside of top sheeting pieces, then sealing everything up with epoxy and gluing them to the top of the tub.
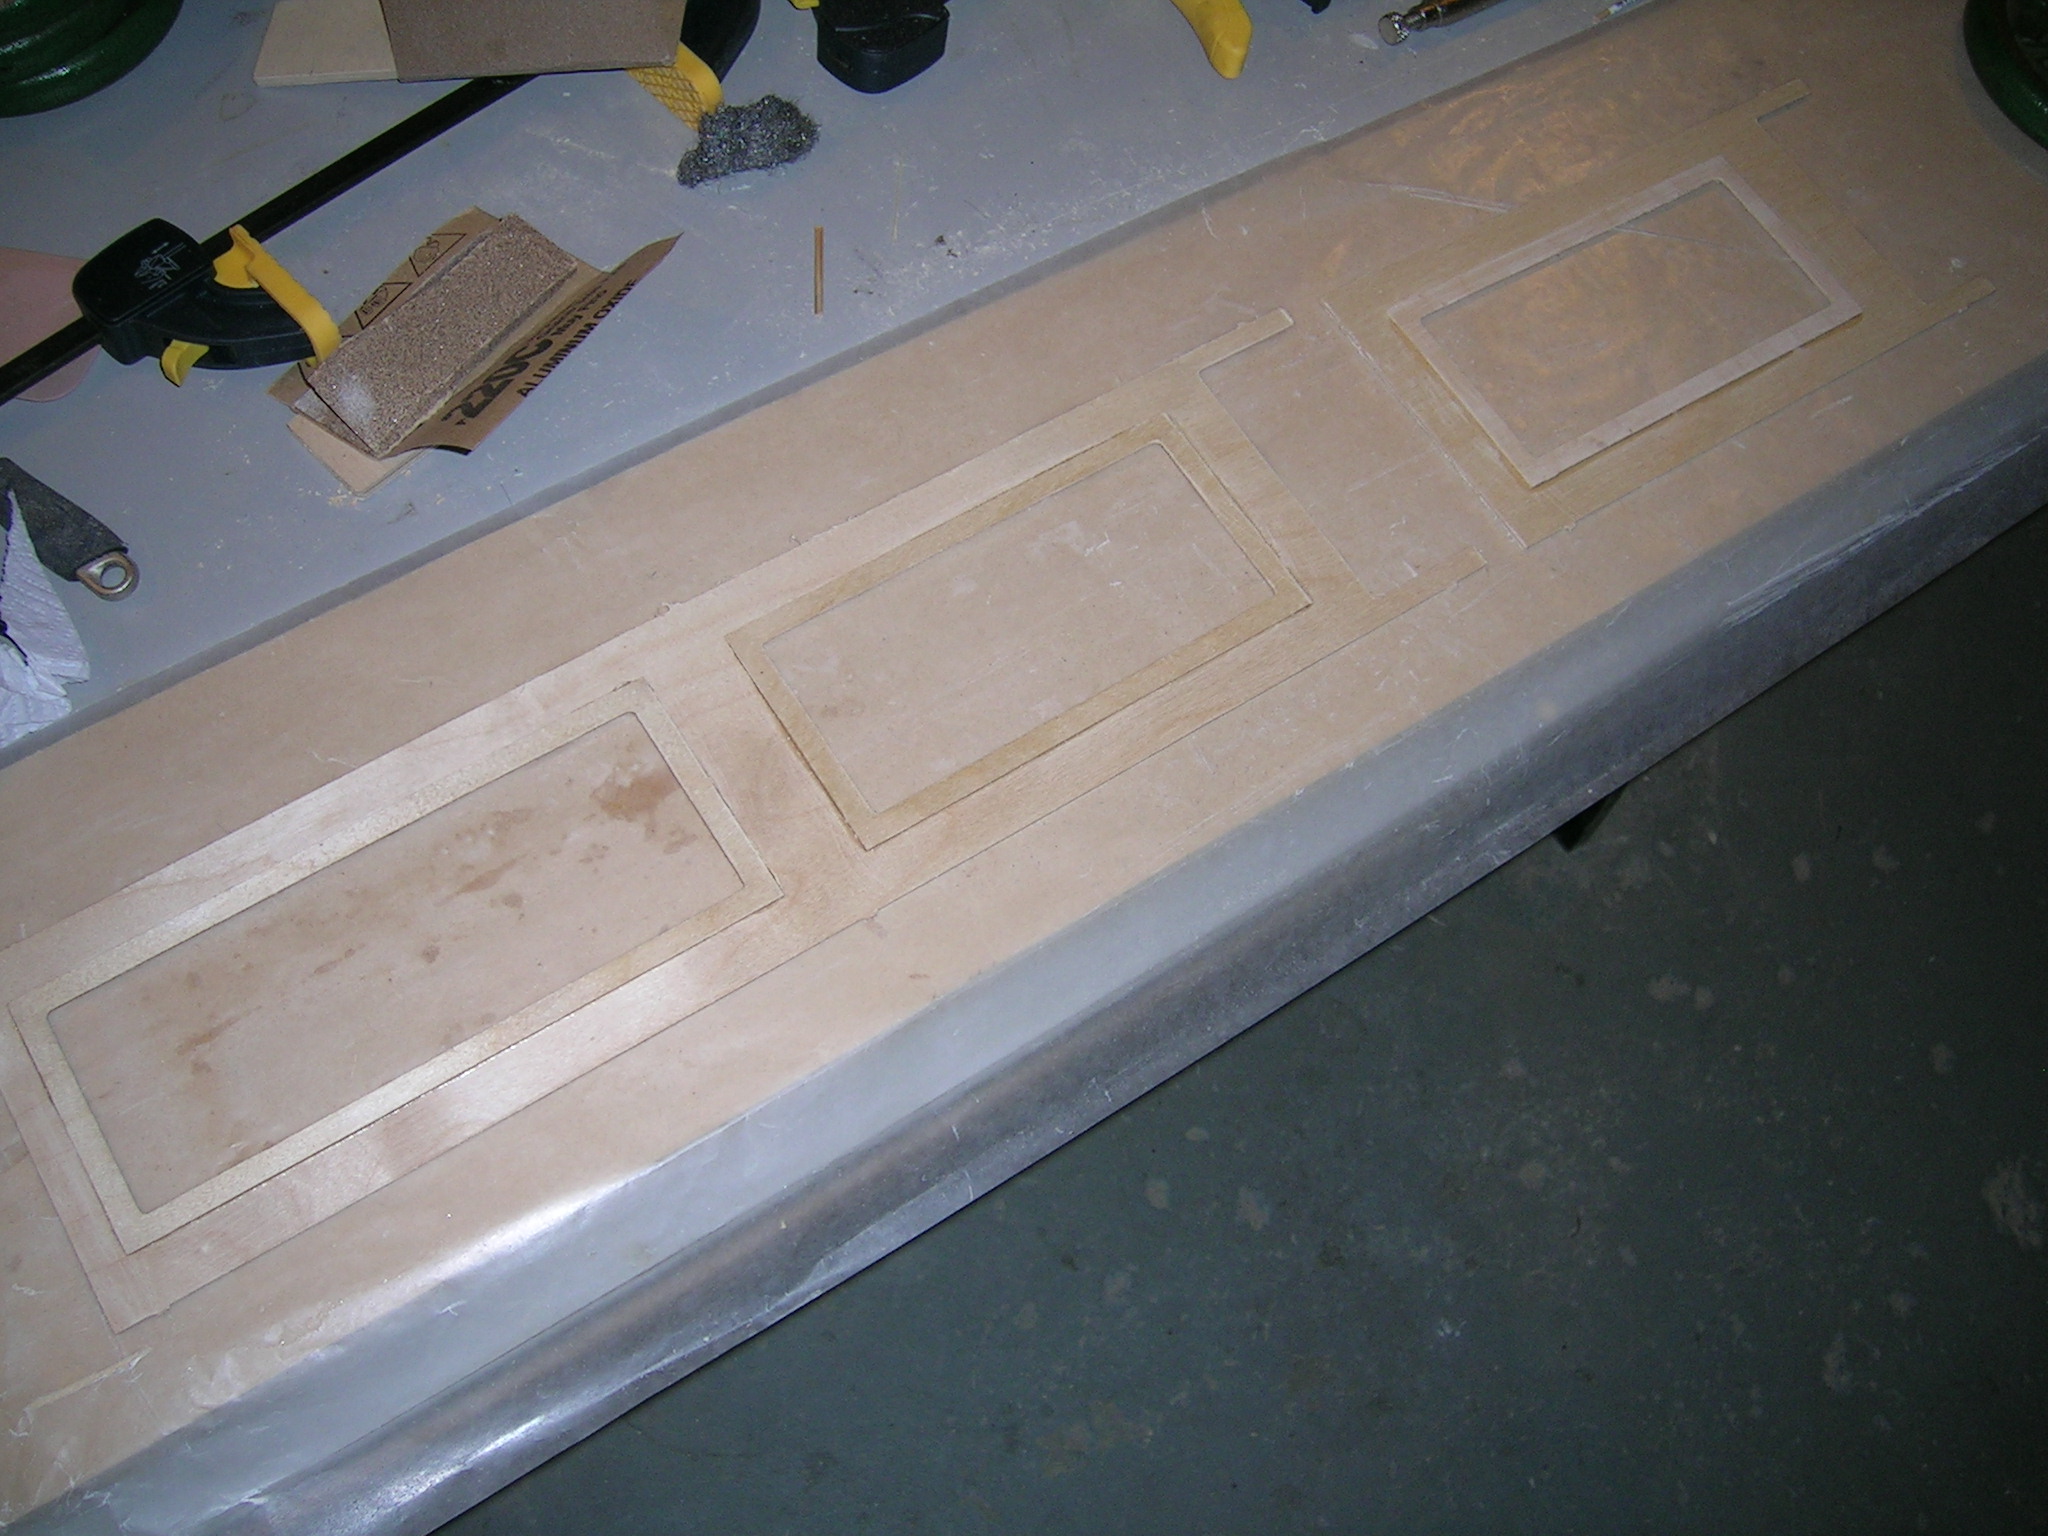

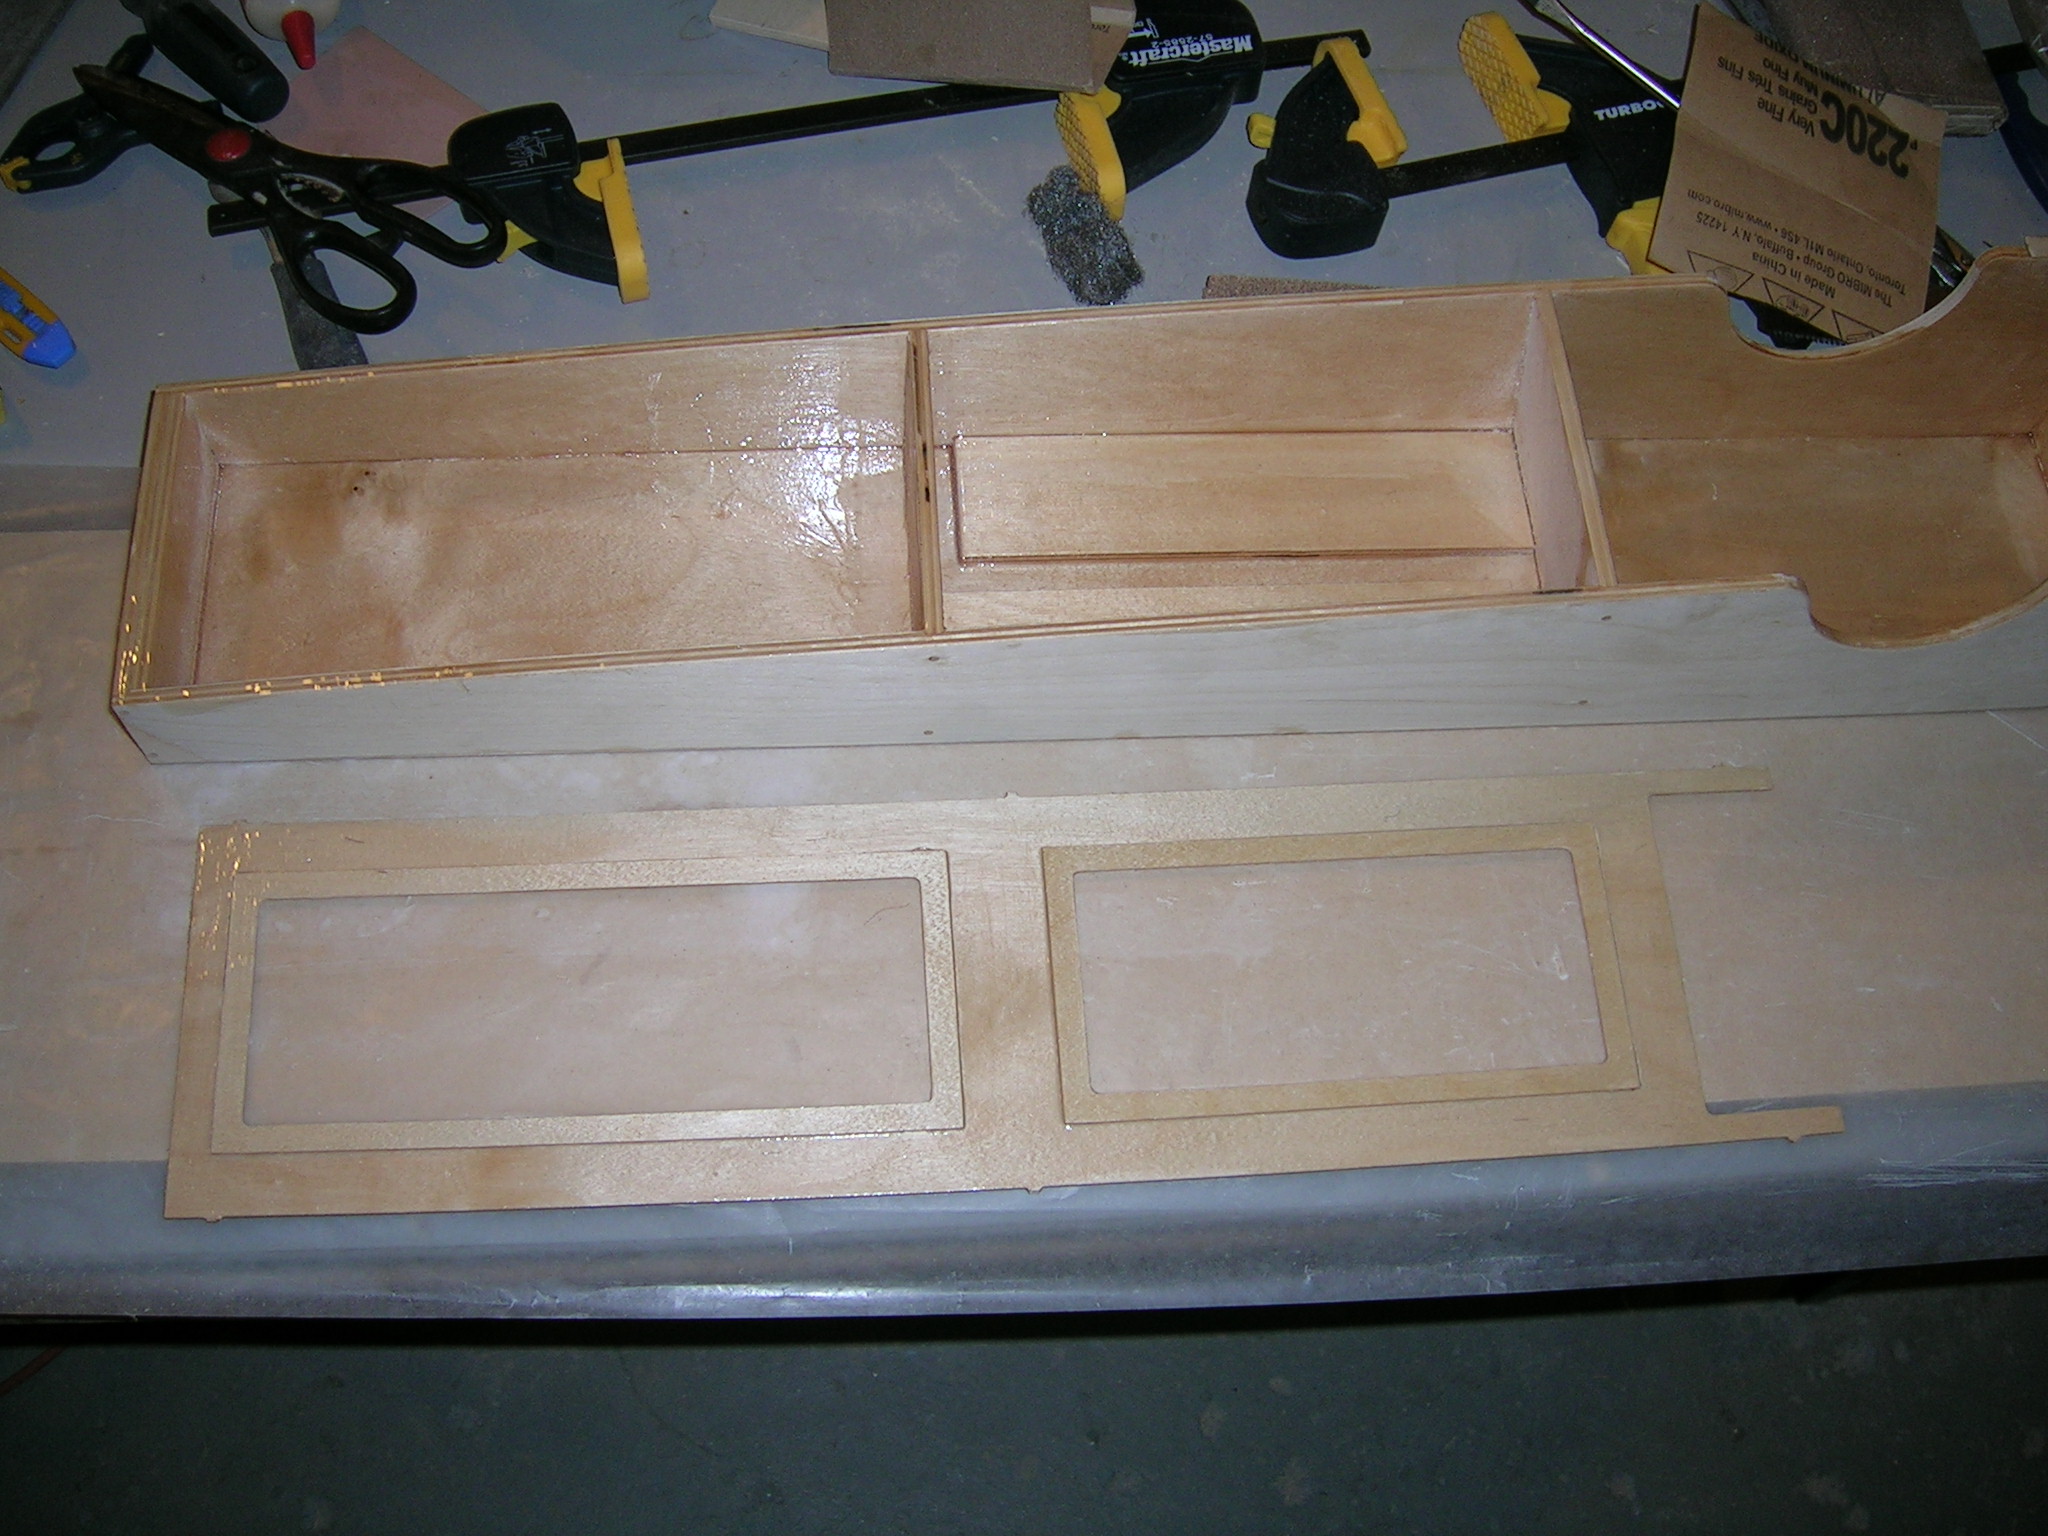
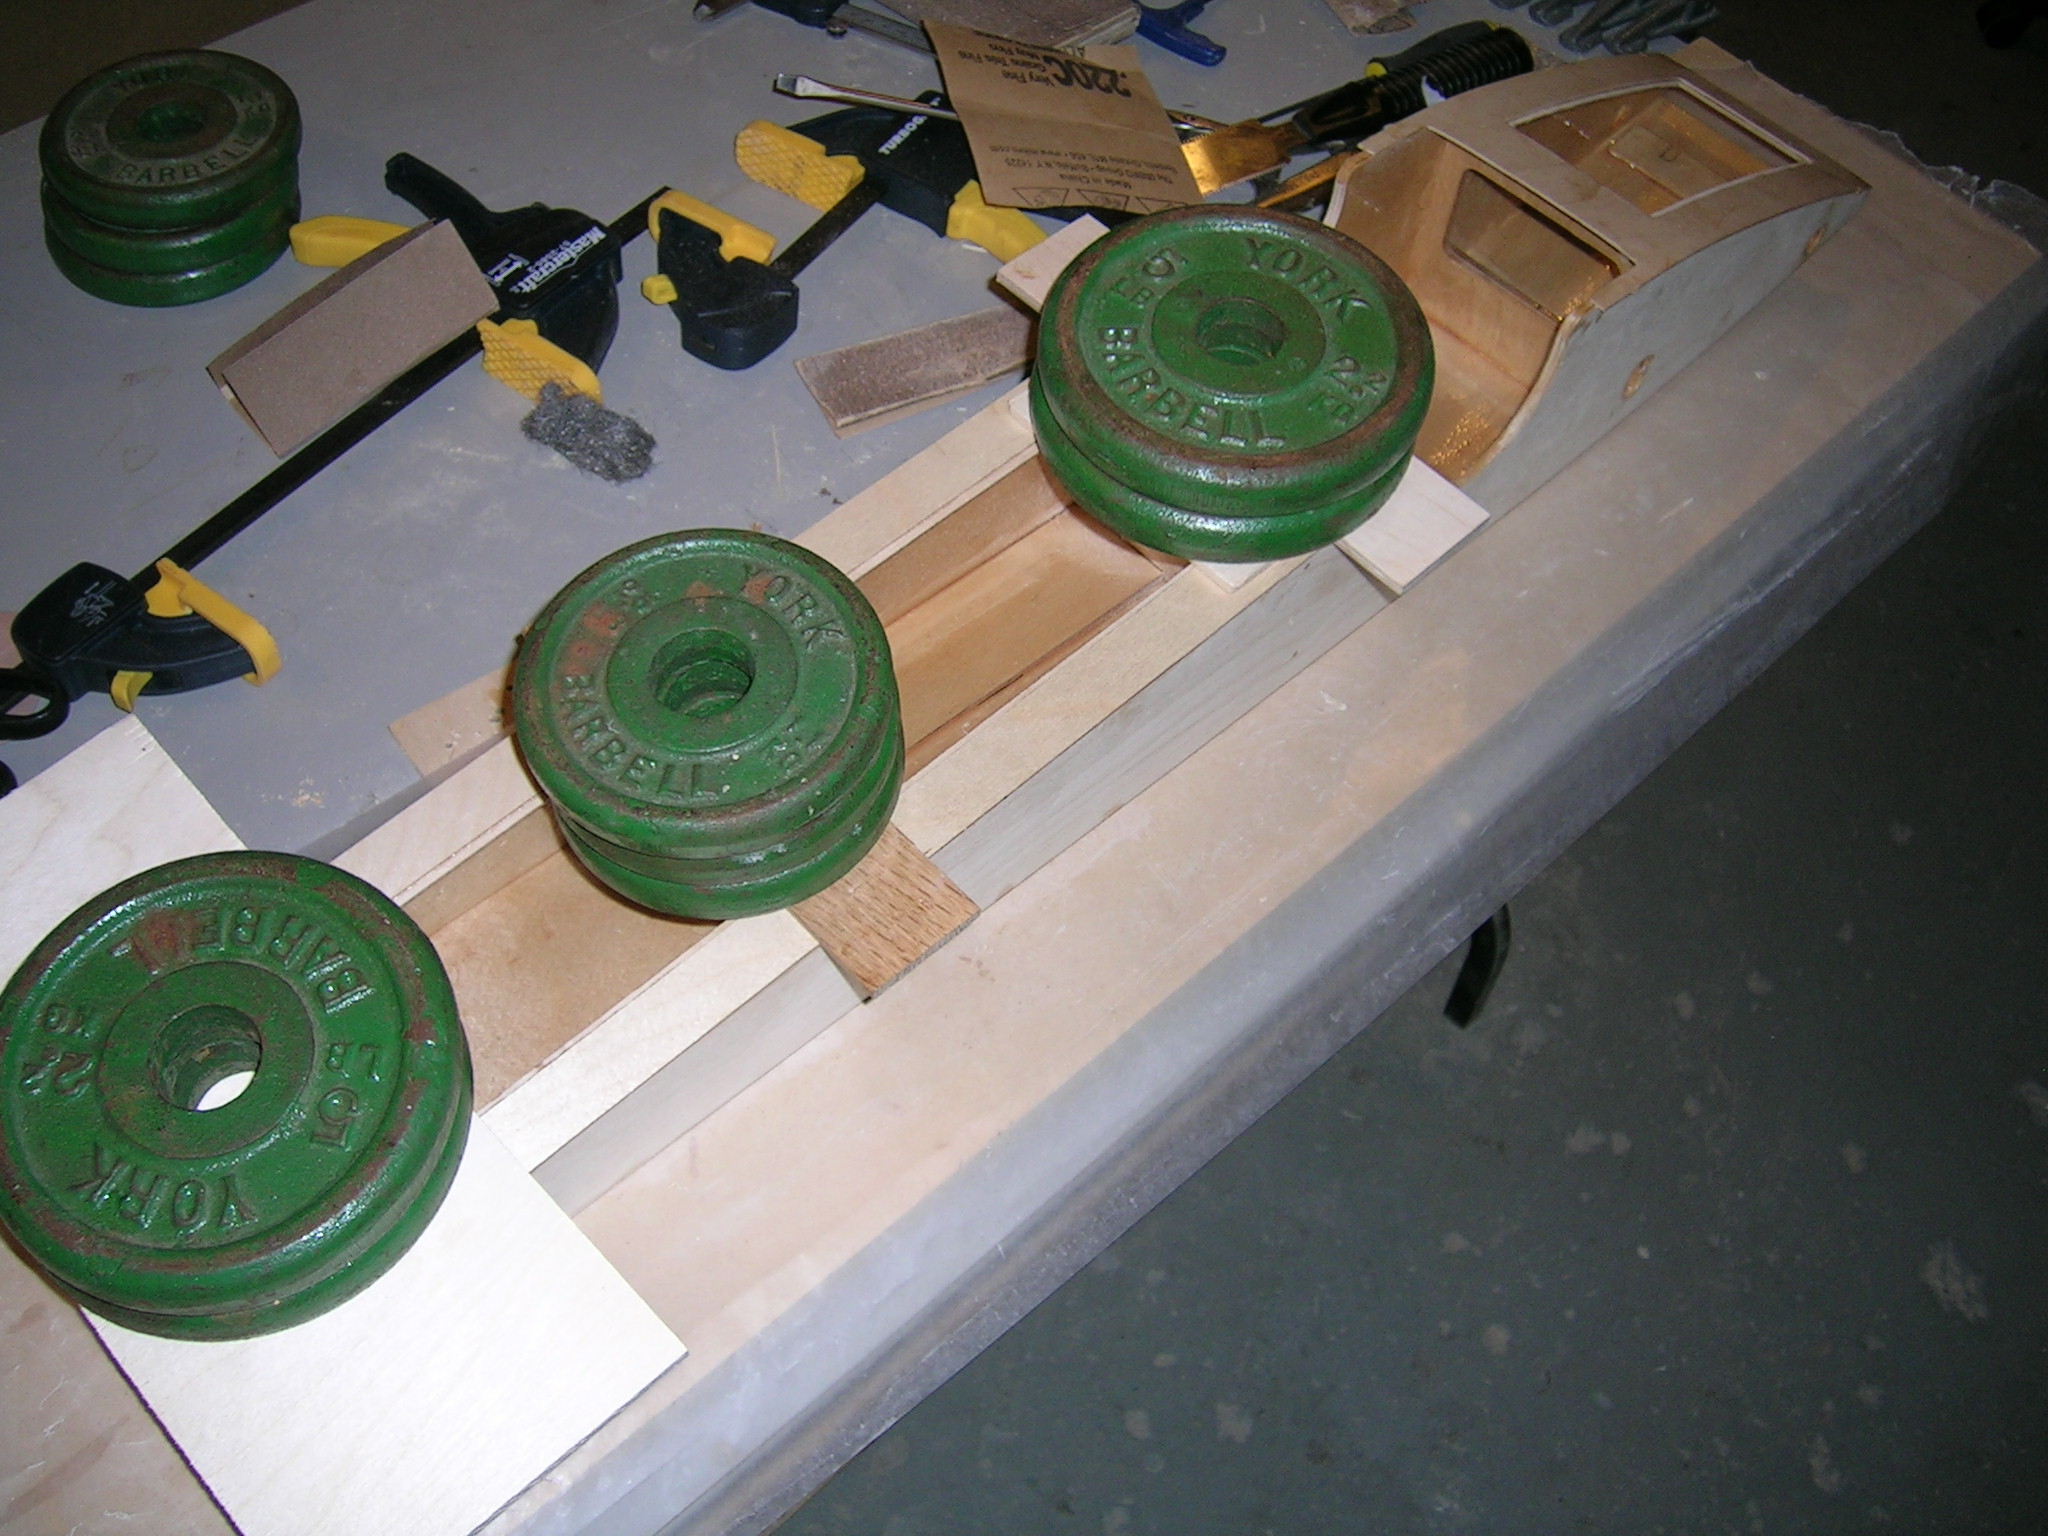
Installing the access cover lips on underside of top sheeting pieces, then sealing everything up with epoxy and gluing them to the top of the tub.
"


Last edit: 15 years 5 months ago by marc.
Please Log in or Create an account to join the conversation.
- Ozpulse
-
- Offline
Less
More
- Posts: 532
- Thank you received: 0
15 years 5 months ago #15476
by Ozpulse
Awwwww! Your little engine is sooooo cute!
Replied by Ozpulse on topic Re: New Warpath build... this one is for Chris "Juice" Rupley
All looks great so far Mark!
I was talking to the fixed wing guys at the other hanger the other week about that cloth, I spied plenty of offcuts from them reskining various wings on full sized aircraft/ultralights etc.
I asked that exact question, thier boss told me it works well with polyester aswell.
Might have to go back and grab me a heap of bits and pieces for my project, I have some surfboard cloth and a roll of 2" tape but thought the tape was a bit heavy for reinforcing a rigger.
I noticed thier are no angle timber pieces along the inside length to reinforce the sides? So Im guessing this cloth is plenty strong enough with no seams etc. opening up?
I was talking to the fixed wing guys at the other hanger the other week about that cloth, I spied plenty of offcuts from them reskining various wings on full sized aircraft/ultralights etc.
I asked that exact question, thier boss told me it works well with polyester aswell.
Might have to go back and grab me a heap of bits and pieces for my project, I have some surfboard cloth and a roll of 2" tape but thought the tape was a bit heavy for reinforcing a rigger.
I noticed thier are no angle timber pieces along the inside length to reinforce the sides? So Im guessing this cloth is plenty strong enough with no seams etc. opening up?
Awwwww! Your little engine is sooooo cute!
Please Log in or Create an account to join the conversation.
- marc
-
Topic Author
- Away
Less
More
- Posts: 2491
- Thank you received: 55
15 years 5 months ago #15478
by marc
"
Replied by marc on topic Re: New Warpath build... this one is for Chris "Juice" Rupley
Ozpulse wrote:
It's been good enough on my boats so far. I guess it all depends how hard one is on them and also how unlucky! :laugh: :laugh: I've not had seams come undone yet...knock on wood! But like they say, more than one way to skin a cat... in my case I prefer the glass instead of the blocks. Just personal preference really. Nothing preventing guys from putting blocks in if they prefer. It's all good, that's the beauty of building them yourself.
All looks great so far Mark!
I was talking to the fixed wing guys at the other hanger the other week about that cloth, I spied plenty of offcuts from them reskining various wings on full sized aircraft/ultralights etc.
I asked that exact question, thier boss told me it works well with polyester aswell.
Might have to go back and grab me a heap of bits and pieces for my project, I have some surfboard cloth and a roll of 2" tape but thought the tape was a bit heavy for reinforcing a rigger.
I noticed thier are no angle timber pieces along the inside length to reinforce the sides? So Im guessing this cloth is plenty strong enough with no seams etc. opening up?
It's been good enough on my boats so far. I guess it all depends how hard one is on them and also how unlucky! :laugh: :laugh: I've not had seams come undone yet...knock on wood! But like they say, more than one way to skin a cat... in my case I prefer the glass instead of the blocks. Just personal preference really. Nothing preventing guys from putting blocks in if they prefer. It's all good, that's the beauty of building them yourself.
"
Please Log in or Create an account to join the conversation.
- JUICR
-
- Offline
Less
More
- Posts: 72
- Thank you received: 16
15 years 5 months ago #15480
by JUICR
JUICE, ZZ RACING
IMPBA
Replied by JUICR on topic Re: New Warpath build... this one is for Chris "Juice" Rupley
Wow Marc you don't mess around. The build looks great so far. Maybe a little extra glass cloth on mine. I'm pretty rough on the equipment. LOL!!
JUICE, ZZ RACING
IMPBA
Please Log in or Create an account to join the conversation.
- marc
-
Topic Author
- Away
Less
More
- Posts: 2491
- Thank you received: 55
15 years 5 months ago #15481
by marc
I'm not expert on glass, but I would use much heavier than that to glass in rails. I've done some before using the cloth that comes with FG repair kits at automotive stores and it actually work really well and was very strong... don't know exactly what weight it is though.
Here is a good article on glassing in rails. He used mat and you can tell its pretty thick stuff. www.modelgasboats.com/Magazine...gine_Rails_101/
"
Replied by marc on topic Re: New Warpath build... this one is for Chris "Juice" Rupley
Hi Marc.
Thanks for advising about glassing.
I have some woven glass, 25 grams/sqm too. It's thin as paper. But will this be strong enough for the engine rails for a heavy Blata?
Cheers!
Woodie.
I'm not expert on glass, but I would use much heavier than that to glass in rails. I've done some before using the cloth that comes with FG repair kits at automotive stores and it actually work really well and was very strong... don't know exactly what weight it is though.
Here is a good article on glassing in rails. He used mat and you can tell its pretty thick stuff. www.modelgasboats.com/Magazine...gine_Rails_101/
"
Please Log in or Create an account to join the conversation.
Time to create page: 0.403 seconds