×
Pictures, videos, questions and/or comments about MGB products. Share your builds and feedback.
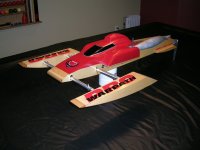
New Warpath build... this one is for Chris "Juice" Rupley
marc replied the topic: Re: New Warpath build... this one is for Chris "Juice" Rupley
JUICR wrote:
Just stay out front and off the buoys Juice!!!") Just kidding.
Just kidding.
Just stay out front and off the buoys Juice!!!
Just kidding. "
Please Log in or Create an account to join the conversation.
- marc
-
 Topic Author
- Offline
- Posts: 2491
- Karma: 24
- Thank you received: 55
marc replied the topic: Re: New Warpath build... this one is for Chris "Juice" Rupley
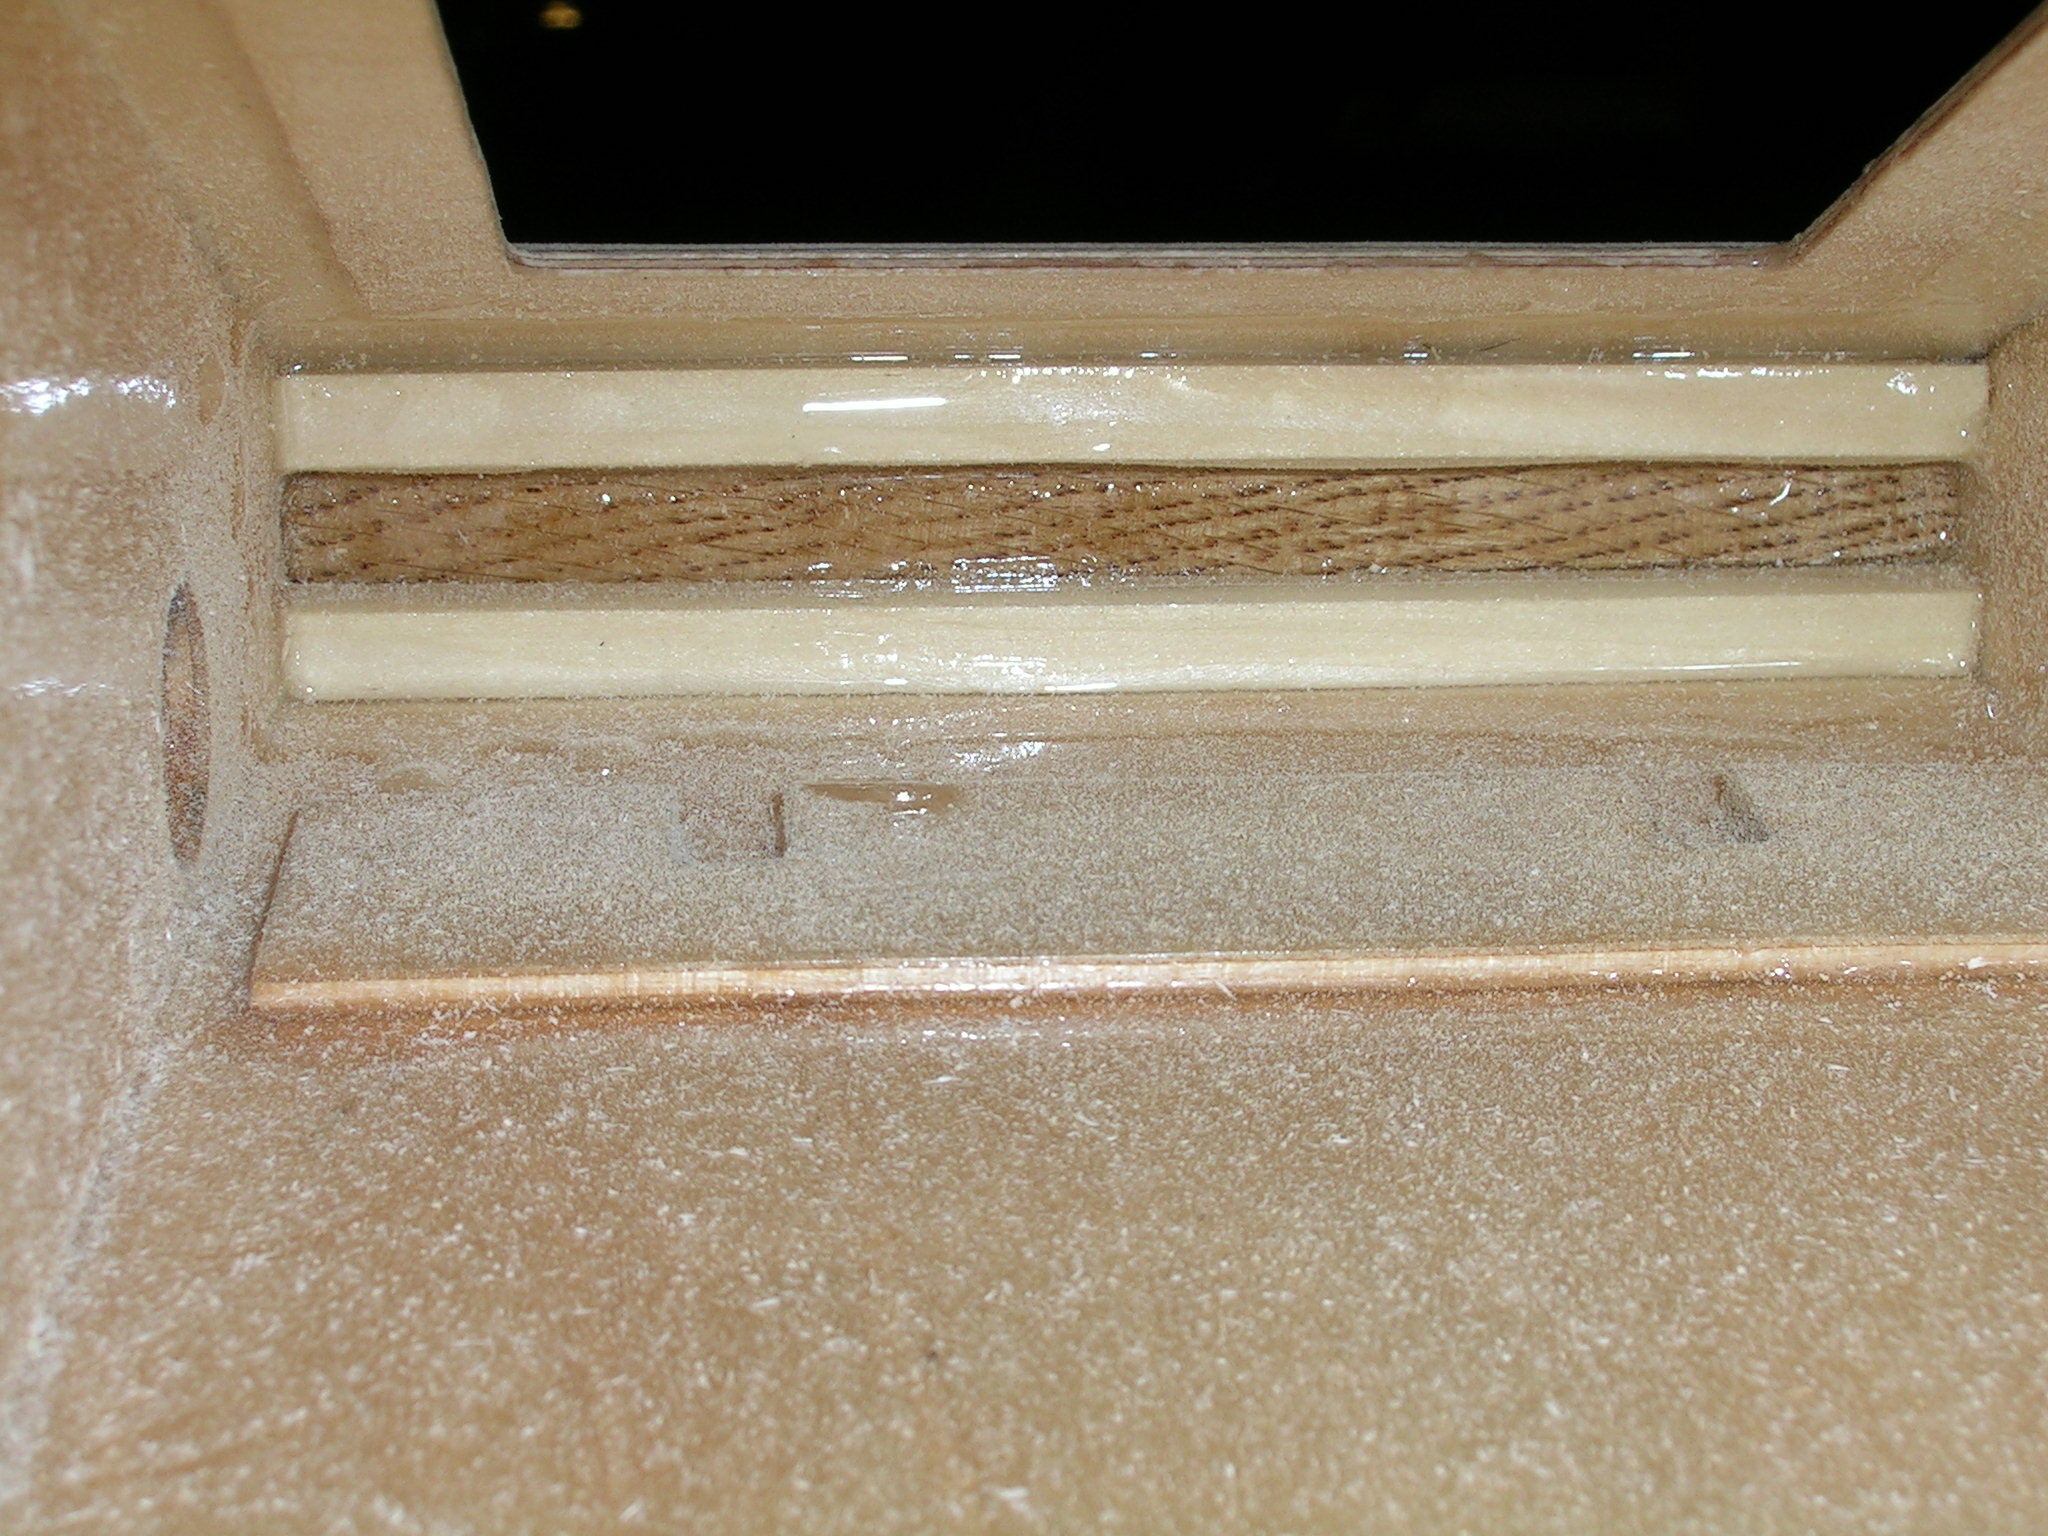
Top sheeting all installed and sanded flush to sides of tub.
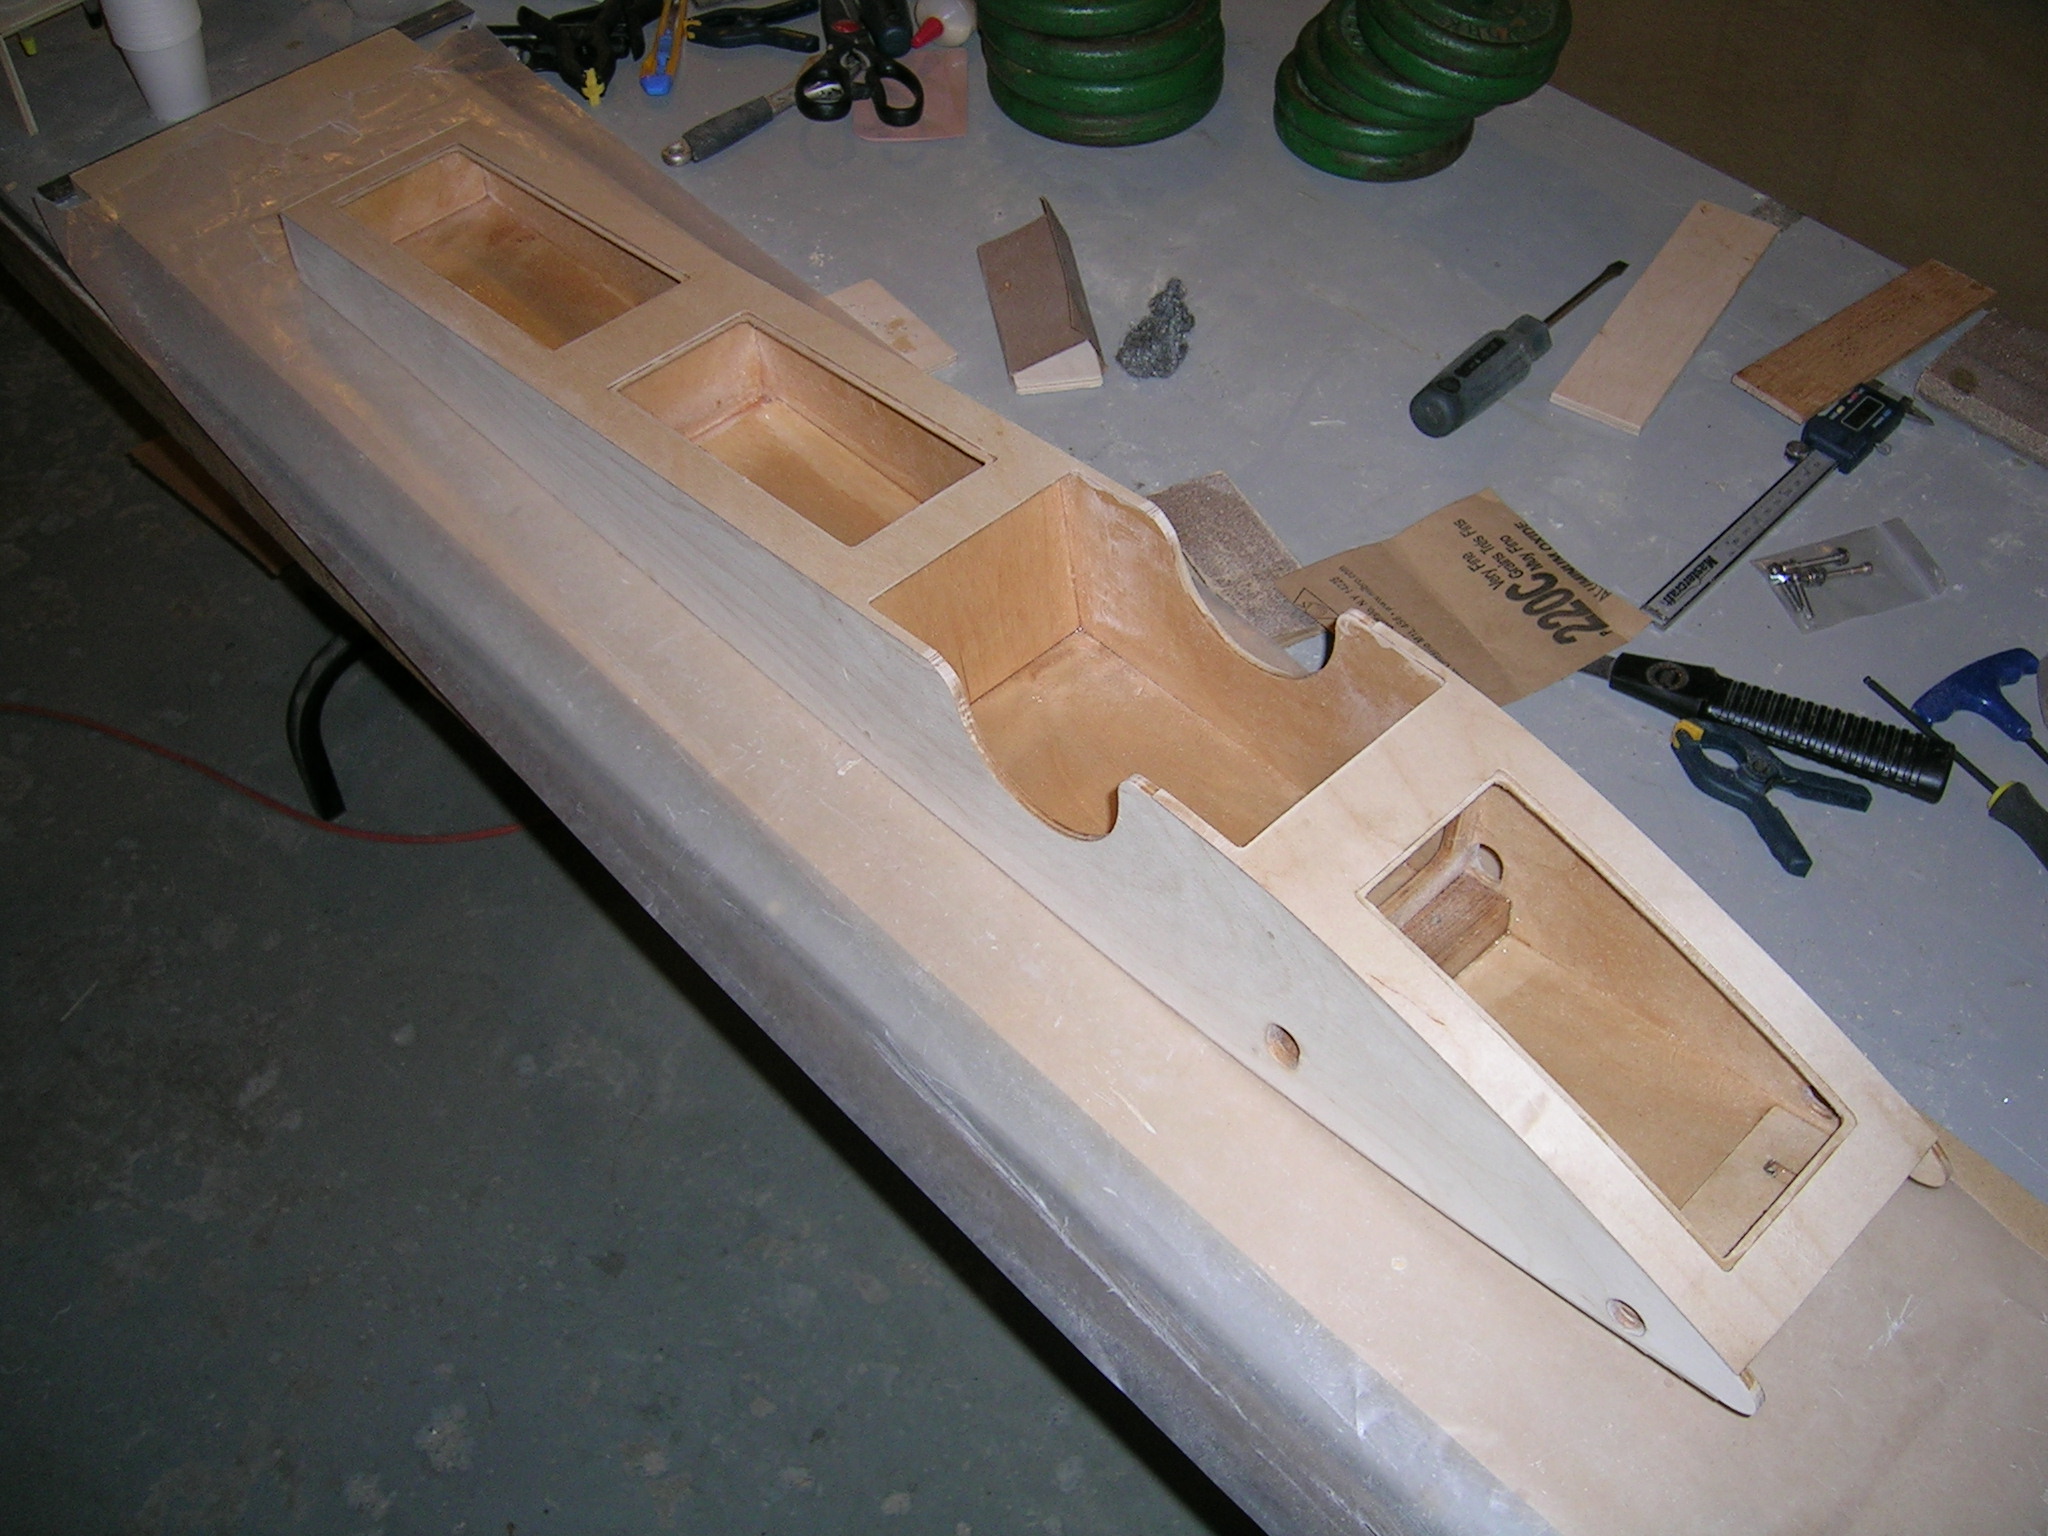
Nose of tube ready to be cut off for installation of full width oak nosepiece.

Nose cut off and 1/4 square strips glued in to keep sheeting straight and for added gluing surface for the nosepiece. Everything sealed with epoxy on the inside. Block sanded perfectly flush before installing nosepiece.

Gluing on the oak nosepiece with epoxy...weighted down to ensure nice tight fit and bond.
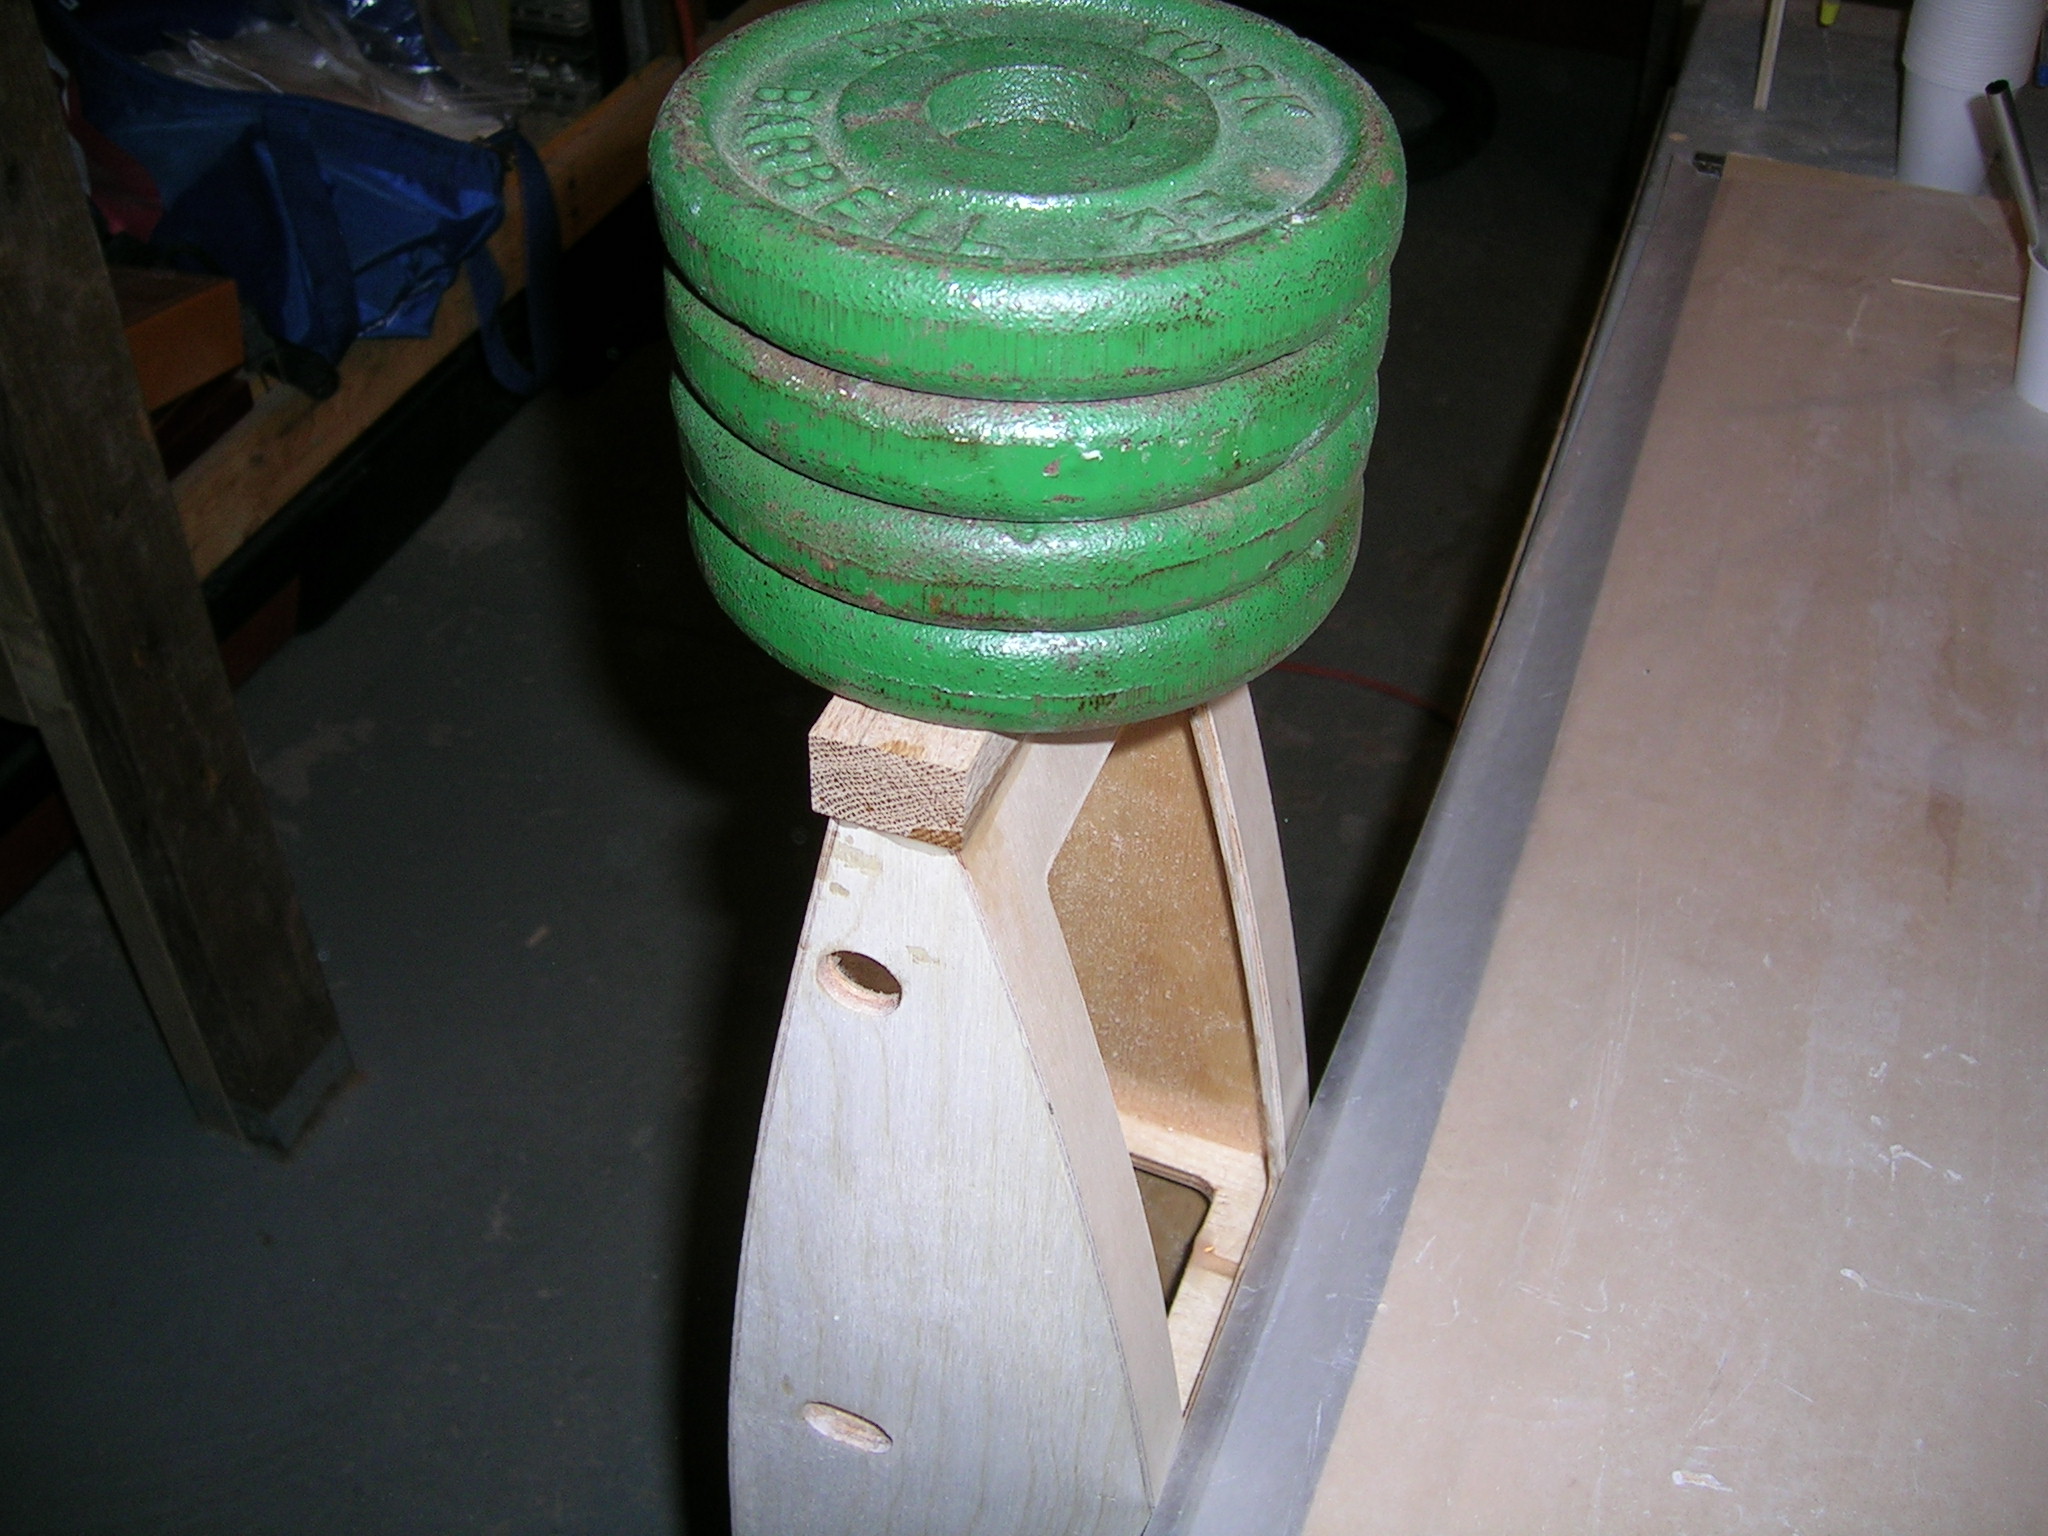
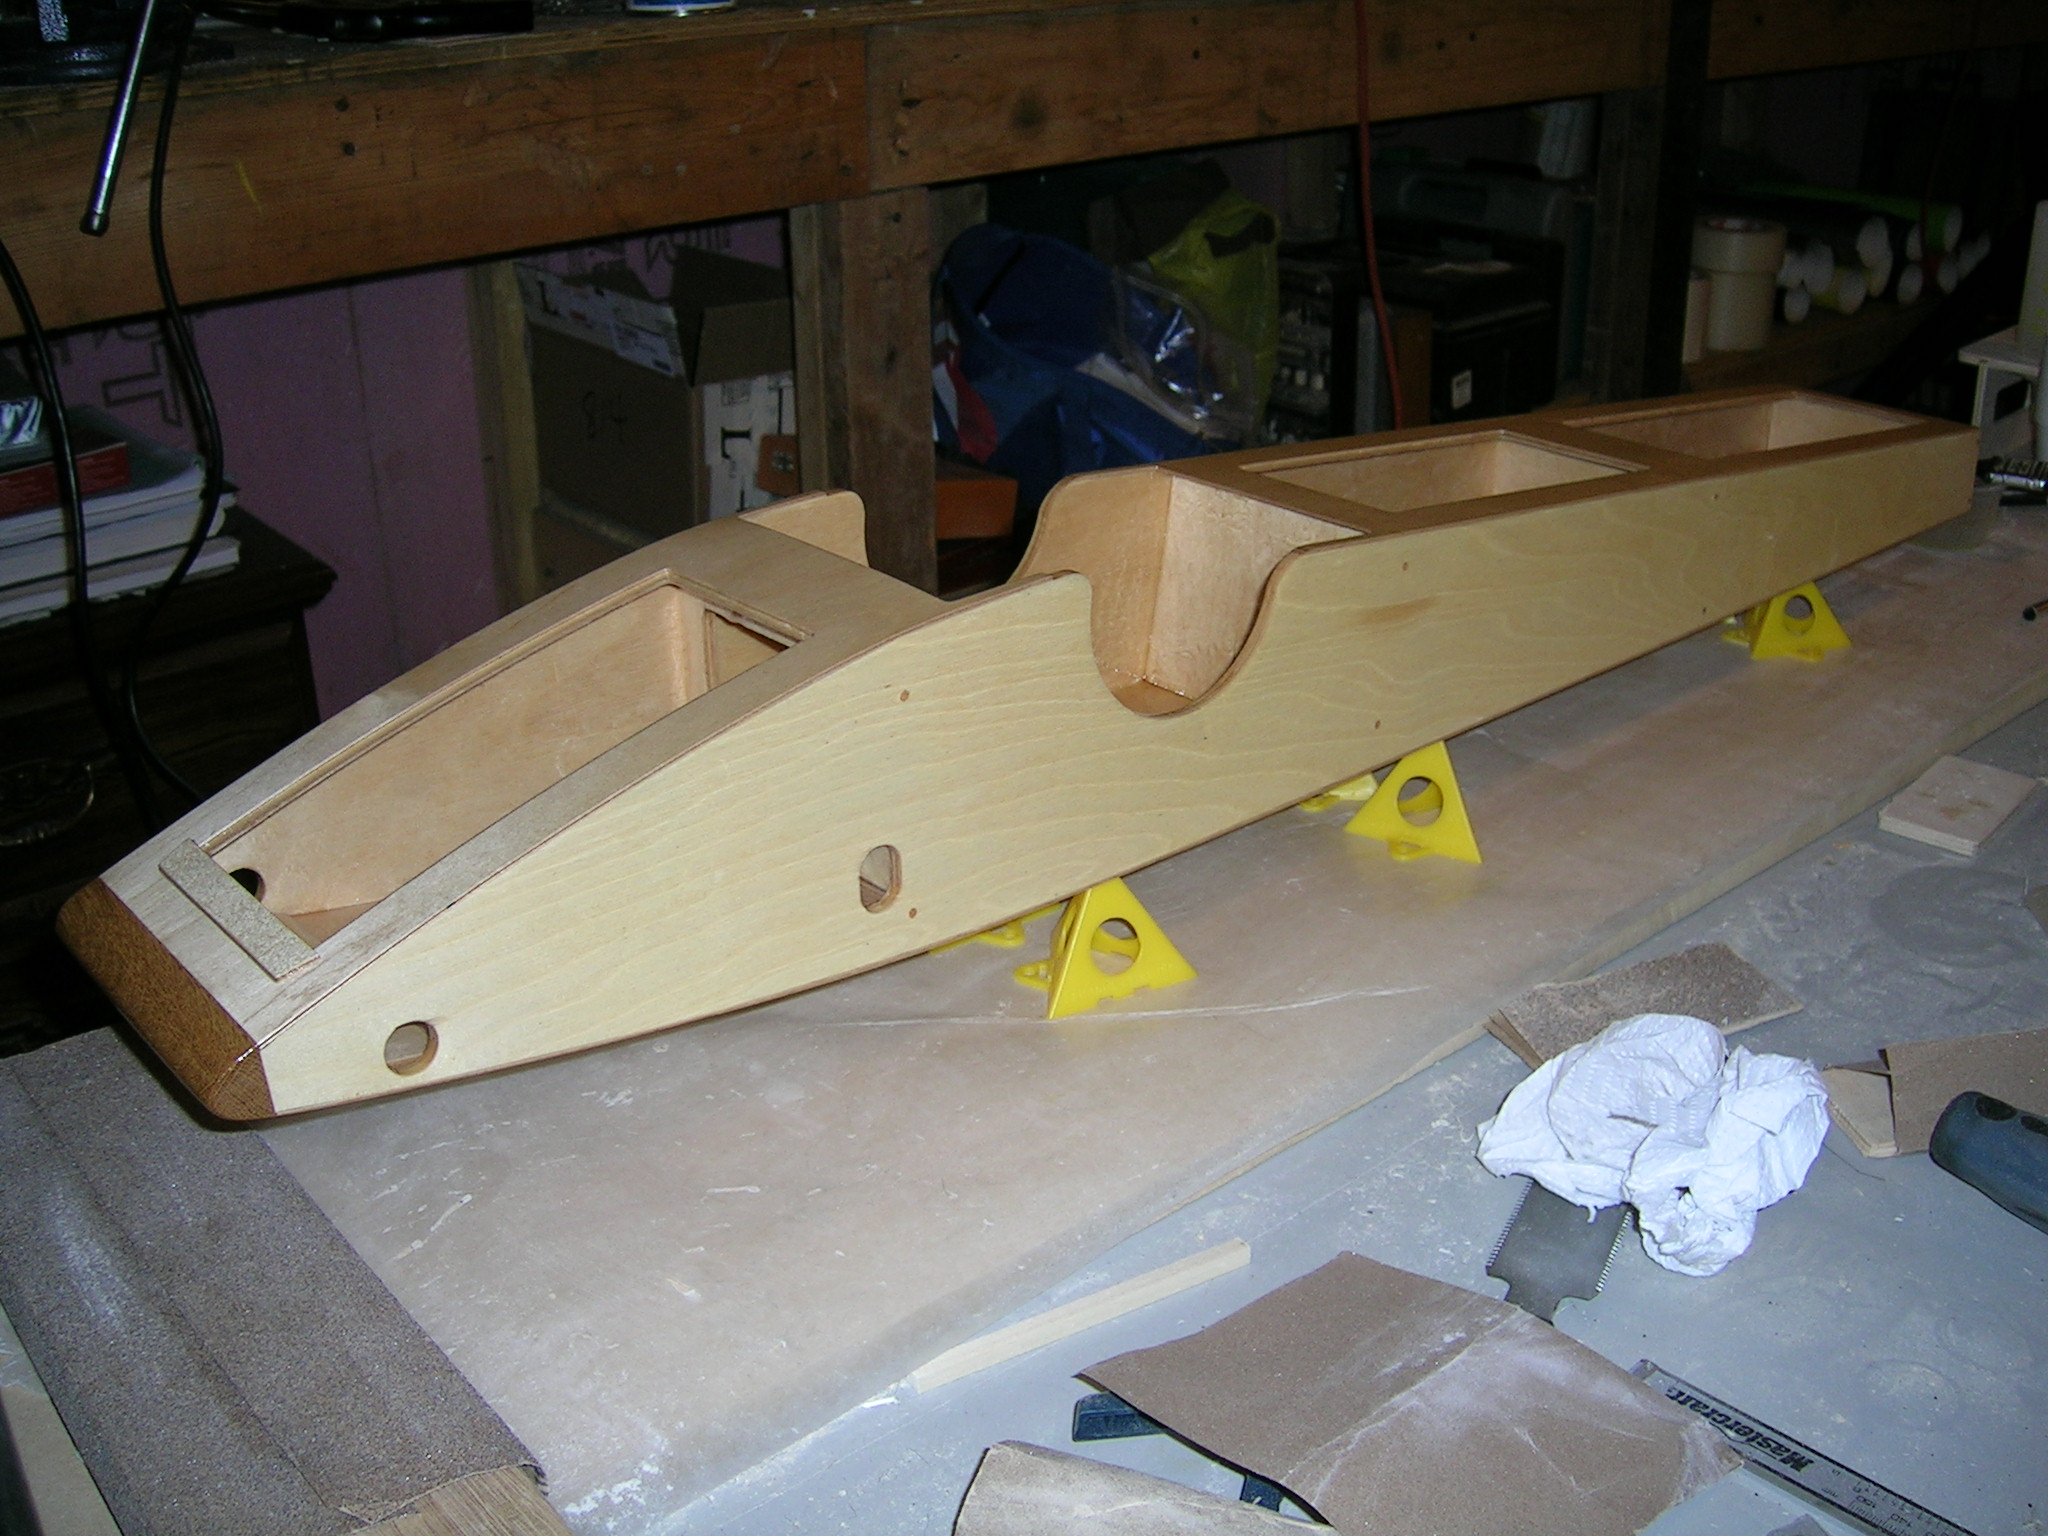
Nosepiece all done..block-sanded to shape and flush with sides.
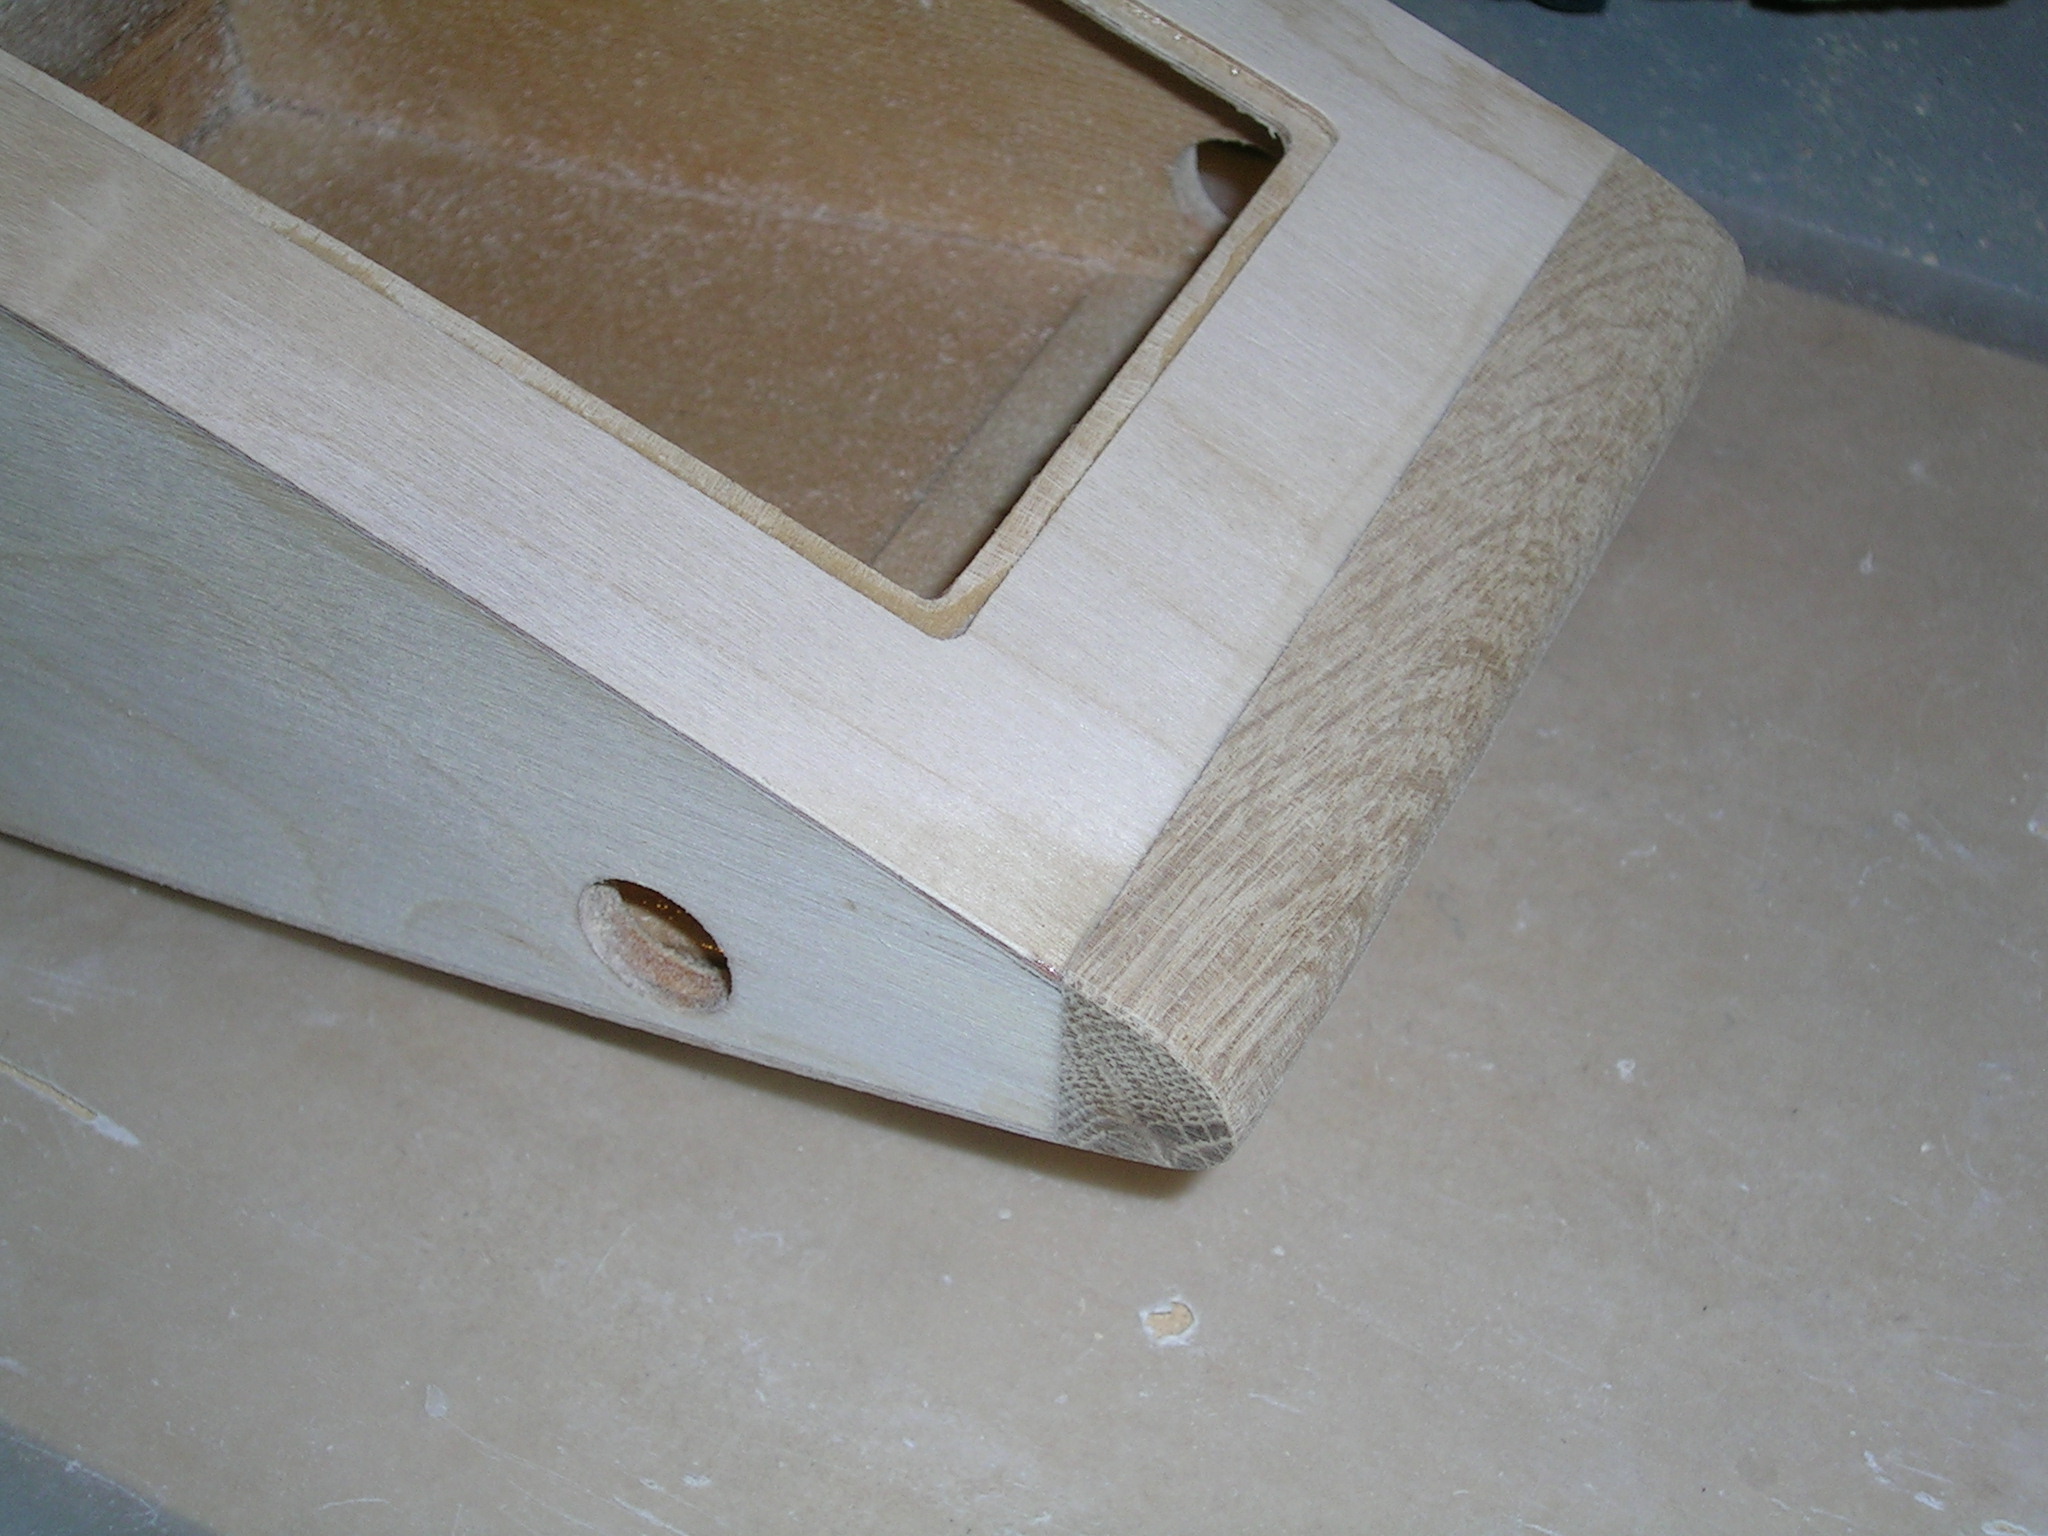
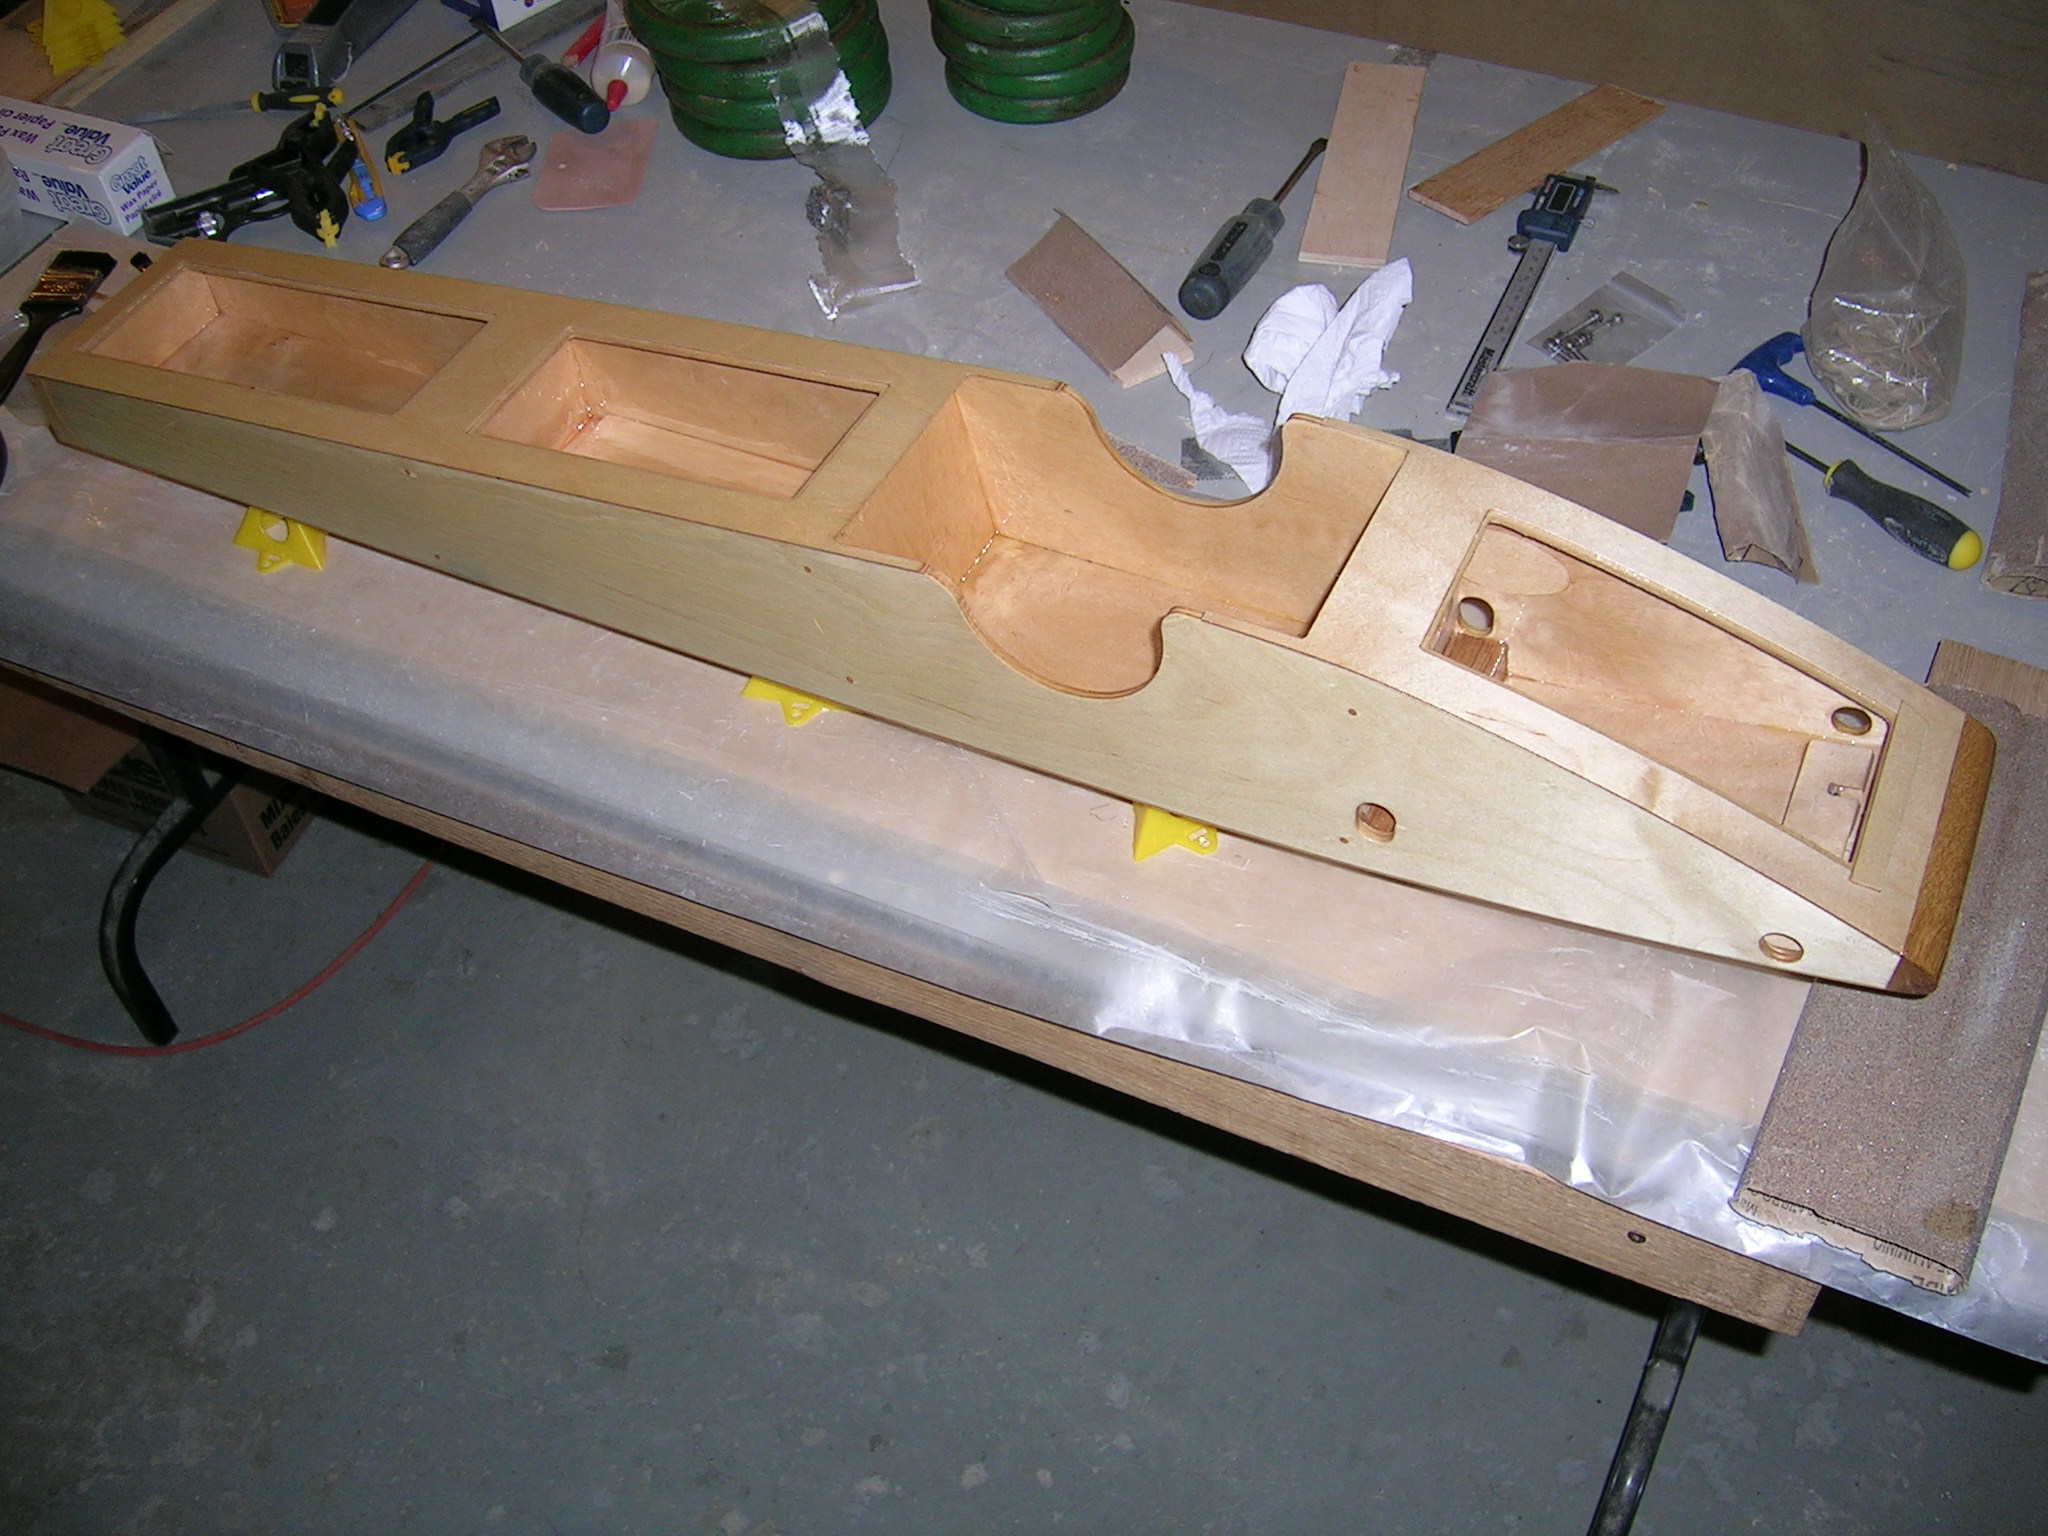
Inside view of the nose.
Nose of tube ready to be cut off for installation of full width oak nosepiece.
Nose cut off and 1/4 square strips glued in to keep sheeting straight and for added gluing surface for the nosepiece. Everything sealed with epoxy on the inside. Block sanded perfectly flush before installing nosepiece.
Gluing on the oak nosepiece with epoxy...weighted down to ensure nice tight fit and bond.
Nosepiece all done..block-sanded to shape and flush with sides.
Inside view of the nose.
"


Last edit: 15 years 4 months ago by marc.
Please Log in or Create an account to join the conversation.
- marc
-
Topic Author
- Offline
- Posts: 2491
- Karma: 24
- Thank you received: 55
marc replied the topic: Re: New Warpath build... this one is for Chris "Juice" Rupley
First coat of West Systems 207 clear on outside of tub.
"


Last edit: 15 years 4 months ago by marc.
Please Log in or Create an account to join the conversation.
- marc
-
Topic Author
- Offline
- Posts: 2491
- Karma: 24
- Thank you received: 55
Canadian Hot Rod RC Boats replied the topic: Re: New Warpath build... this one is for Chris "Juice" Rupley
What;s the nose piece Marc -- Oak?
That looks so good like that I don't think I will paint mine .... very nice
That looks so good like that I don't think I will paint mine .... very nice
Zoom Zoom .....
Toy Boats Toy Boats
Misty Creek Boats
www.youtube.com/channel/UCjwPZIU4nBUUk1CG0xf3TnQ
Last edit: 15 years 4 months ago by Canadian Hot Rod RC Boats.
Please Log in or Create an account to join the conversation.
- Canadian Hot Rod RC Boats
-

- Offline
- Posts: 959
- Karma: 12
- Thank you received: 68
Woodie replied the topic: Re: New Warpath build... this one is for Chris "Juice" Rupley
Marc.
Thats really good and precise work as I see it.
But I tell ya - you would not like to have an inside wiew of MY nose.
Cheers!
Woodie.
Thats really good and precise work as I see it.
But I tell ya - you would not like to have an inside wiew of MY nose.
Cheers!
Woodie.
Please Log in or Create an account to join the conversation.
- Woodie
-

marc replied the topic: Re: New Warpath build... this one is for Chris "Juice" Rupley
Canadian Hot Rod RC Boats wrote:
Yes it's oak.. exactly like the kit I sent you. Only thing not in the kits is the 1/4 blocks...I actually had not planned on doing the nosepieces like this in the beginning. So I just went to a local CTC and picked up the 1/4" square in 36" for a couple bucks. I will most likely add it in the next kits I make though. I really like the nose this way and will update the instructions with this info.
Yes it's oak.. exactly like the kit I sent you. Only thing not in the kits is the 1/4 blocks...I actually had not planned on doing the nosepieces like this in the beginning. So I just went to a local CTC and picked up the 1/4" square in 36" for a couple bucks. I will most likely add it in the next kits I make though. I really like the nose this way and will update the instructions with this info.
"
Please Log in or Create an account to join the conversation.
- marc
-
Topic Author
- Offline
- Posts: 2491
- Karma: 24
- Thank you received: 55
marc replied the topic: Re: New Warpath build... this one is for Chris "Juice" Rupley
Finally getting a little bit of time to get back to work on this rigger today... starting on the sponsons.


"


Last edit: 15 years 3 months ago by marc.
Please Log in or Create an account to join the conversation.
- marc
-
Topic Author
- Offline
- Posts: 2491
- Karma: 24
- Thank you received: 55
mitchesx replied the topic: Re: New Warpath build... this one is for Chris "Juice" Rupley
Marc - are you gluing the wood to the foam before cutting or was that just for tracing the outline? Anyone think Bob Smith Adheisives are as good as Z-Poxy?
Please Log in or Create an account to join the conversation.
- mitchesx
- Offline
- Posts: 165
- Karma: 4
- Thank you received: 2
marc replied the topic: Re: New Warpath build... this one is for Chris "Juice" Rupley
mitchesx wrote:
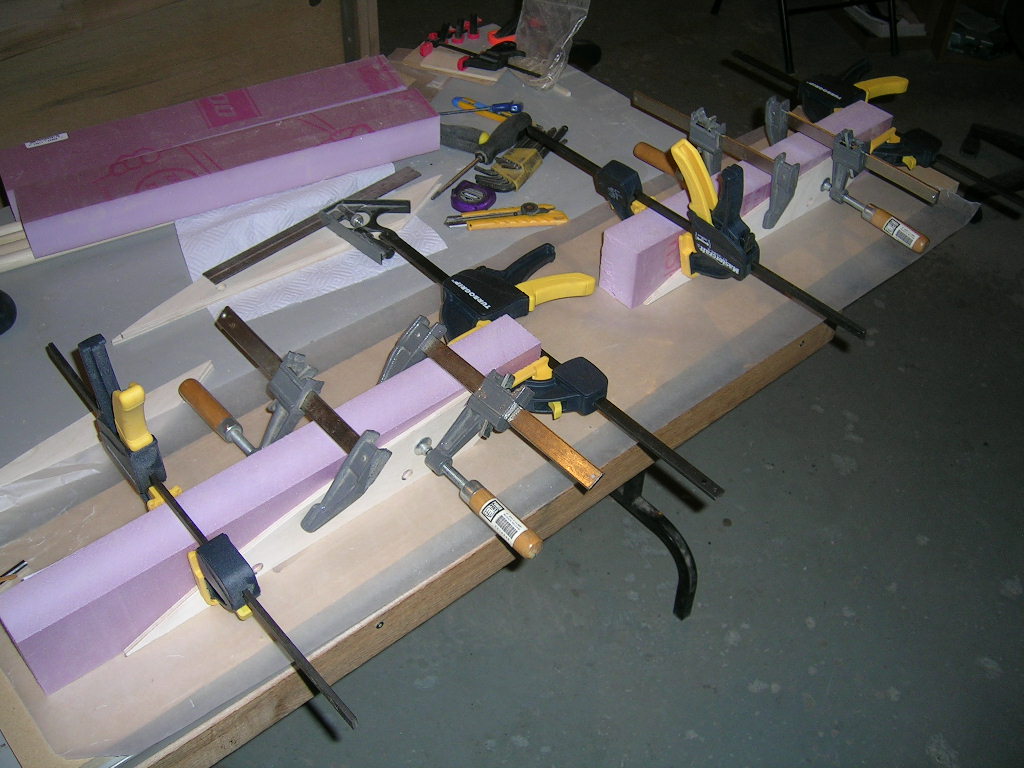
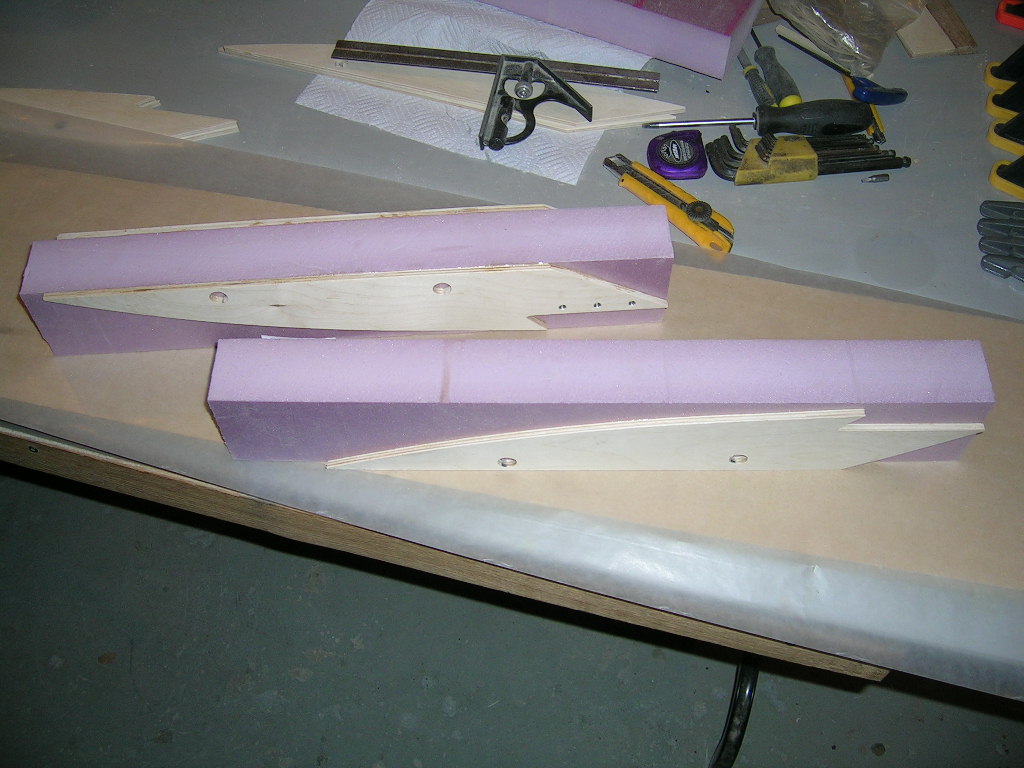
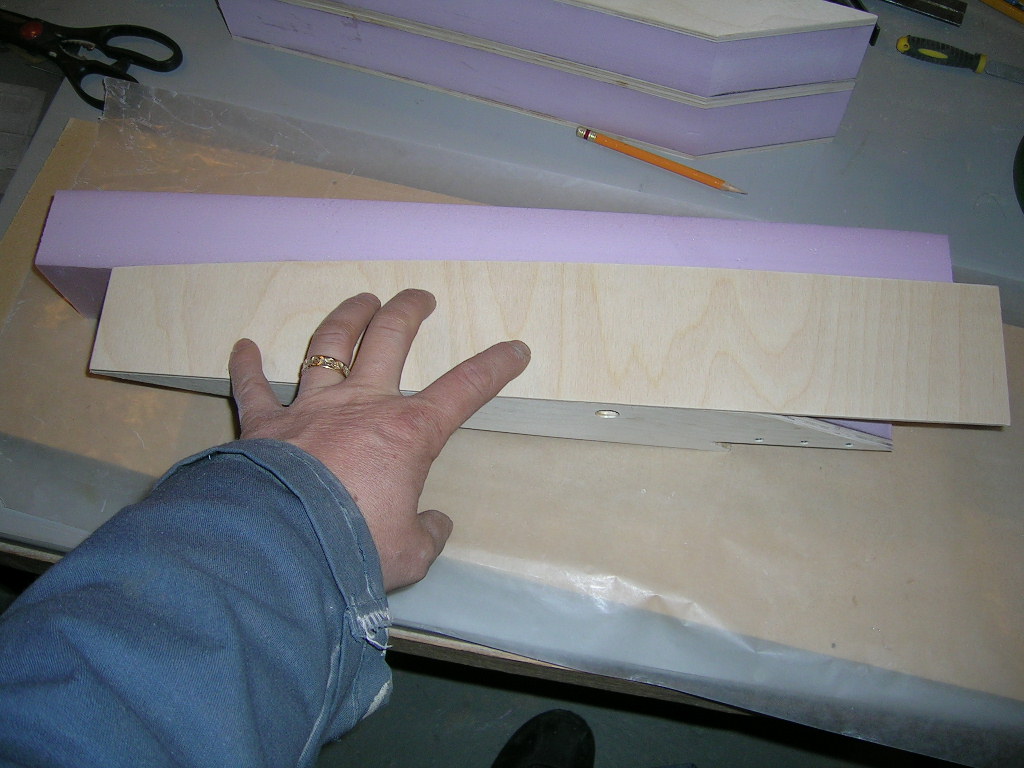
As pictured there Steve, the foam is glued "sandwiched" between the two pieces of 1/4" ply. This is the first step of building the sponsons. This has to be done on a flat surface and the flat surface of the pieces of ply and the foam flat on the building surface. The back of all 3 pieces square at the back. Make sure to put the pieces on the correct sides of the foam as explain in the instructions... one piece on each sponson is shorter in height and goes on the outside of the sponson (furthest away from the boat). The foam is cut AFTER it has been glued between the plywood pieces.
I am going to post more pictures of the progress of the sponsons.
"
Last edit: 15 years 3 months ago by marc.
Please Log in or Create an account to join the conversation.
- marc
-
Topic Author
- Offline
- Posts: 2491
- Karma: 24
- Thank you received: 55
marc replied the topic: Re: New Warpath build... this one is for Chris "Juice" Rupley
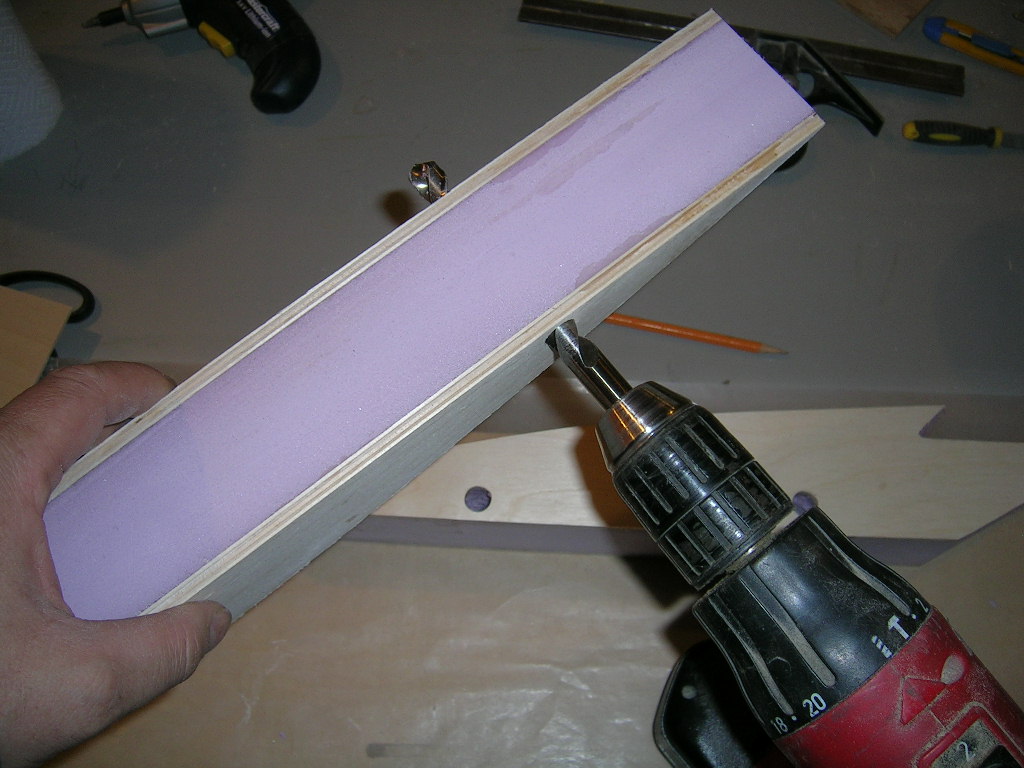
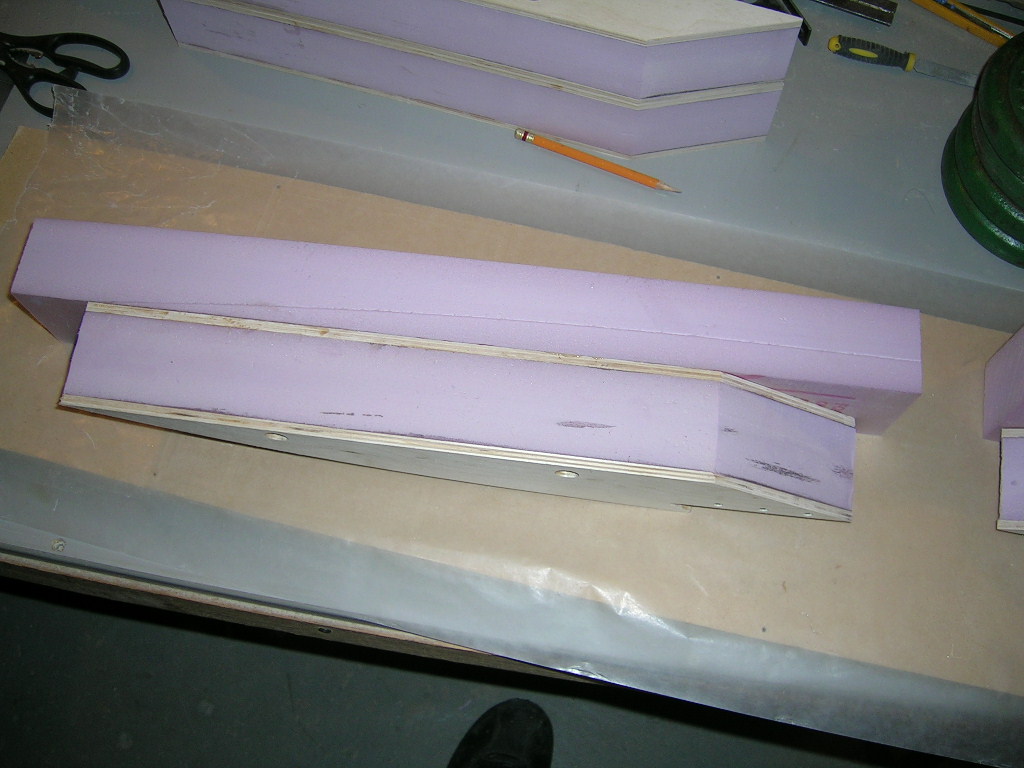
Drill out foam with a 31/64 bit going slowly from one hole to the other making sure not to elongate the holes in the plywood.
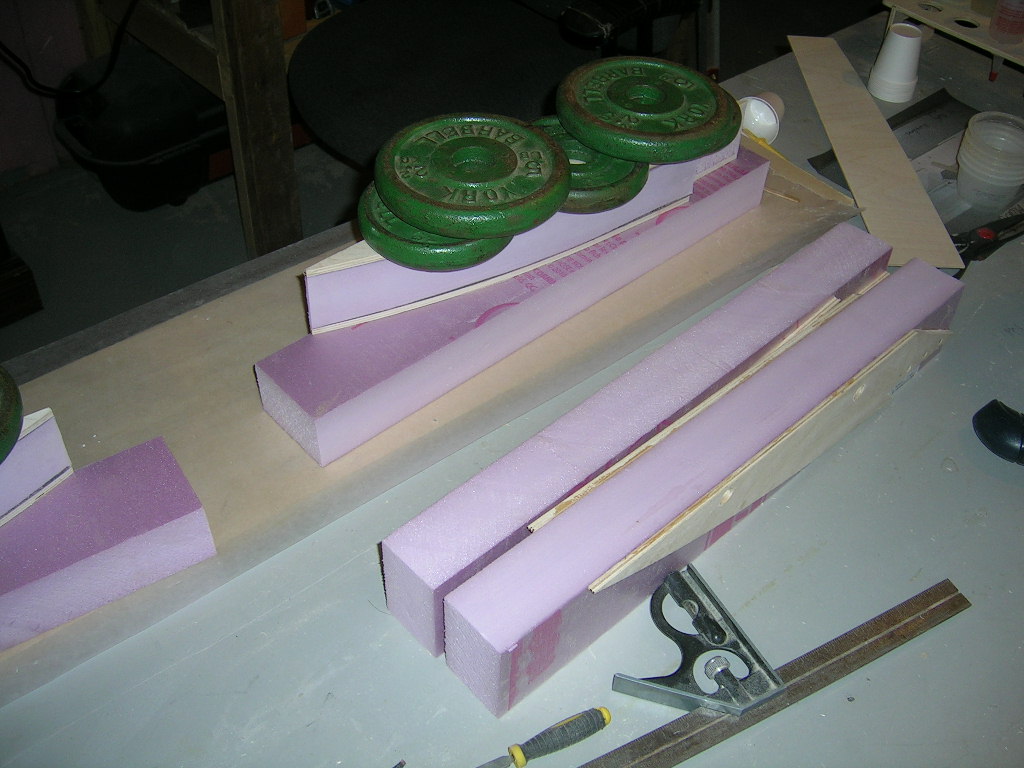
Gluing on the second (outside) layer of foam to the sponsons... make the flat sides even and weigh down until epoxy cures...
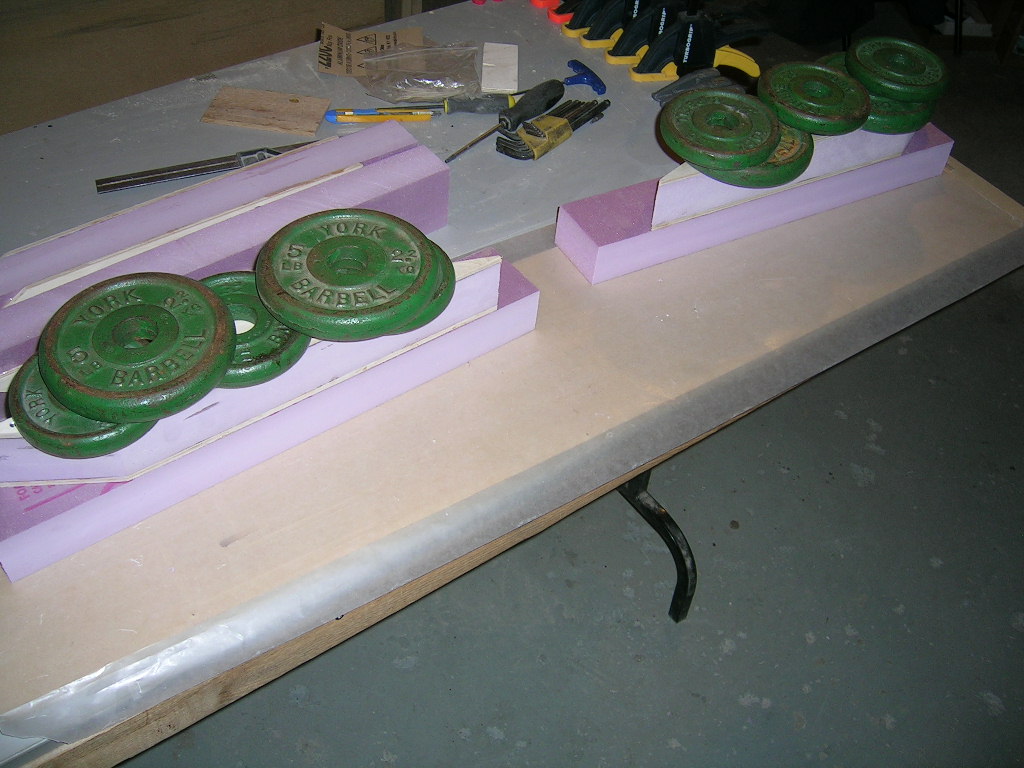
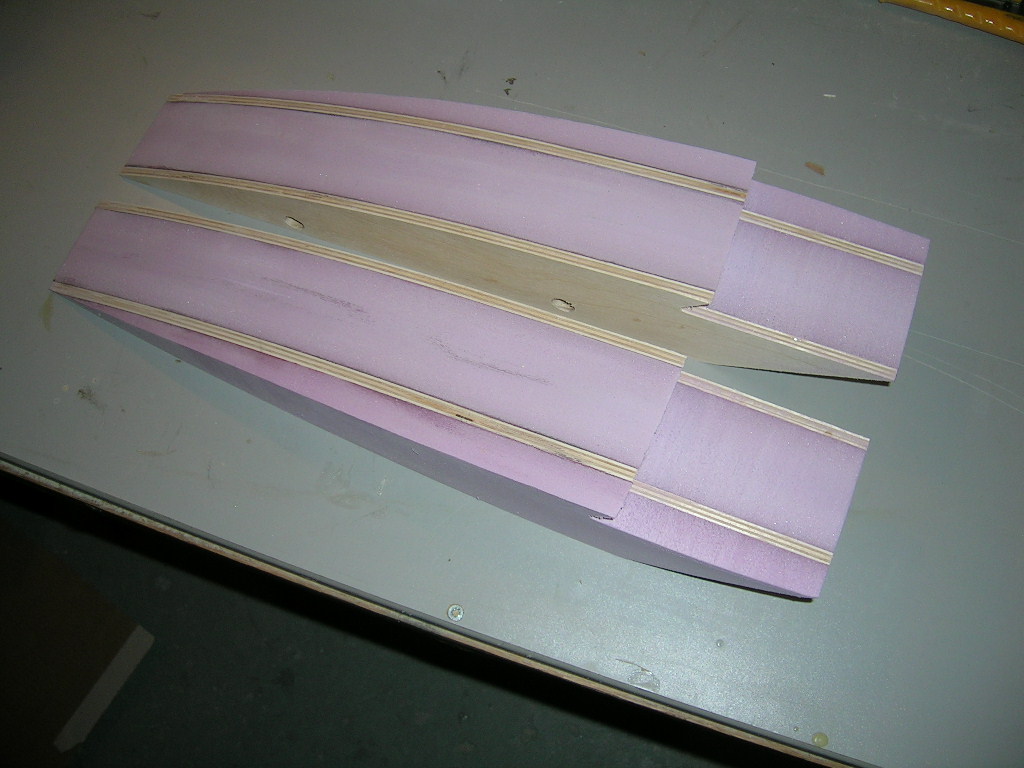
Now I used the template supplied in the kit to trace out the outline of the sponson. Simply lay the template on the top of the sponson making tip even with tip of sponson and inside edge even with sponson inside edge and trace outline on the foam. Flip template over and do the same on other sponson. Cut foam vertically following the lines you just made. Then block sand smooth. Put both sponsons back-to-back when sanding to make them the same.
Foam has been cut and all edges block-sanded to match the rest of the sponson following wood edges as guides.

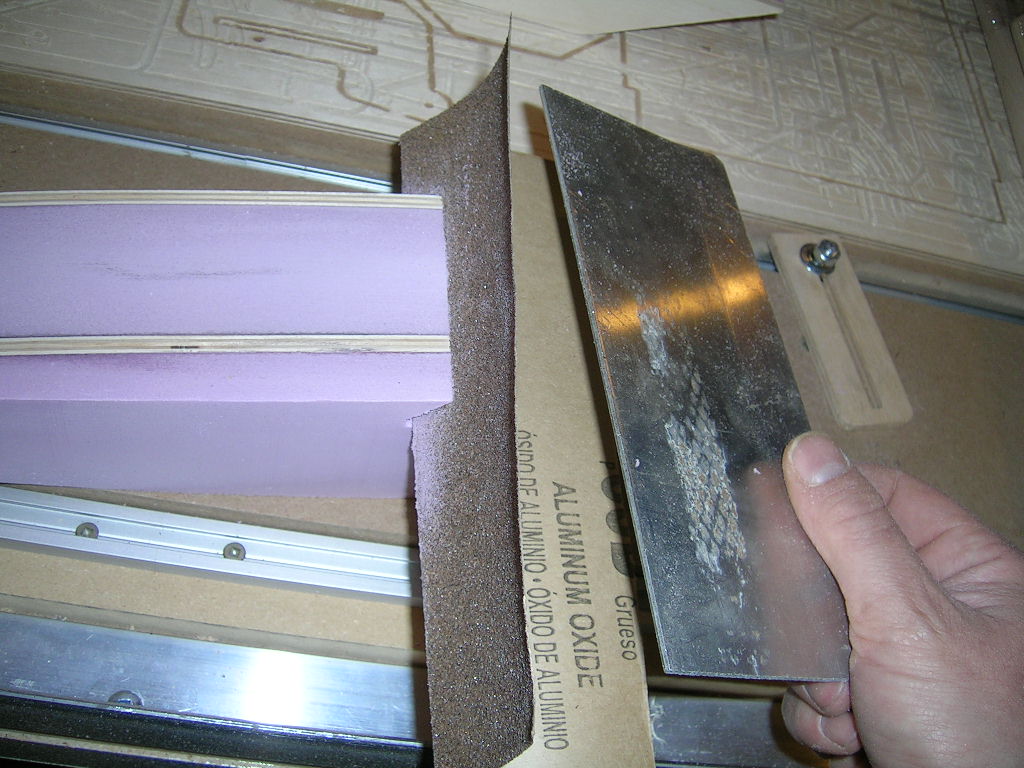
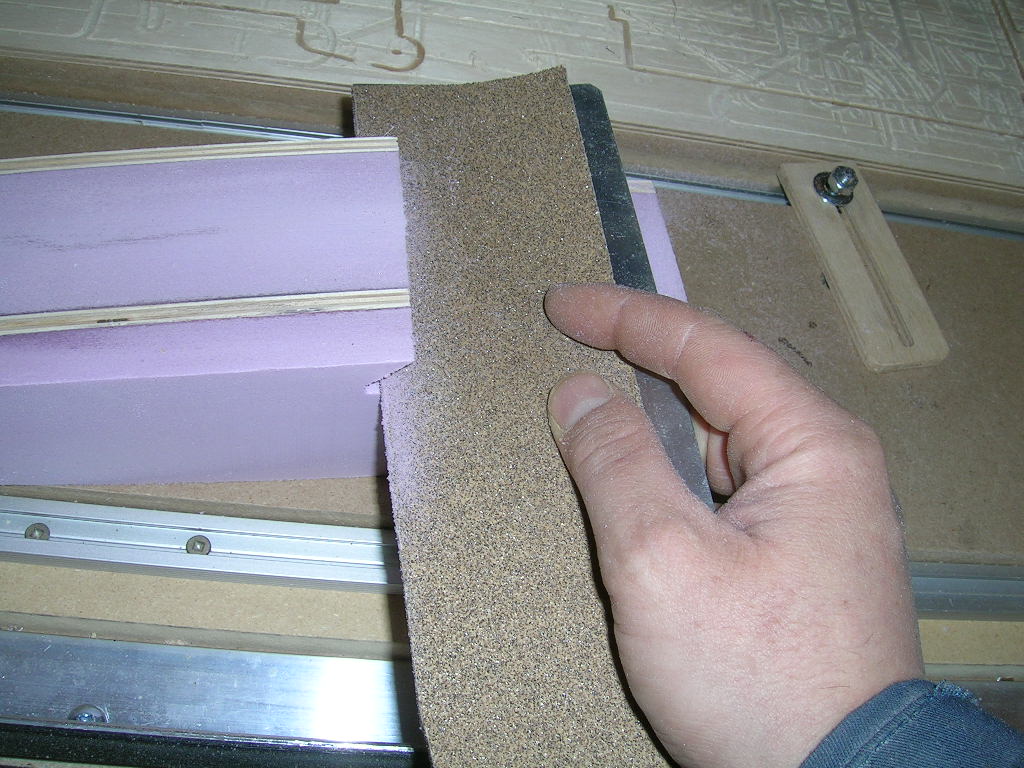
Here is what I use to get into the tight spots. It's just a flat aluminum plate 1/8" thick with sandpaper over it. Works great for block-sanding in the tight bend under the sponson.
Gluing on the second (outside) layer of foam to the sponsons... make the flat sides even and weigh down until epoxy cures...
Now I used the template supplied in the kit to trace out the outline of the sponson. Simply lay the template on the top of the sponson making tip even with tip of sponson and inside edge even with sponson inside edge and trace outline on the foam. Flip template over and do the same on other sponson. Cut foam vertically following the lines you just made. Then block sand smooth. Put both sponsons back-to-back when sanding to make them the same.
Foam has been cut and all edges block-sanded to match the rest of the sponson following wood edges as guides.
Here is what I use to get into the tight spots. It's just a flat aluminum plate 1/8" thick with sandpaper over it. Works great for block-sanding in the tight bend under the sponson.
"


Last edit: 15 years 3 months ago by marc.
Please Log in or Create an account to join the conversation.
- marc
-
Topic Author
- Offline
- Posts: 2491
- Karma: 24
- Thank you received: 55
Time to create page: 0.083 seconds