Crankshaft Shim
whitefish created the topic: Crankshaft Shim
_____________________
Edited 08-17-13. This thread started out showing a tool based on posts I saw on
another RC boat forum. I saw it in so many different forms, I mistakenly accepted
that crankshaft shimming is good practice. Well, to be blunt - it's not good
practice. Please skim through the start of this thread and dig deeper as it
progresses - there is some very good info in the later posts.
_____________________
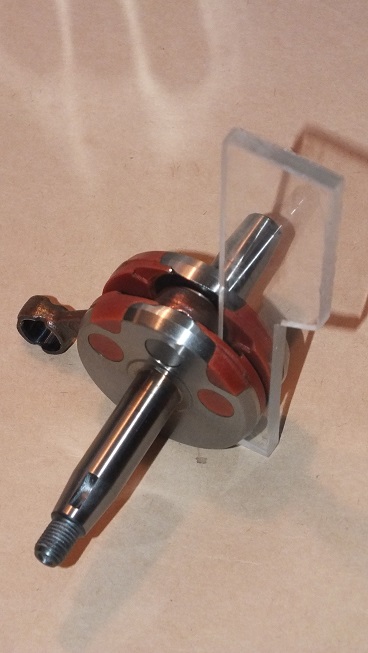
Numerous objects have been suggested for inserting into engine crankcases
for the purpose of binding the shaft and allowing the rotor nut to be installed
or removed with no risk of twisting the crankshaft.
I've seen more than one instance where random workbench objects have been
identified and used with good results. My efforts to find something acceptable
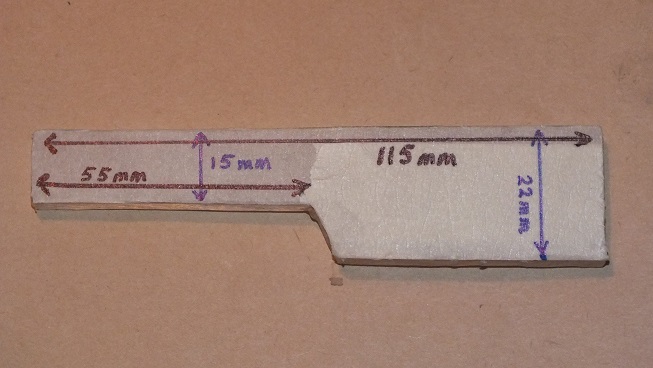
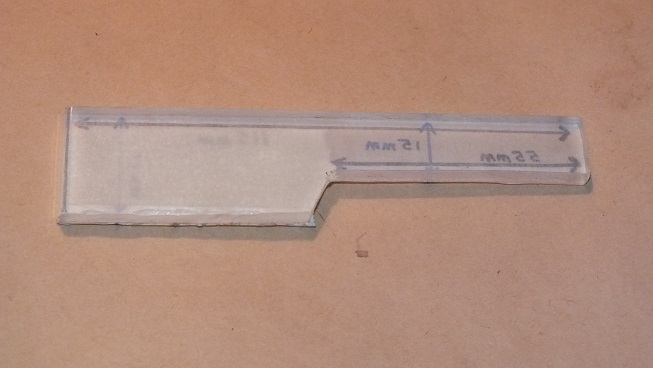
kept failing. Out of frustration, I knew a 3/16 inch thick piece of some sheet
material could allow a shim (aka stopper) to be made. The only 3/16 thick plastic
I had around was some Lexan so I started sawing away on a scrap and the pics show
the results.
- can be used to shim between the rod and the case from either side
- leaves no particles inside the crankcase like leather or fabrics can
- cannot scratch or mar any internal surface(s)
- does not crack when torque pressure is applied to the crankshaft spindle(s)
To display the sizing, I applied masking tape to one side and marked the four widths
involved. Only takes a few minutes to make with a saw. The cut edges can be buffed
with sand paper or squeegee to remove all the plastic fragments sticking to the
cuts. Could also be made just as well from other materials beside Lexan - just did
not have anything else on hand that I liked as well as the Lexan.
Since similar tools are preferred by many over the infamous "Piston Stoppers",
maybe this one should be called the "Crankshaft Stopper"???
Last edit: 12 years 5 months ago by whitefish.
Please Log in or Create an account to join the conversation.
- whitefish
- Offline
- Posts: 155
- Karma: 2
- Thank you received: 25
danielplace1962 replied the topic: Crankshaft Shim
You are best to only be on the rear porkchop without touching the rod.
I use a 1/4" strip of aluminum with some extra heavy gauge industrial heat shrink of it.
I use a 1/4" strip of aluminum with some extra heavy gauge industrial heat shrink of it.
Last edit: 12 years 6 months ago by danielplace1962.
Please Log in or Create an account to join the conversation.
- danielplace1962
- Offline
- Posts: 101
- Karma: 1
- Thank you received: 17
whitefish replied the topic: Crankshaft Shim
Different crankshaft designs offer different possibilities.
The CY stuffer cranks have no porkchop shoulders available. No other option but
to use the crank pin. May be another good reason to use no more than the suggested
torque spec. I've been using 112 in. lbs. (Zen's Standard Torque) with no problems
observed.
_________________________
Another aspect of rotor installation is wet fit vs dry fit. Installing these rotors
reminds me so much of installing harmonic balancers on FS engines I cannot help but
rely on some ingrained thinking.
When a FS harmonic balancer slides on an FS crankshaft, the mechanic is expecting
three things to happen:
1. full engagement of the conical fit
2. no binding of the crankshaft key
2. no damage to any other engine part while the balancer nut is being torqued
The oldest trick in the book to get 1 & 2 right every time is to coat both conical
parts (plus the groove, the key and the threads) *very* lightly with Anti-seize.
I've never had a problem doing these tiny rotors the same way.
Two other pluses about using Anti-seize is:
1. when removing (does not matter if it's next week or next year), they pop off super
easy - it's very kind to the shaft and the tool
2. rust formation is suppressed - makes the next install *so* much easier
There is a mechanic's myth that Anti-seize can make some threaded nuts work loose.
This is a myth. As long as a properly adjusted torque wrench is used with the correct
technique, there is a long list of "mission critical" threaded nuts that will never
work loose if coated with Anti-seize, including rotor nuts, harmonic balancer nuts,
automotive wheel lugs, manual shift clutch cover screws, FS flywheel retainer screws,
disk brake caliper retainer screws, etc, etc.
Please Log in or Create an account to join the conversation.
- whitefish
- Offline
- Posts: 155
- Karma: 2
- Thank you received: 25
strictlybusiness1 replied the topic: Crankshaft Shim
CC,
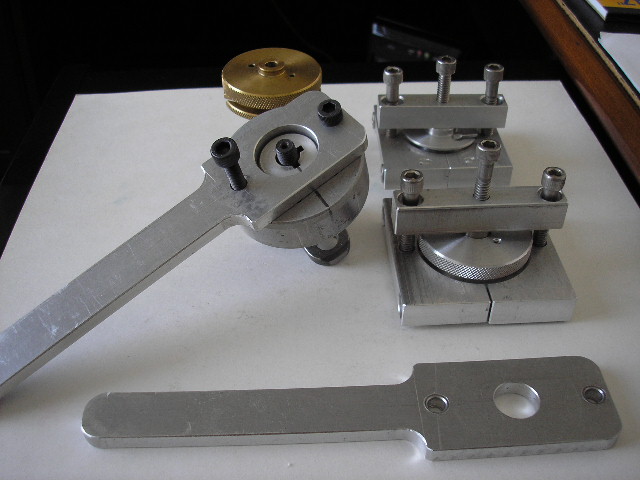
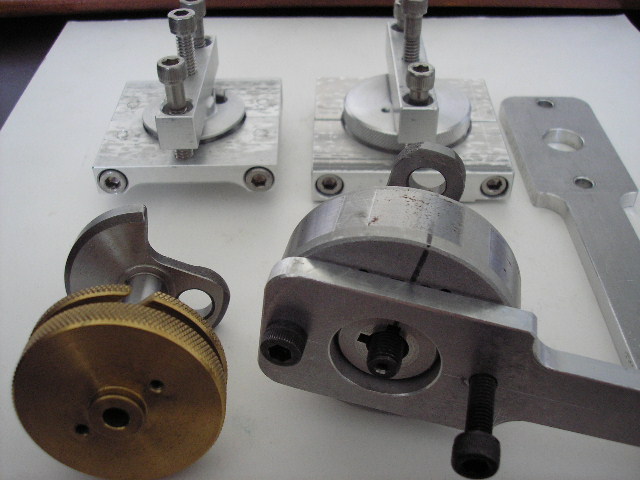
I DO NOT place anything inside the engine to tighten or loosen hardware mounted securely on tapers. The tools shown in the photos can remove & install hardware without stressing other engine parts. The split collar pullers can use the wrench type handles seen in the photos mounted to the puller when tightening bolts or nuts. Since I use Loctite & a torque wrench to install screws & nuts, piston stops or other types of devises would not be advisable.
JA
Please Log in or Create an account to join the conversation.
- strictlybusiness1
-

whitefish replied the topic: Crankshaft Shim
Cool tools, JA! I will modify one end of my rotor puller and try it your way. There
is a lot to be said for never pushing on the crankshaft pressfits.
is a lot to be said for never pushing on the crankshaft pressfits.
Please Log in or Create an account to join the conversation.
- whitefish
- Offline
- Posts: 155
- Karma: 2
- Thank you received: 25
danielplace1962 replied the topic: Crankshaft Shim
Not one of those tools will help you hold the flywheel when installing a EZ start pawl nut.
There is a reason we pull the cylinder and shim between the crank and the case. It is the easiest way to hold the crank when installing a EZ start.
The bolt holes in in the flywheel are not accessible when the pawl nut is on the end of the crank.
You are not going to stress a crank shimming it so you can seat the flywheel when you are shimming the end you are working on. Hardly anyone uses a regular starter these days since the easy start has been out for two years it's about all you see on engines anymore.
I have tools for holding it without shimming but there is no better way for the average Joe to hold the crank while installing a EZ start than pulling the jug and shimming the flywheel side of the crank half.
The way the poster is doing it is incorrect and on a aircooled engine as he is demonstrating with you should use a tool that bolts in the puller holes as there is no need for shimming the crank. And you certainly don't shim it in the middle of the rod. You might as well just drop some rope in the cylinder if you going to do that. He is stressing the crank assembly incorrectly.
Last edit: 12 years 6 months ago by danielplace1962.
Please Log in or Create an account to join the conversation.
- danielplace1962
- Offline
- Posts: 101
- Karma: 1
- Thank you received: 17
strictlybusiness1 replied the topic: Crankshaft Shim
I guess everyone will have to use an EZ start pawl nut to make you happy. All of the problems with these things tells me to find another way. Besides a simple tool could be made to hold the OD of the flywheel which would allow the same procedure to be done.
By the way Daniel, you still haven't explained how you check those crankcase bottoms after they have been cut with that special mandrel held in the three jaw chuck. Is this an EWAG process???
By the way Daniel, you still haven't explained how you check those crankcase bottoms after they have been cut with that special mandrel held in the three jaw chuck. Is this an EWAG process???
Last edit: 12 years 6 months ago by strictlybusiness1.
Please Log in or Create an account to join the conversation.
- strictlybusiness1
-

whitefish replied the topic: Crankshaft Shim
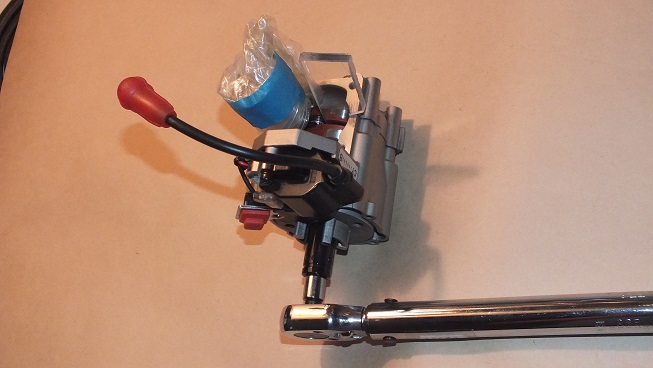
Since all forms of shimming crankshafts is questionable (especially for cranks constructed
using three pressfits) here are two more methods for stabilizing the rotor while not stressing
the cranks pressfits. These two methods are being demonstrated on the CY style rotors.
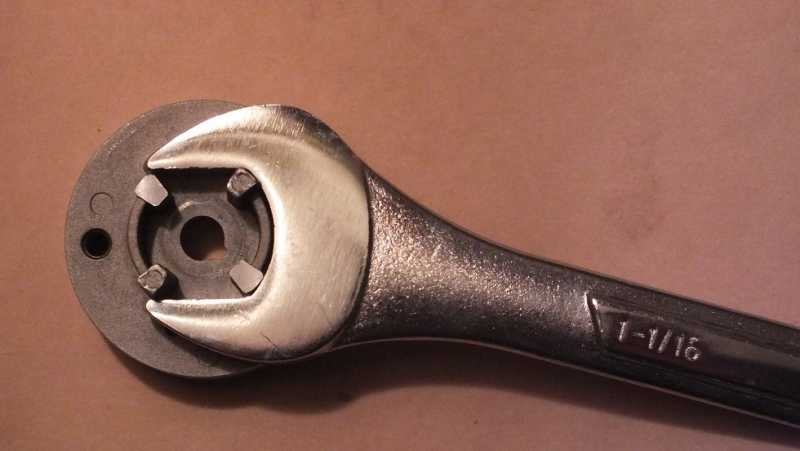
The first shows how a 1 & 1/16in. open end wrench can fit the CY's aluminum starter tangs
to secure the rotor. Works OK but a little cumbersome holding such a large wrench on a
tiny rotor. One of those "Plumber's Spanner Wrenches" could work just as well.
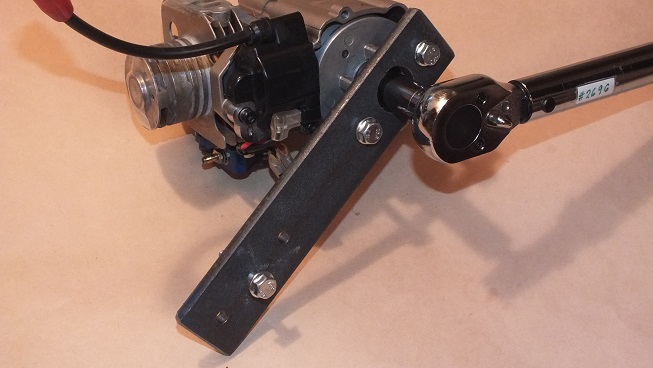
The second uses two machine screws passing thru a bar tool (a length of 3/16" X 1&1/2" steel
flat) and engaging the threaded holes in the rotor. By far, the more convenient method of the
two. Really makes the various shim ideas look inferior - specially since the same tool bar can
remove using one end and install using the other.
A torque wrench is used to apply 112 in/lbs to tighten the rotor nut.
Please Log in or Create an account to join the conversation.
- whitefish
- Offline
- Posts: 155
- Karma: 2
- Thank you received: 25
whitefish replied the topic: Crankshaft Shim
Found a video showing a method for EZ Start installation:
EZ Starts are using a cast aluminum pulley which needs to be installed carefully or
the threads can be damaged. I wonder how many install/remove cycles the nut can
endure before the Loctite starts to degrade the aluminum threads?
www.davesmotors.com/eg195_2
If a helicoil insert was installed in the cast aluminum pulley, it might become
more durable and predictable??? If the helicoil was installed in the pulley with
JB Weld (slow) it just might lock it in better??? Don't know - could be worth a try.
Please Log in or Create an account to join the conversation.
- whitefish
- Offline
- Posts: 155
- Karma: 2
- Thank you received: 25
strictlybusiness1 replied the topic: Crankshaft Shim
Excellent info in the post & the helicoil is a great idea. Makes the idea of opening the engine to put on or remove hardware seam rather silly.
Please Log in or Create an account to join the conversation.
- strictlybusiness1
-

Time to create page: 0.153 seconds

