
Product Review Article...
Our review of the Rampage Mono from CC Racing Engines...
The Rampage Mono is quickly building a reputation as a top contending oval heat racer. The boat is an original design by Mike Cantavespri of Louisiana USA and is exclusively sold by CC Racing Engines. Mike does not build boats for a living he does this purely out of love for the sport. The design and development of this hull stretched over many months of trial and error, until the boat was performing exactly the way he wanted it to. The Rampage was released over a year ago, and although not produced at such high volumes as some other boats, it has already proven itself many times at both club and National races across the US and Canada. It made its first official outing when Carlo Catalanotto (owner of CC Racing Engines) raced it at the 2008 Northern Nats in London and took home first place in LS27 mono.
* Sadly, Mike passed away in 2010 and the R/C boating community lost a very good person in Mike, but the Rampage continues to be produced by his brother Denny Cantavespri and can still be purchased through CC Racing Engines (see contact info below).
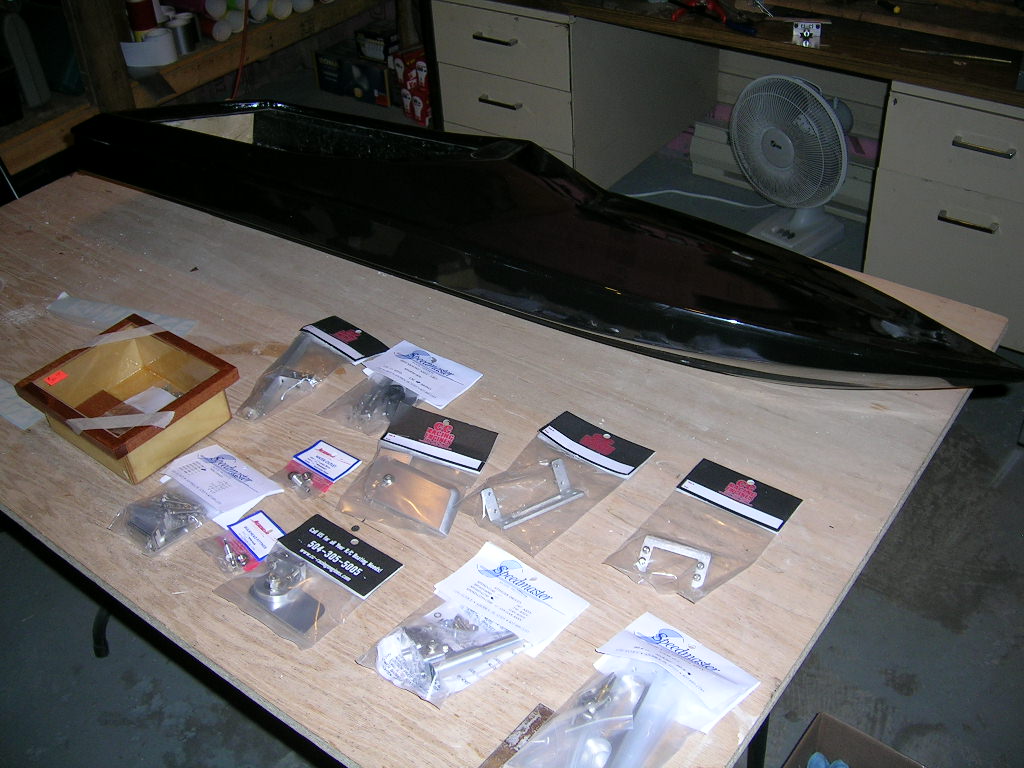
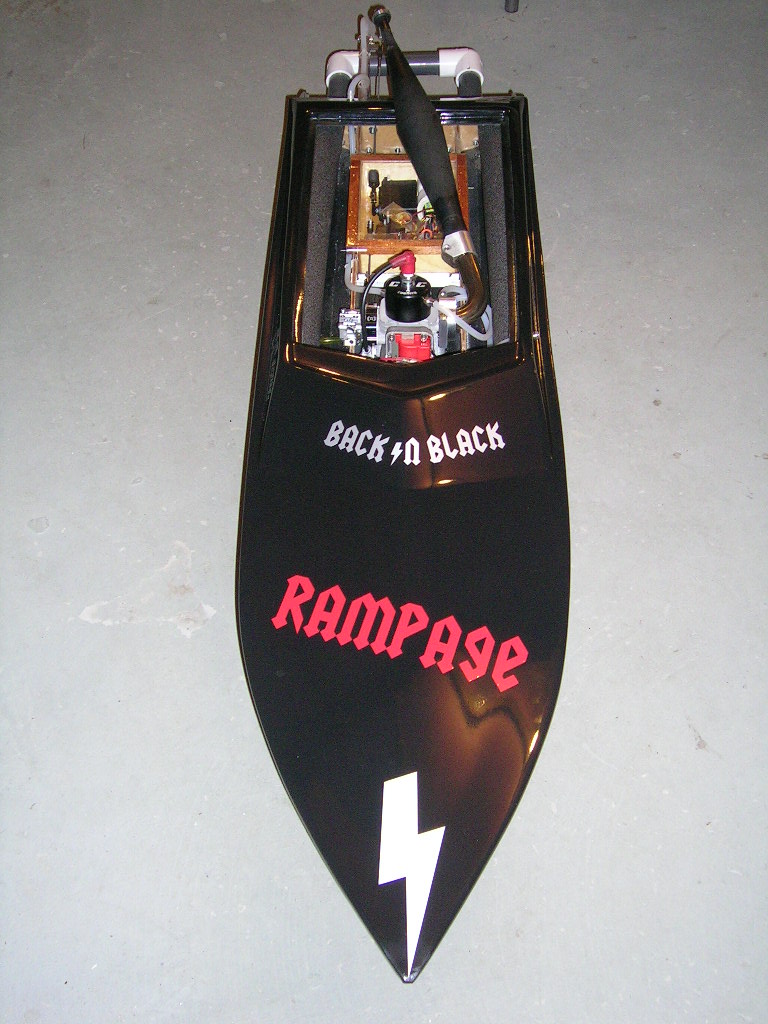
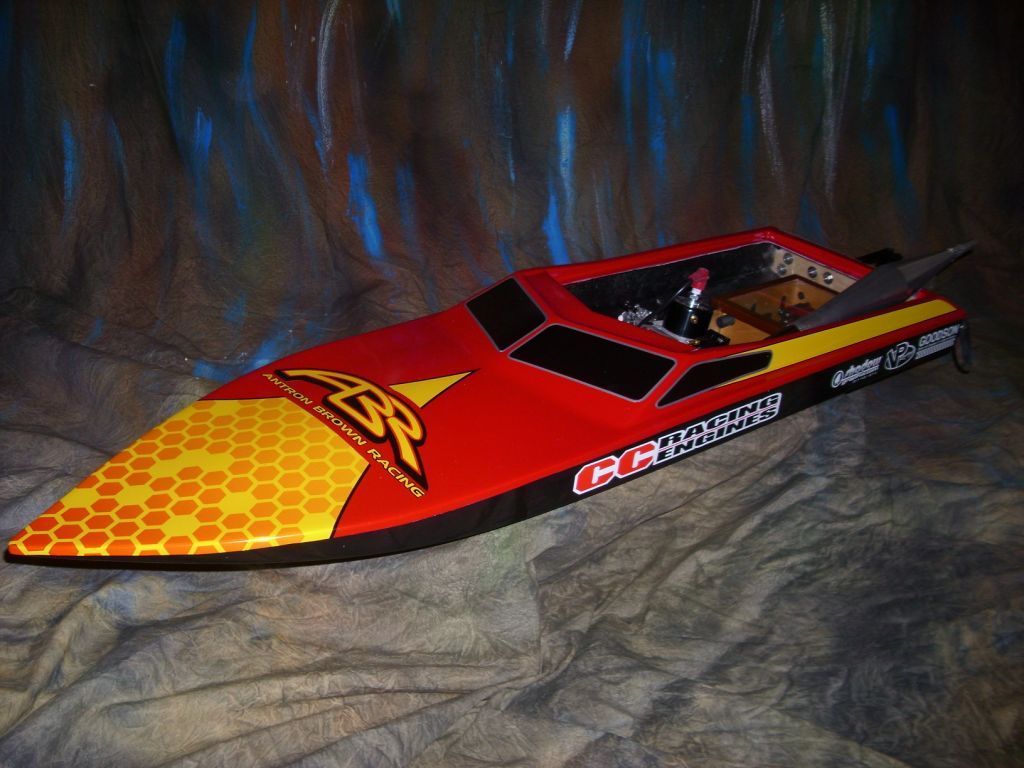
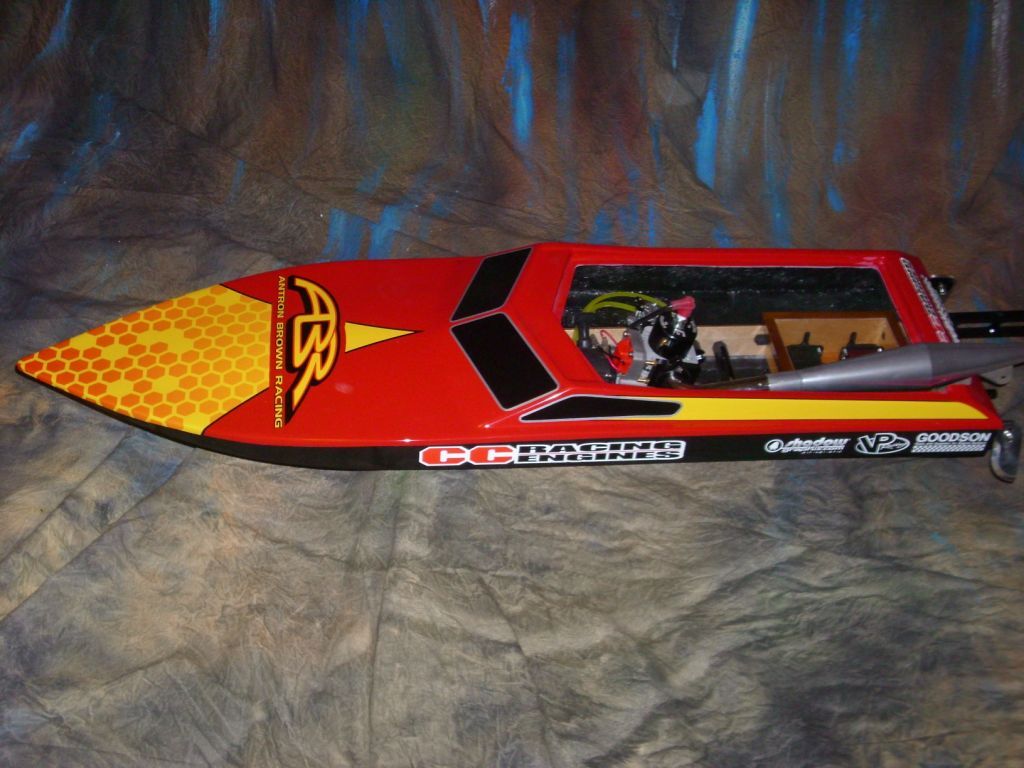
The hull is 45 inches long and is made of fiberglass (polyester resin) and has a nice smooth gelcoat finish available in several different color combinations. The deck/hull joint is of the shoebox type which means the deck overlaps the bottom of the hull at the seam. The seam is also reinforced from the inside of the hull with fiberglass tape. The Rampage features pre-installed and glassed-in 1/4 inch thick plywood engine rails (stringers) and transom plate. I ordered my Rampage in all black gelcoat. I also ordered all the recommended hardware for the Rampage from CC Racing Engines.
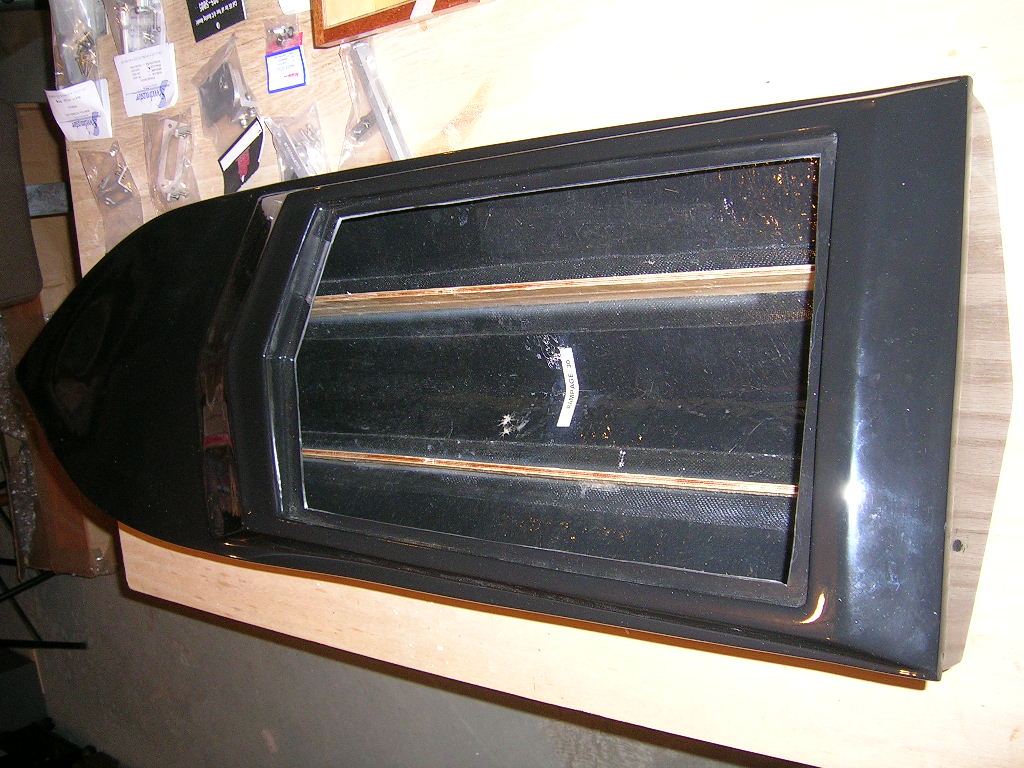
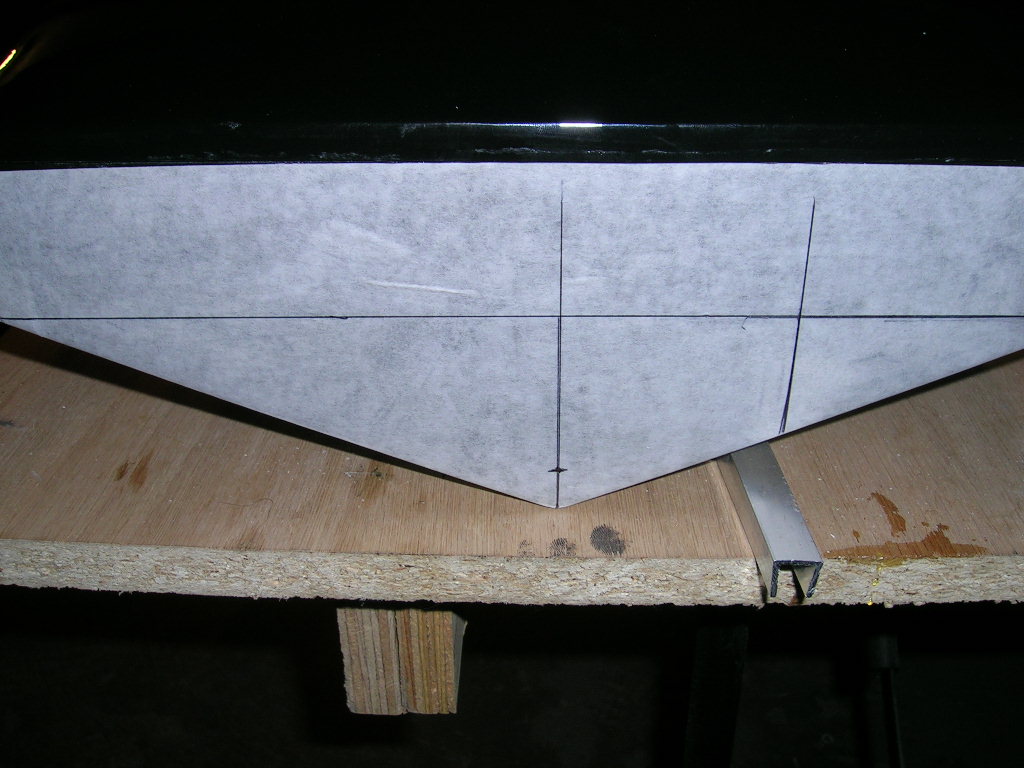
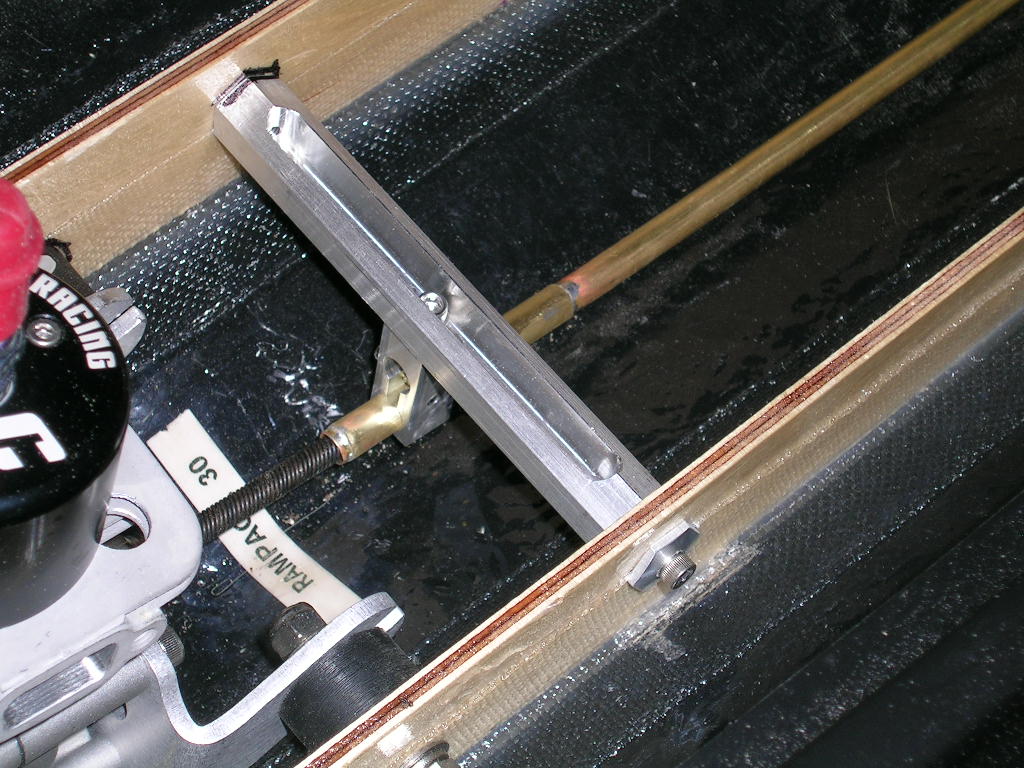
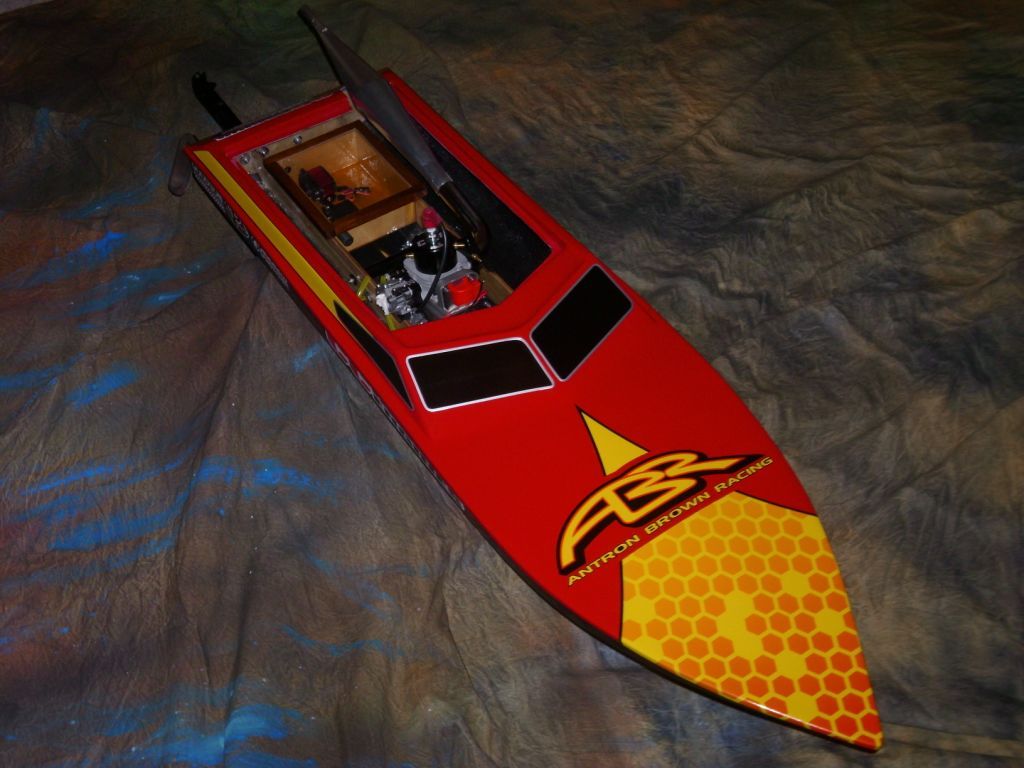
Some pictures of the inside...


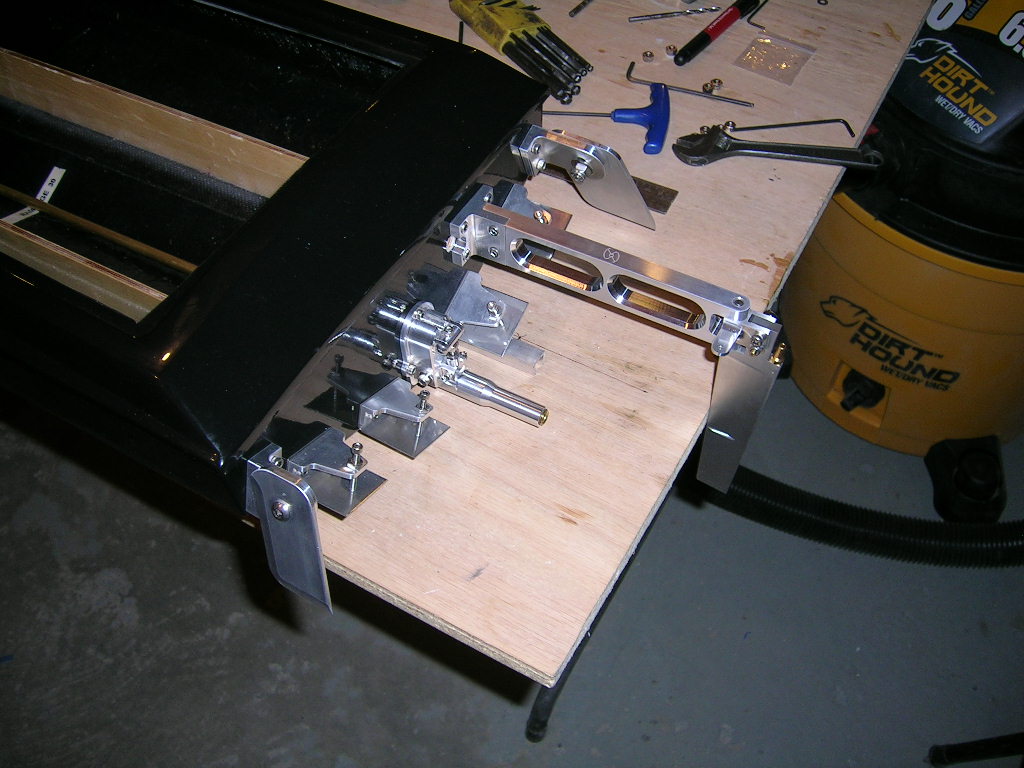
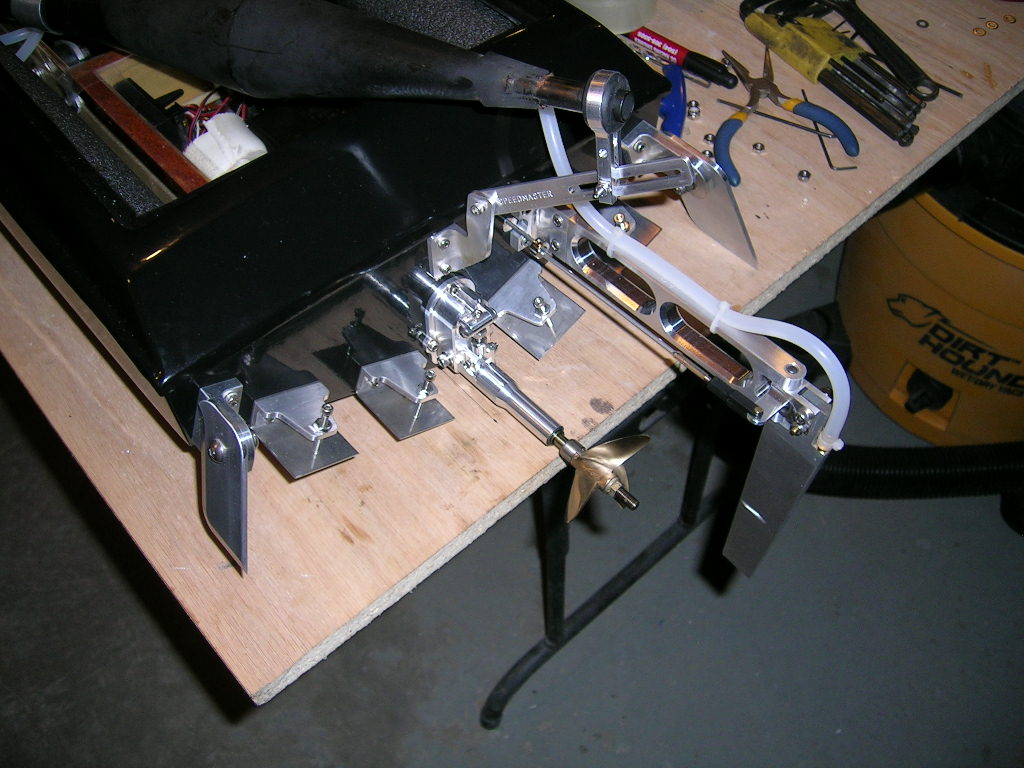
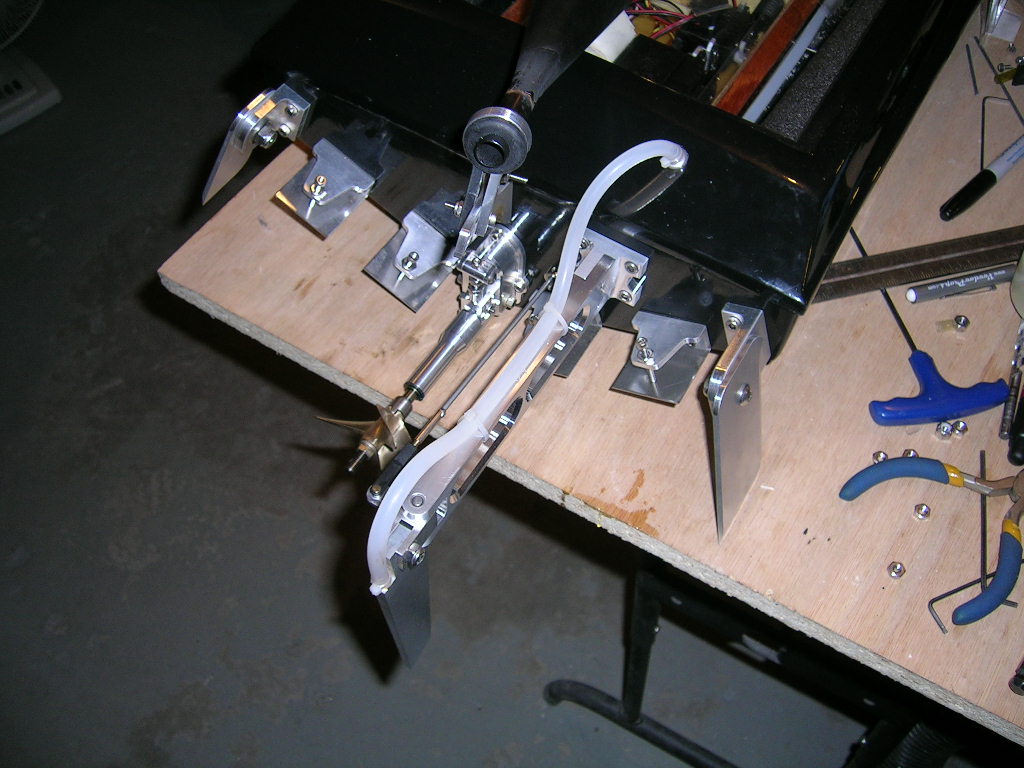
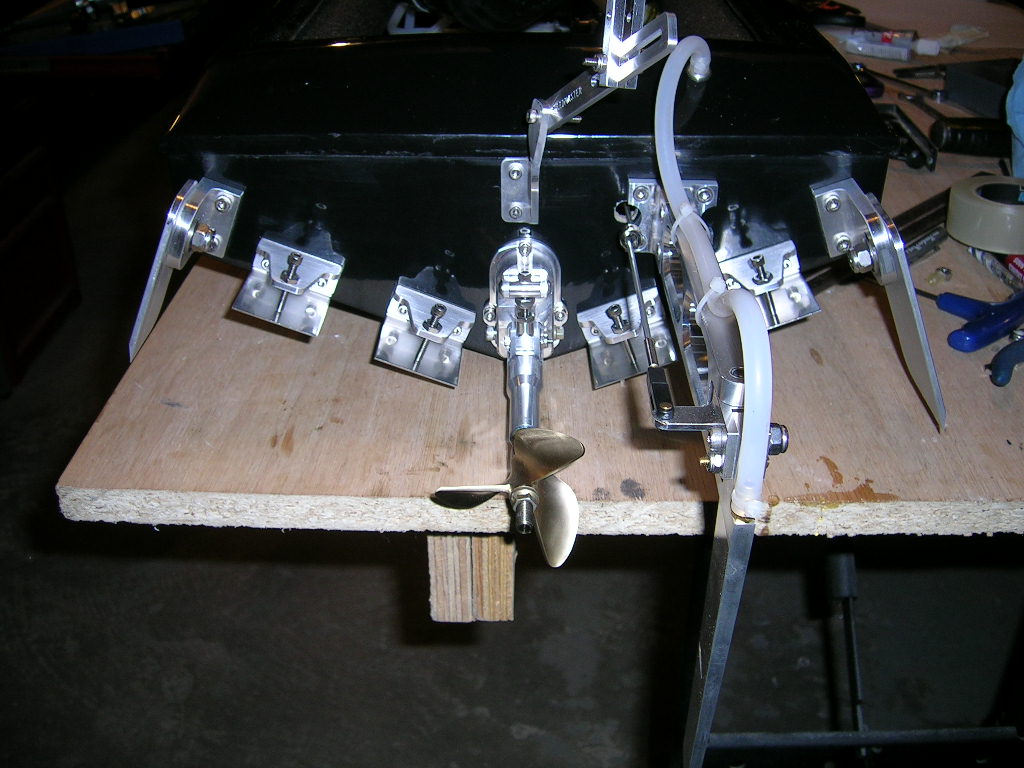
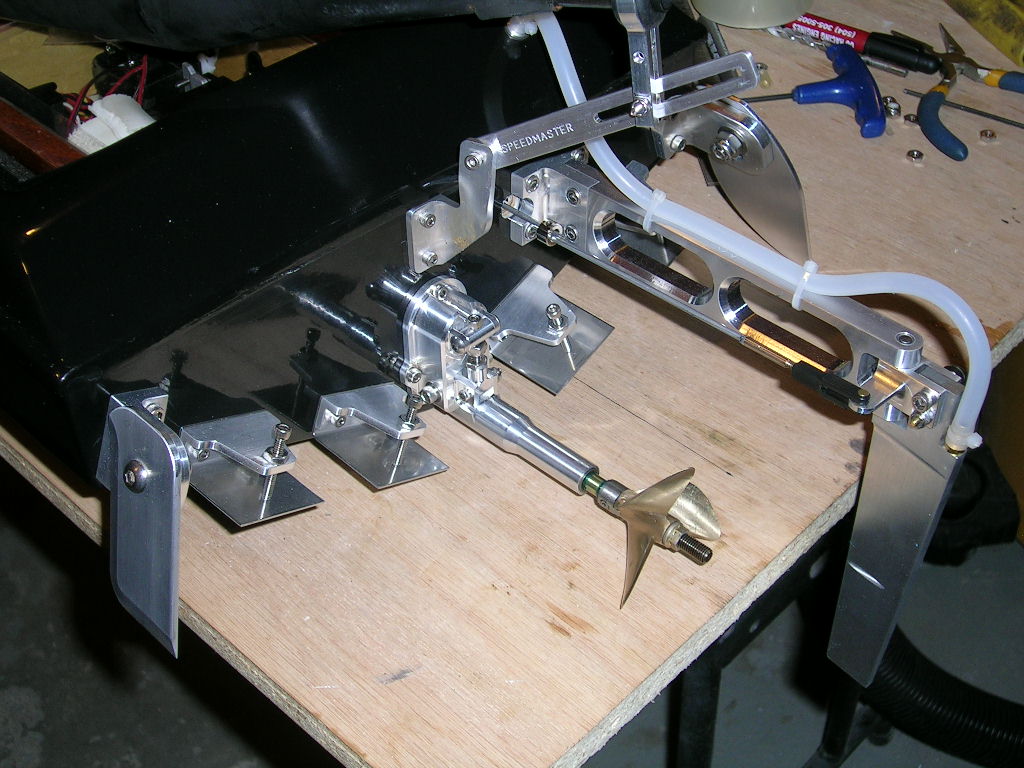
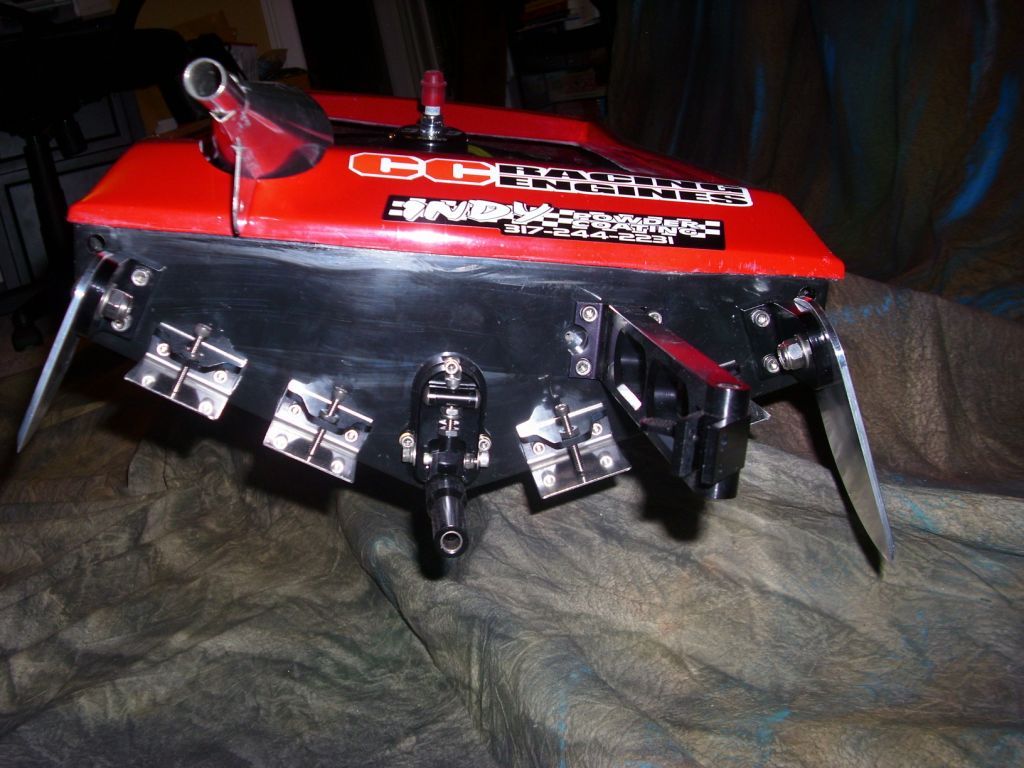
The Rampage is a fairly forgiving hull when it comes to hardware used, but CC Racing Engines recommend Speedmaster for the stinger drive, rudder and trim tabs. For turn fins they have their own that were designed specifically for the Rampage (although they will work well on many other monos as well). The turnfins are teardrop shaped and made of strong aluminum all CNC machined. All mounting hardware is stainless steel. The Speedmaster hardware is also all CNC machined high quality aluminum and stainless steel. You really can't go wrong with this hardware combination on the Rampage.
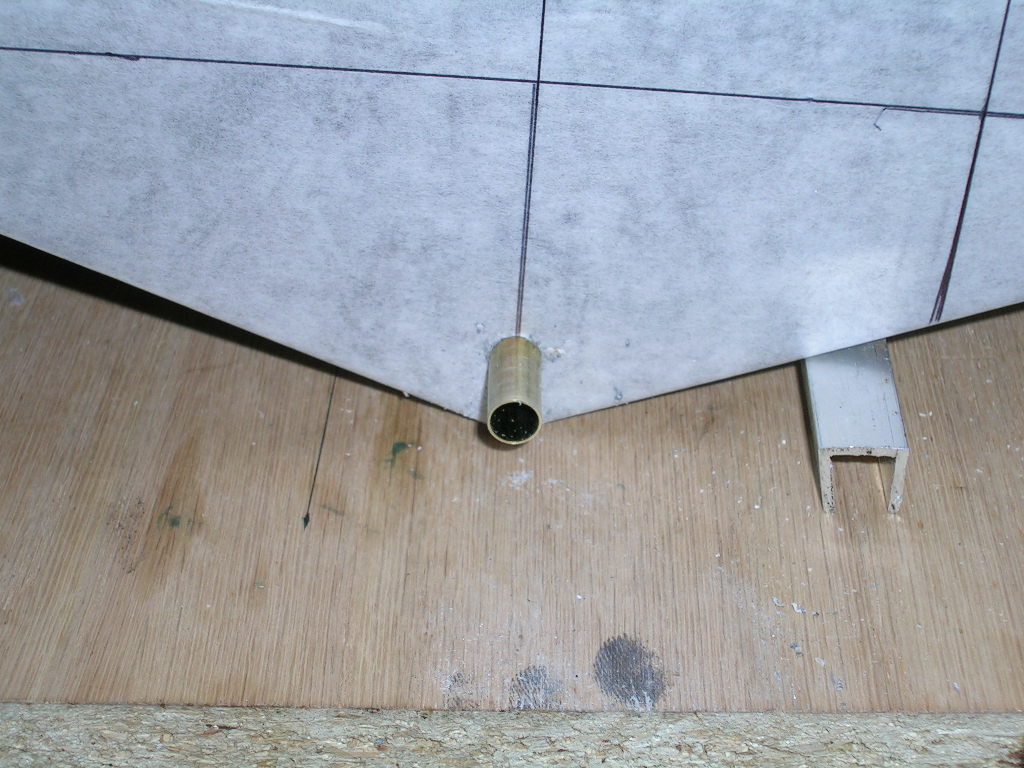
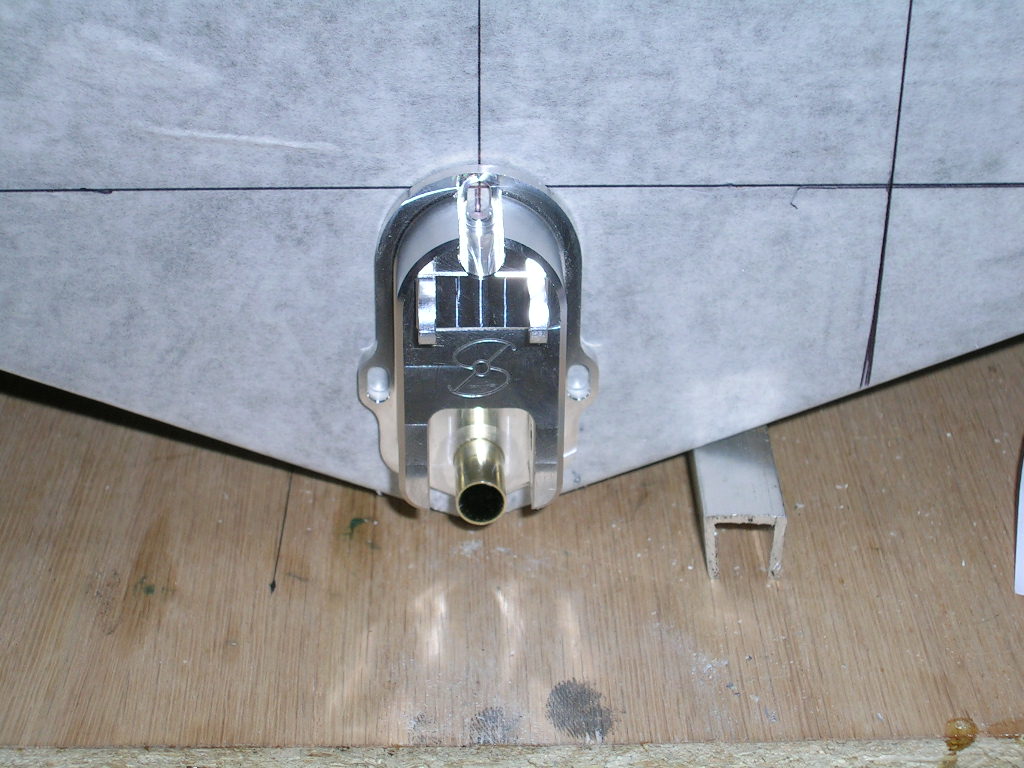
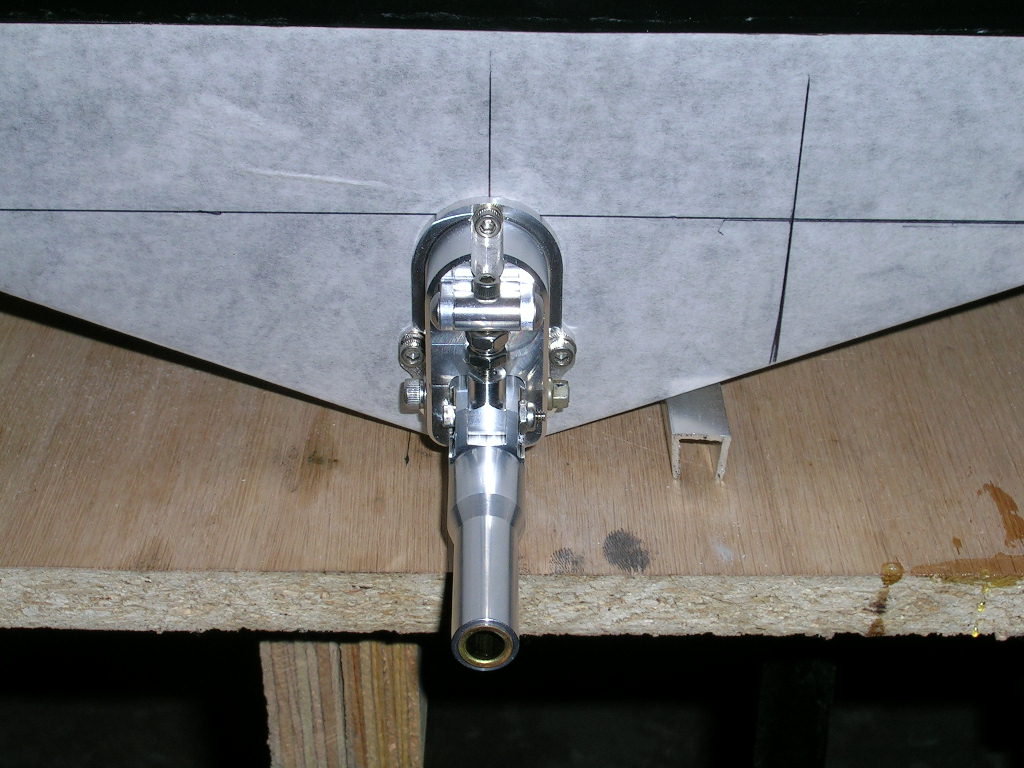
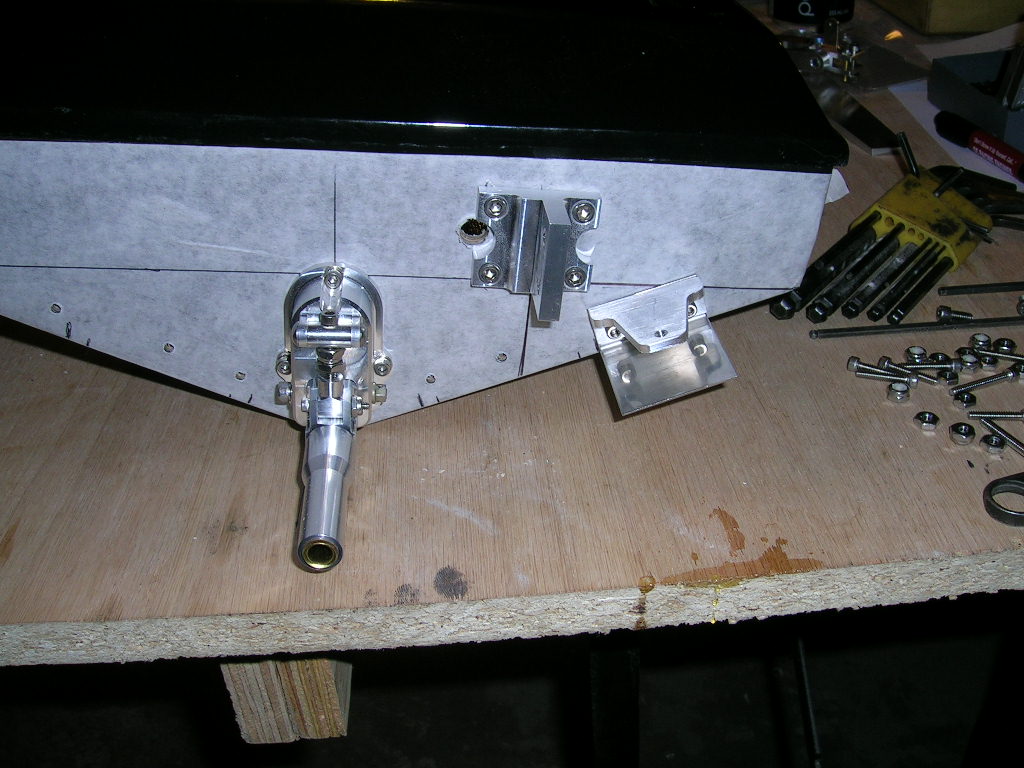
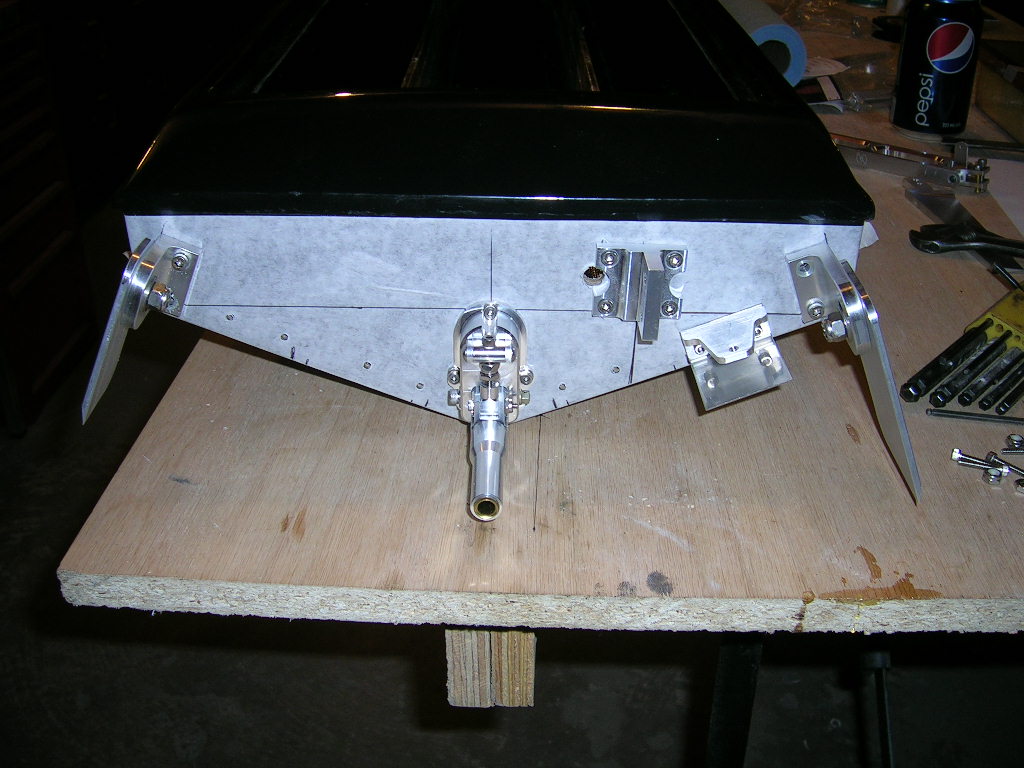
The first thing I install on the transom is usually the drive. An easy way position your drive accurately is to drill a small (approx. 1/8") hole on the marks you did for the drive on the transom. Then re-drill the hole to the correct size for the stuffing tube you will use (usually 5/16"). Once the hole is done, fit a piece of the 5/16" brass tubing in through the transom and slide the drive onto it. Now your drive is perfectly centered on its mark, and you can start drilling the mounting holes and install the bolts and nuts to hold it in place. When installing the drive, mount the bolts as low as possible in the mounting slots so that you can lower the drive later on when fine tuning. You also will have to slot/elongate the stuffing tube hole accordingly to allow for the drive to be lowered. Do this after all the mounting bolt holes have been drilled. I use a small milling bit in a Dremel to slot the stuffing tube hole. Set the drive angle to neutral (parallel with the keel) for initial setup.
The rudder used is a Speedmaster 60/90 tapered single pickup blade on a 6" extension bracket. The bracket should be positioned so that it is centered on the rudder line done earlier. Position the bracket so that the rudder blade will be about 2-3/8" to 2 1/2" below the keel of the boat. On my Rampage, the bottom of the Speedmaster rudder bracket ended up being even with the line I drew from chine to chine. You can trim the rudder blade accordingly if you mount the bracket a little low. Remember to make a hole in the transom for the control rod linkage.
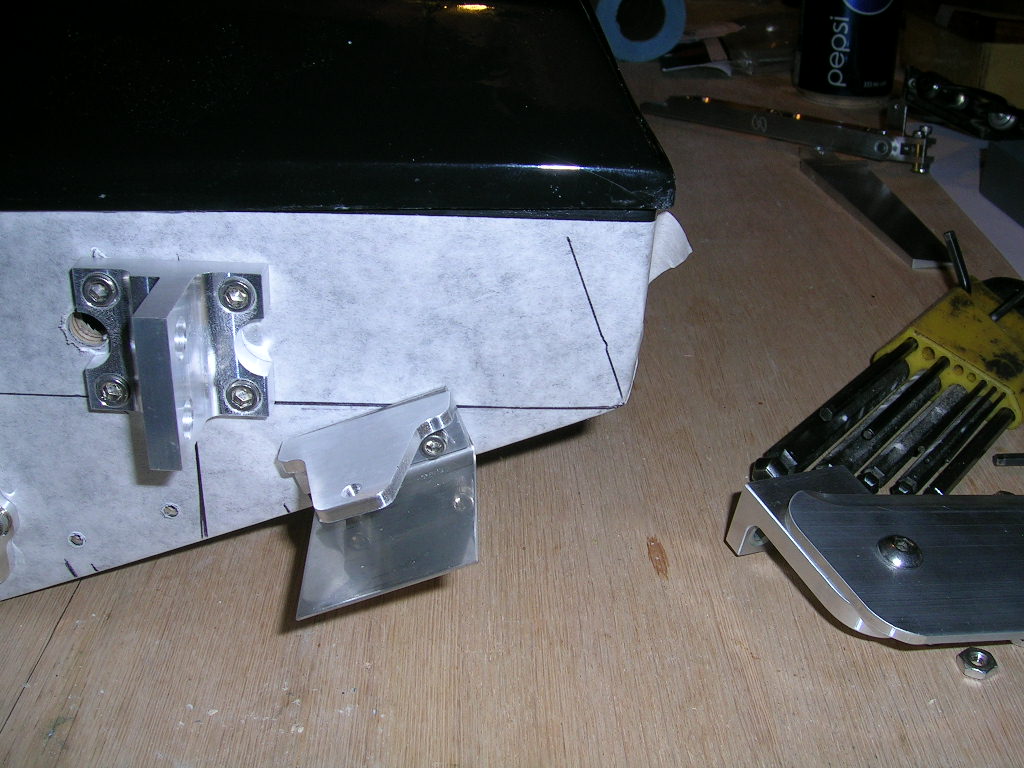
I mounted the inner trim tabs at 1-1/4" from the keel and the outer tabs at 3-3/4"" (from the keel). The tabs should be about 1/16" above the bottom of the boat. On my Rampage I used the usual right turn fin and a left (smaller) fin for better high speed left turns. This helps when running offshore courses and also if you have to make a quick left to avoid a collision. The turnfins are both mounted parallel to the bottom of the hull and in line with the chines. The brackets on mine are approximately 1/8" above the bottom of the boat. The CC Racing turn fins have a slotted hole in them so that you can easily adjust depth at the lake when testing. Adjust them roughly by holding the boat level on the table and having both turnfins about 1/4" above the table. You can fine tune on the water, putting them deeper if the boat seems to hop or slide in the turns. You typically want them as deep as possible without having them dragging in the water when the boat is going straight.
* note: the turn fins have been updated to a "teardrop" shape (you can see in some of the pictures further in this article. The teardrop fin from CC Racing is now the norm for the Rampage mono. The Rampage in this article is running the updated fin in the pics and videos below.
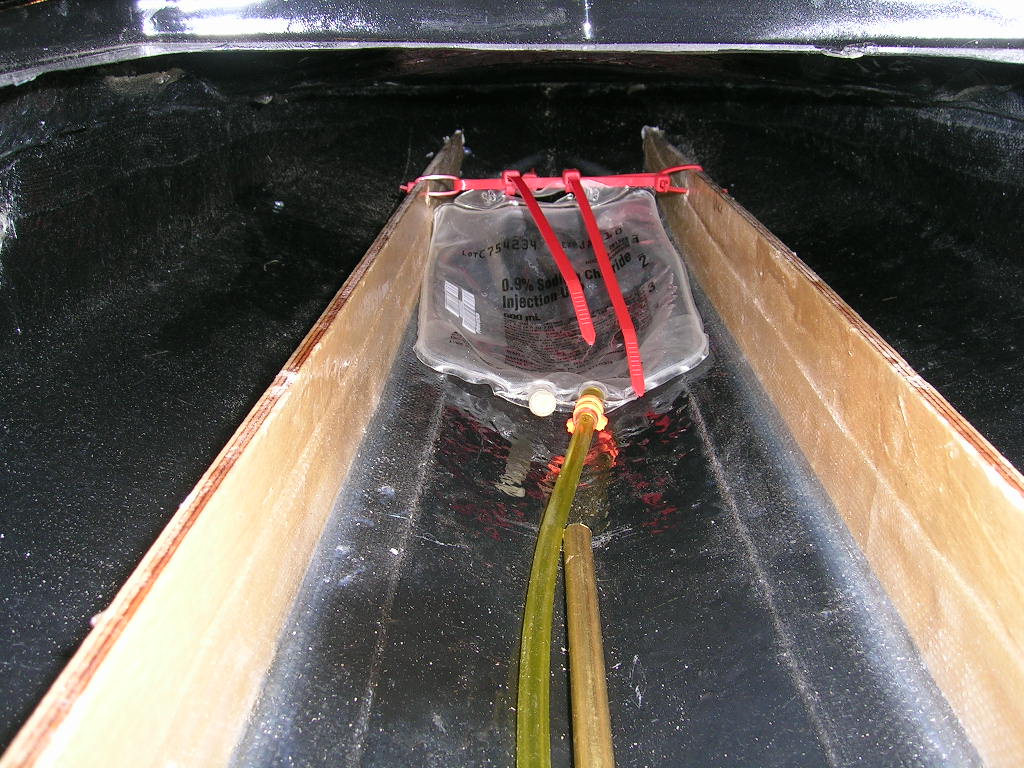
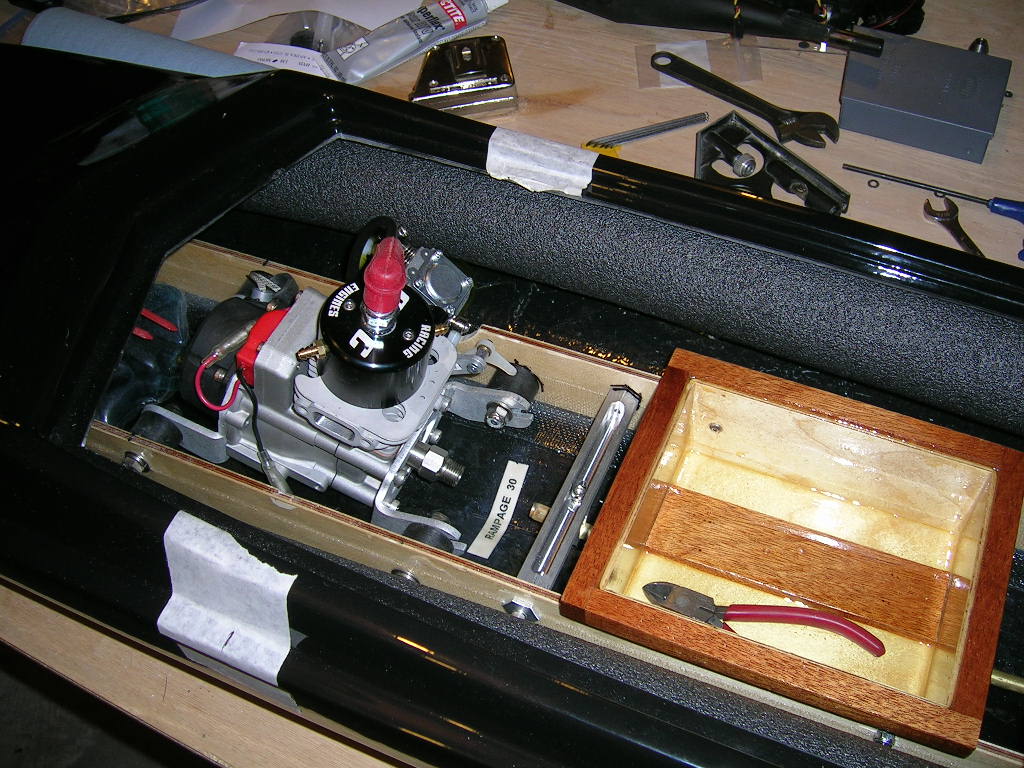
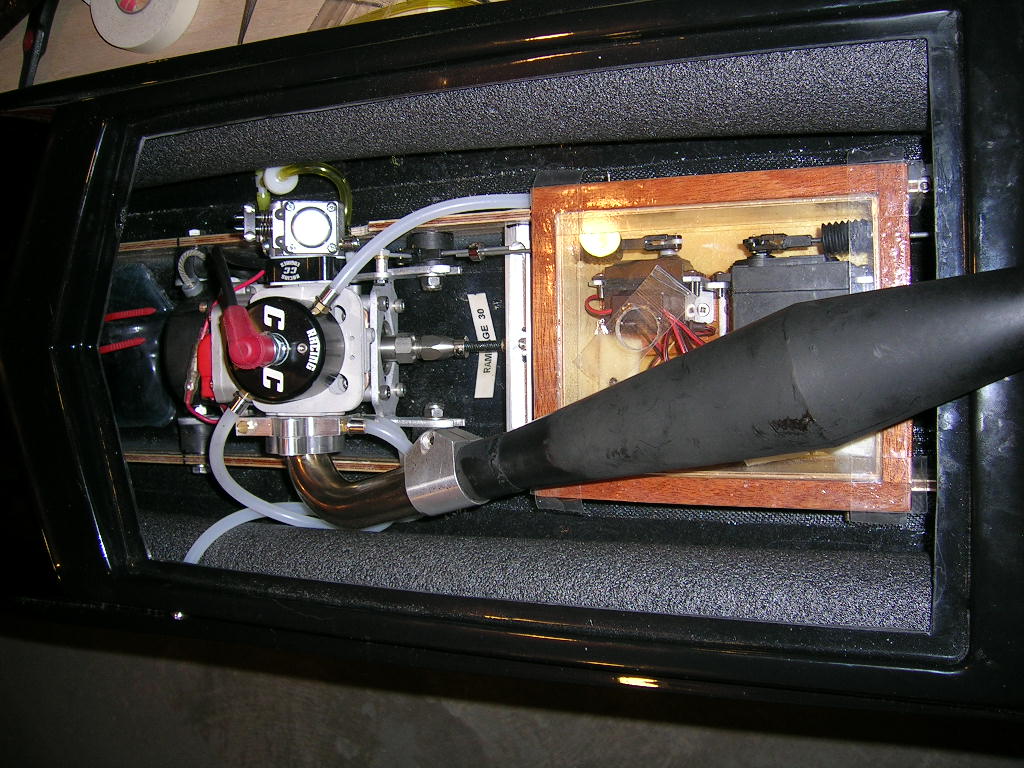
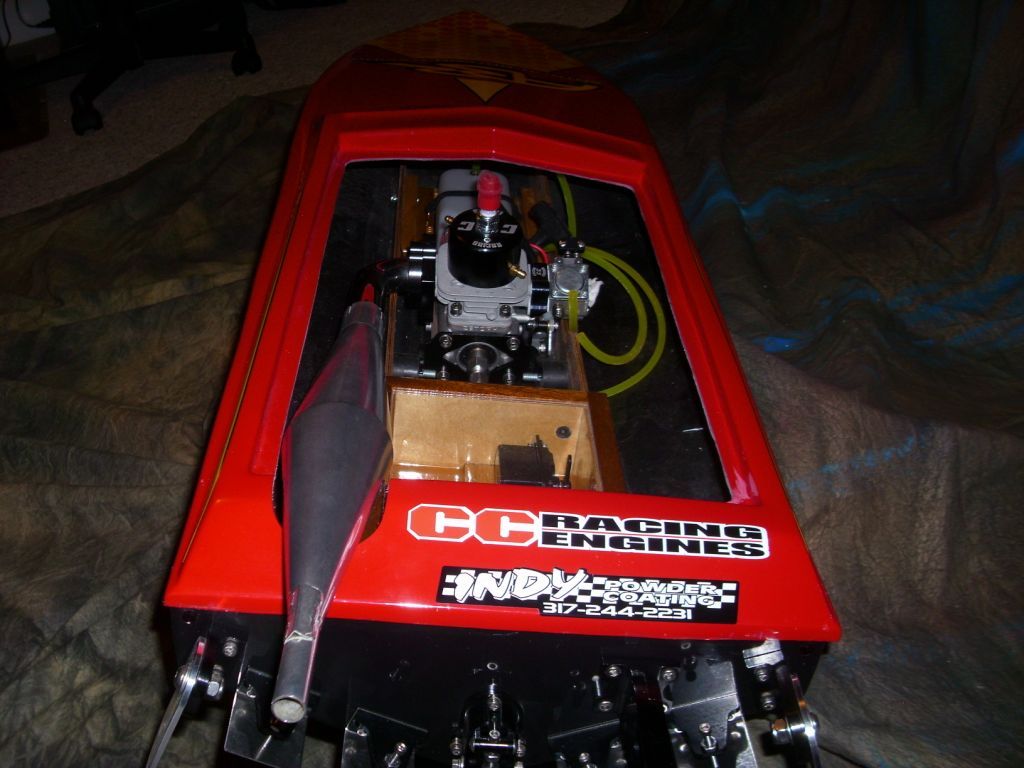
Once the bag was in place, I started putting all the other items loosely in the boat in their approximate locations. Radio box with electronics in it (don't have to be mounted in box for this step, just IN the box), engine, tuned pipe, flex cable, etc. Put the box where you want it in the boat. You can put the flex cable in the drive if you want, although we don't really know what its finished length will be. You can also omit the flex cable, it won't really change much in the end. Some guys will even install the pool noodles (for floatation) in the hull at this point before adjusting for C.G. I really do not bother... Mount the pipe to the engine and position the engine in the hull to get the desired C.G. These are the main components that will have a big effect on the center of gravity (C.G.) of the boat. I set my C.G. at 14.5" on my Rampage. This was without fuel.
With everything in place, mark the rails for the engine mounts, radio box and T-bar and mount the items. The starboard side rail (stringer) will have to be notched for clearance of the carburetor to allow the engine to sit as low as possible in the hull. I use a piece of 1/16" plywood as a spacer under the engine when marking and drilling for the engine mounts.
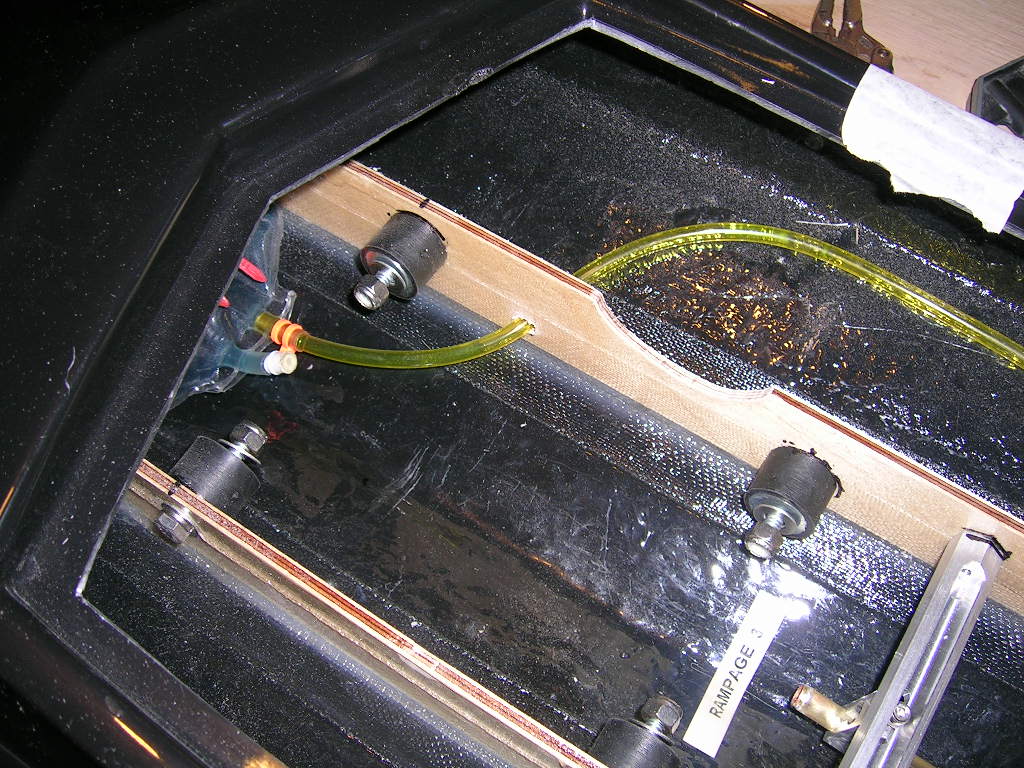
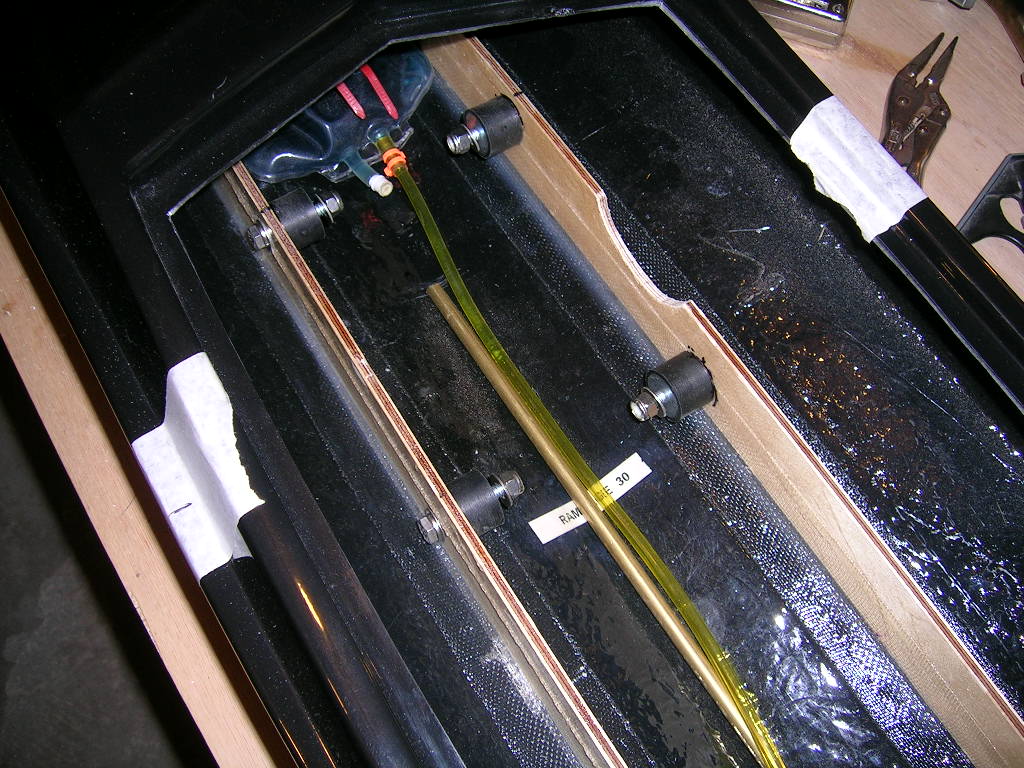
I used a CC Racing "T-bar" for securing the stuffing tube in the boat at the engine end. This is a very heavy-duty unit that allows for easy alignment of the tube to the engine collet. It is also designed to clamp down on the stuffing tube so that you do not have to use any type of adhesive to hold it in place. If you are using a 5/16" stuffing tube you will simply need to solder on an 11/32" sleeve over the tube where it fits inside the T-bar since the bracket is drilled 11/32". If you are using a Teflon-lined stuffing tube, then you are good to go without any mods and these tubes have an outside diameter of 11/32".
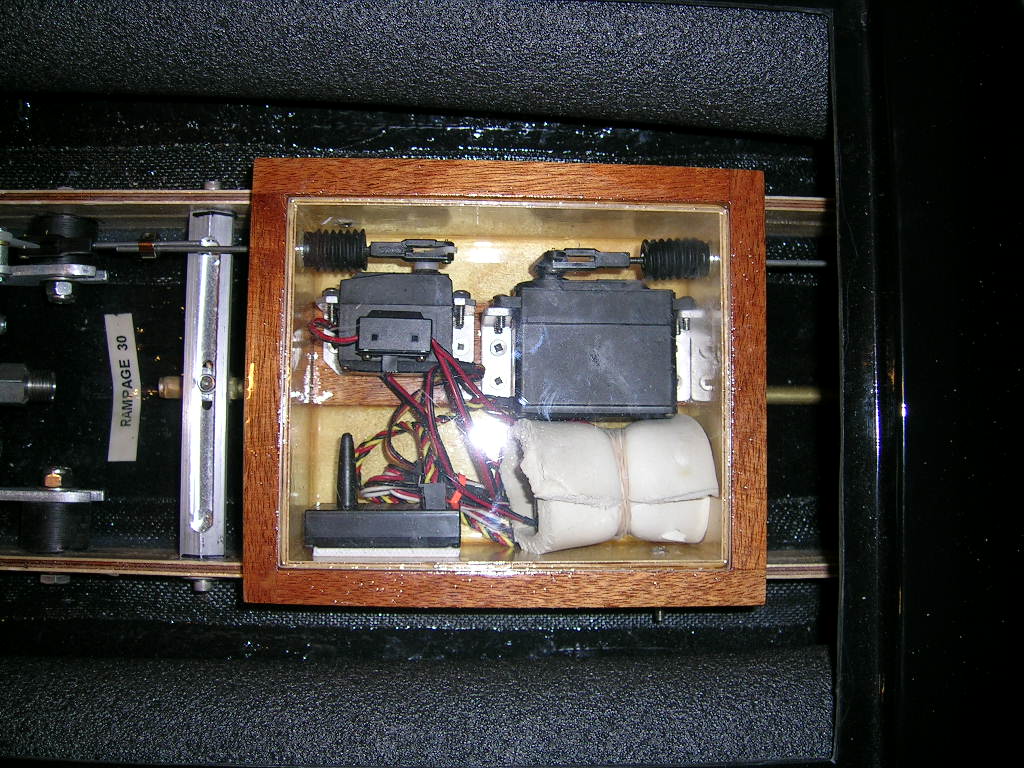
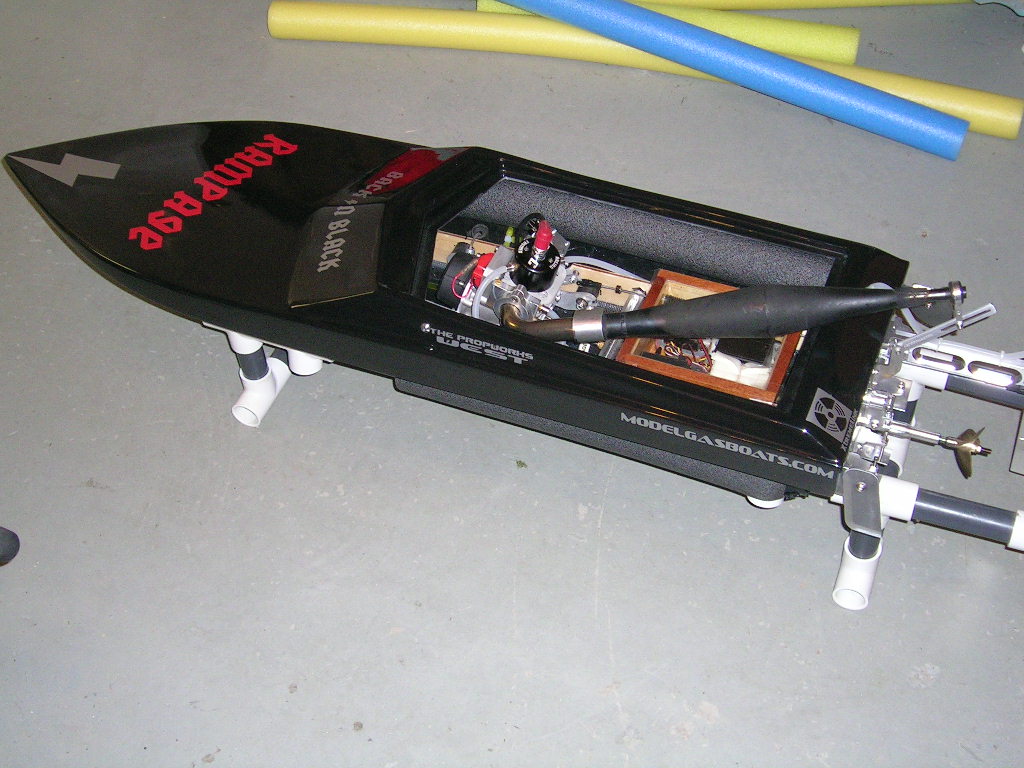
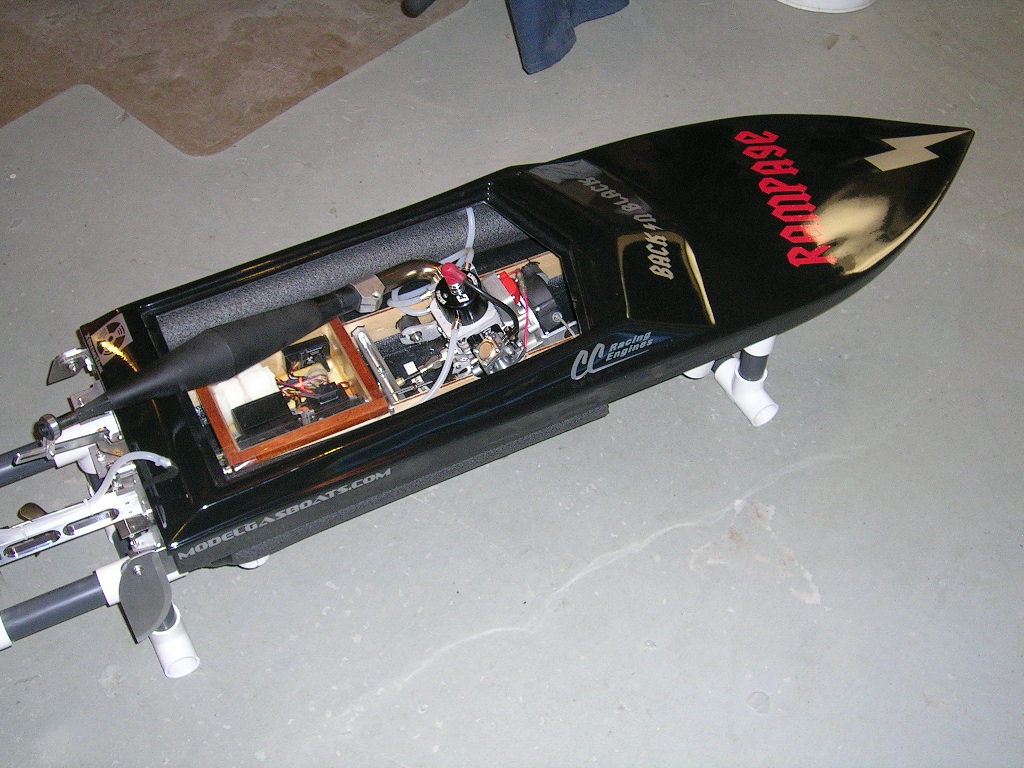
For a radio box I decided to try on of the wood boxes also sold by CC Racing. This was a first for me, and quite honestly, I really regret not having tried them sooner! These boxes are simply awesome. They are hand made with quality wood and completely sealed inside out with epoxy. There is ample taping surface around the edge of the box to properly seal down the plexi-glass lid, and it has a very smooth finish that the tape adheres well to. I used the standard size box. It fits perfectly between the 5" spaced rails and as ample room for all the electronics, including a 1/4scale servo. It also has a 1/4" piece of hardwood laminated to the bottom for screwing your servo mounts into. You can easily fit a failsafe and voltwatch in there also if you wish. The box is simply mounted to the rails with stainless steel bolts and nuts with a bit of silicone sealant around the bolts to seal them up properly. You can use just about any mounting method you want with this box. It is a really easy box to setup and install. I used Aeromarine pushrod seals, and mounted them with the Redline Pushrod Seal Mounts. These are very nifty! The servo brackets used were from CC Racing.
I finished up the build by permanently mounting the engine and pipe in the boat, mounting all radio gear and linkages, routing all water and fuel lines and of course adding floatation to the boat.
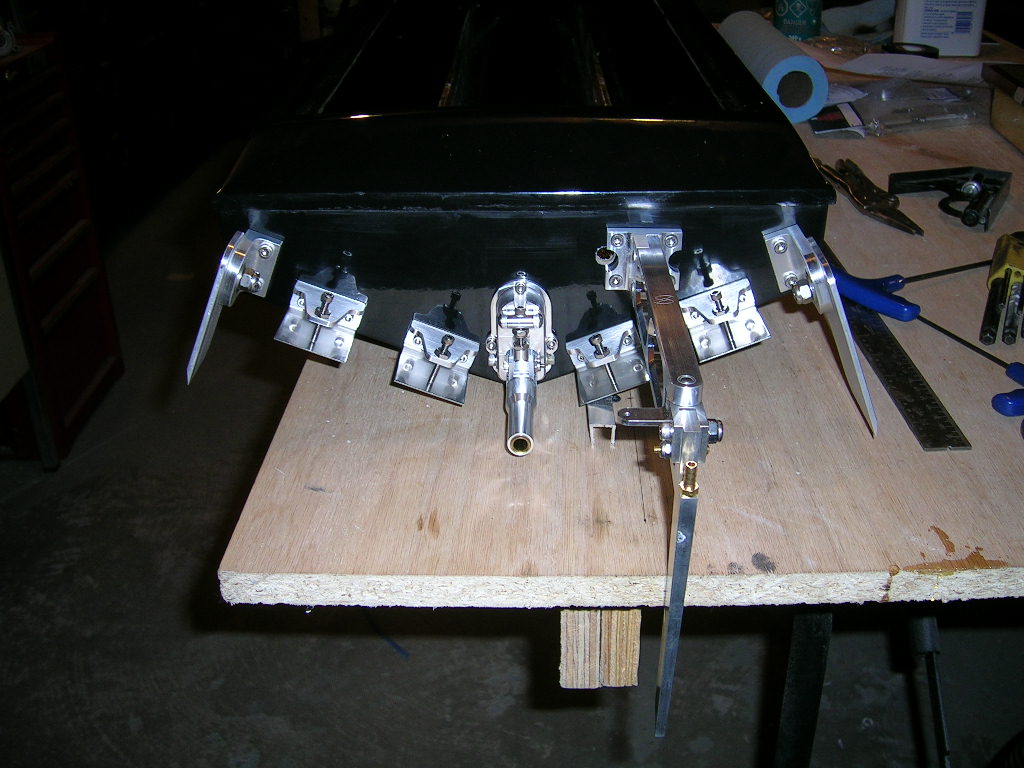
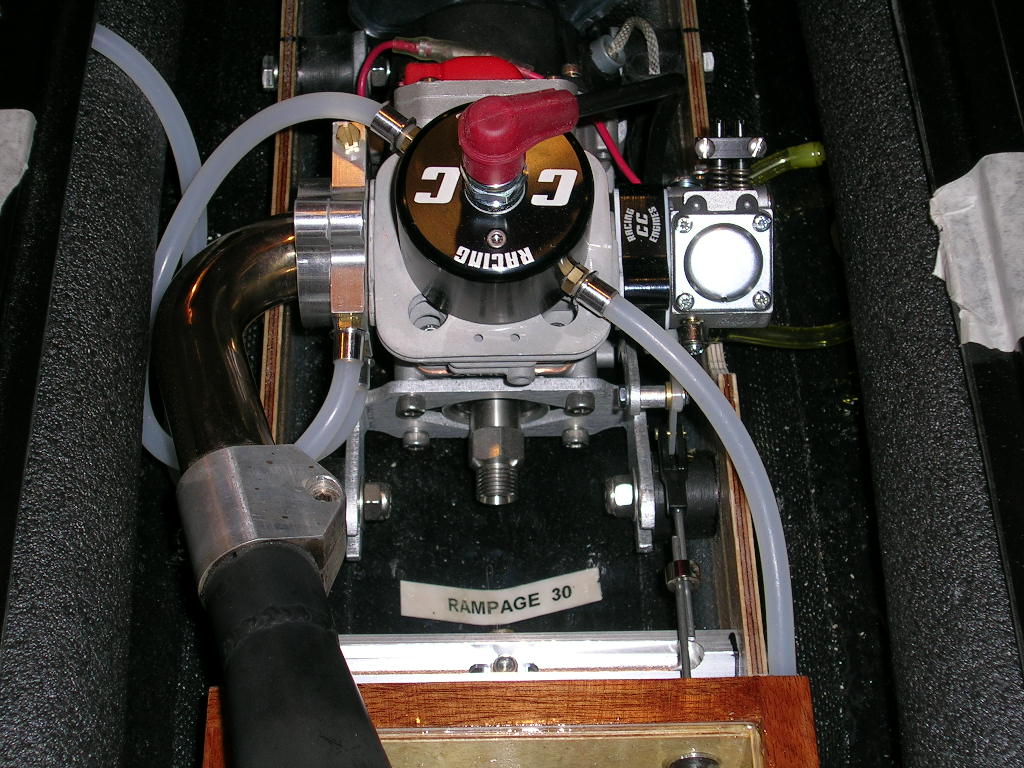
The tuned pipe I used was a CC Racing steel pipe on a stainless steel 100 degree 1" diameter header. The CC pipes now feature a new enhanced pipe clamp to hold them firmly on the header. It now uses two clamping bolts that are both bigger then the original single bolt. The tuned pipe bracket is from Speedmaster and is an easily adjustable unit that does a good job of holding the pipe in position over the transom.
*Note: you can use a 90 degree header instead and have the pipe run next to the radio box, instead of over it, and in this case you can notch the transom to get the pipe to sit lower in the boat. This is a good idea and I will most likely change mine to this setup.
Here are some pictures of the last steps of completing the assembly.
A few pictures of the boat finished and simple vinyl applied...
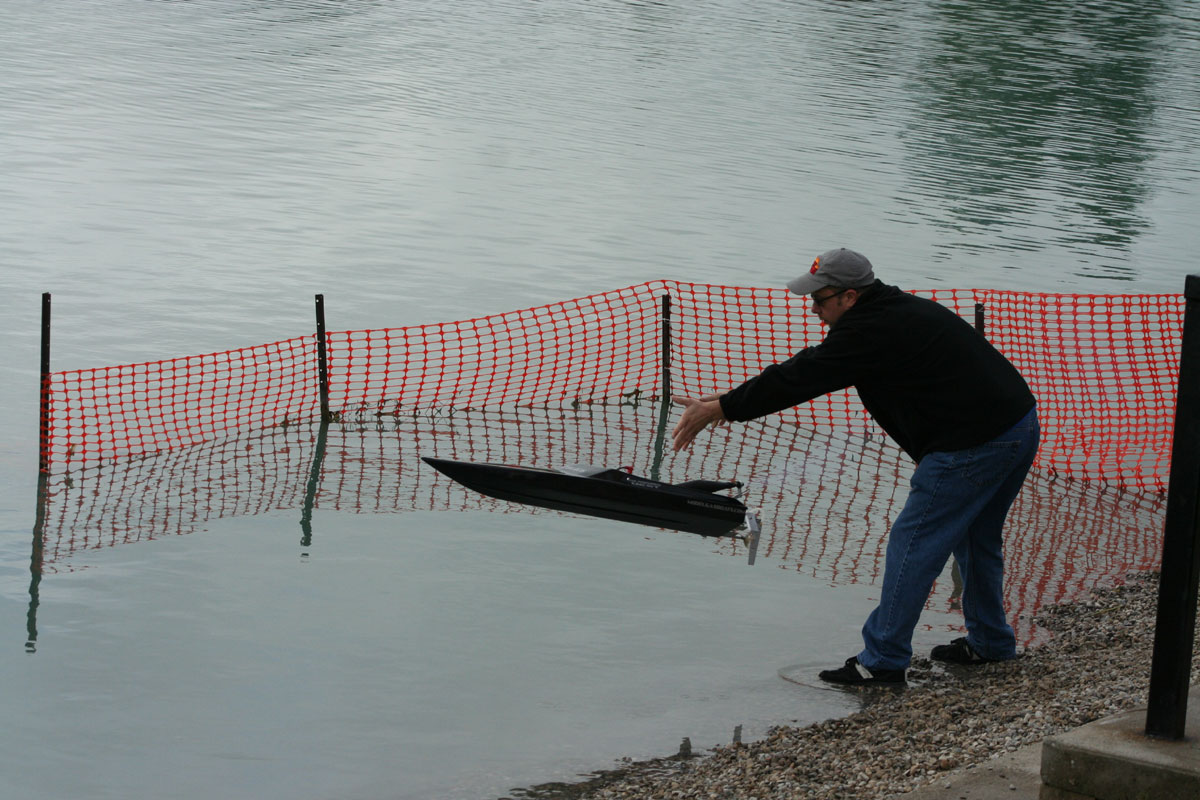
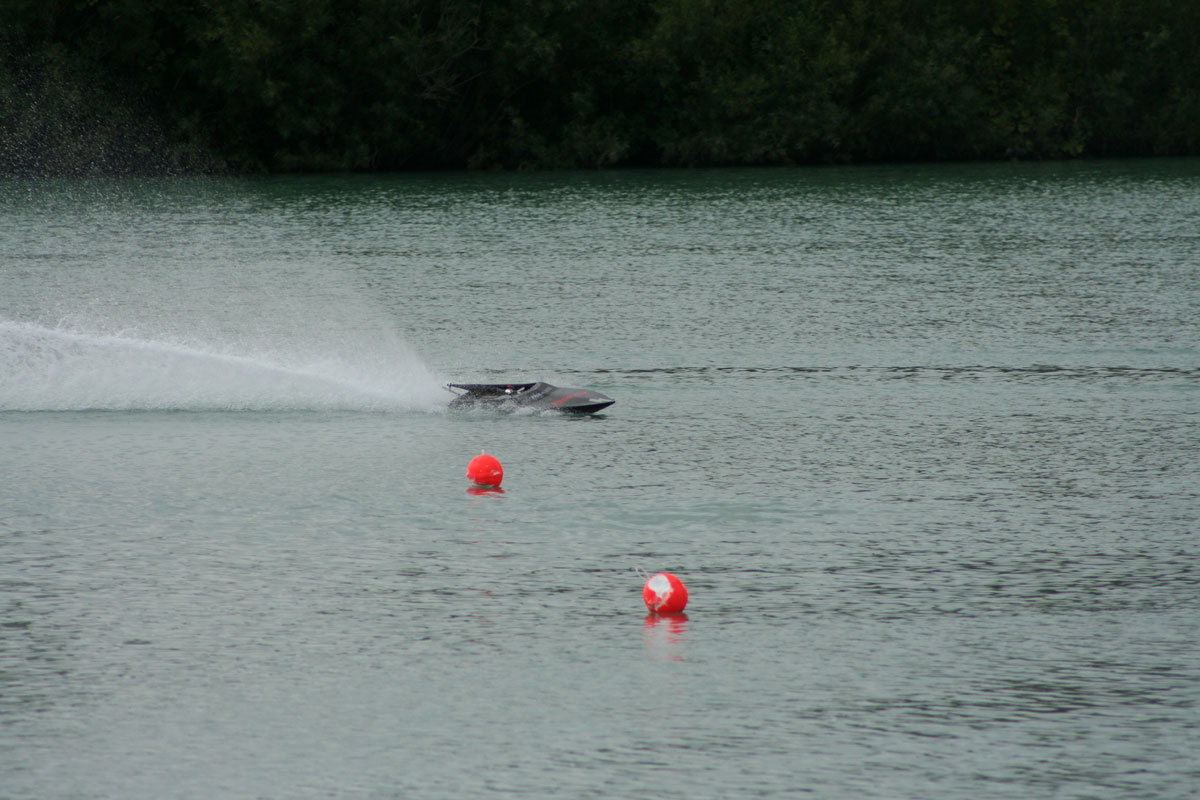
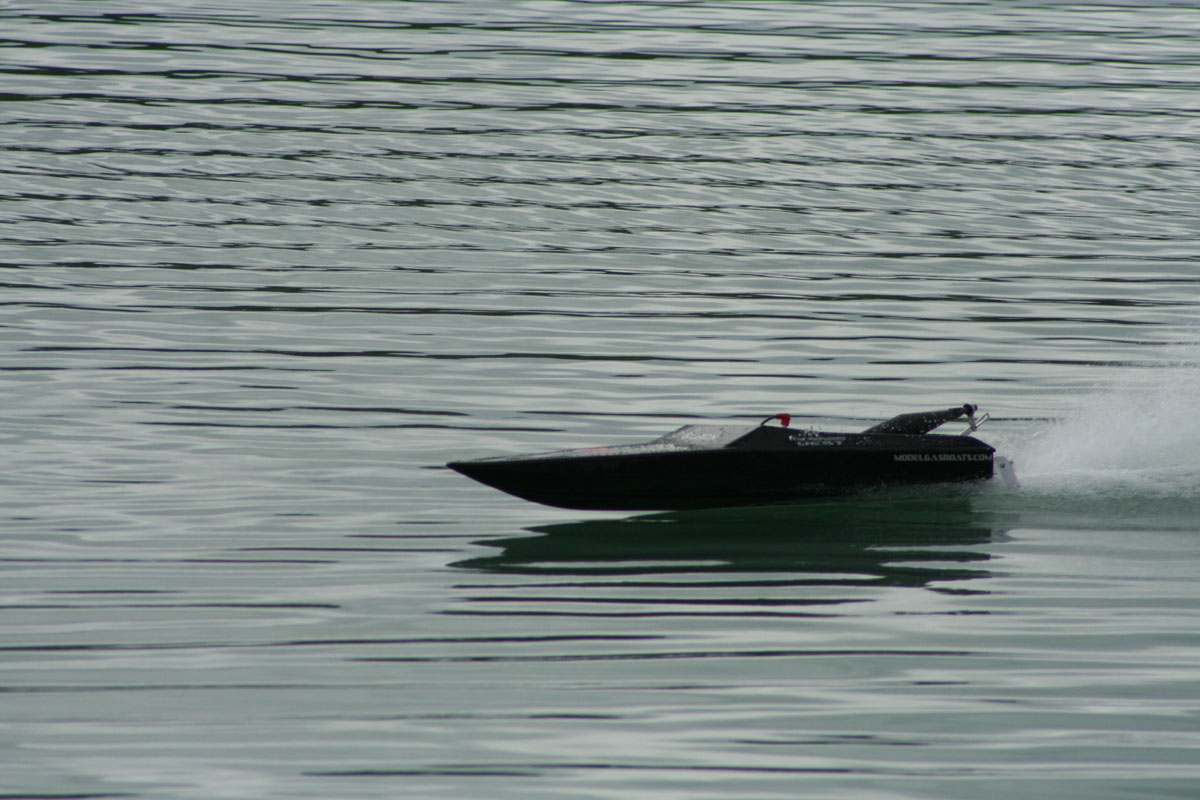
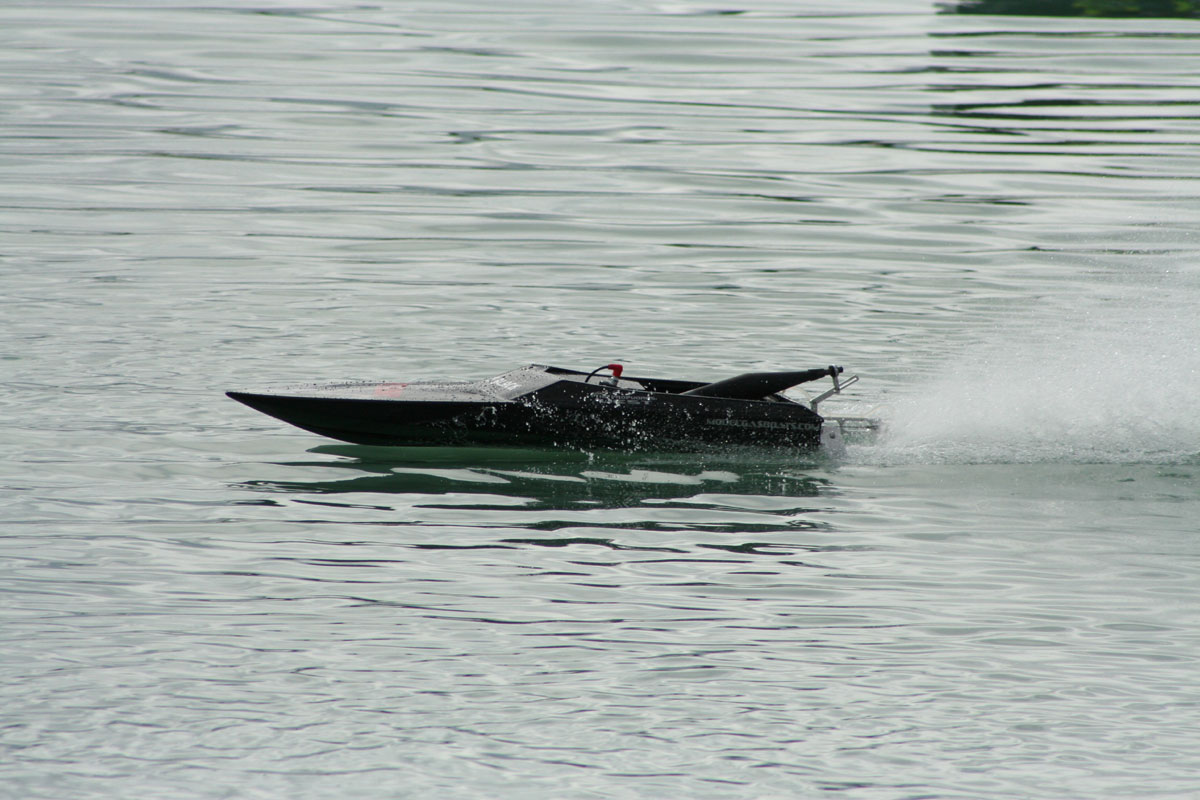
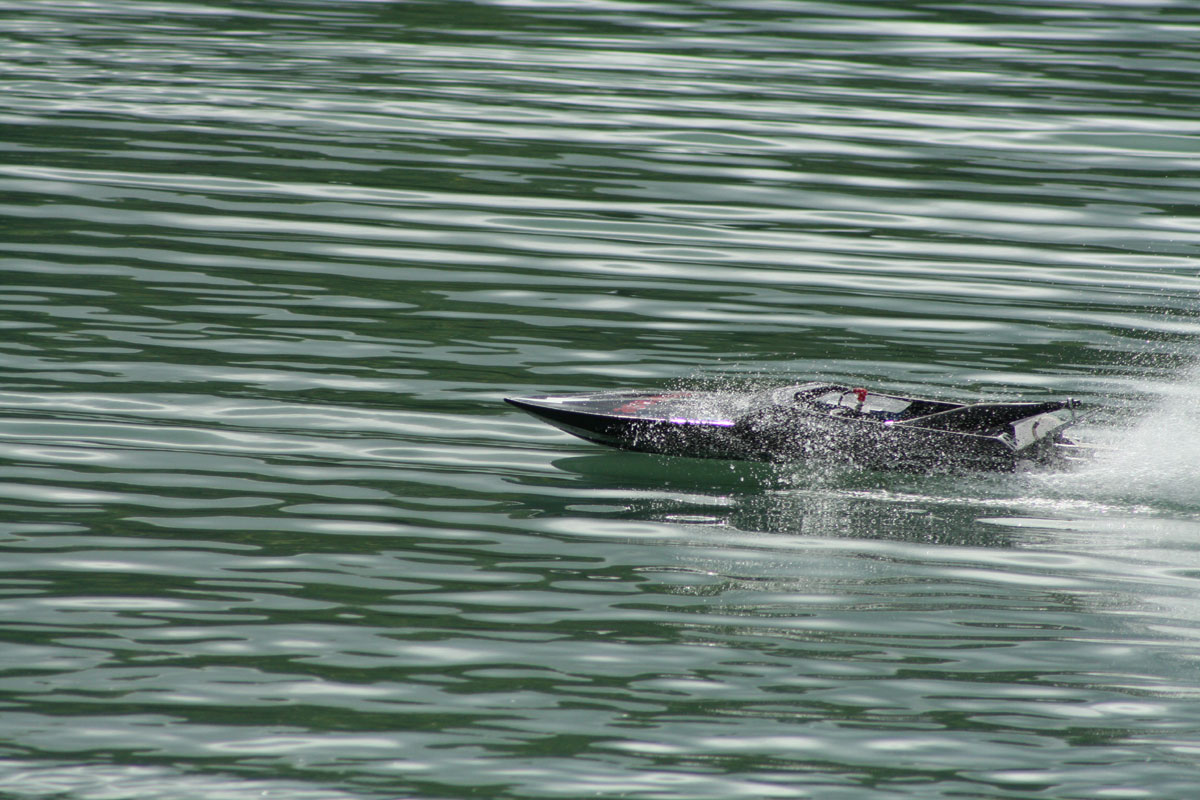
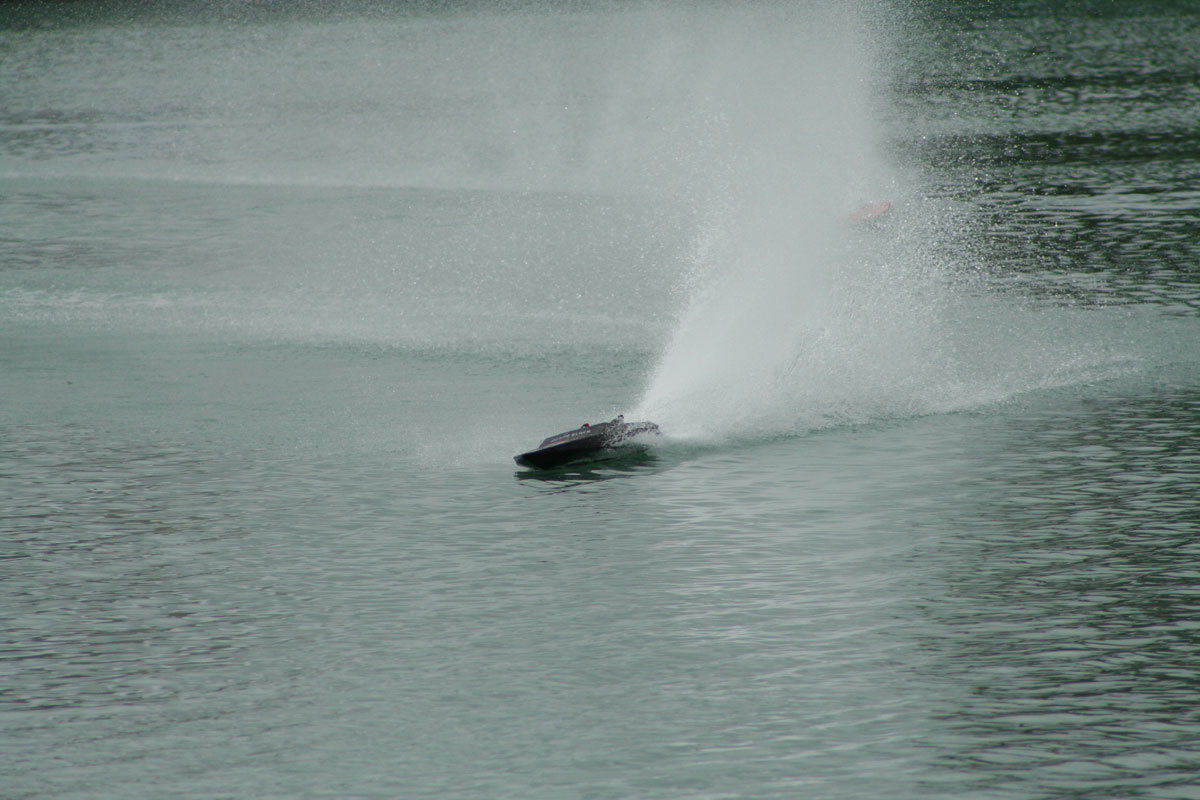
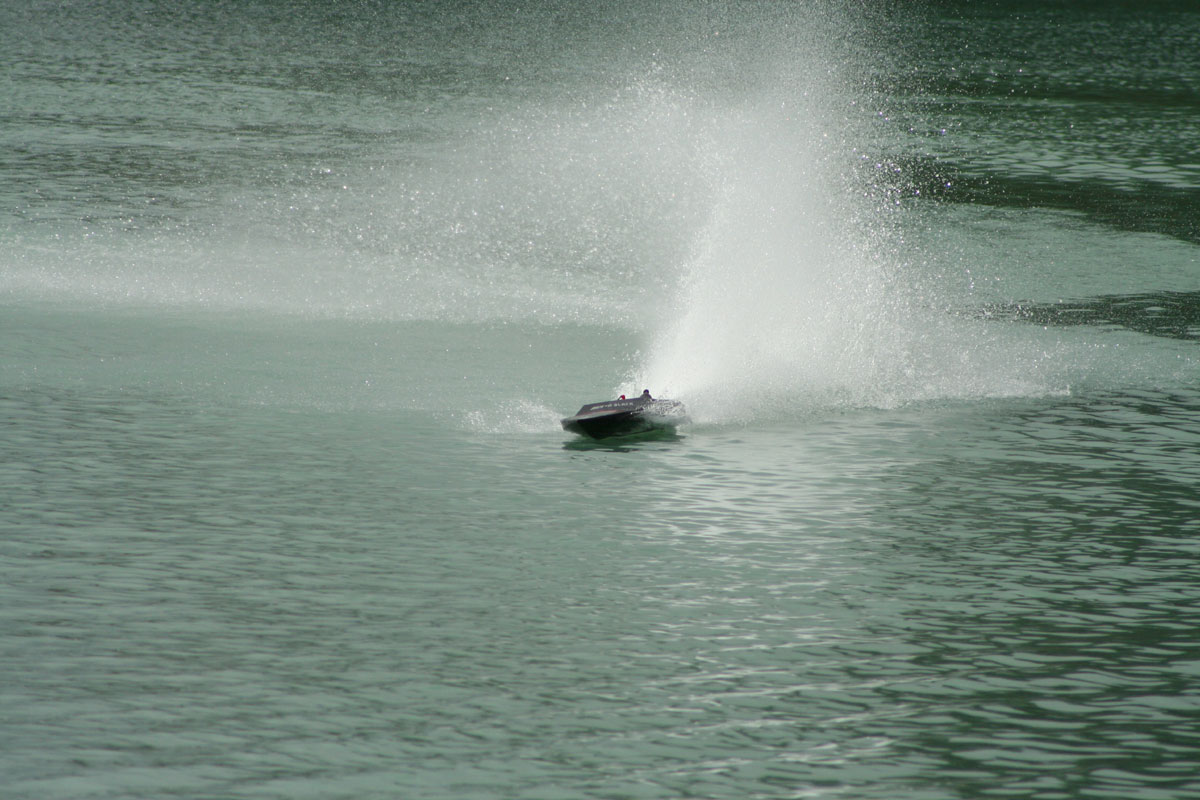
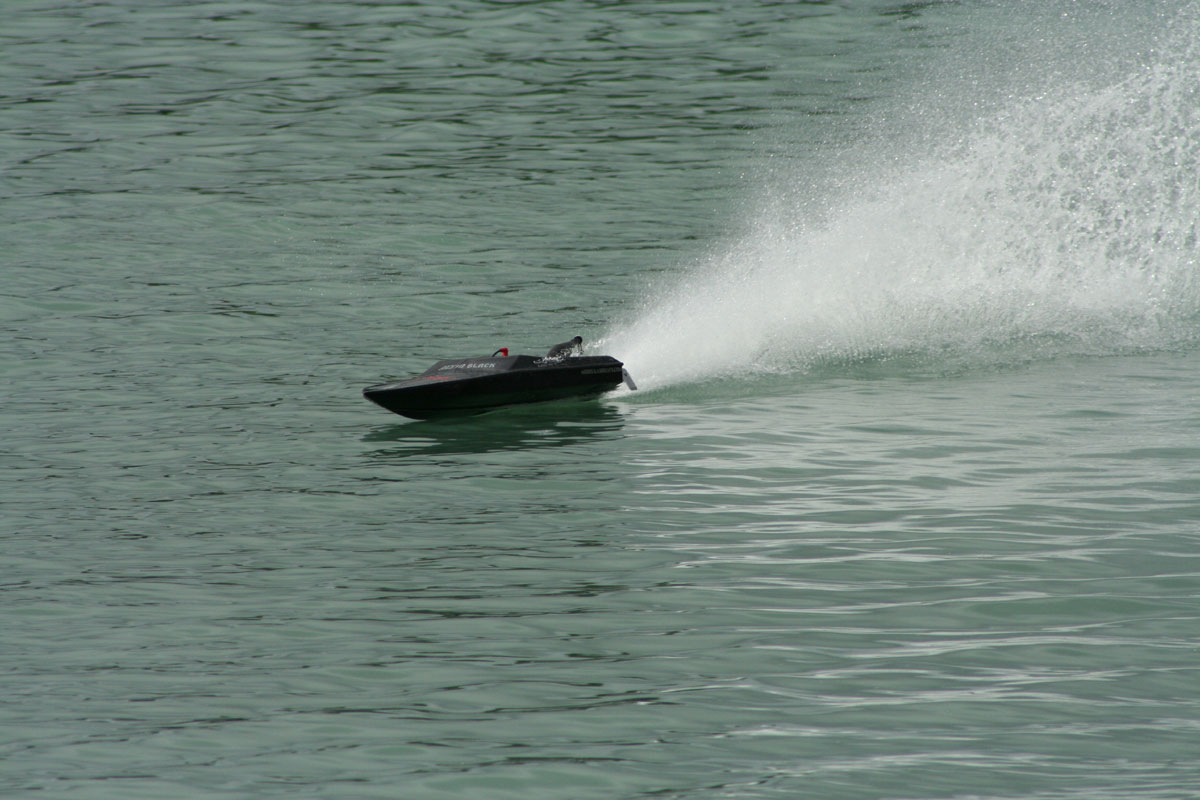
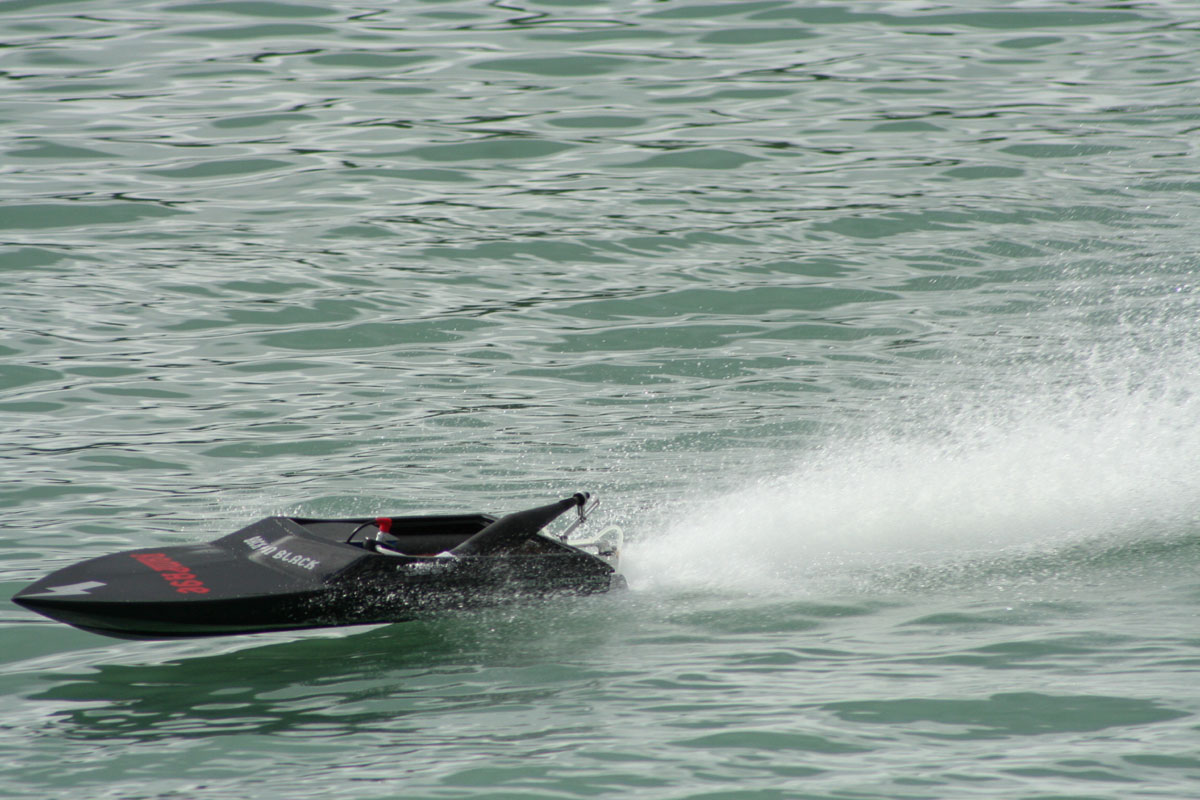
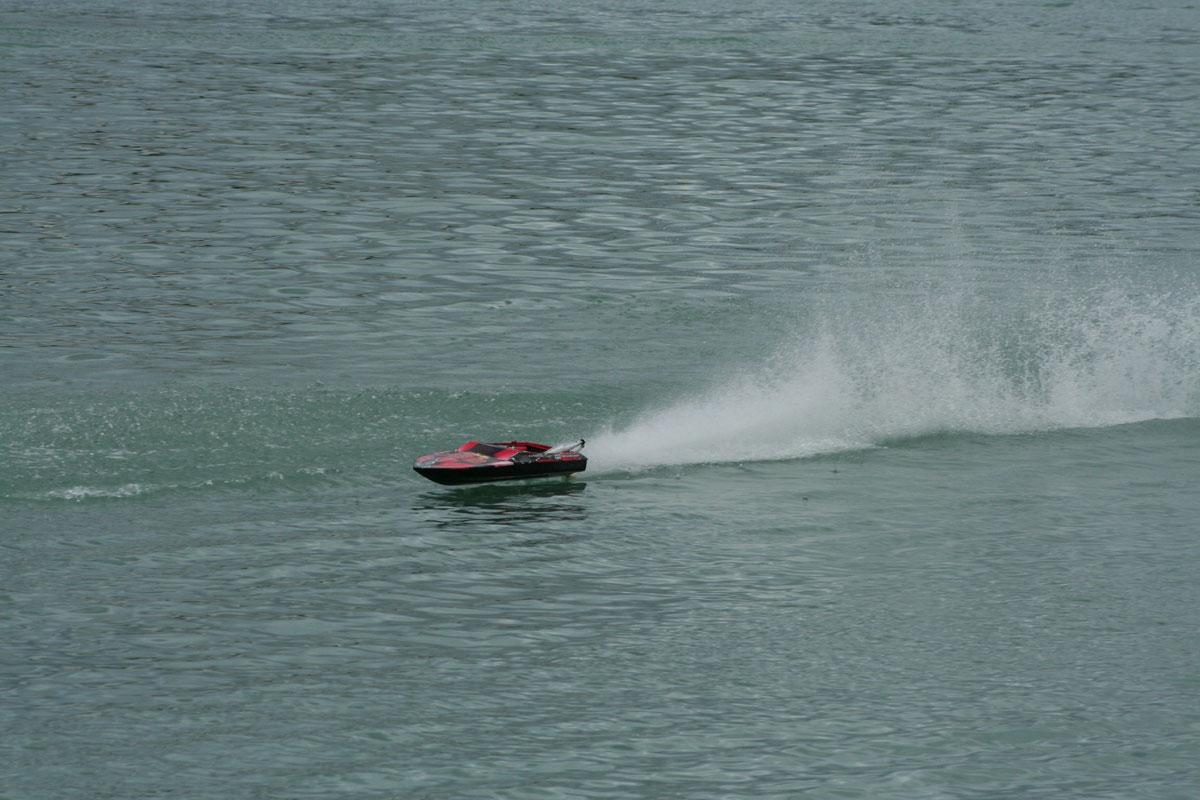
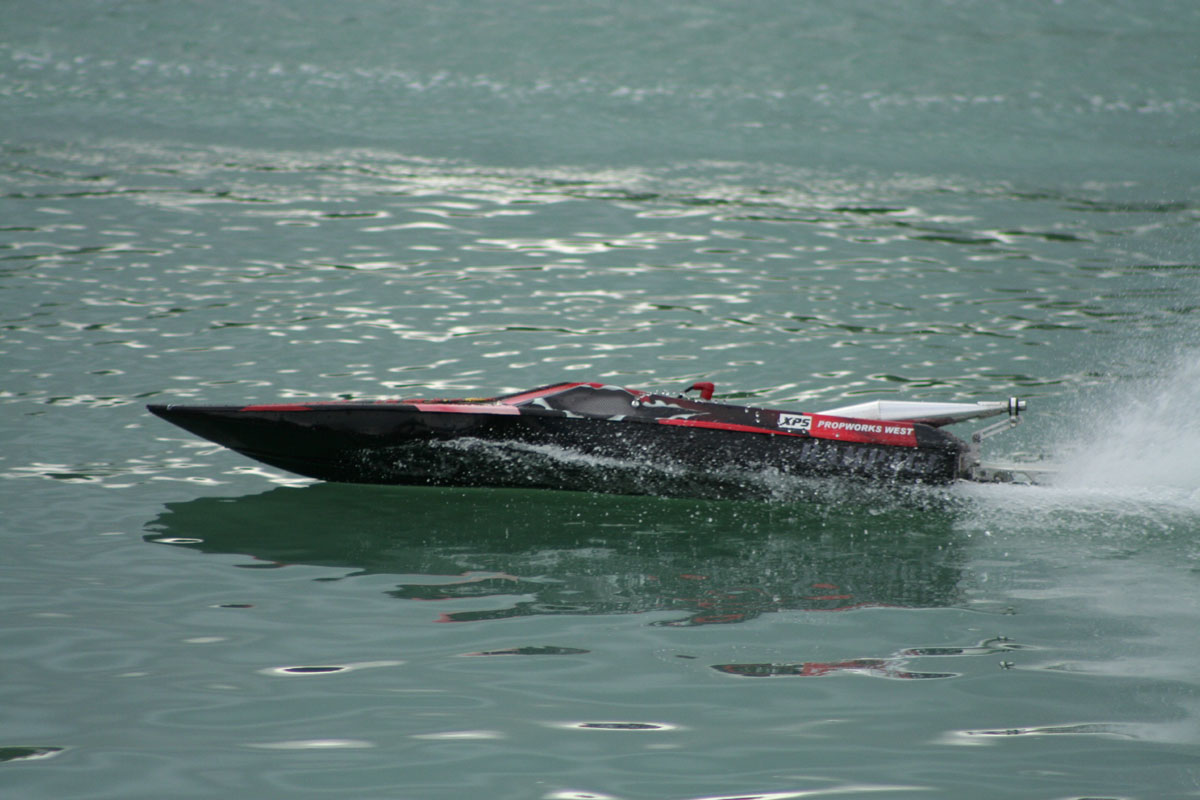
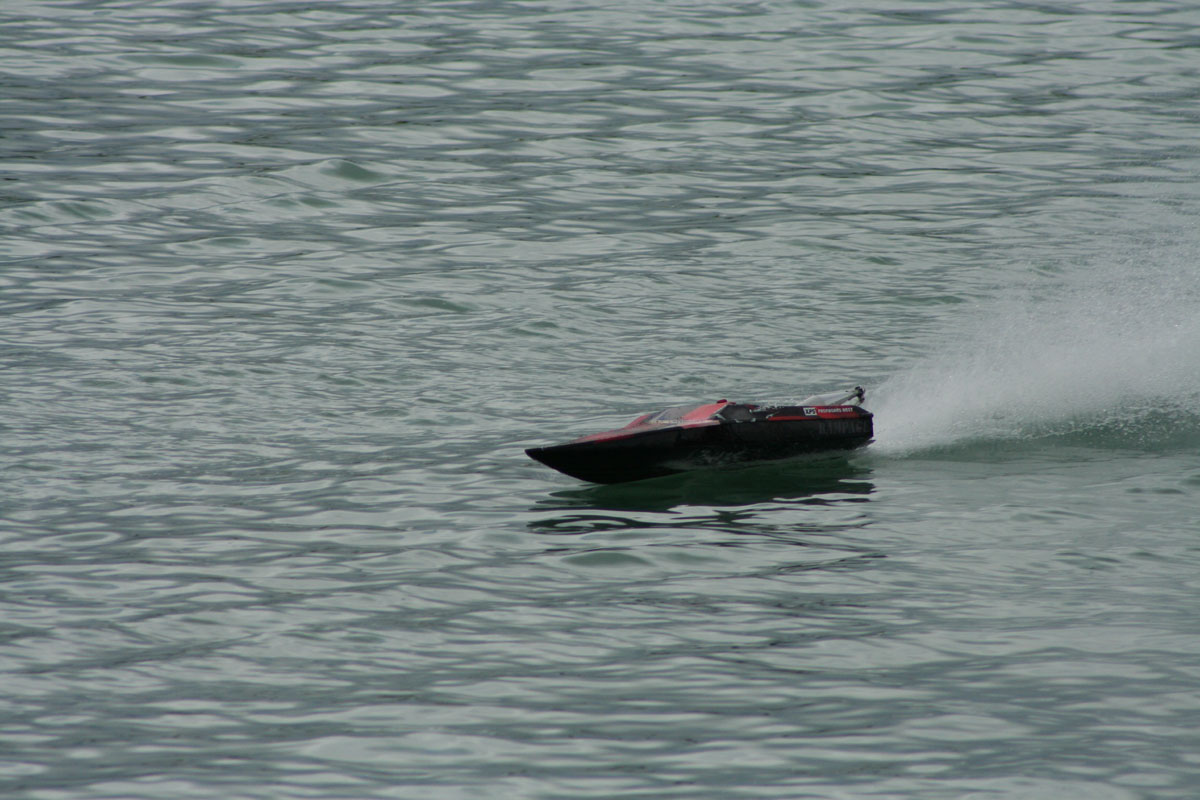
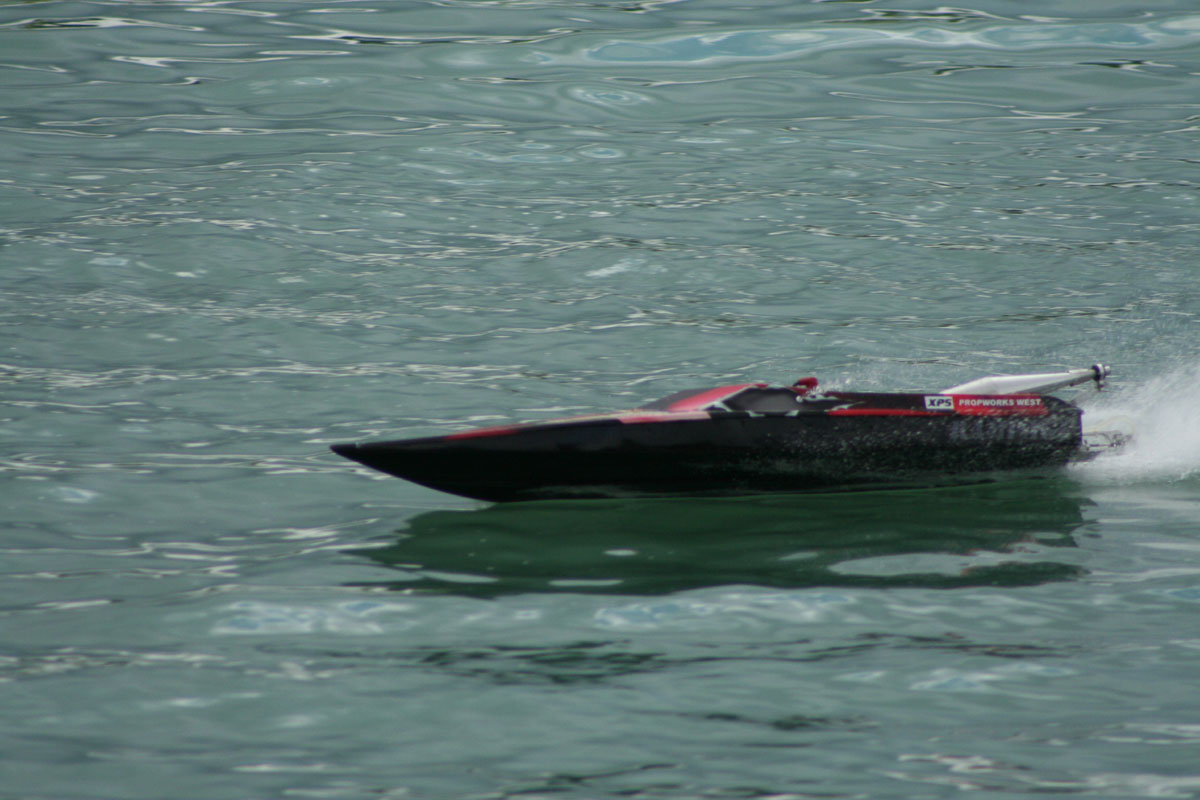
On the water...
My Rampage ran great right off the build table. It was fast and handled extremely well. It was put to the ultimate test however only shortly after I finished building it, when I took it to the Northern Nats in London Ontario and raced it against the competition. I will be honest here, it ran good, but it did take me until the end of round 3 to really get it dialled in perfectly. In the fourth round it was running the way I wanted it to. This is normal though, you can't really expect to go out to the pond on your own and get a boat trimmed for heat racing. You can get it close if you have enough experience, but more than likely you will have to fine tune in real race conditions. I tried adding weight in the boat, removing weight, adjusting tabs, and finally ended up with the setting I have listed below in this article. This is how mine runs best.
Chris "Juice" Rupley has been racing the new Rampage all season (2009) with great success. Here is what he had to say about the Rampage:
"The first time I saw the boat run was at the Northern Nats in '08. Then I saw the boat run again in Durant at the Gas Nats and I told Dale (my racing partner) we were going to run the Rampage for the '09 season. The setup was easy. I used the same setup I had on my Lazer. M&D drive with the 190 Speedmaster tabs and the 6 inch standoff 60/90 tapered blade and CG at 14 1/2. The first time the boat hit the water it was a windy day. I was very impressed with the boat. It seemed to love the rough water and was fast. What I really liked about the boat was the way it cornered. It carves them like no other. Dale had his there too. We would go out and run them till the tanks were almost dry, bring them in to refill and then back on the water. These boats were just a blast to run. At the Gas Clash in Maryland, I was one heat away from winning it all but a driver error gave me a DNF and I finished third for the weekend. At the Internats in Seville I won all five rounds but a buoy cut cost me a perfect score. The Rampage is one bad mono. RAMPAGE BABY!!!"
In the little time since its official release the Rampage has won many races, too many to list them all here, but here are a few of the bigger event wins:
1st Place LS27 Mono: 2008 Northern Nats- London, Ontario
2nd Place LS27 Mono: 2008 IMPBA Gas Nats
3rd Place Open Mono: 2008 IMPBA Gas Nats
1st Place Trophy Dash (Best 6 Boats shootout): 2008 IMPBA Gas Nats
2nd Place Trophy Dash (Best 6 Boats shootout): 2008 IMPBA Gas Nats
2nd Place Super Sport Mono: 2008 IMPBA gas Nats
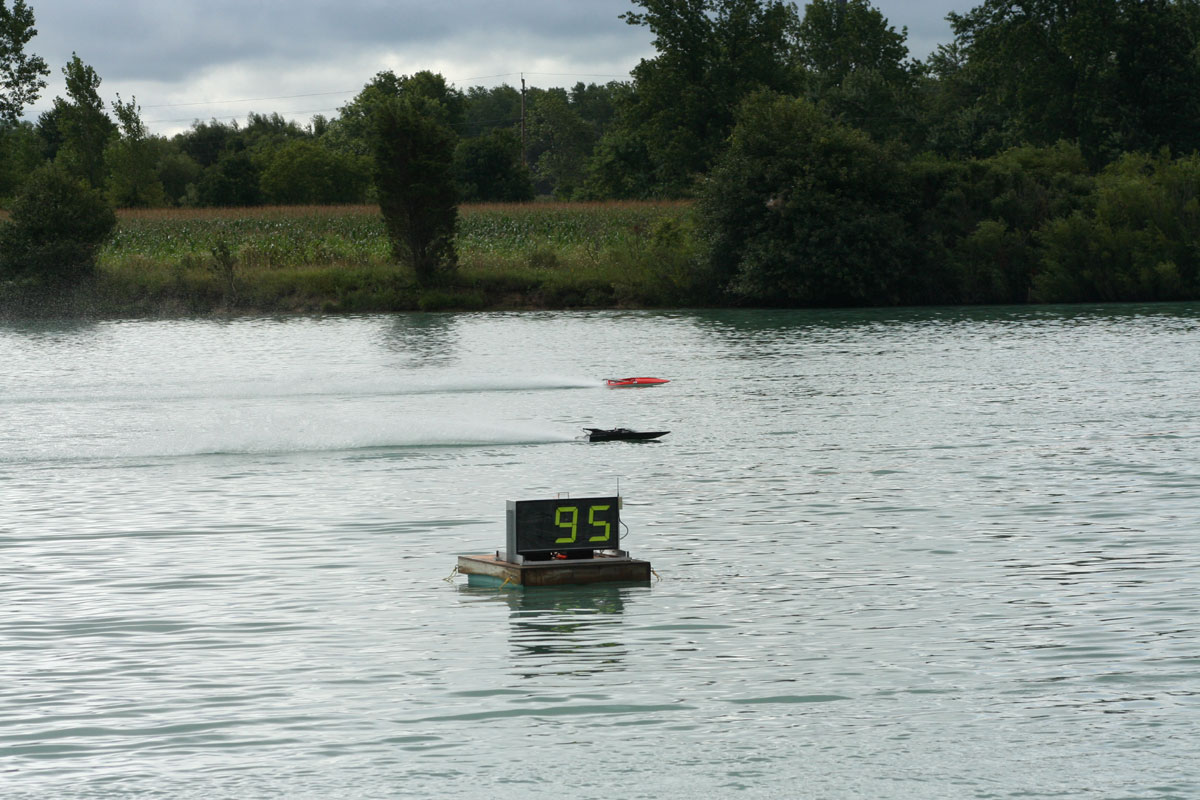
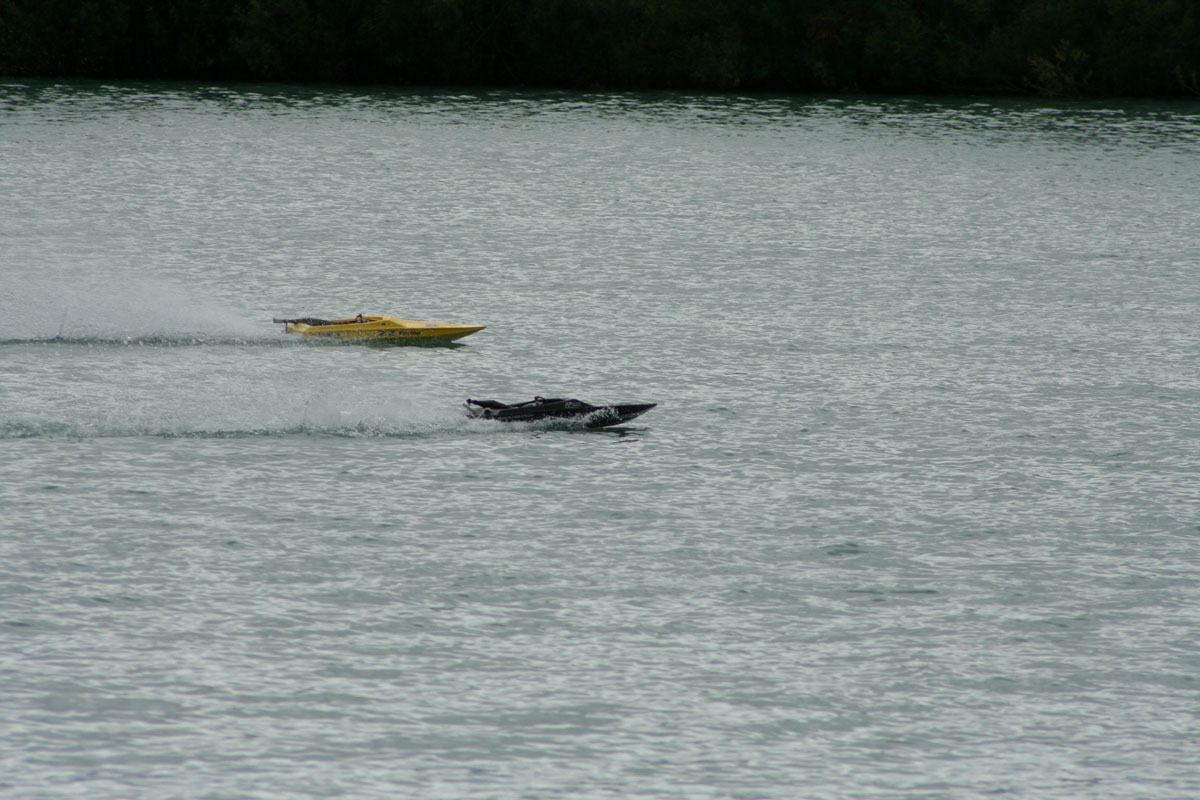
A couple Rampages (mine and Dale Brobst's) getting ready for the start...
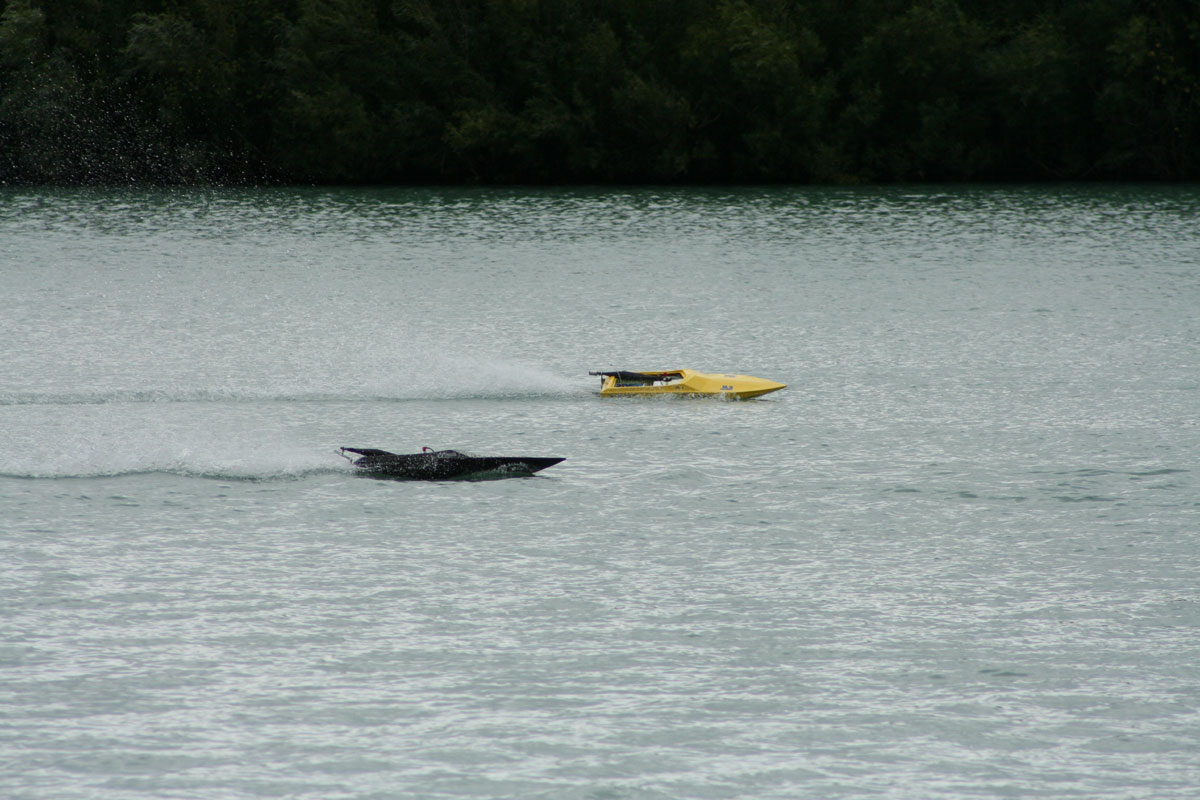
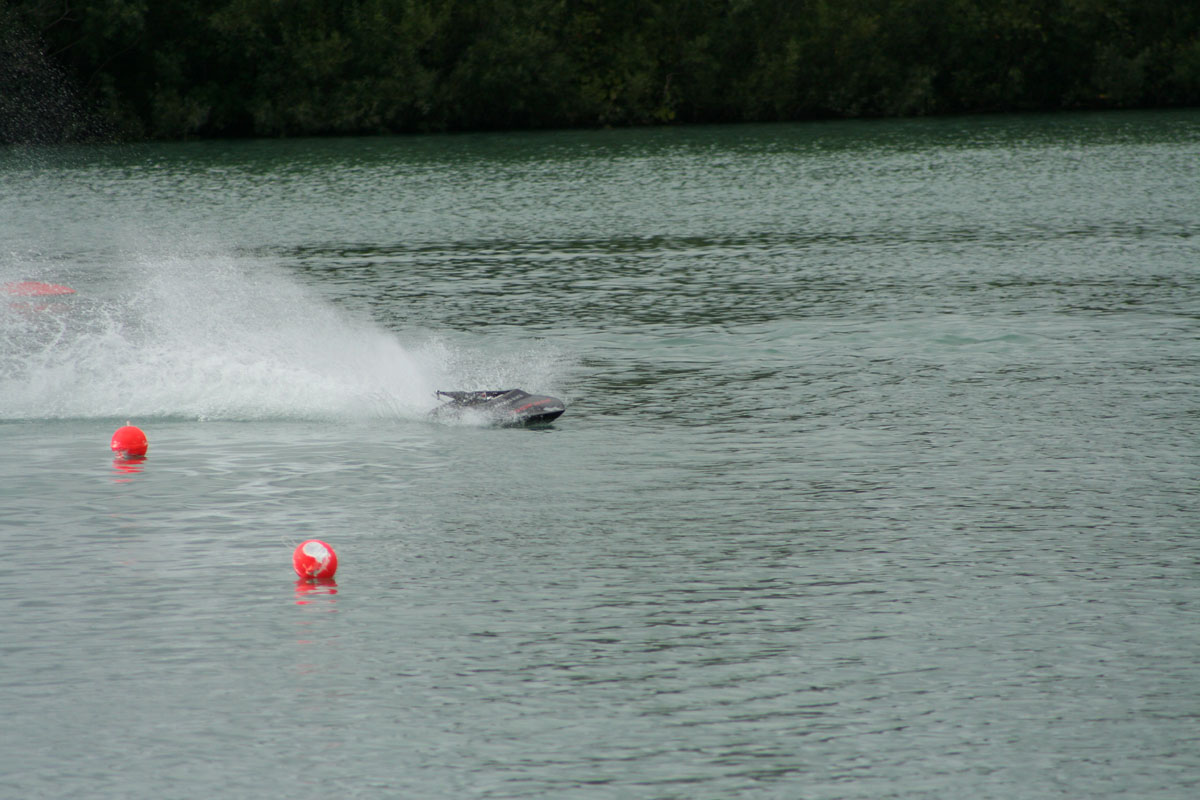
Some pictures of Carlo Catalanotto's Rampage in action at the same race...
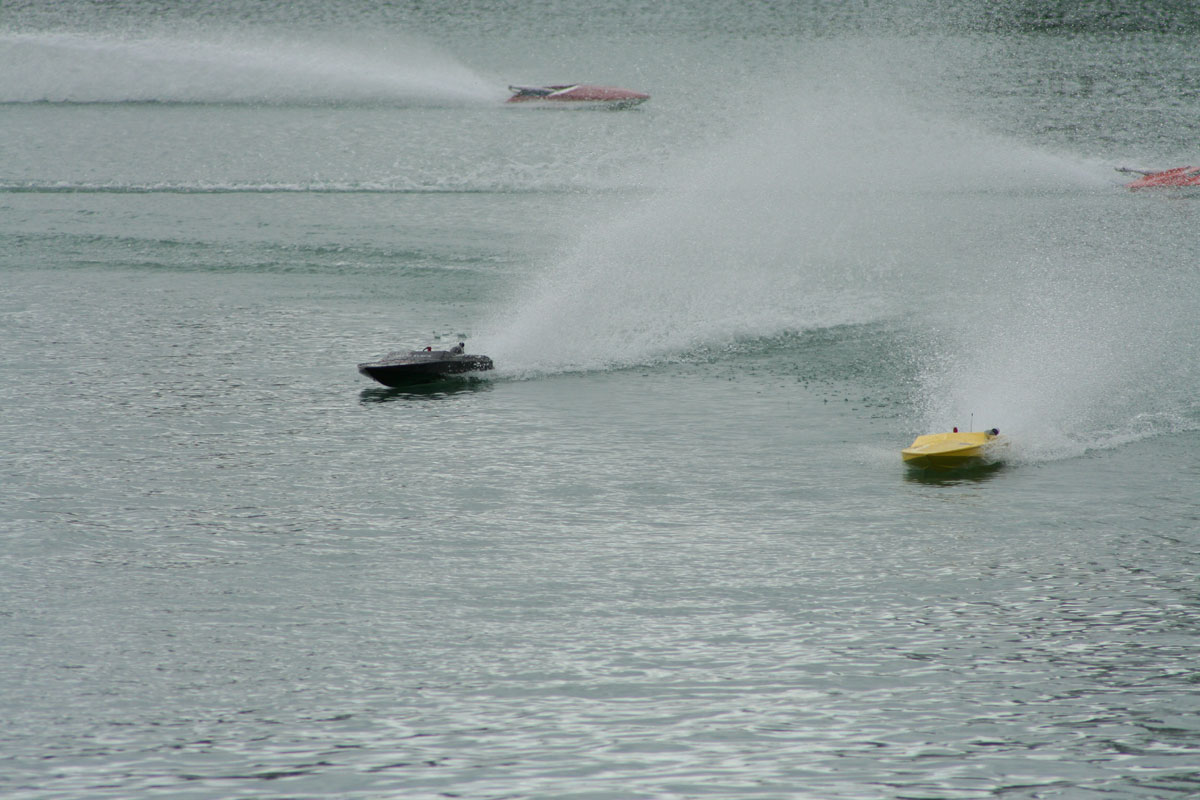
1st Place Winner LS27 Mono...second year in a row.
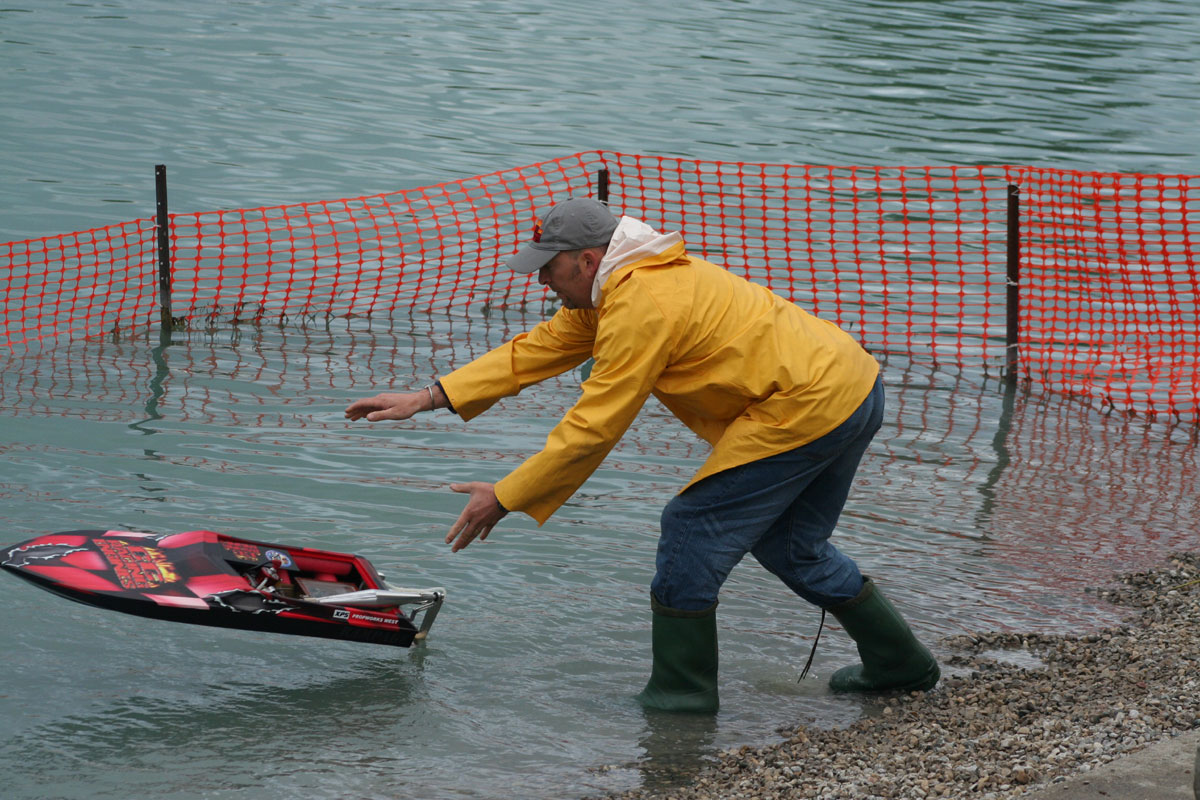
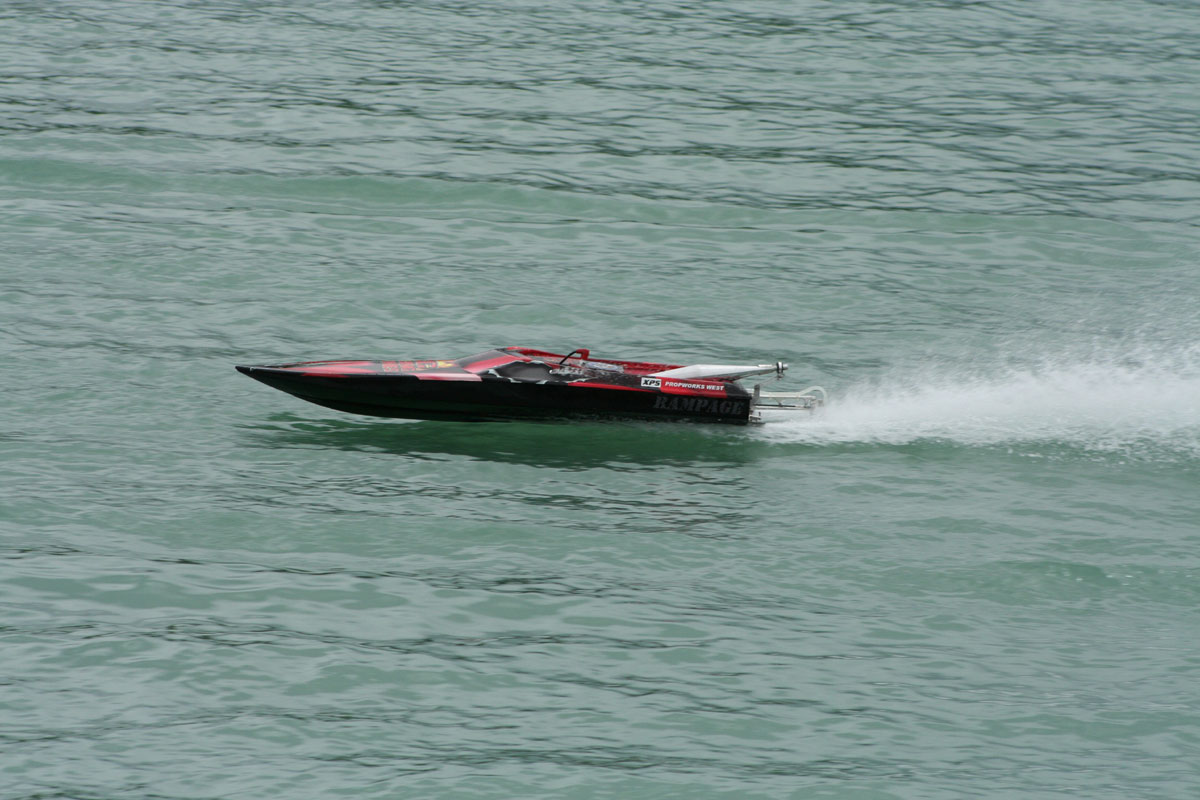
*Notice how he mounted the pipe low in the transom using a 90 degree header.

Here is a short video of the boat - Test run before race day..
Video with music soundtrack

Video without music
Settings that worked well on my Rampage:
Drive depth: 1/2" from keel to centerline prop shaft at transom
Drive angle: very slightly negative (prop end down)... approx. 1-2 degrees
Trim Tabs: outer tabs neutral, inner right tab barely touching straight edge, inner left tab just a hair higher than inner right one.
Propellers: Propworks West 6717/3 425-C (best for heat racing) and 6717/3 430-C (for going fast!)
Additional weight in boat: none
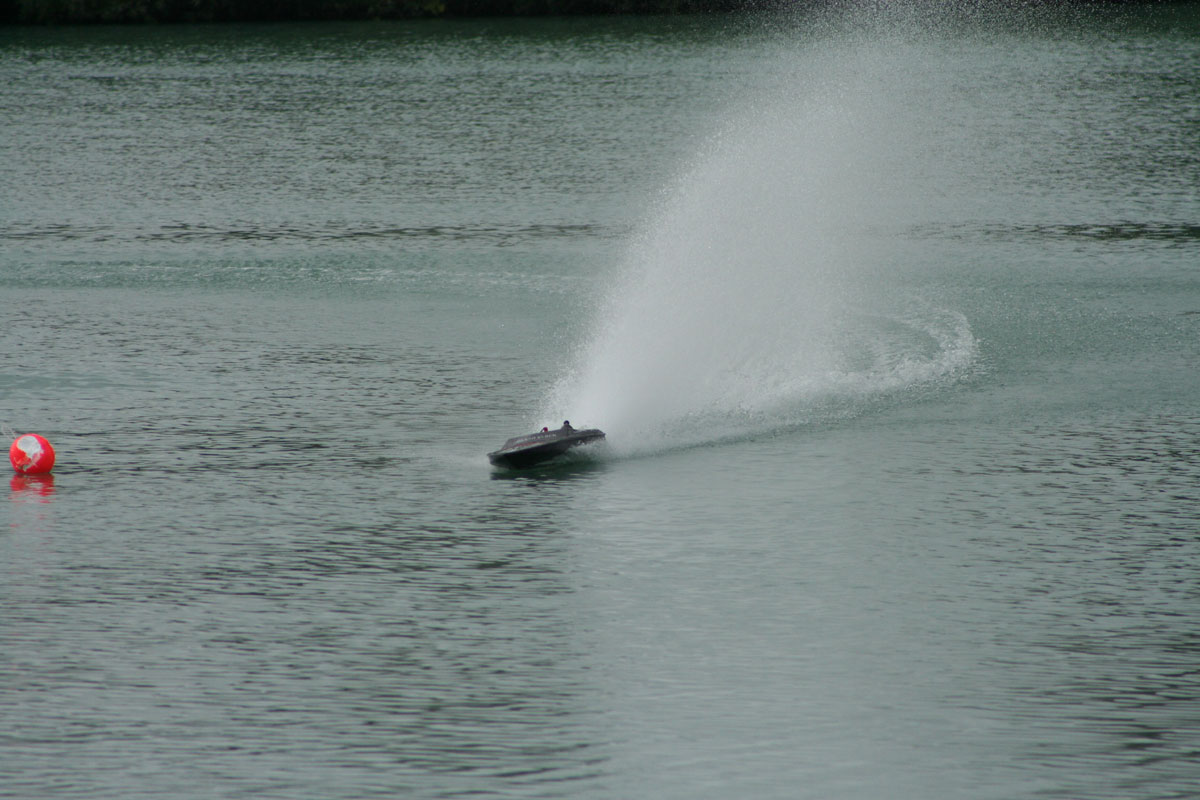
* I strongly recommend you make a carb shield to cover the carb side half of the hatch opening. The boat leans so hard in turn, it will wash itself down in some cases! You can actually see this happening three times in the video posted above...when the boat slows down... that's not the driver letting off the throttle, that's water spray getting to the carburetor! I had decided to run it without the carb shield just to shoot the video since we were alone out there...that's how I know this!
Final impressions...
I think this may very well be the best racing mono out on the market right now at the time of writing this article. The construction is very good, the performance is awesome! Driving this boat takes a little bit of getting used to, as it will lean on its side at the slightest bit of rudder input, but it will literally carve through just about anything you can through at it. Runs fast in the straights and turns like it’s stuck on rails!
If you don't already own a Rampage you probably will want to if you have to race against them! Word of advice though, do not wait until the last minute to order one because, as mentioned at the beginning of this article, these boats are not mass produced. I sure am lucky I got mine in time for the summer!
Components used for this boat review from the following companies:
Special Thanks:
-
Mike Cantavespri for taking the time to lay-up the boat for me at a very busy time of year for him.
-
Carlo Catalanotto for the killer engine! Plus helping with hardware, setup and also test driving the boat while we took video.
-
Brent Daily for the props that give us that edge!
-
Eric Lis for the use of his video camera and taking footage.
-
My wife Andree for taking all the great pictures.
Happy Boating!
Contact / Purchase Information:
CC Racing Engines
501 Bellview St.
Riverview, LA 70123
United States
Tel: 504-305-5005
Email: This email address is being protected from spambots. You need JavaScript enabled to view it.
Website: www.ccracingengines.com
")

 (couldn't help myself)
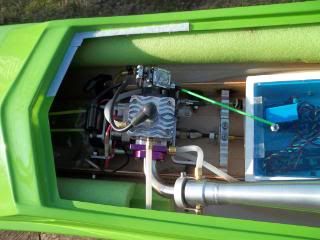

 Now I'm just waiting for Schneider to comment in here as he's always on my case but in fun.