Product Review Article ...by Rudy Hilado
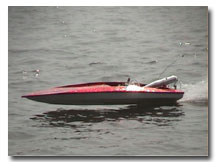
A look at the hot Seaducer 47 racing mono!

I've always been impressed with the performance of the Seaducer mono hulls, especially when powered by large nitro motors. They are incredibly fast racing monos. Many boaters have adapted the largest Seaducer nitro hull for gasoline motors. It's a tight fit, but it is possible to fit a Zenoah PUM or QD25 in the boat. The performance of the boat was still impressive, but the motor seemed to be a bit heavy for the small hull and heavy chop would, at times, cause the hull to submarine. Gas boaters were calling for a larger boat more capable of handling the gas motors. Jerry Crowther of Seaducer Boats responded by building the Seaducer Gas 47 racing mono. This boat was designed to support the larger and heavier gas motors. It is 47 inches long and 12 inches wide , which makes it a full 5 inches longer and 1 inch wider than the largest Seaducer nitro hull.
I first saw the new gas Seaducer running at the Winter Nats back in January, 2003. I was very amazed with the performance of the boat. It seemed to run effortlessly around the buoys and it looked to be the fasted boat on the course. A few months later I finally ordered the hull. Jerry was very upfront about the availability and delivery date of the hull and it arrived just as he stated, nicely packed with no damage during shipping.
The Hull
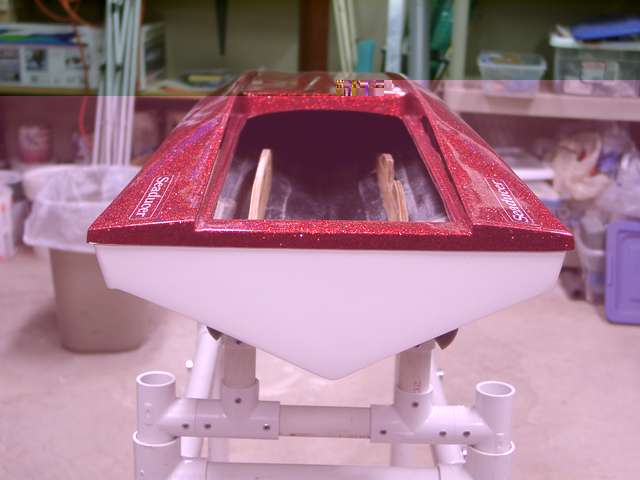
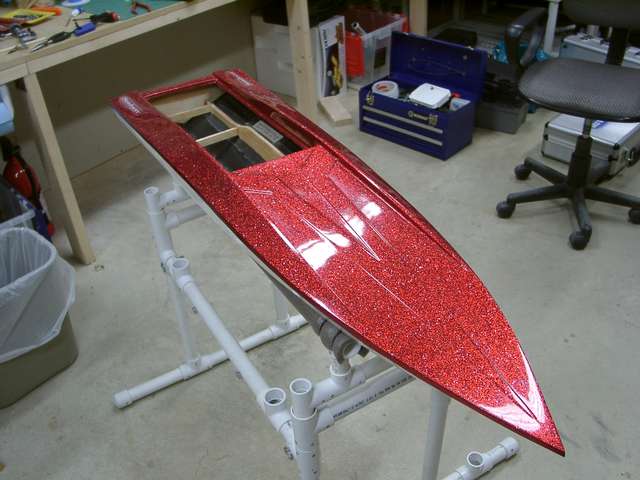
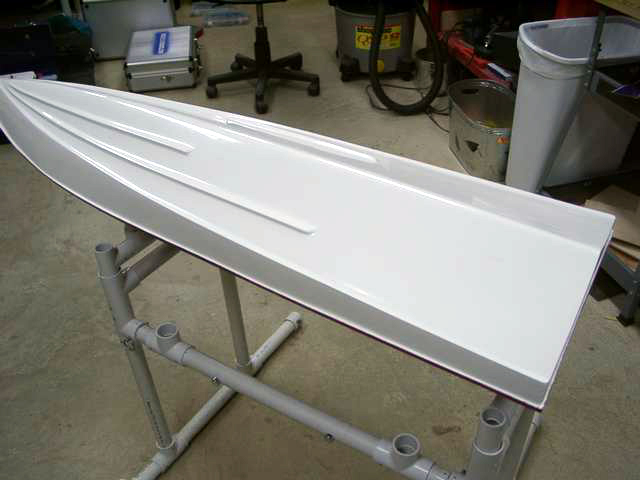
The Seaducer Gas Racing mono still maintains the very unique Seaducer deck look, but the characteristic droop in the nose is more subdued, which provides a little more clearance for the heavier chop created by larger gas boats. Also freeboard on the boat is correspondingly higher, which allows the large gas motor to sit more comfortably in the hull.
Seaducer hulls are specially designed for racing and this hull is no exception. The boat is very light and strong as it is laid up with carbon fiber and polyester resin. The deck is designed to maintain a very low aerodynamic profile and as true with all the Seaducer monos, the boat does not require any trim tabs. A hook is built into the hull which is designed to provide the correct riding attitude for the boat. With the hook in the bottom, the boat does not need the extra weight of trim tabs and it generally simplifies the building and tuning of the boat, since there are fewer points of adjustment.
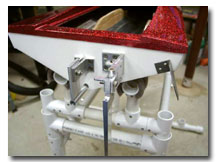 I purchased the hull along with the recommended hardware kit from Seaducer. The hardware kit included the motor mount, surface drive strut, and rudder, pipe mount, and antenna with mount. The hull comes with the matching radio box with clear lid, fuel tank tray, turn fin, and cowling. The hardware kit is designed for a collet drive system. Since the strut is mounted close to the transom, there is very little room for a square drive ferrule, so using a square drive is not recommended. Jerry also includes fairly extensive instructions on where the motor should be mounted as well as the transom hardware.
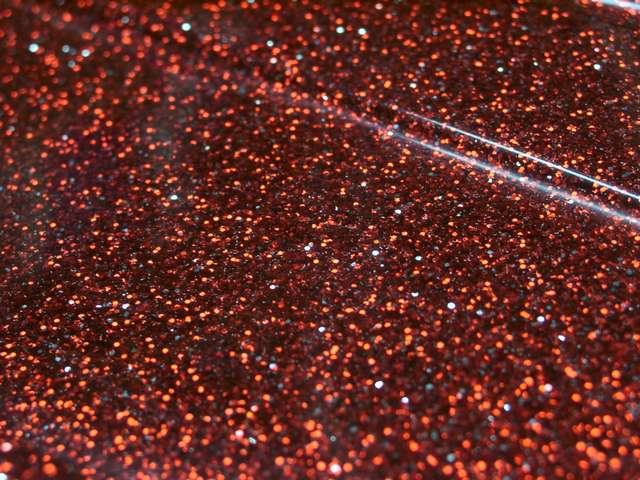
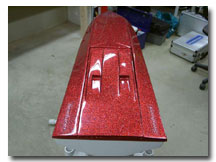 The gel coat on the deck was flawless. The metal flake gel was absolutely stunning. I paid extra of this option, but I believe it was worth it. Not only does the metal flake gel coat get an extra "ooh" and "ahh" from the spectators and boaters at the lake, it also hides any dirt or scratches. It's very hard to see anything on the deck but the bright sparkling metal flakes.
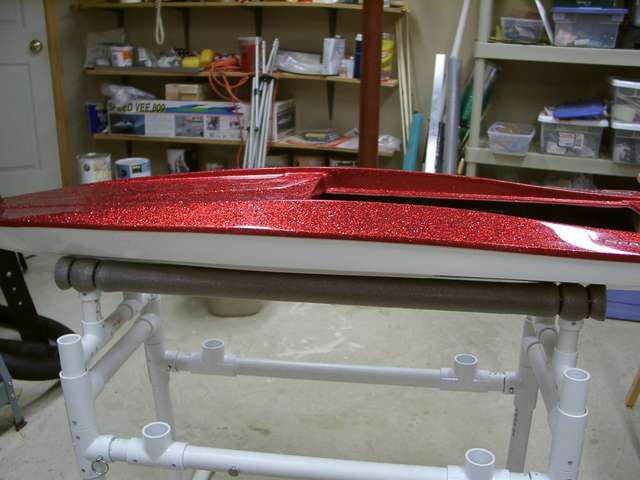
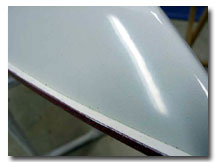 The bottom gel coat also looked to be flawless, but after much closer inspection, I noticed that a small section of the nose area was a little light on the white gel and the under coating could be seen. It's was very minor issue as it did not affect the handling or the structure of the boat, and it was in a very difficult spot to notice.
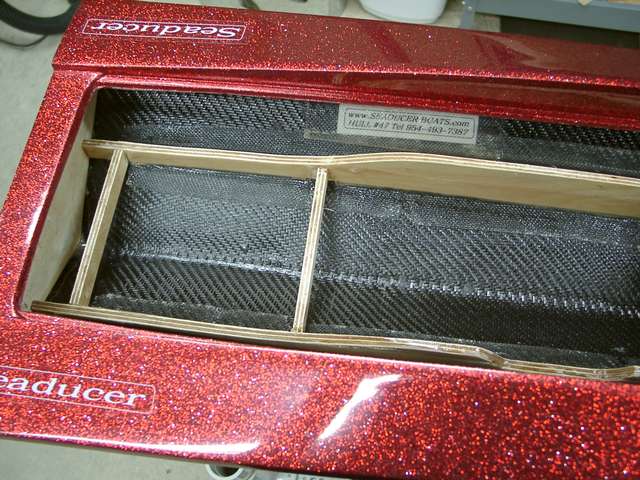
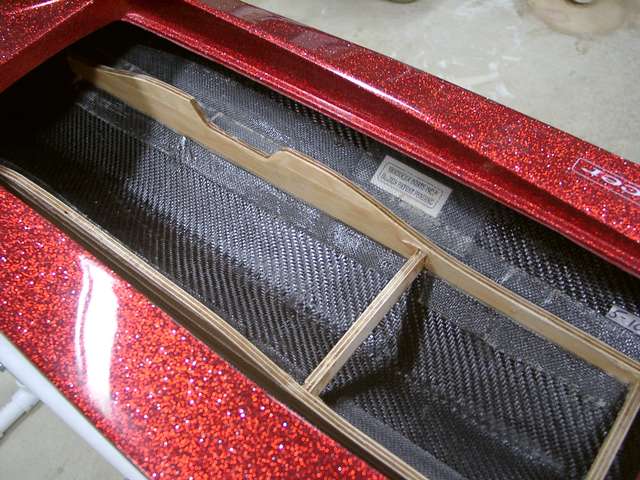
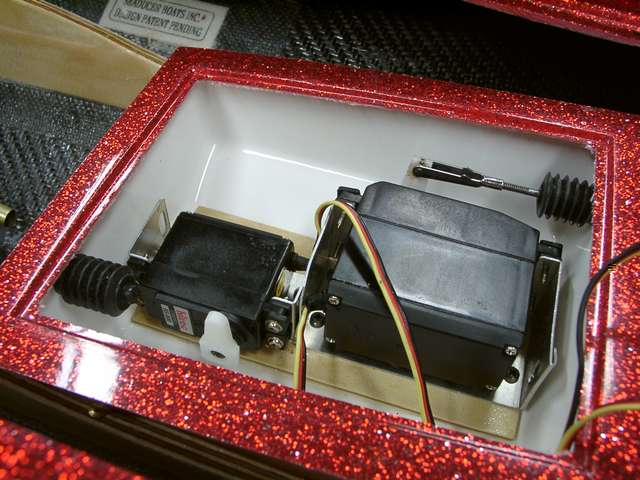
The hull comes with the radio box rails already glassed in place. The radio box is custom made for the boat and it fits perfectly between the rails and sits flush with the hull of the boat. The box is also gel coated to match the deck of the boat, which is a very nice extra touch.
Building the Boat
Installing the motor was relatively simple as the starboard engine rail is already precut to make room for the carburetor. I cut the deck a little to make it easier to choke the carb with my finger when starting the motor. Since this boat is a little wider, it was not necessary to do any cutting on the exhaust side to make room for the pipe header, which was typically required on the smaller Seaducer hull.
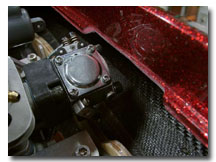 I followed the instructions on where the motor should be mounted. According to the documents, the center of the exhaust port should be placed 14 inches measured from the inside of the transom, which should set the proper center of gravity for the hull. I generally don't like CG specifications based on motor location, but since the radio box location was fixed and I was using the recommended hardware kit, following the instructions exactly seemed prudent. I would prefer the CG was specified as a distance from the transom, not based on motor position from the transom. That way boaters can use different transom hardware, pipe and radio box components and still set the CG appropriately. It should also be noted that motor position was specified without specification of which tuned pipe should be used. There is a significant weight difference between aluminum pipes and steel pipes, so using a heavier steel pipe would move the CG toward the transom.
 I set the motor using a wooden dowel measured at 14 inches to help mark the proper location. I started by placing the front motor mounts (collet side) first. I wanted to mount the motor as low as possible so I used a rubber pad to keep the motor 1/8 inch off the hull bottom, then I marked where the front mount rubber isolator should be placed. I then set the rear mounts so there was enough angle to have the stuffing tube go under the radio box.
 One thing I noticed in trying to mount the motor very low, the bottom of the ignition coil was touching the hull. I decided to move the coil out of the way to provide clearance for the motor. In the end, though, this turned out to be a bad idea. By having the coil "hanging" in the air, I damaged the grounding contact (and the coil is fairly expensive to replace). I eventually moved the coil back to it's original mount position, but I made the bottom mounting tab on the coil thinner (by grinding the plastic down) which provided enough clearance so the mounting screw did not touch the hull
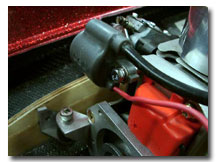 . The coil cannot be mounted directly over the pull start since the starter needs to be rotated counter clockwise 90 degrees to fit between the motor mount. (This problem has been addressed by Seaducer. Their hardware kit now includes a new coil bracket. See addendum at the end of the article- ed.)
I followed the instructions very closely for the placement of all the components, but I built my boat using a Cooper aluminum tuned pipe so I had to make my own pipe mount. I also opted to use an IV bag for the fuel tank, so I didn't use the fuel tray or a standard hard tank.
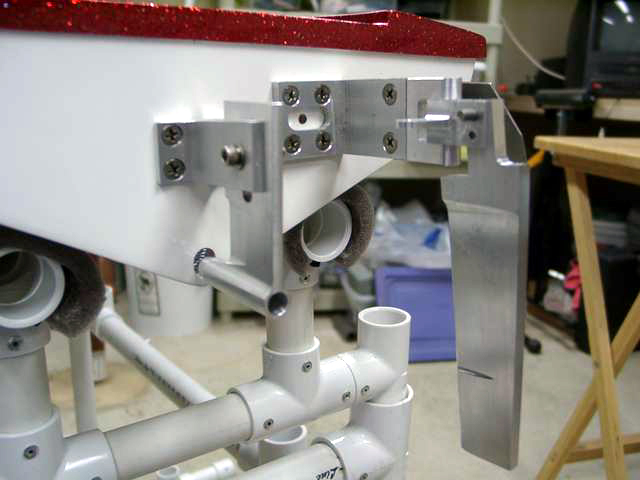
 The transom hardware mounting is fairly straight forward as a template of the transom is included with the instructions. The instructions tell you how far the rudder should be below the transom, which requires cutting the rudder to make it shorter.
The boat includes a matching hatch that helps increase down force on the boat and shields the carb from any water spray from other boats. I set my boat up using a 100 degree header with a Cooper Quiet pipe. It required a bit of aggressive cutting on the  hatch to make it fit, but it worked out and it can easily be put on or taken off.
After a couple of evenings, the basic assembling of the boat was completed.
On The Water
I started out by setting the strut as low as possible in the hull; flat with no positive or negative angle. I have a limited number of props so I pulled an ABC G20 prop out and used that as a starting point.
The boat ran great, it was fast but it was behaving a little erratic on the water. I went through several different props and noticed that the boat behaved very differently with each prop. I tried the popular Prop Shop 6717/3 and the boat did not like it at all. With the 3 blade prop, the boat wanted to make aggressive right-hand turns and it made it nearly impossible to go straight.
I finally put a Prop Shop 7015/2 on, and with this prop the boat came alive. It ran straight and carved turns effortlessly, both left and right. The motor came up on the pipe and the boat was flying through water!
I've learned that the Seaducer boat is very sensitive to proper prop selection. I spent a lot of time going through every prop in my prop box and each one made the boat handle very differently. A lifting prop really pushed down the nose and made the boat plow; some of my 3 blade props made the boat incredibly difficult to steer straight. The boat seems to have narrow ideal performance parameters, which makes this more of an intermediate/advanced racing hull. But once you take the time to match the motor, pipe, strut and prop settings, WATCH OUT! The hull comes alive and it is an incredible water rocket! The Seaducer can carve turns on a course like no other boat. At full throttle the boat can execute a turn and have virtually no loss in speed! I believe this is due to the hulls natural tendency to turn. The rudder throw needed to make a right hand turn is barely perceptible. All that is needed is enough rudder throw to lay the boat on it's side and it makes a clean turn, and the low amount of rudder deflection results in less drag in a turn. If you increase the rudder movement you can do amazingly tight U-turns without any threat of spinning out.
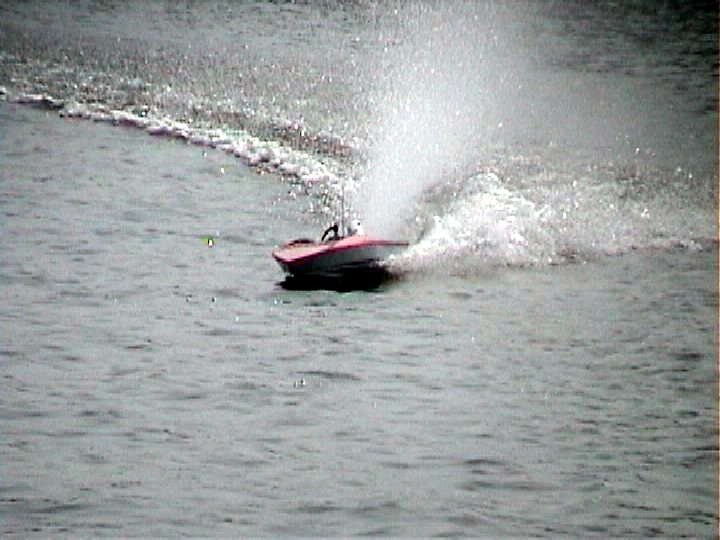 One of the best mono race drivers I've witnessed is Oscar Leech, who races some incredibly fast nitro powered Seaducers (they push the 70 mph mark in heat racing trim). I had the opportunity to let him checkout my boat and it's setup after a recent race. I handed him the transmitter and he gunned the boat. He proceeded to hit the course and make several perfect laps in lane one, the whole time at full throttle. The boat carved up the course like it was on rails! It was an amazing display of driving ability and boat performance. When he finished, Oscar turned to me (my jaw was hanging open) and handed back the transmitter, then smiled and simply said "Now that's how you drive a mono! The boat's running fine."
Jerry Crowther has a specific prop recommendation for his hull. It's a modified Octura 1475 with a little more cup and rake. He's having them specially made and calling these props the SDG1. I've ordered one of these props. I'll report back once I have a chance to test it out.
I would rank the Seaducer Gas hull as one of the top racing monos. It's unique design allows for a light, clean, and very fast racing boat. I would not use the hull as the first boat for a novice gas boater as it takes a little bit of patience and trial and error to get the right combination of strut and prop settings for your motor and pipe. But your patience will be rewarded with an outstanding racing mono that will fly past the competition and help put you in the winner's circle!
Comments:
- · Well built, high quality construction
- · Recommend for Intermediate/Advanced racers
- · Incredibly fast, well handling boat...a "driver's" boat.
- · Narrow performance setup window, hull likes only certain prop/strut settings
- · Top performing mono race boat!

Setup and Specs:
- · Length: 47 inches
- · Width: 12 inches
- · Motor: Toxic Marine modified Zenoah G260
- · Pipe: Cooper long pipe, MidWest 100 degree header
- · Hardware: Seaducer
- · Prop: Prop Shop 7015/2 (try many different props), soon to be the SDG1.
- · Cost as ordered: $350 for hull w/hatch, $50 for metal flake, $170 for hardware kit (includes new coil mount)
Contact Information:
Seaducer Boats
2071 NE 55th Court
Ft. Lauderdale, FL 33308
E-mail: This email address is being protected from spambots. You need JavaScript enabled to view it.
Website: www.seaducerboats.com
Addendum:
The new coil mount puts the ignition coil directly above the pull start. The coil plate is very thin but it has threaded nuts pressed into the top mounting holes so the coil can be bolted directly. Oddly, the nuts are threaded for 6-32 bolts, so the stock coil screws cannot be used. You'll have to supply your own 6-32 bolts and washers. This new coil position does not interfere with the hatch, which still fits nicely on the boat. (Jerry Crowther informs me that this bracket was preproduction and the brackets that are now shipping have the proper nuts so the stock screws can be used! - ed.)


Additional pictures of the Seaducer Gas Racing Mono:
 |
 |
 |
 |
 |
 |
 |
 |
 |
 |
 |
 |

