How-to Article ...by Brad Mahs

Learn how to make a set of trim tabs...instructions and drawing included.
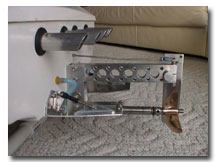
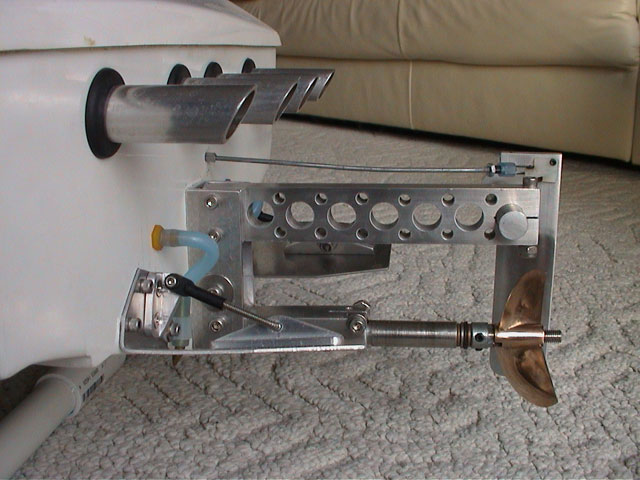
I don't like buying things – at least, not if I think I can make it myself instead of paying retail! Years ago, I wanted a set of semi-scale looking trim tabs, the kind that looked like hydraulic Kiekhaefer units on full-sized offshore boats. Not finding suitable anything except small plastic units, I decided to design and build a pair of aluminum tabs. This design is easy to build with simple hand tools (hack saw, hand drill, etc.), they're very easy to adjust, and have a nice stand-off scale look to them! The attached drawing shows dimensional views for the various pieces. You can leave them with a natural brushed aluminum finish, polish them up to a mirror shine, or paint them black for a true scale look.
One note:
if you don't have a brake press for bending metal, use a vise with 2 pieces of
hardwood to hold
the sheet stock. Then bend the aluminum over by pressing on it with another
piece of hardwood. This will give you a nice sharp bend with no marring of the
aluminum.
Materials:
Trim tab:
(2) 1/16 x 2 x 4-1/4" aluminum
Upper mount: (2) 1/2 x 1/8 x 1" aluminum
angle
Lower mount: (2) 1/2 x 1/8 x 2" aluminum angle
Hardware:
(2) 4-40
Ball Clevis
(2) 6-32 x 1-1/2" S.S. rod (or S.S. screws with heads
cutoff)
(2) 6-32 S.S. Nyloc nuts
(10) 8-32 x 1/4" S.S. flat-head machine
screw
(8) #8 S.S. Truss head (or round head) wood screw for mounting to
transom
-or Optional replacement for thru-bolting:
(8) 8-32 x 3/4" S.S.
Socket Head Cap Screw
(8) 8-32 S.S. flat washer
(8) 8-32 S.S. Nyloc
nuts
Instructions:
- 1. Cut, drill and tap trim tabs from sheet stock. Deburr as required.
- 2. Bend tab 90 degrees along bend line as shown.
- 3. Cut, drill and tap Upper Mount brackets. Deburr as required. Be sure to make one as shown, and one opposite image!
- 4. Cut, drill Lower Mount brackets. Deburr as required.
- 5. Install Upper and Lower mount brackets as shown, using 8-32 flat-head machine screws, and red Loctite, or epoxy (preferred). Do not overtighten!
- 6. Grind off all exposed threads on backside of tabs!
- Optional: Polish tabs, or prime and paint trim tabs (black for a scale look). Can also cover exposed threaded rod with shrink tubing for more scale look.
- 7. Attach ball clevis to Upper Mount with Loctite or Epoxy.
- 8. Bend 6-32 stainless steel rod as shown. Install long end into ball clevis. Slip short end through hole in Lower Mount and secure with 6-32 Nyloc nut.
- 9. Install finished tab to transom using either wood screws, or through-bolt with washers and Nyloc nuts. Make sure the tabs DO NOT extend below transom! This will cause excess drag! Leave a 1/16" gap minimum between bottom of tabs and bottom of transom.
It's best to mount tabs centered on engine rails (assuming std. 5" rail spacing, 1/4" thick rails).
Adjusting tabs:
- 1. Remove 6-32 Nyloc nut from threaded adjusting rod;
- 2. Remove rod from Lower mount. Turn rod out (CCW) to lower tab, turn rod in (CW) to raise tab.
- 3. While putting pressure on tab (up or down, as required), align rod back in hole in Lower mount, and replace Nyloc nut.
Have fun!
Feel free
to use these instructions and plans for your own personal use.
This
information cannot be resold or used for commercial or retail
production.
Trim Tab Fabrication Brad Mahs copyright 1996


