Learn how to set your radio correctly and using it to help you win races!
I take calls everyday answering questions ranging from lap times to top speed, handling to props and everything in between, but I am amazed at how often one of the most important part of a good setup is overlooked and never discussed. I travel to races all over the country and see quite a bit of different styles of race boats and all the different ways that they are setup to achieve the same goal. Some guys spend hours upon hours testing props, hardware and setups to get there boat to perform as good as they can make it perform around the course in the tough heat race conditions. The thing that surprises me the most is the little bit of time spent learning what your controller, receiver and servos can do to help improve the performance of these race boats. There are a lot of ways that some of the most popular controllers can help you out in your goal to win races. I will try to address a lot of the little things that need to be done in your basic setup that will help with this goal.
 First
thing’s first. If you buy cheap equipment, you will have cheap results. These
boats that we race are expensive and the last thing you should skimp on is your
radio equipment. You should always use a steering servo
with a minimum of 200oz.in of torque on the steering, preferably with metal
gears, for any of your gas powered boats. I don’t agree with the common thought
of just putting the cheapest servo you can find on the throttle as this is what
controls your engine and shuts it off in case off problems. I have very little
patience on this issue as I have seen too many out of control boats at races
that put everyone else’s boats in danger because of weak servos and cheap radio
equipment. This not only puts your boat in a bad situation but puts your
competitors in danger also. Spend the money one time and put quality radio
equipment in your boat or boats.
Next, always use a quality rechargeable 6 volt battery pack in your radio box. They are relatively cheap and will help the performance of your servos and receiver. Never use the cheapo alkaline receiver battery packs that come with many radios as I have seen too many nice boats run into the bank after the batteries have popped out of the cheap plastic holder. Please avoid this at all costs. Make sure to buy a good battery charger with “peak detection” so that you will not overcharge your batteries.
You should never charge your receiver pack at more than the recommended rate. There will be instructions with your battery and with your charger please follow them.
As a general rule of thumb:
- charge at 1C for fast charge
- trickle charge at 0.1C
Where
“C” equals the CAPACITY of your battery pack.
For
example:
Let’s
say you have a 1200mAh pack. That is 1.2 Amps so a 1C charge equals 1 x 1.2
Amps, so you set your charge rate at 1.2 Amps.
If
you want to apply a trickle charge (0.1C or sometimes referred to as 1/10C)
that would be 0.1 x 1.2 Amps, so 0.120 Amps, or 120 mA.
As mentioned, follow the suggestions of the battery manufacturer to be 100% certain.
Getting Started
When
you are first getting started set all of trim settings on your radio to the
neutral position. Turn your radio on and turn your boat on. If your servos are in the neutral position your
rudder should be centered and your throttle should be in the idle position. If
that is not the case which it rarely is, here are the things that you should
do.
Let’s start with setting your steering or
rudder. If your servo arm is not
centered then you should remove the screw that holds it on the servo remove it and place it as close to
center as you can get it and put the screw back in.
 If
your rudder is still not straight and your servo
is in the neutral centered position then you need to adjust the length of the
rod that connects the two to each other making the length between the two
longer or shorter until your rudder is as close to straight as you can make it.
Now some radios do not have Sub-Trim
and if that is the case then you can just use your trim to get it straight. If
your radio is equipped with a Sub-Trim
then you should use the steering Sub-Trim
to center your rudder. If you do it this way your rudder will be centered and
your normal trim will still be in the neutral position and will leave a lot of
room in either direction for you to adjust once the boat is in the water to get
it tracking straight.
Now let’s get to the throttle servo. With your controller and boat turned on and your trim in the neutral position make sure you’re your servo arm is centered. If your servo arm is not centered then you should remove the screw that holds it on the servo and place the arm as close to center as you can get it and put the screw back in.
The throttle Servo should just barely have the blade open on the carburetor. If it is not then you need to adjust the length of the rod that connects the two to each other making the length between the two longer or shorter until the throttle blade is set where you need it. This will get you close and we will discuss setting your idle after we set a few more things.
The
next thing we need to check is to make sure you that you have wide open
throttle when you squeeze the trigger. If you squeeze your trigger and you do
not have wide open throttle there are some things that we can do to fix the
problem. First thing to do is adjust
what holes you are using in each connection of your throttle. You will want to
use the hole that is furthest away from the screw on your servo and the one that is the closest to the pivot point on your carburetor
connection as these settings will give you the most movement with the limited
throw from your servo. If you have
too much throw then you can move your connector away from the pivot point on
the carburetor connection using the next hole out on the arm. The next thing to
check is to make sure your servo is
not pushing your throttle too far and putting a strain on your servo. This
is where your EPA
End-Point-Adjustment comes into play. Hold your throttle wide open and If it still
has too much throw decrease how much
throw your servo has with your
throttle EPA until it backs the
throttle down a little from wide open and then just add enough back to put it
at wide open. Now you need to push forward on your trigger and make sure that
when you do that it completely shuts your throttle blade, again if it has too
much throw then use your EPA to
remove just enough throw that it shuts your carburetor off. This will help your
servos have a long life and help to
stop them from draining your battery with no unnecessary strain.
Now for those of us that have Sub-Trim it is time to go to the Sub-Trim for the throttle. You can now start your engine and use your Sub-Trim to adjust your Idle and to make sure that it will stay running at a idle without you touching the controller. If you do it this way your idle will be set and your normal trim will still be in the neutral position and will leave a lot of room in either direction for you to adjust once the boat is in the water to get it to idle under a load.
 The
next tip that I have for you is one of the most overlooked things that I have
noticed in the last few years. Having too much steering throw in your rudder is
a problem that causes boats to hook in the corners, people to cut buoys and
simply have trouble getting there boats to make smooth turns. Most people just
make sure that there rudder is centered and never pay any attention to how much
throw is in there rudder. This is a situation where testing is the only way to
find out how much is too much. You will need to keep turning down the steering EPA on your radio until you can no
longer keep the boat close to the buoys while making a turn. Then just put
enough back that the boat will stay in lane one while wide open around the
corners. This will help cure most of the problems I mentioned earlier as well
as help keep the speed up through the corners as the rudder is only moving
enough to make the boat turn without scrubbing a ton of speed.
Most quality radios also have a feature called “Dual Rate”. This is another nice feature that can be used on the steering. What this does is allow you to actually make the total range of movement MORE or LESS by simply adjusting one switch as you run! The switch is usually a thumb switch located above the throttle leaver of the transmitter so it is easy to adjust while you are running your boat. It will not affect previously programmed steering ratios, but will in fact increase or reduce the range of motion by percentage, equally left and right.
To
try and make this easier to understand, here is an example. Let’s say you have
your boat all adjusted for heat racing following the steps outlined above. You
notice now that your boat doesn’t have enough steering when you are going
slower. You can crank up the Dual Rate a little bit and it will give you that
extra steering you require. The same applies if you feel you need to remove a
little bit of steering at high speeds, simple bring down the dual rate a little
bit. A very nice feature indeed!
There are so many things that these new controllers can do if you just read your manual and explore your options. Hopefully after reading all of this it will have helped you with some of the more basic functions.
I call these the four basic rules and these will help keep
you running properly.
- 1st- Read your manual and keep it handy as it will give you good information on how to program your controller.
- 2nd-set all of the controls on your boat before going to the pond or lake, you can make fine tuning adjustments once you are there. Make sure your steering is set in the right direction, make sure you have wide open throttle and more importantly make sure that it will shut the boat off if the trigger is pushed all the way forward.
- 3rd- Always check your batteries in your controller and your boat before you decide to make some laps.
- 4th- Make sure that nobody is on your channel before you turn your radio on. Most clubs will have a frequency board with a clip for each channel listed on them. Only turn your radio on after you have the clip that matches your channel.
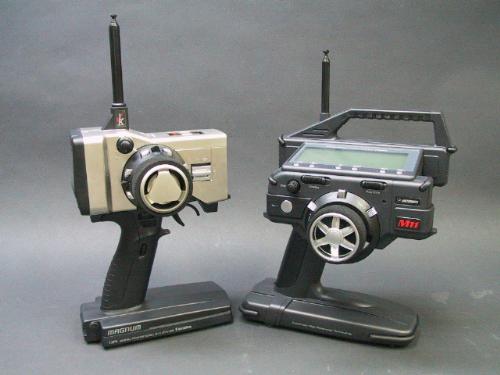
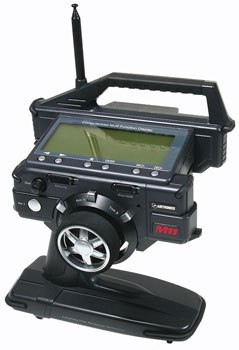
Here are the three most popular styles of Controllers


2.4GHz Spread Spectrum Technology
One of the most exciting new breakthroughs in hobby radio technology is the use of 2.4GHz spread spectrum technology -- which gives modelers of ALL skill levels the fastest, smoothest, most accurate and most reliable control possible. This style radio equipment in particular has advantages that greatly benefit new R/Cers. Simply by pushing a button, you link the receiver to a single transmitter -- each 2.4GHz transmitters has been assigned a unique ID code at the factory. Once that link is set, the receiver responds only to that one transmitter. In addition, most of the 2.4GHz systems never stay on a single frequency for more than two milliseconds. You never have to worry about signal conflicts, and never need to wait for an open frequency when you're eager to enjoy a day of racing with other boaters!
Glossary
Adjustable Travel Volume (ATV) - ATV allows you to preset the maximum travel of a servo to either side from its neutral position. Such settings help tailor control action to suit your driving style.
Endpoint Adjustment - End point adjustment is used to adjust the proper amount of servo movement on the model’s steering angle to steer left and right and/or adjust the carburetor throttle arm stroke.
Throttle End Point Adjustment - Throttle end point adjustment is used to adjust the carburetor stroke. This is where you will set your controller to make sure that you do not have too much throw on your servo in either direction.
Steering End Point Adjustment - A model’s turning radius can differ from left to right because of variations in Hull design and boat setup. In such cases, the left and right servo steering angle is adjustable.
Sub-Trim - Be sure that the servo is centered as close as possible before making this adjustment. This feature corrects trim neutral for steering and throttle, making it possible to use the main trim from the center position. When adjusting linkages, this sub-trim allows you to fix accurate center position.
Servo Reversing - This radio feature allows you to install the servos where they can give the best pushrod routing without concern about the direction of servo rotation. When your installation is complete, turn on your radio and check each channel. If a channel operates opposite of its intended direction, a simple flick of a switch corrects the problem.
Transmitter (Tx) - The hand-held radio controller. This is the unit that sends out the commands that you input.
Receiver – an electronic device that receives signals from a transmitter, and converts the signal into data to control servos and/or speed controllers
Servo - small mechanical motors used for controlling the speed and steering of an r/c car or truck
Rechargeable batteries - older type are called NiCad, newer ones NiMH, the latest craze is LiPo style batteries.

