Been having problems with a sticking carburetor because of the butterfly coming loose? Read this tech article by renowned engine builder Carlo Catalanotto and be rid of those butterfly blues!
I have seen so many instances of carbs sticking and seen
the problems from screws backing out and going through expensive engines once
removed and not re-installed correctly that I figured I would help you
guys that want to fix them yourself. This is a simple how to article on how to
fix your carb. First I would like to talk about what is actually happening that
causes this problem most of the time. We are twisting these little engines far
beyond what these carbs were ever designed for and the harmonics and vibrations
that they are subjected to is what rattles the screw that holds the butterfly
tight loose. When that screw comes loose it allows the butterfly which is not
perfectly round (It is actually egg shaped) to spin on the shaft. When it spins
on the throttle shaft that it is mounted to it does not seat in the venturi
correctly any longer. Since it will not seat correctly it will allow air
around its outside diameter of the butterfly and in turn will not allow you to
shut the engine off when you try to push your trigger forward. This problem is
only multiplied when guys use a hard linkage to the carb instead of a bell
crank system that is not attached directly. When you use a bell crank system
and you have a problem with the carb it lets you know when you can not shut the
engine off that there is a problem and you can fix it before anymore damage is
done. When you use a hard style linkage you force the carb closed and the
butterfly digs into the aluminum housing and eventually ruins the butterfly and
the carb. So for those of you who have used this method to cure you carb
problems I would re-think what you have done and hope that your blade has not
dug into the carb housing and sent aluminum through your engine.
Here is the procedure that we use here at
the shop at CC Racing Engines:
Find a clean dirt free spot
on your workbench or wherever you work on your stuff. Completely
disassemble the troublesome carb with the exception of the throttle shaft. This
is also a good time to inspect your gaskets, diaphragm and check your screen
for dirt particles. Next make sure that you have not lost the clip that
holds the shaft in place on the side of the carb, this must be in place before
you do anything else as this keeps your shaft In line.

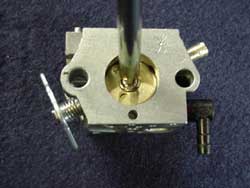
Remove the screw out of the shaft and remove the butterfly and inspect it for
burs. If it has burs or is bent in anyway it would be best to replace it. The
next thing we need to do is clean the shaft and the screw with carb
cleaner, let it dry or blow it off with compressed air. When we re-install the
butterfly first make sure that you have a little tension from the carb return
spring on the shaft assembly. Then when installing the butterfly you will need
to make sure that the small indented nipple on the middle of the butterfly
butts up against the flat part of the throttle shaft as this is what aligns the
butterfly on the shaft.

When re-installing the screw use a very small amount of red Loctite just
enough to coat the threads. ***Note you do not need a lot of Loctite
just enough to coat the threads.*** Make sure to line up the butterfly put
the screw back in and very gently and lightly snug it. Now make sure
the shaft turns easy and the butterfly closes all the way before you completely
tighten the screw.

After you tighten the screw, Make sure that there is no loctite oozing out that
could get in between the shaft and the carb housing as it will make the carb
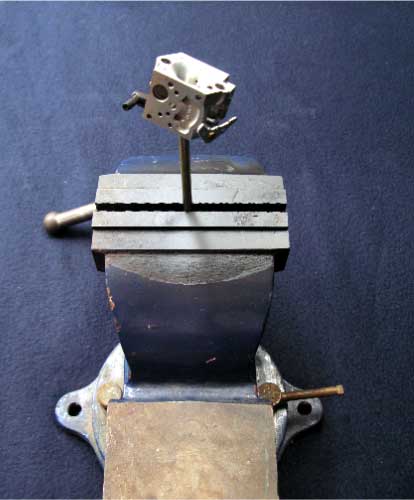
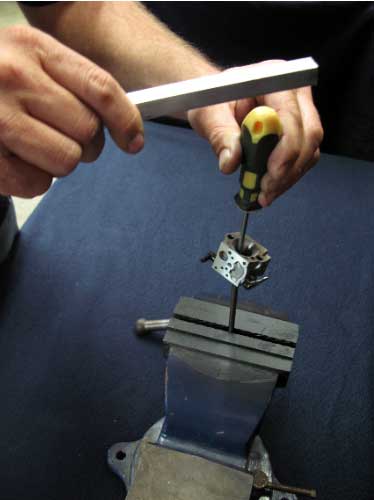
almost impossible to free up. Place the carb screw side down on top of a
Philips head screwdriver to support the throttle shaft (I use the Zenoah tool
that comes with the engine and mount it in a vice) and stake the end of the
screw that sticks thru the throttle shaft. You can do this with a center punch,
Philips head or a flathead screwdriver.


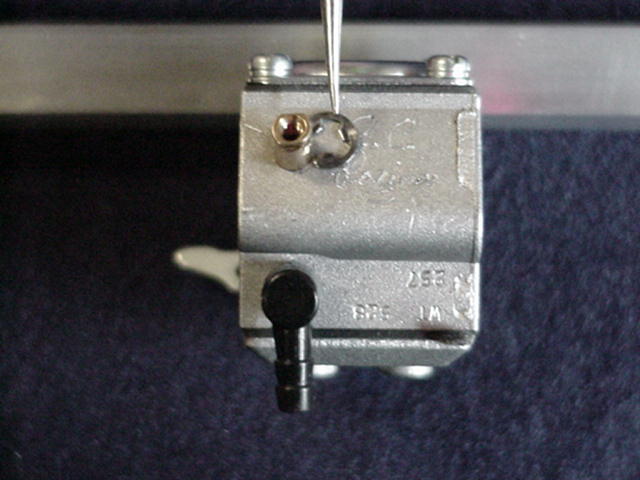
After you stake it,
it may be hard to turn the throttle shaft and this is because the
screw has pulled on the shaft a little and caused it to be slightly bent. That
is no problem as there is an easy fix. Place the carb face side down on
top of a rag or shop towel on a hard supported surface. Use a Phillip head
screw driver and place the end of the screwdriver back in the screw
as if you were going to tighten it (Again I use the Zenoah tool that comes
with the engine) and give it a gentle but firm tap to the end of the
screwdriver to straighten the shaft. Check the carb to see if it is easy to
turn as you may need to do this procedure again to get it to be completely
free. Put a couple of drops of oil on each side of the shaft and you are ready
to re-assemble the carb.

If you do this procedure correctly you will not have to
worry about your carb screw coming loose any longer as I have never had one
give me any trouble after this has been done.
Carlo
CC Racing Engines
1-504-305-5005
www.cc-racingengines.com


