Product Review Article ...by Len Williams
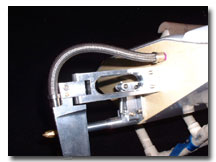
Dress up your boat with these nice braides water lines...
 Are you
looking for some pizzazz? Some more flash? Do you want that hi-tech
indestructible feature found on the best of the best? This may be your
answer!
Who doesn't love the look of Stainless Steel braided lines! It is great stuff brought to us from the aerospace industry. It looks nice but has a purpose behind it. It's tough, abrasion resistant and shiny! On our boats we don't really need these qualities but there can be some instances where the toughness and abrasion resistance could come in handy. I can recall during a particular race where two boats were going at it hard and coming out of a turn, the inside boat caught a wave and went airborne over the outside boat. At the moment nothing seemed out of the ordinary, until the outside boat slowed on the back straight. Fortunately the driver sensed a loss in power, and a good thing he did. It so happens the water line from the rudder had been sliced by the boat that had jumped over it, moments before. Is this a reason to install SS lines on your boat? Maybe. If you think so, then here is an option if you've been looking for a product like this.
A look at the material
I
received a section of this SS line with some ferrules to work with from Michael
Casey, he works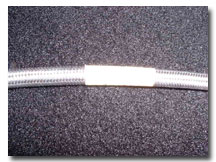 with this
material and adapted it to his boat; and what a fine job he did! Upon receiving
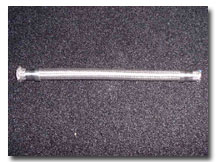
the line I noticed a couple things worth mentioning. This is the real thing with
a rubber liner that will work great for water lines and it is also fuel
resistant.
The line has a good I.D., slightly less that 3/16" but slightly larger than 5/32", the extra large silicone tubing we generally use is tight on a 5/32" drill bit. The SS ferrules have a tapered flare above the fitting you intend to use, and allows some flexibility without wear. The line is slightly stiffer than I expected but has good flexibility for the application I intended. One of your reservations may be a metal-to-metal interference causing a possible radio glitch, but it has the flexibility to operate on the rudder with the stiffness to prevent flopping around in rough conditions. Keeping the hose to a proper length should cause no problems.
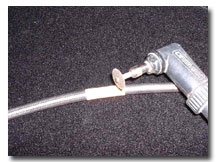 Cutting,
Fitting & Installation
Keep in mind you are working with some tough material that has its nuances. Cutting was simple using a Dremel with a fiber wheel cutoff disc. After taping with masking tape and marking the desired length, it cut quite easily. I ABSOLUTELY RECOMMEND YOU WEAR SAFETY GLASSES, as you are cutting fine SS wire. After cutting, I dressed up the ends on the belt sander, slid the ferrule over the line and voila!
Now,
together with ferrules, it's time to fit it on the project. I chose to use this
line going from the 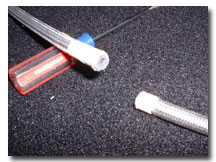 rudder to
the transom bulkhead fitting. I found you must drill out the rubber line
slightly, as the ferrule when slid down acts as a clamp, and really clamps well.
On the bulkhead fitting, I drilled the rubber to 3/16" and when installed, you
can carry the boat by the hose - it grips amazingly well! Press the hose firmly
onto the fittings, and try to keep the braid from twisting (this detracts from
the clean look you're after).
 Once fully
seated, carefully remove the tape without unraveling the braid; now slide the
ferrule down tight over the fitting.
I used a SPEEDMASTER single pickup rudder in this situation and ran into one slight modification you must perform. The recess for the hose barb does not have enough clearance for the ferrule to properly slide down over the hose. You need to make a cut approximately 1/8" wide to open the area for a good and proper installation in this area.
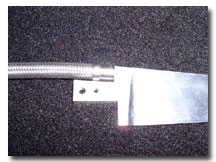 I use a
variable speed scroll saw with a course blade for cutting aluminum, and have
found it cuts quite well; the blades will last amazingly long cutting metal.
Obviously not the best in the world, but we use what we have! We're modelers! On
some other brands of rudders, this may or may not be required as it was on this
particular application.
Summary
To add it all up, this is some neat stuff!!!
One
suggestion I might make if you are interested in working 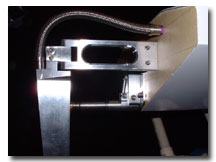 with this product; work with Michael. He can give you the needed
tips and hints! The most difficult part I encountered was getting the ferrules
over the line after it was cut. This required some thought, some sore fingers
and a slight bit of frustration, but in the end I am very satisfied with the
results. I will also seek some hints myself for getting those ferrules on! One
might be to put them on before cutting, I think that would have eased my pain,
but who reads instructions? Leather gloves will do you well also! :o)
Contact
If you are interested doing a similar project contact Michael R. Casey (This email address is being protected from spambots. You need JavaScript enabled to view it.), phone 909-204-1310 (located in Anaheim, CA). He's a great guy and extremely helpful.
Click here for a .pdf file of Michael Casey's instructions.
My sincerest gratitude goes out to Michael for all the help and assistance in making this article possible!

