
An alternative to the traditional thottle linkages...the PCM Direct Throttle...
*This article was originally written in 2003. Somehow it was accidentally removed from the site so I dug it up from the archives and re-published it due to some recent interest in such throttle assemblies. Unfortunately, the larger images were lost. M.L.
Are you like me when it comes to servo linkages? Like to keep it simple with as little free play as possible? Well the Direct Throttle linkage by Patrick Mulvany might be just what you're looking for!
After seeing a picture of one of Pat's Direct Throttle linkages, I decided to contact him and order a kit to give it a try. If you like to run open servos in your boats (servos outside of the radio box) this kit is perfectly suited to this application (although it can also be used with radio box setups). The kit was shipped promptly and arrived here in due form with complete installation instructions.
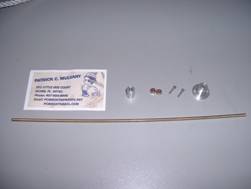
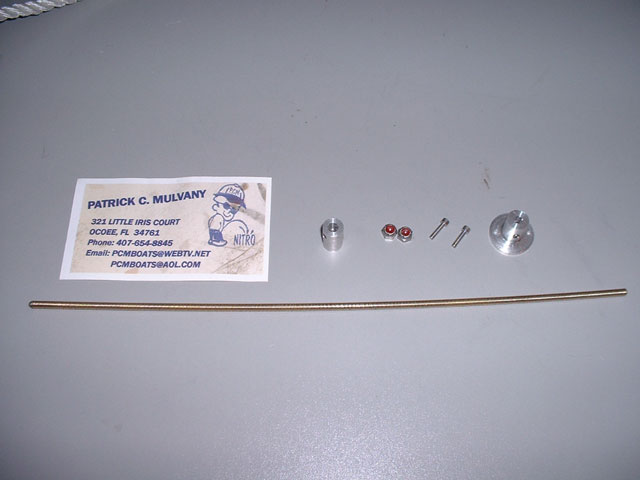 The parts consist or a carburetor adapter, a servo adapter, a 1/8" flex cable, and stainless steel hardware (bolts, nuts and set screws). The adapters are machined aluminum. Installation is quite simple. Fit the carb adapter to the carburetor's butterfly shaft and secure in place using the supplied set-screws. When ordering the kit, make sure to let Pat know which carburetor you are using and preferable specify the butterfly shaft's size so that your kit can be machined to proper size. The fit on mine was perfect! The servo adapter is made to fit on a round servo horn, so you will need to have one for your specific servo. From the looks of it, an "X" servo horn could also be used, but the round horn makes the setup stronger.
 Simply lay the adapter over the round servo horn to find matching holes. Drill out the holes in the horn to accept the 2-56 screws. At this point, I had the horn off the servo. I left the horn's attachment screw in the horn and secured the servo adapter to the horn using the (2) 2-56 screws and nuts supplied. Next install the horn on the servo and see if the nuts and bolt ends clear the servo body when servo is moved. If not, simply file off the ends until they clear. I used a standard Airtronics servo and no filing was required. The servo adapter is drilled straight through, thus allowing you to tighten the servo horn screw to hold it in place on the servo (if you left it in there before putting on the servo adapter, otherwise you can't get the screw in). You could also just leave the servo horn on the servo and fix the servo adapter to it, either way works fine.
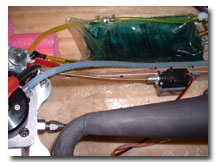
 Now is the time to select the place to install your servo, and cut the flex cable to the proper length. The servo will have to be mounted with servo horn and carburetor butterfly control rod facing each other, and lined up as closely as possible. The beauty of this kit is that even if they don't line up perfectly, the flex cable will make up for it (within limits of course).
There are many ways of cutting the flex cable. A rotary tool with cutting disc seems to work fine. Tin both ends of the cable with solder once they are cut to the proper length. Insert the cable into both adapters (carb and servo) and secure in place with the set-screws. A thread sealant should be used to prevent the set-screws from loosening during operation. One feature I really liked about this kit is that all adapters use double set-screws. The hold is very solid.
That's it! Installation is complete. All that's left is to set your servos direction correctly, and adjust end points to allow for the proper opening and closing of the carburetor.
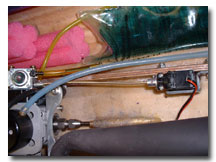
When setting up throttle servo at more than 6" away from the carburetor, Pat suggests using some 5/32" K&S brass tubing to support the flex cable. He also notes that for radio box installations the brass tubing can be used to exit the flex from the box. The tube is sealed to the box with epoxy, and a piece of silicone tubing is used as an added seal between the flex and brass tube.
This is a very innovative way of addressing throttle linkage, and the response is, as the name states, "direct". Little to no freeplay in the linkage. It will fit virtually any boat setup and is particularly well suited for exposed throttle installations, since mounting the servo to the boat's stringer yields an almost perfect alignment with the servo.
As with all reviews, we must try and address the ups and downs of things. The only real downside I can see for the PCM throttle linkage is that you can not throttle the carburetor manually since it's positively locked to the servo...so to start and test an engine, you need your radio transmitter. This is the same for all positive movement throttle assemblies however. On the up side, this type of linkage is much less prone to runaway boats due to carburetor stickage...in most cases it will allow to shut down the boat even if the carburetor butterfly sticks a bit. So in short, a little bit of convenience is sacrificed for extra safety. Overall, a very good throttle linkage alternative depending on your installation and priorities.
Additional information:
Price: Contact for up-to-date pricing
Shipping method: US Postal Service, domestic and international
Contact Information:
Patrick C. Mulvany
Email: This email address is being protected from spambots. You need JavaScript enabled to view it.
Happy Boating!