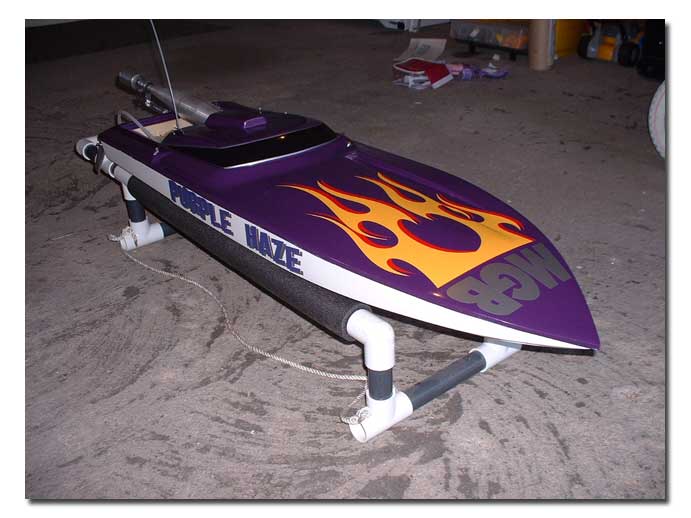
Here is a picture of the hull and hardware as received from Herzog Racing. This package is a Category 3 Hurricane kit.
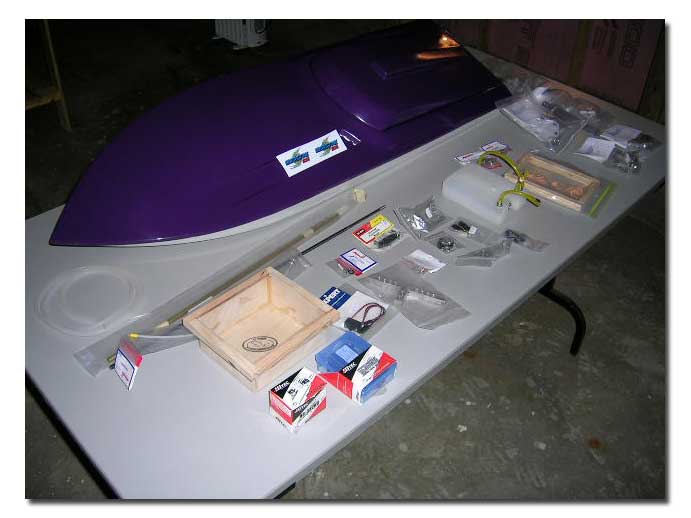 It includes all the hardware needed to complete the assembly, including servos, radio box, gas tank and tank tray, linkages, etc. The kit arrived well packaged inside a sturdy cardboard box. There were even two purple pool noodles used in the packaging. I don’t know if this was intentional or not, but they came in handy for the floatation in the boat! The hardware package contains all very good quality components. The drive is from Speedmaster, as are the trim tabs, tuned pipe bracket and rudder. The gas tank is a Sullivan « V » bottom tank modified by Chris and includes a check valve on the vent allowing air into the tank while at the same time keeping gas inside and water out. The radio box is an all wood box with plexi cover, also made by Herzog Racing.
Assembly:
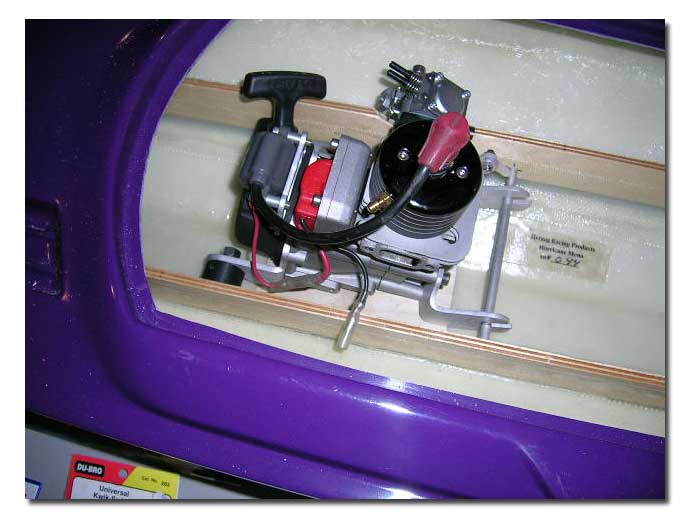
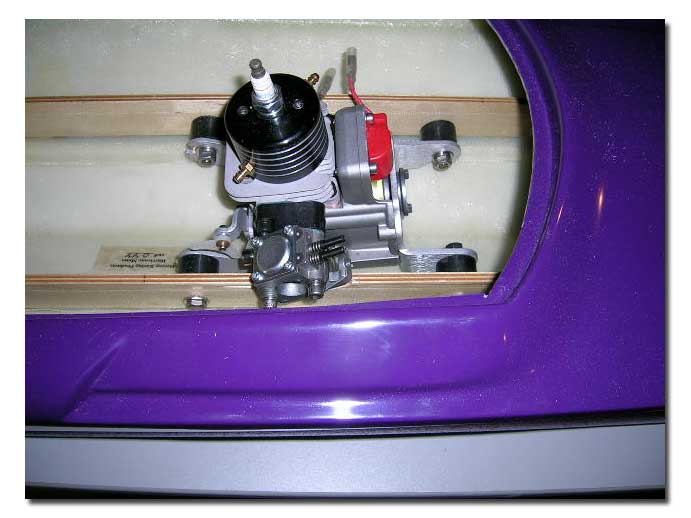
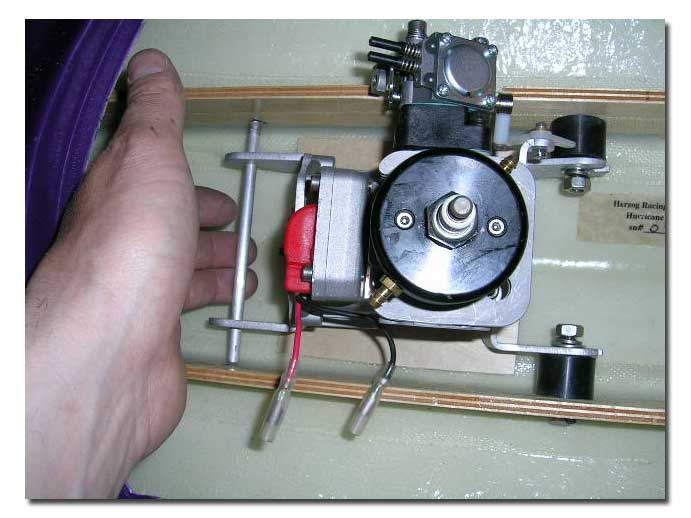
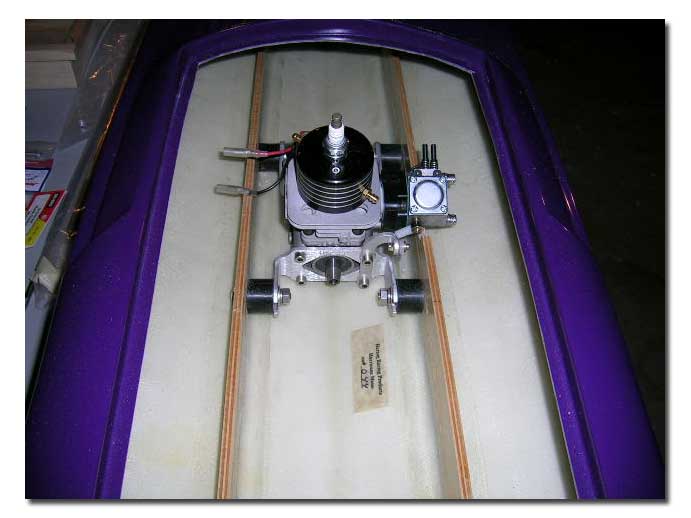
The first thing I did was to take a dummy engine and install the supplied motor mounts. These mounts include a coil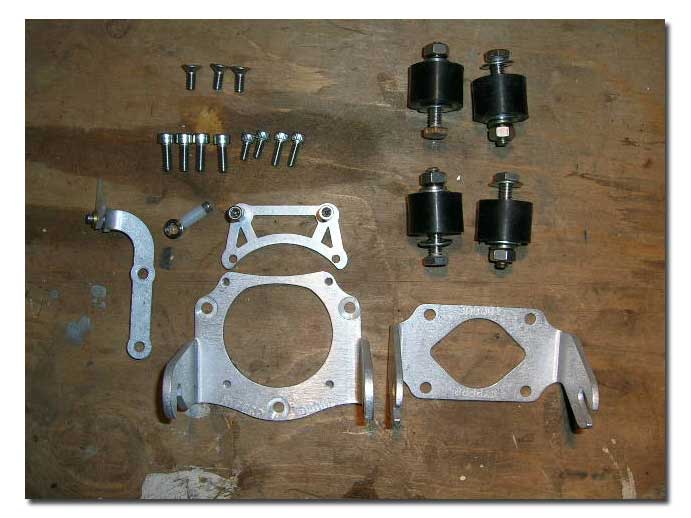 relocating bracket that positions the coil over the starter. They are pretty straight forward to install. On a new engine, remove pull starter and replace the original aluminum mounting plate with the new front mount. Reinstall the pull start and the coil relocating bracket at the same time. Move the gray coil from its side location under the carb and mount it to the new bracket over the pull start. Install the back mount on the engine, as well as the throttle bellcrank arm. That’s it! All you have to do now is drill the stringers in your hull to accept the rubber isolators and you’re done. This was the next step in the assembly. To try and make the installation of the rubber isolators easier, I tried a new method that worked out quite well actually. I took a piece of ¼ inch aluminum rod and cut it to 5 inches in length to fit perfectly between the stringers. I placed the engine in the hull at the location indicated in the instructions with a piece of 1/16 inch plywood underneath it for clearance. With the ¼ inch rod in the mount slots all I had to do was mark the stringers where the rod touched them. I used a 90 degree adapter on a rotary tool to drill the stringers on the marks. I also cut out some of the starboard stringer to make room for the carburetor as I got the motor as low as possible inside the hull.


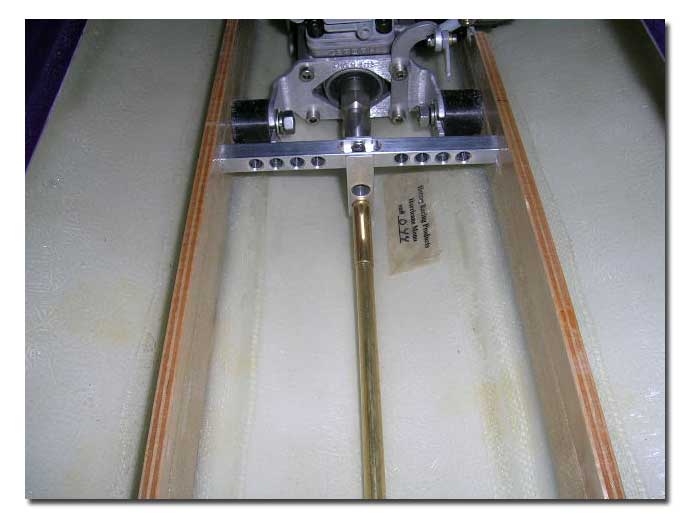
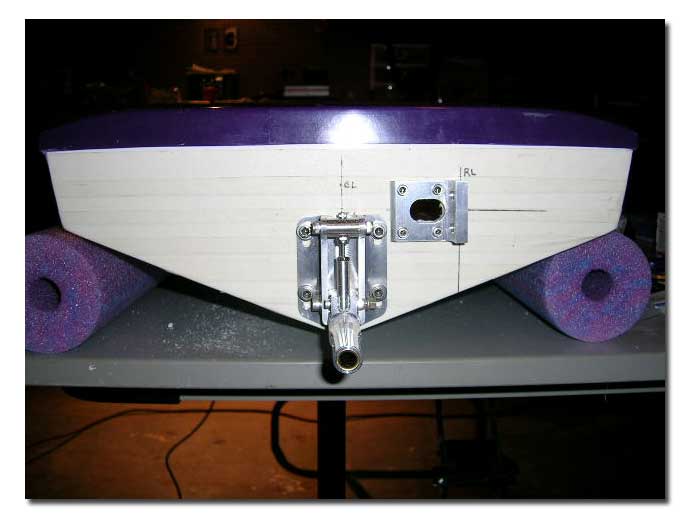
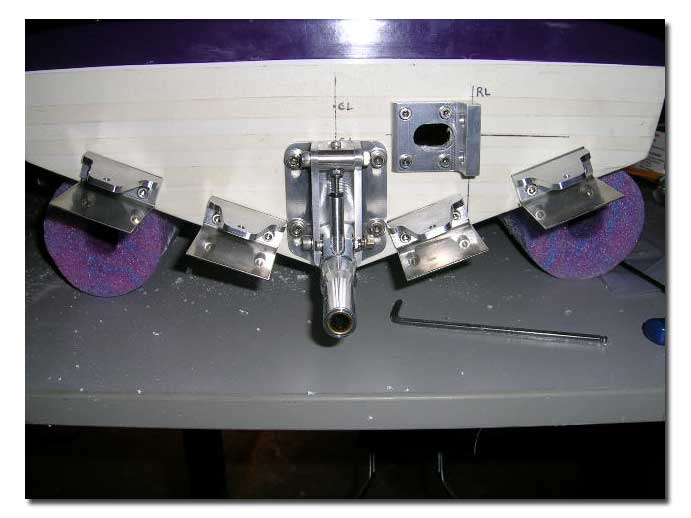
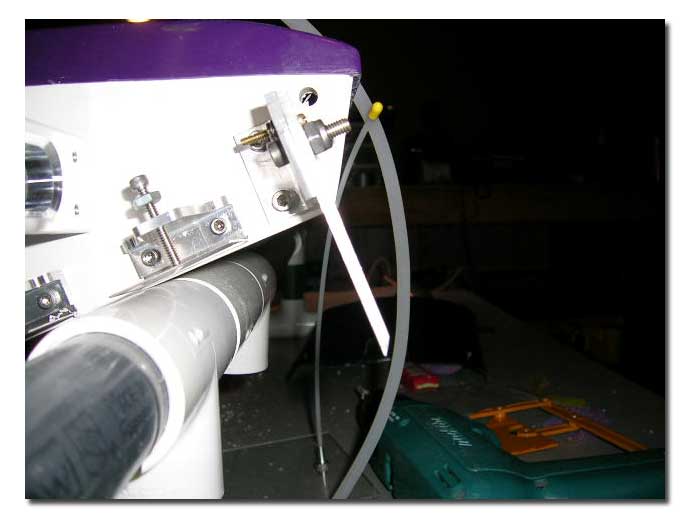
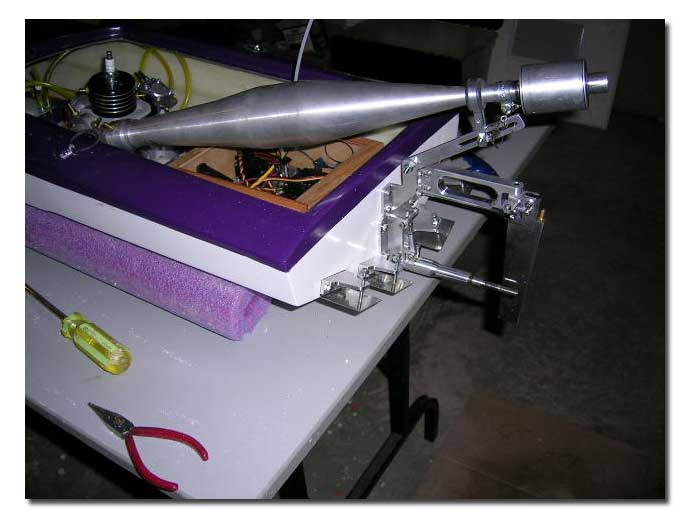
 Next came the transom hardware. Following the supplied instructions, I started with the Speedmaster drive. The drive needs to be installed dead on center of the transom, with the bottom of its bracket at 1/16 to 1/8 inch up from the bottom. Before starting on the transom I always mask it up and draw all my mounting lines, including the hull center line, and rudder center line. Get the lines correct and installing your hardware will be much easier and precise. Also, the masking tape helps prevent gel coat chipping when you drill. Use a high speed drill and light pressure when drilling holes. Once the drive bracket was installed, I drilled the transom for the stuffing tube. I do this with the drive bracket still in place, at its lowest setting. Then I move it to its highest setting and using a rotary tool and small milling bit, I slot the transom to allow full adjustment of the drive once the stuffing tube is in place. The stuffing tube on this setup goes into the drive and is supported at the engine end with a Butch T-bar. The T-bar is easy to install, lightweight and does the job well. To find the correct location for the rudder, measure 2 ½ inches right (starboard) of the center line used to position the drive. Draw another vertical line at this point. This is the rudder centerline. Next measure 1 ¾ inches up from where the rudder line intersects the bottom of the hull. Draw a horizontal line at this point. Now set the Speedmaster rudder bracket up against the rudder line and center its pushrod hole on the horizontal line you drew. This will put the rudder right where you want it to be and at the perfect depth. This is, of course, assuming you are using the supplied Speedmaster rudder and 3 ¾ inch standoff bracket. The recommended trim tabs for the Hurricane are the Speedmaster 1.5 x1.5 inches, four of them. The tabs should be mounted about 1/32 inch up from the bottom of the hull. Mount the two inner tabs as close as possible to the drive, while still being able to adjust them and the drive. The two outer tabs go one (1) inch out from the inner tabs. Chris recommends setting the inner tabs parallel to the hull bottom, and the outer tabs with about 1 degree negative angle. To do this, run a straight edge on the bottom of the hull extending under the tabs. Set the two outer tabs so that their end just touches the ruler. This will get you very close. Chris also recommends about 1 degree negative angle on the drive. I ran a straight edge up against the keel and to the tip of the drive. I dropped the back end of the drive about 1/16 max. As it turns out this setting worked really well for me. If you do need to adjust the ride attitude of the boat, it should be done with the drive, not with he inner trim tabs. I mounted the turn fin right at the chine on the starboard side and at 90 degrees with the boat’s riding surface, as specified in the instructions. I did not give the fin any forward or rear tilt. I mounted it with the top of the fin parallel to the top of the bracket. To support the tuned pipe I used the supplied Speedmaster tuned pipe bracket. I mounted this later in the build, after the engine and pipe were in place. I mounted the bracket directly over the drive bracket, but that can vary depending on the tuned pipe used. I used an aluminum 2 inch band pipe on a 100 degree header topped off with a T-mod muffler.
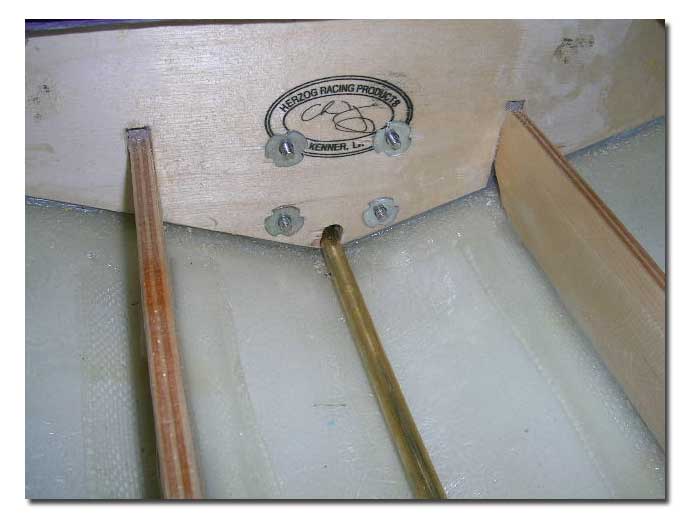
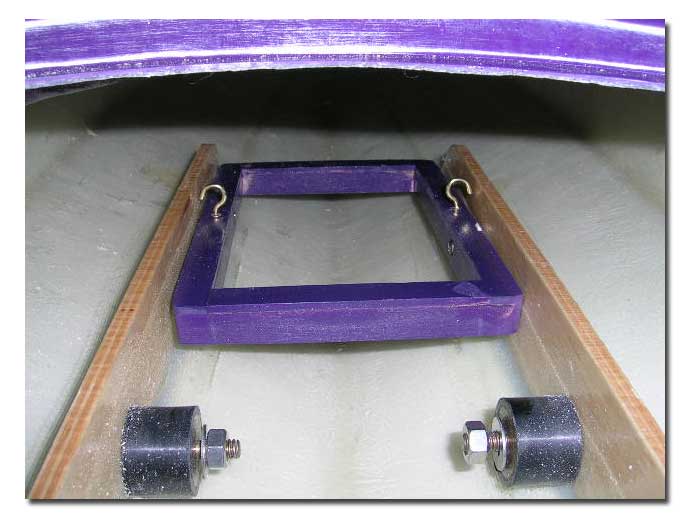
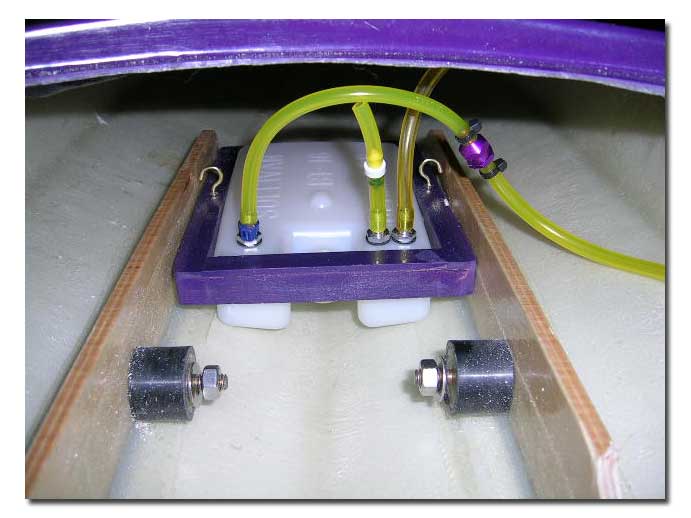
For the fuel cell setup, I used the tank Chris sent me along with the tank tray. This is a neat setup and easy to install. I contacted Chris to know where to install the tank as I didn’t find that information in the setup sheet. He told me to install the tray so its forward end is flush with the end of the stringer, so I did just that. Worth mentioning is the fact that the tray is predrilled and countersunk for the two stainless steel wood screws supplied. I thought this was a nice touch. It also comes with two screw- in hooks to strap in the tank. The tray is also predrilled for these. Once the tray is in place, drop in the tank and strap a rubber band across the hooks to hold the tank in.
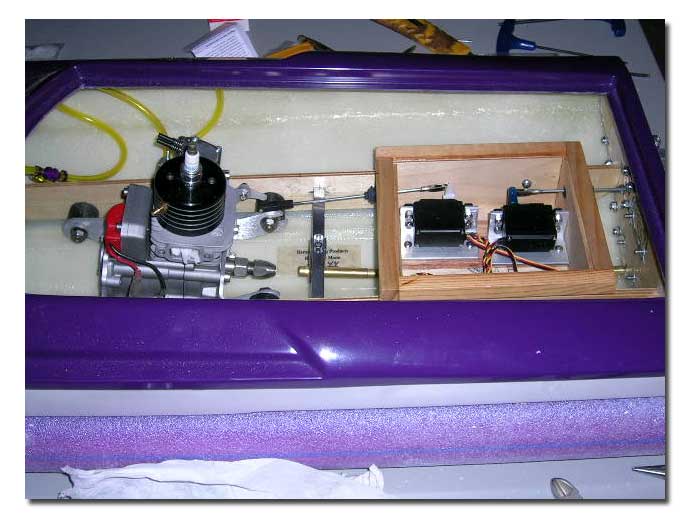
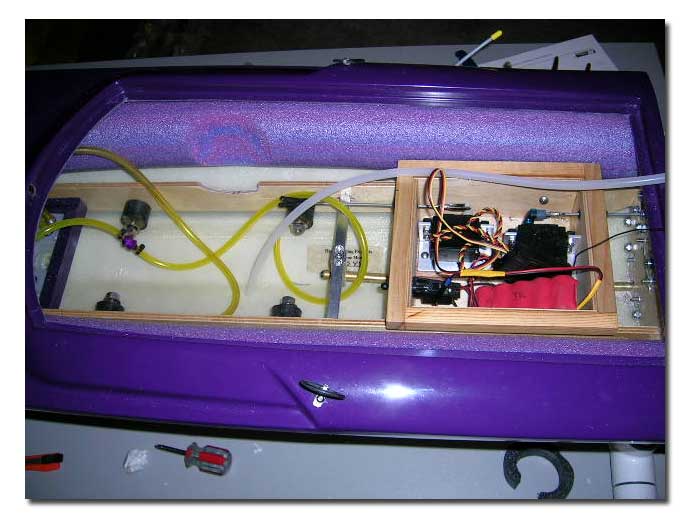
The radio box setup is pretty straight forward using the Herzog Racing radio box. This is an all wood box, with lexan cover. The box came with the kit, ready to be sealed. Epoxy works well for sealing wood. Once the box was sealed, I epoxied the piece of ¼ hardwood in the bottom to screw in the servo mounts. You can see some pics here of the layout I used. This will vary depending on preference, but in short what I did was I positioned the two servos so that they would have a straight shot at the throttle bellcrank and rudder. The box also has ample room for your receiver, a good size battery pack and even a failsafe if desired. All the parts required for the radio box assembly were supplied in the kit, including the custom aluminum servo brackets, switch and switch mount, antennae and mount a standard servo for throttle and a high torque digital servo for steering. The antennae came with a bracket to mount it to the hull, but as with most of my boats, I opted to mount it in the cover of the radio box. I mounted the box to the stringers using some stainless steel wood screws and some marine goop to seal them up. This might not be the preferred method for most, but it’s quick and easy, and I am not one to pull radio boxes from hulls very often, so this works for me. Besides, the way this is setup with the servo mounts screwed to the bottom of the box, you can remove all electronics from the box in only a few minutes, while leaving the box in the hull.

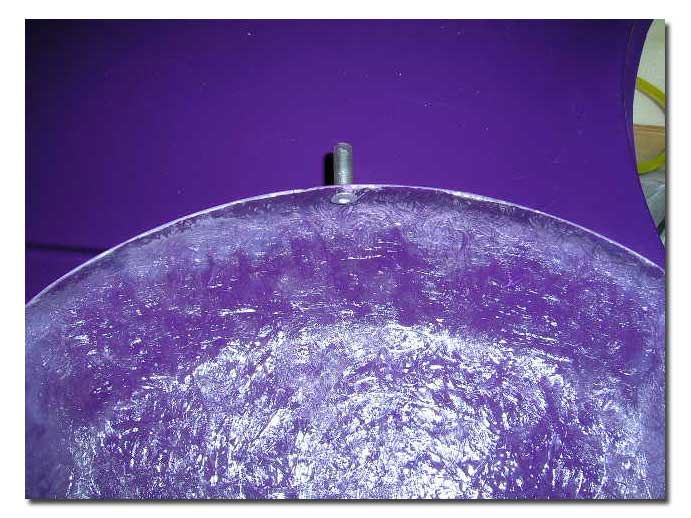
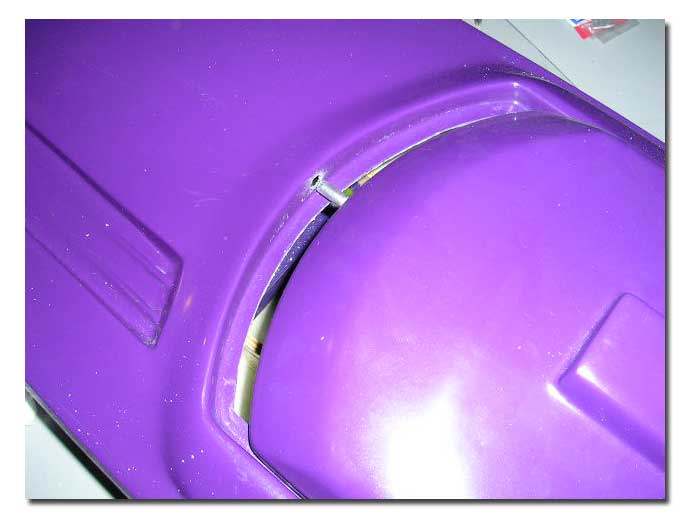
With all this done all that was left to do was mount the cowl and cutout the air intake vents. The cowl hardware supplied was pretty straight forward and worked quite well. For the front of the cowl, simply drill a hole and insert the supplied pin from inside. On the other side, slip the piece of tubing over the protruding end and voila! Drill a matching hole in the deck of the hull to accept the front pin just installed on the cowl. For the back of the cowl, all the hardware was supplied for a simple yet effective Oring retention system. I cut my cowl really short on my Hurricane since I often test different tuned pipes and doing it this way makes it much simpler for swapping. The Oring system was perfect for me in this case! If you keep the cowl full length, this system with work equally as good, or you can also opt for rare earth magnets for a concealed retention system.
Center of gravity of the finished boat: with the boat complete and fuel in the tank, CG should end up at 13 ½ to 13 ¾ inches from the outside of the transom.
Finishing up I painted the windshield and added some cool decals that were supplied by Jim Geiger (Aka Superrod1969 on JRCBD).
Comments:
Commenting on a product is always somewhat difficult for me, as sometimes there are things that one might dislike and in all efforts to keep things as honest as possible the good and the bad points must be noted.
So in resume, here are my thoughts on the Hurricane Mono:
- great looking boat
- hull construction is very good hull is solid
-On a side note though if I ordered another Hurricane I would ask for a heavier lay-up for the cowl because of the way I cut it. If the cowl is left full length, this shouldn’t be an issue though.
-The top deck lay-up is also lighter than most monos I have seen. I might consider adding a brace under the deck on mine, since I do lot of big water jumping with it… just to be on the safe side.
*** while doing the write-up on the Hurricane, I spoke with Chris and he informed me that the points noted above about the layup of the deck and cowl had already been addressed.
- The gelcoat finish is nice and there is no need to paint the hull if you find a color you like in the vast selection of colors available. This is something I look for in hulls because I do not like to paint them.
- Handling is superb…cornering performance deserving special mention.
- Stage 3 version as reviewed is a thorough package, making assembly a real pleasure!
- The supplied instruction sheet makes setup very easy.
- Customer service is great, Chris has always replied to my inquiries in a timely manner.
On the water: Click here for a VIDEO of the Hurricane!
Motor used: modified Zenoah G260PUM, Midwest 100 tuned pipe, T-mod 2 inch stinger muffler.
This was the fun part! One thing I have come to expect from manufacturers is a good product and even better setup instructions. If such is the case, one should be able to follow instructions precisely and have a very successful first outing. The first manufacturer I had dealt with who supplied such a package was Insane Boats, and I can now say the same about Herzog Racing with this Hurricane package. First time out, fired up the motor and launched the Hurricane. Did a few slow laps to make sure all was fine and then I opened her up and she came to life! I brought it back in after a few minutes, checked all nuts and bolts for tightness (good thing cause I had forgotten to lock the adjustment screws on two trim tabs). I then refueled and went at it again. I also raced it side be side with a PI Generation 2 Hydro just for fun, which it was! I have since taken the Hurricane to the lake several times, and ran it in various conditions. Chris recommends a Propshop 6717/3 for heat racing. I did not have one on hand so I tried a few props and found an ABC G20 to work fairly well for me. Speeds were in the upper- mid 50’s but what was most impressive in my opinion was the way the boat took on even very hard turns without much loss in speed and stability. I would however recommend sticking with the recommended props for racing, as the wrong propeller will cause handling issues, I experienced that while testing different props. I can honestly say this hull handles superbly. In all fairness, I must note that I have not raced it in a club race yet though, as my schedule this year has not allowed, so I had to limit myself to fun racing and play boating for the time being.
This is the first official season for the Hurricane, yet it is quickly making its presence known on the racing circuits around the country.
Final thoughts
The Herzog Racing Hurricane is a very nice hull, the Stage 3 package as reviewed is great and I would highly recommend this package to anyone, racers and sport boaters alike. The boat was designed for racing, but from my experience it will also make a great play boat. This is something new boaters should consider if they just want a play boat but might want to step up to racing in the future. All boaters eventually feel the need to go faster, and this boat will be able to keep up!!
Happy boating!
Contact Information:
Herzog Racing ProductsWebsite Email: This email address is being protected from spambots. You need JavaScript enabled to view it.
 If you haven’t already heard, there is a new kid on the block and he’s sure to brew up quite a storm in the Mono segment of boat racing! Ever since Chris Herzog, owner of Herzog Racing Products first announced the upcoming new hull, I have been following closely to see how this boat would turn out. Actually Chris and his father Fred have been into R/C boat racing since 1979. Fred was also very much involved in the design of the Hurricane, and now makes all the radio boxes and tank trays sold by Herzog Racing Products. Chris’s mother, Regina is also part of the company, handling all the billing and receiving.

 It includes all the hardware needed to complete the assembly, including servos, radio box, gas tank and tank tray, linkages, etc. The kit arrived well packaged inside a sturdy cardboard box. There were even two purple pool noodles used in the packaging. I don’t know if this was intentional or not, but they came in handy for the floatation in the boat! The hardware package contains all very good quality components. The drive is from Speedmaster, as are the trim tabs, tuned pipe bracket and rudder. The gas tank is a Sullivan « V » bottom tank modified by Chris and includes a check valve on the vent allowing air into the tank while at the same time keeping gas inside and water out. The radio box is an all wood box with plexi cover, also made by Herzog Racing.
 relocating bracket that positions the coil over the starter. They are pretty straight forward to install. On a new engine, remove pull starter and replace the original aluminum mounting plate with the new front mount. Reinstall the pull start and the coil relocating bracket at the same time. Move the gray coil from its side location under the carb and mount it to the new bracket over the pull start. Install the back mount on the engine, as well as the throttle bellcrank arm. That’s it! All you have to do now is drill the stringers in your hull to accept the rubber isolators and you’re done. This was the next step in the assembly. To try and make the installation of the rubber isolators easier, I tried a new method that worked out quite well actually. I took a piece of ¼ inch aluminum rod and cut it to 5 inches in length to fit perfectly between the stringers. I placed the engine in the hull at the location indicated in the instructions with a piece of 1/16 inch plywood underneath it for clearance. With the ¼ inch rod in the mount slots all I had to do was mark the stringers where the rod touched them. I used a 90 degree adapter on a rotary tool to drill the stringers on the marks. I also cut out some of the starboard stringer to make room for the carburetor as I got the motor as low as possible inside the hull.


 Next came the transom hardware. Following the supplied instructions, I started with the Speedmaster drive. The drive needs to be installed dead on center of the transom, with the bottom of its bracket at 1/16 to 1/8 inch up from the bottom. Before starting on the transom I always mask it up and draw all my mounting lines, including the hull center line, and rudder center line. Get the lines correct and installing your hardware will be much easier and precise. Also, the masking tape helps prevent gel coat chipping when you drill. Use a high speed drill and light pressure when drilling holes. Once the drive bracket was installed, I drilled the transom for the stuffing tube. I do this with the drive bracket still in place, at its lowest setting. Then I move it to its highest setting and using a rotary tool and small milling bit, I slot the transom to allow full adjustment of the drive once the stuffing tube is in place. The stuffing tube on this setup goes into the drive and is supported at the engine end with a Butch T-bar. The T-bar is easy to install, lightweight and does the job well. To find the correct location for the rudder, measure 2 ½ inches right (starboard) of the center line used to position the drive. Draw another vertical line at this point. This is the rudder centerline. Next measure 1 ¾ inches up from where the rudder line intersects the bottom of the hull. Draw a horizontal line at this point. Now set the Speedmaster rudder bracket up against the rudder line and center its pushrod hole on the horizontal line you drew. This will put the rudder right where you want it to be and at the perfect depth. This is, of course, assuming you are using the supplied Speedmaster rudder and 3 ¾ inch standoff bracket. The recommended trim tabs for the Hurricane are the Speedmaster 1.5 x1.5 inches, four of them. The tabs should be mounted about 1/32 inch up from the bottom of the hull. Mount the two inner tabs as close as possible to the drive, while still being able to adjust them and the drive. The two outer tabs go one (1) inch out from the inner tabs. Chris recommends setting the inner tabs parallel to the hull bottom, and the outer tabs with about 1 degree negative angle. To do this, run a straight edge on the bottom of the hull extending under the tabs. Set the two outer tabs so that their end just touches the ruler. This will get you very close. Chris also recommends about 1 degree negative angle on the drive. I ran a straight edge up against the keel and to the tip of the drive. I dropped the back end of the drive about 1/16 max. As it turns out this setting worked really well for me. If you do need to adjust the ride attitude of the boat, it should be done with the drive, not with he inner trim tabs. I mounted the turn fin right at the chine on the starboard side and at 90 degrees with the boat’s riding surface, as specified in the instructions. I did not give the fin any forward or rear tilt. I mounted it with the top of the fin parallel to the top of the bracket. To support the tuned pipe I used the supplied Speedmaster tuned pipe bracket. I mounted this later in the build, after the engine and pipe were in place. I mounted the bracket directly over the drive bracket, but that can vary depending on the tuned pipe used. I used an aluminum 2 inch band pipe on a 100 degree header topped off with a T-mod muffler.


