How-to Article ...by Brad Mahs
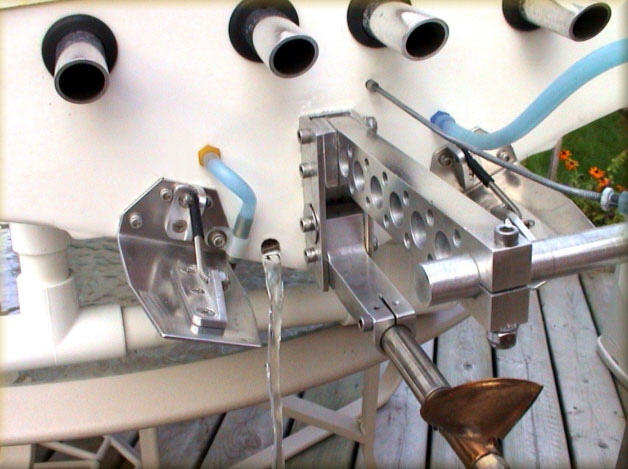
Learn how to install a drain plug on your boat...
 It really
doesn't matter how I run my boat, easy or wild, if it's windy or calm; I always
end up with water in the bilge. Sometimes it's a capful; but when I'm jumping
waves, it can be a lot more! Completely draining a big apache hull is nearly
impossible. When turned upside down, water still sits in the gunwales, and just
sloshes back into the bilge when I put the boat on the stand. Tired of swabbing
the boat out at the end of the day, I decided to install a simple drain plug in
the transom. It's a simple project any do-it-yourselfer can perform in about 15
minutes.
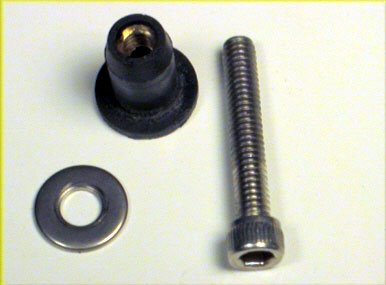 Components:
Three parts needed are the plug itself, an 8-32 x 3/4" long Stainless Steel socket head cap screw, and a #8 S.S. flat washer. That's it.
The drain plug is a neoprene flanged expansion nut, available at most hardware stores or home centers. The one I use is an 8-32 x 5/16" long, and has a brass threaded insert in the end. For the screw, you could also use a brass, and either a pan head or round head as well. If you're putting them in a catamaran (one in each sponson), you'll need two of each of these parts.
Tools: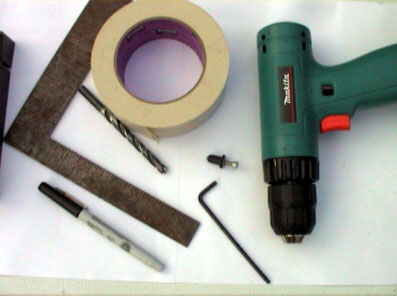
- A drill
- 11/32" drill bit
- Ruler
- Masking tape
- Marking pen/pencil
- 1/8" Allen wrench
Installation:
Start by determining where to locate the drain hole. The ideal location is low on the transom, close to the bottom inside of the hull. The right side on a vee hull is typically best, since most of the time is spent turning right. More on this later. On my hull, I wasn't able to get the drill into the right side without removing the rudder assembly - so being lazy, I opted to install the plug on the left side. Place a piece of masking tape on the area to be drilled, aligned with the bottom of the hull.
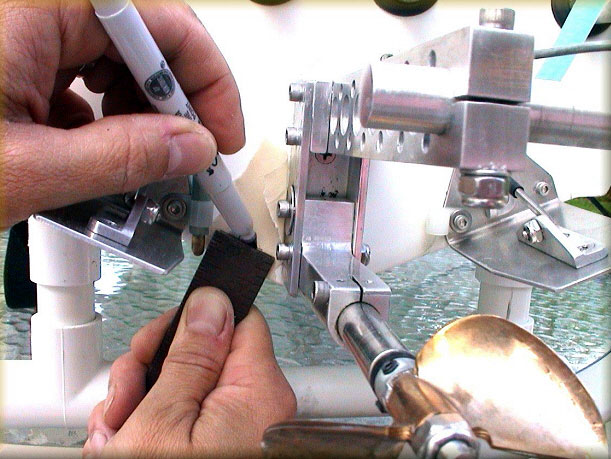 Next,
measure up from the bottom of the hull 1/8". This will be the bottom edge of the
hole. This should put the bottom edge of the hole flush with the inside of the
hull bottom.
Now measure up ½ the drill bit diameter from the first mark and make another mark on the tape. Make a cross-mark perpendicular to the hull bottom, as close to the centerline of the transom as possible. I was limited by drill clearance, so I didn't get as low in the hull as I'd like.
Now the fun part; drill the hole! Typically, I'd use a countersink bit to drill the hole through the gel-coat until I have the proper diameter, then finish the hole with the proper sized drill bit. This eliminates chipping of the gel-coat. Again, limited by clearance, I just drilled the hole with a normal drill bit.
Here's a
tip: plan on this installation when you're setting up your hull, prior to
installing any transom hardware. That way, you can position the hole in the optimum location and not worry about any clearance
problems.
If you're inclined, you may want to coat the inside of the hole with resin to eliminate any chance of water rotting or delaminating the transom.
To install the plug, just put the washer on the screw, and insert the screw into the large end of the plug, until the threads engage. Don't tighten yet!
Insert the plug into the hole until the flange is seated on the transom, and then lightly tighten the screw with an Allen wrench. No need to crank it down; you might crack the gel coat or rip the rubber plug. That's it!
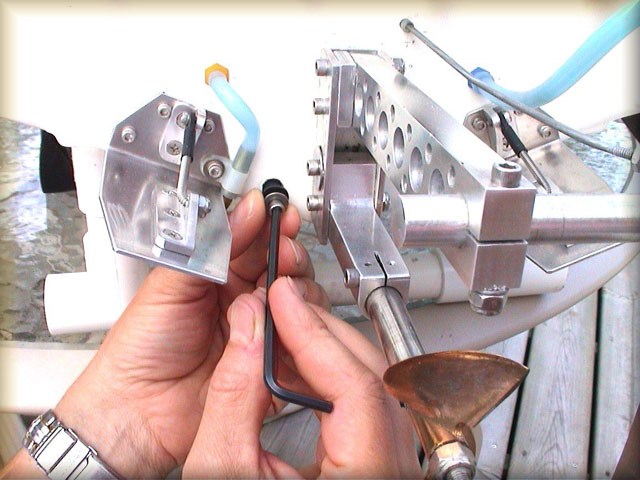
Now, when I bring the boat in for refueling, I just place it on the stand, pull the plug and tilt the hull until all the water has drained out. For racing, it would be a simple matter to pull the plug and run with the open hole. Most of the water splashed into the hull would drain out while underway. If the boat stalls, the open drain hole would allow water to fill the hull, and (with proper flotation), hopefully float deck-high to minimize the amount of boat sticking out of the water, acting like a target!
For a few bucks and a few minutes time, this is definitely a worthwhile project!

