How-to Article ...William James
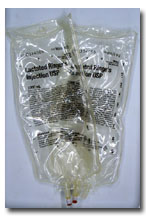
Learn how to properly setup a Gas Bag system in your boat!
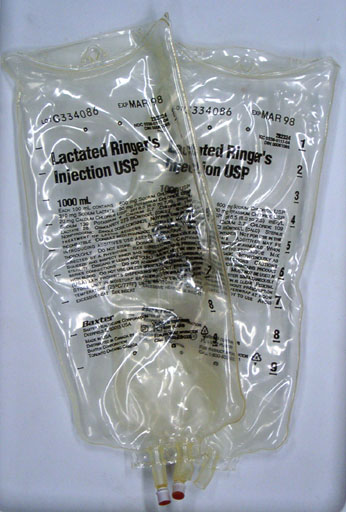 Collapsible
bags make excellent gas tanks. They may carry different names – IV bag, saline
bag, bladders, etc. We'll use the term "bag", so no one will take offense to
differing terminology. This How-To is intended to help you make the switch from
the old style hard tanks and even the newer "made for gas" tanks and cells, to
an excellent alternative proven by racers and recreational boaters
alike.
The most important benefit of a bag fuel cell, is that it creates a closed fuel system that has many advantages and fewer disadvantages than standard vented gas tanks.
Advantages:
- No vent is needed for Bag gas tanks, which eliminates the chance of water being drawn into your gas tank through the vent.
- The bags are less smelly and there is no way for fumes to escape since no vent or external connections are present to leak gas or fumes.
- Bags keep the gas oil mix from foaming, which can be a major performance limiter with standard tanks.
- Bags are lighter in weight than the majority of standard nitro fuel tanks adapted to gas tanks.
- Center of Gravity (CG) adjustments can be made easily because the bag doesn't have to be permanently mounted like standard tanks, and can be moved based on wind or water conditions.
- Bags can be easily removed from the boat after running and stored separately, almost eliminating the gas smell from your boats completely. I store my boat in my office where I can look at it throughout the day now that it does not stink!
- It is very cheap and easy to retrofit your boats with Bags. New installations are even easier.
- Racers like to keep the changing weight (gas tank) as near to the fore-aft CG as possible. This way the boat handles consistently regardless of the gas level in the tank . You don't want your boats bow to get lighter as the water gets rougher in a race.
- IV Gas bags allow the CG of the gas tank to be placed very low in the boat. Hanging a bag in the boat may negate this advantage depending on the placement of the bag and how much fuel is used.
Disadvantages:
- A fuel pump is needed to fill the Bags. I purchased my Dave Brown "6 Shooter" for around 15 Dollars. Nice electric pumps are available for a few dollars more. Other hand crank fuel pumps are also available. Make sure that the pump is designed to handle gasoline (most nitro fuel pumps are not compatible with gasoline). In a pinch, you can convert a soda bottle (well rinsed) into a pump; just drill and attach a barb fitting to the cap. Fill the bottle, cap it, attach your fuel line to the fitting, tip it over and squeeze to pump fuel.
- Bags may be more prone to rupture and harder to keep away from sharp or hot objects like your pipe or engine. This is dependent on your setup, and can be almost completely negated by thoughtful installation. Note that a bag with gas in it can contact the engine crankcase and won't melt; the fuel acts as a heat sink to keep the bag from melting. To be safe, you can also use a 1 liter soda bottle split lengthwise to cradle, or even cover the bag.
- You must be aware of how much reserve fuel is left in your bag; there is no advanced warning before running out of gas, like the sputtering of a sloshing almost empty conventional gas tank.
Bag Gas Tank Installation
Step 1: Choosing the appropriate size of your Bag and then finding one
Bags commonly used in RC Boats are IV bags which typically come in two sizes, 1000ml and 500ml. A 1000ml bag holds a whopping 33 ounces of gas when full; so most people who run them do not fill them completely unless they are trying to test the battery capacity of their radio! For most racers and recreational boaters, a 500ml bag is compact and easy to fit anywhere inside the hull.
Availability of the bags can vary. Some medical supply houses will sell them, others won't. Likewise, some clinics or vets may make discarded ones available to you, others will not. If you do seek used bags, make sure to ONLY use saline bags. In some instances, it may be illegal to sell, distribute or possess "used" IV bags for anything except saline.
Bags must be made from a plastic compatible with gasoline. Bags made from PL146 plastic (Baxter) are known to be resistant to gasoline. An alternative to IV Bags are incontinence bags. These can be purchased online from medical supply stores like www.ocumedical.com or www.allegromedical.com (Allegiance (Baxter) Leg Bags). There are quite a few people who frequent Jim's R/C Boat Dock who have the bags available. Baxter Medical Supply may be a source that will sell the bags. There are many other places to get them, so post a message on Jim's, and someone will probably offer assistance.
Step 2: Attaching the tubing to the bag
Fittings
on the bag may vary in size. You may need to buy or fabricate a fitting to
transition from one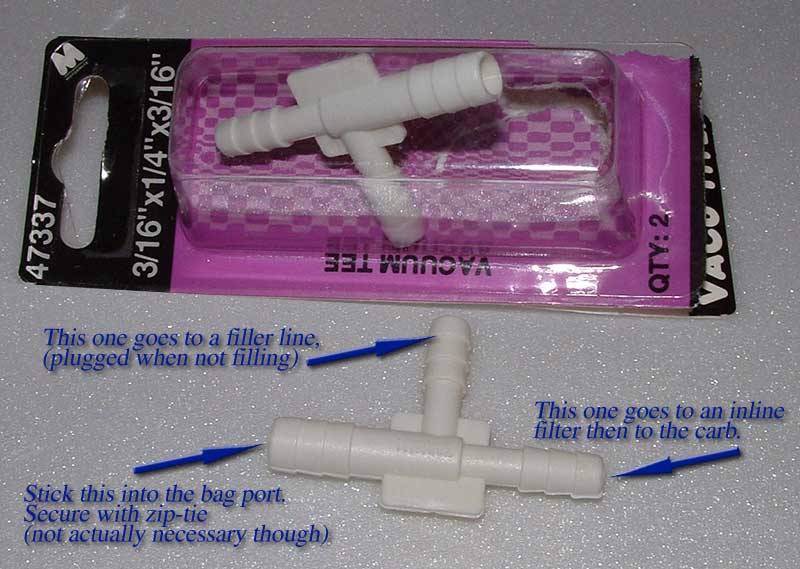 tube
size to another. Don Betz from M&D Designs Racing uses the commercially
available vacuum fittings. They are 3/16 X 1/4 X 3/16 Inch and come from stores
like AutoZone, Advanced Auto Parts, etc. Don's method is simple and also allows
for the fuel return line from the primer bulb on the carburetor.
You can also use stuff you probably have laying around with another method described below.
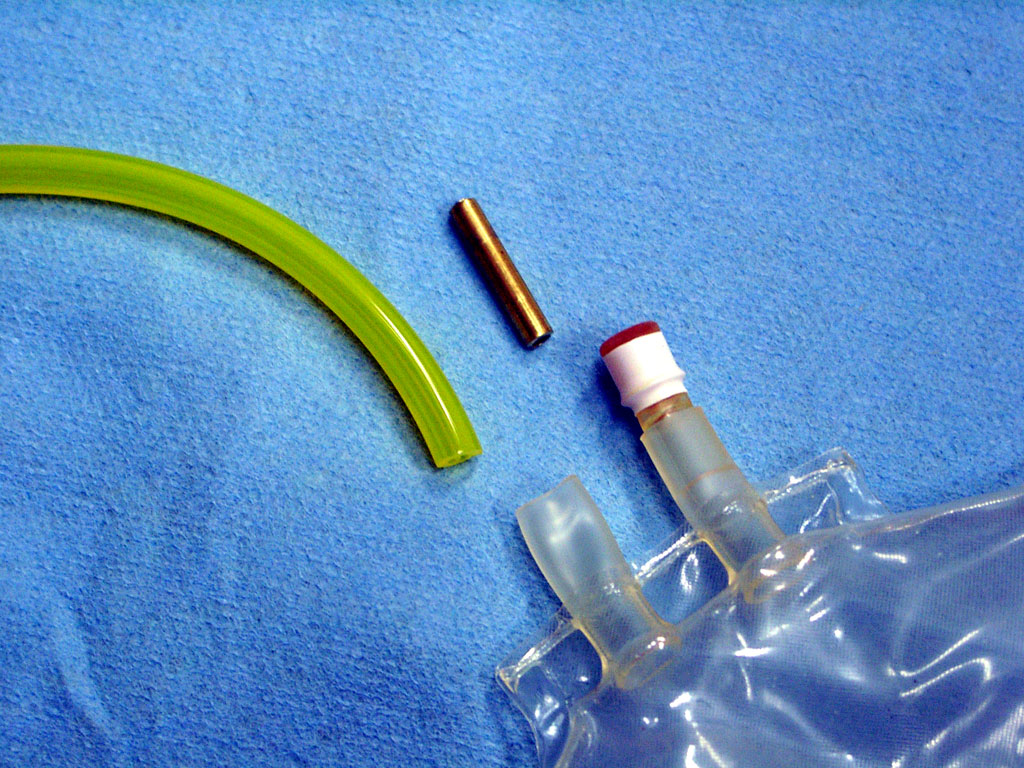 You will need an appropriate length of Tygon
tubing, a Bag of suitable size, a short length of 5/32 brass or aluminum tube,
and a zip tie (or similar tubing clamp). Note: It is very important that you do
not use silicon tubing for gasoline! Silicone should only be used for water
lines on your boat!
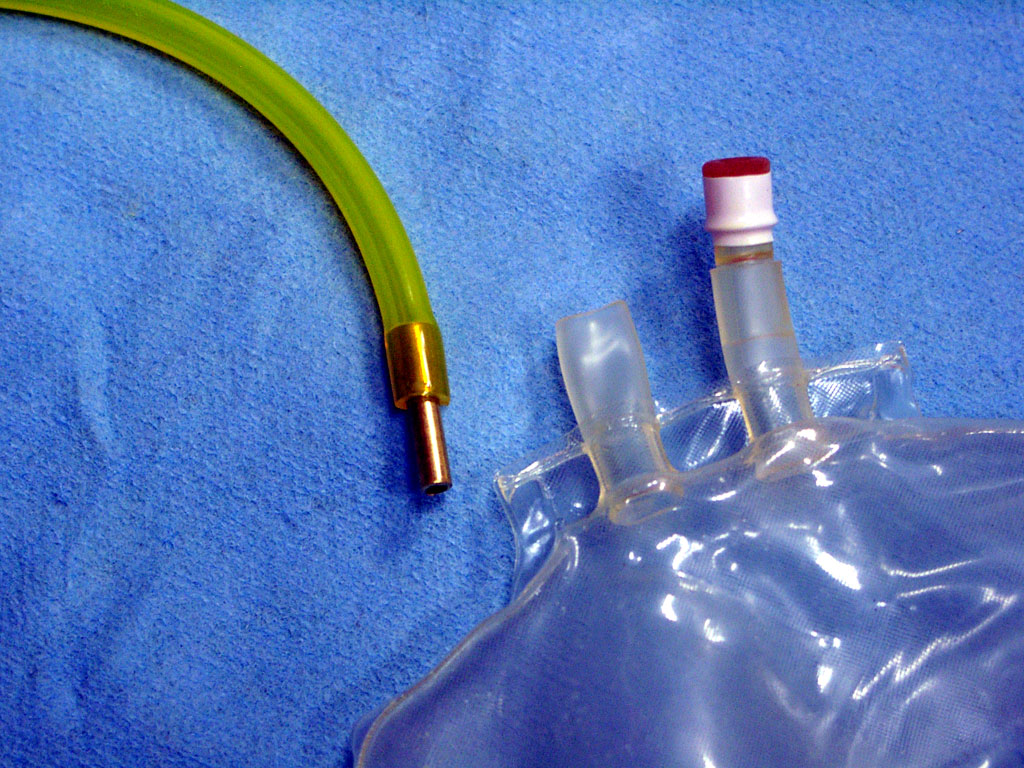
Cut the 5/32 brass or aluminum tubing about 1 inch long. Insert the tube into the end of the Tygon, about ½ to 1 inch. Insert this into the open outlet of the Bag. It will be very snug and the open outlet may need to be soaked in very warm water or stretched very carefully with needle nose pliers prior to insertion. Be careful not to tear the outlet tube!!
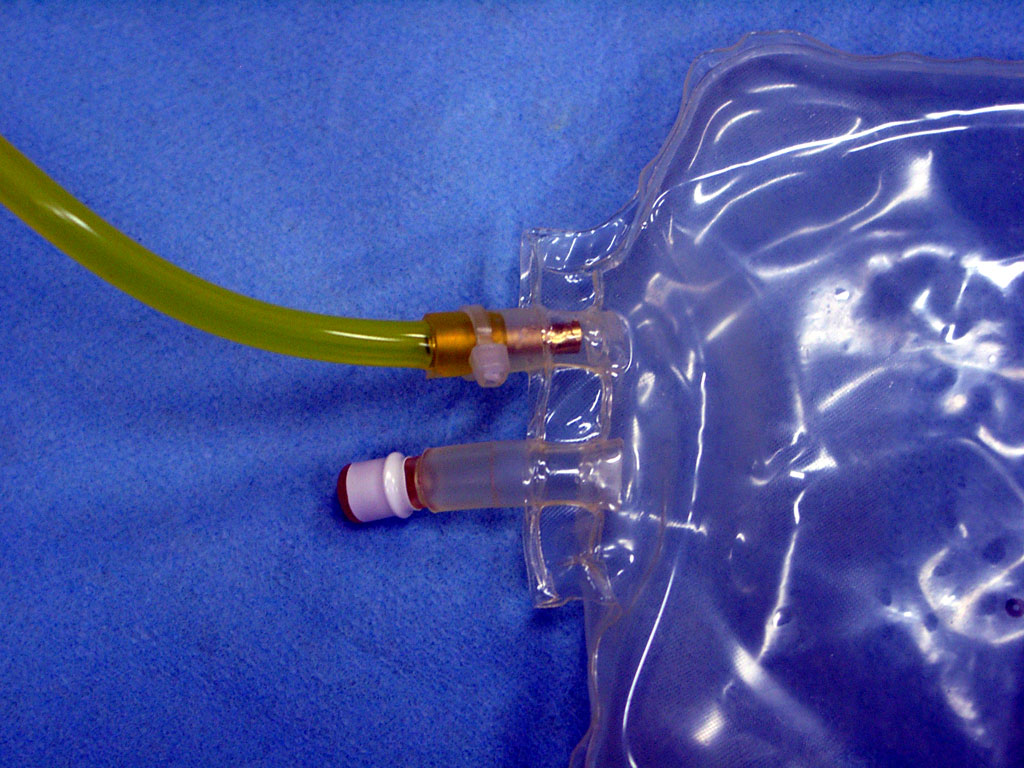 Once inserted, secure with a zip tie wrap.
Make absolutely sure the zip tie is as tight as you can get it, because if the
bag is going to leak, it will do so at this connection! Your bag turned tank is
now finished and should resemble the photo. Easy, huh?
Step 3: Mounting the bag
Plan
for success, then mount the bag. Mounting methods basically fall into two
categories; Lay it fla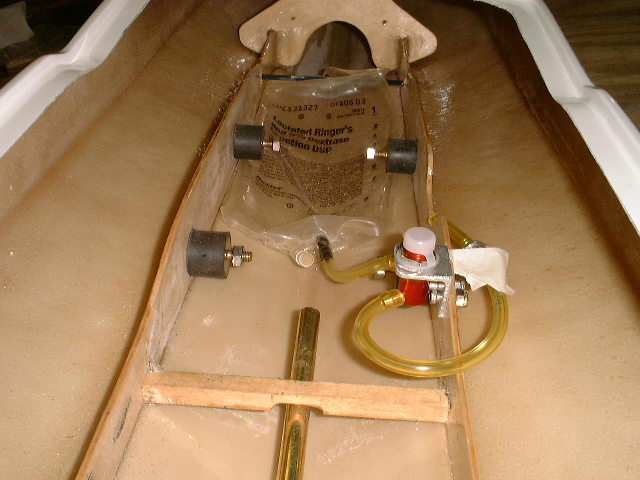 t in
the hull, or hang the bag from a hook mounted under the deck or side of the
boat. If the bag is laid flat in the bottom of the hull, it may be necessary to
remove all the air from the bag – called "burping" the bag. A flat bag install
does allow the bag to be positioned under the motor, closer to the CG of the
boat.
 If the bag is hung at an angle or vertically,
with the outlet facing down, there is very little risk of having any air
ingested into the fuel line. This can eliminate the need to burp the bag, and
simplifies filling. But, it might mean positioning the bag in a traditional
location (similar to a hard tank). A good combination is to place the bag under
the engine , outlet facing the transom, and elevate the bow end of the bag. A
1000ml bag works well in this case.
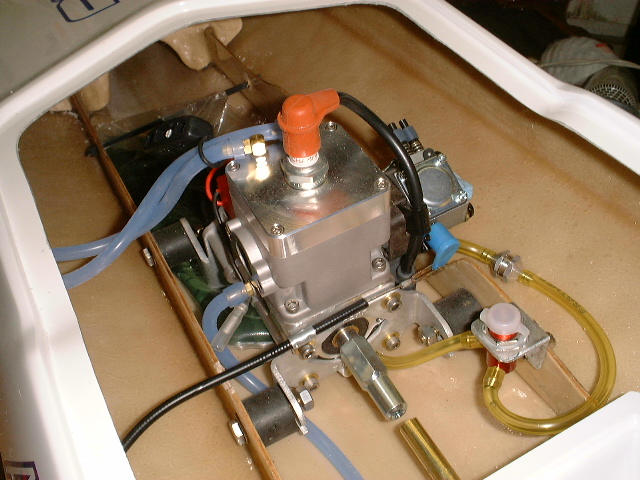
In the
photos above, you can see a flat mount, using a zip tie with a lock on each end
between the stringers and through the hanger hole in the top of the bag. This
particular install uses a quick fill device, but this is for convenience only
and not a necessity.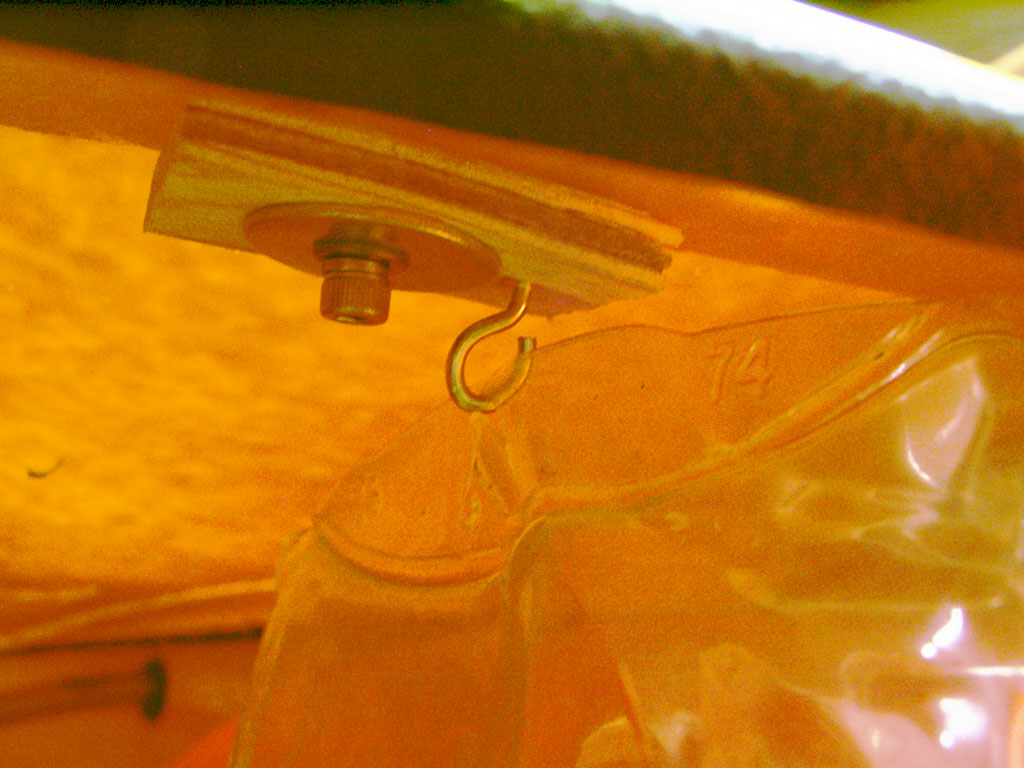
In these photos you can see a hook installed in plywood attached to the underside of the deck. This particular piece of ply is actually the mount for a launch/retrieve handle.
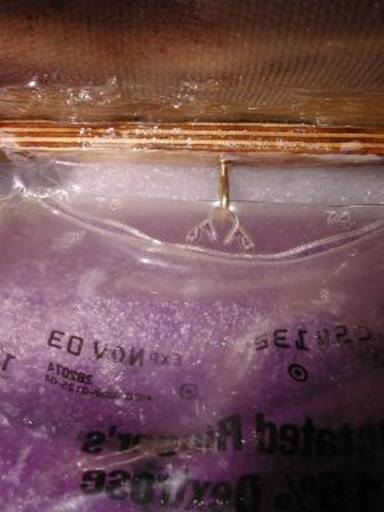 Be creative, it may be necessary to epoxy a
piece of ply to the underside of the deck to screw the hanging hook into. Be
sure to screw in the hook and cut off the excess threads sticking out of the
backside of the ply, before applying any epoxy.
In
these photos you can see two different "hanging bag" installs to get a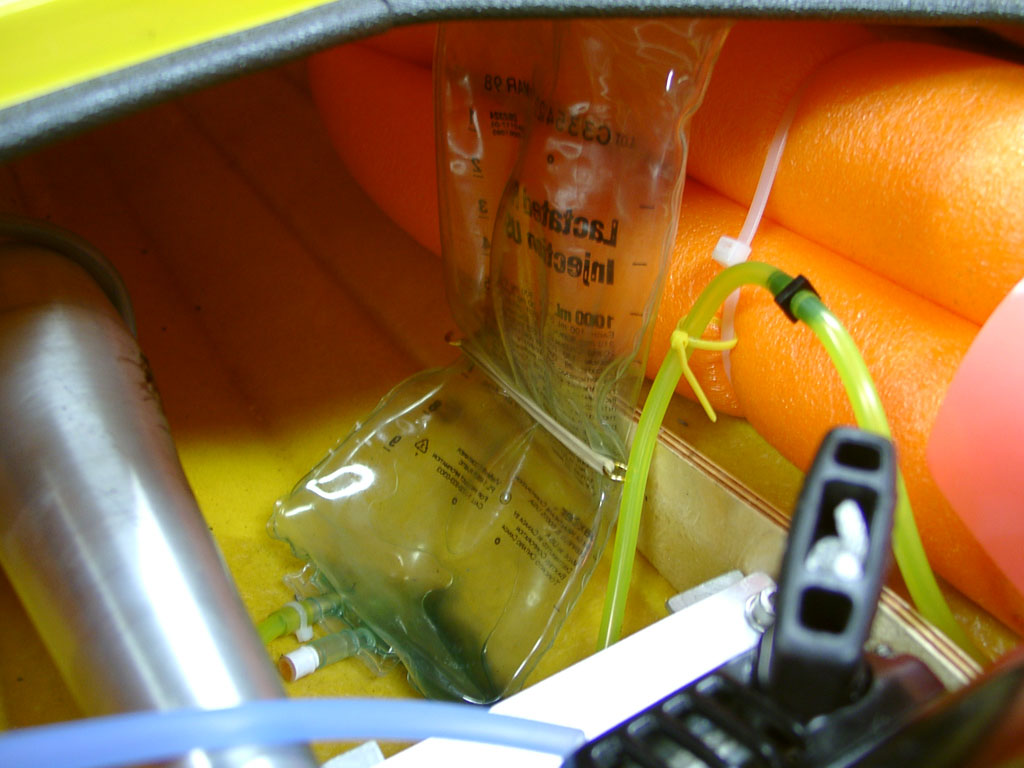 good idea of what it takes. This one uses a
rubber band to keep the bag from swinging around while the boat is under way.
The dark barbed tubing coupler makes a convenient place to hook up the filler
line from your gas pump when filling the tank.
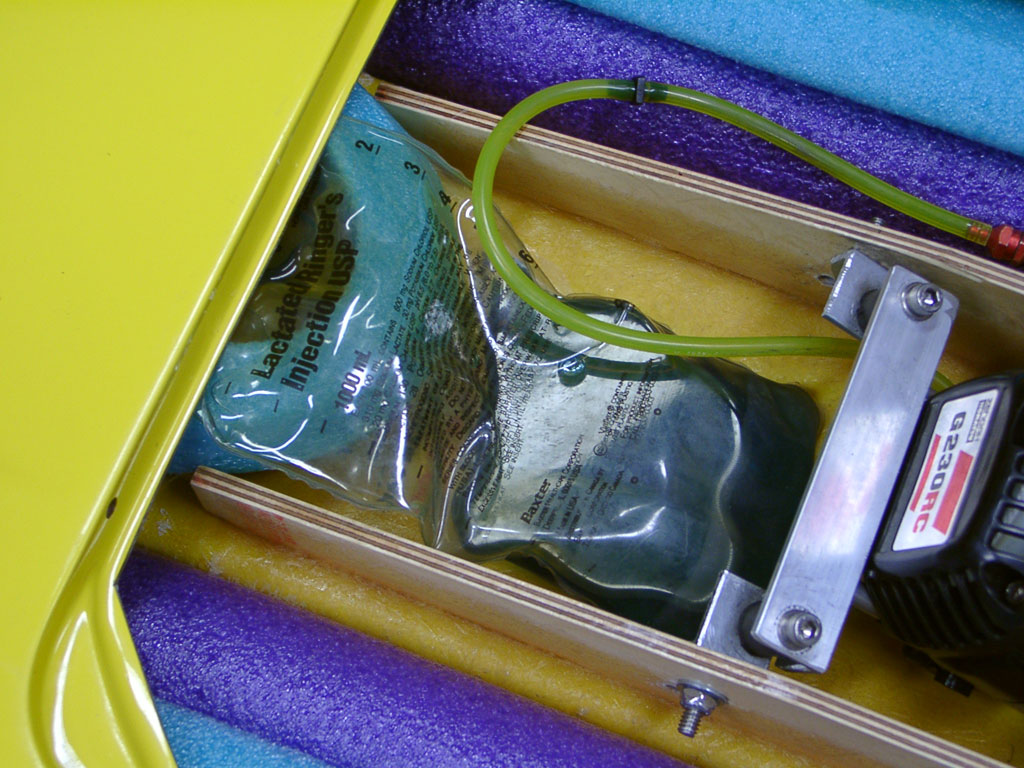 No securing of the bag is necessary in this
installation because the bag is held in place by the hook it is hanging on and
the stringers inside the hull..
Step 4: Filling the bag.
There are many different ways to plumb a bag fuel system, mostly dependent on the method used to fill the bag. In all cases, be sure to install a fuel filter between the filling point and the bag. That way, fuel will be filtered before it enters the bag, and any contaminates in the bag will be filtered and trapped before they enter the carb.
Air in the bag is a factor you must deal with when using Bag tanks. If you use the "hanging bag" method, air rises to the top of the bag negating the need to do anything unless you want to run for hours and fill the bag to the top. If the bag is laying flat, you must "burp" the air; fill the bag to the proper level, tip the bow of the boat forward so that all the air rises to the outlet and run your fuel pump backwards to evacuate all the air. You now have a bag with very little or no air in it. You can also use a quick fill device, which should eliminate almost all air from entering the system.
If your bag is removable, the simplest method is to plumb directly from the filter to the carb. When refueling, remove the fuel line from the carb, connect the fuel pump and fill the bag. When the bag is filled, "burp" the air out and clamp off the end (to keep air from entering the line). Reinstall the fuel line on the carb, remove the clamp, reposition the bag in the hull and you're set!
Step 5: Using your Bag fuel cell.
You can cap off the return line from the carburetor when using a fuel bag. This is the fitting nearest the primer bulb on most carbs. Use a short piece of Tygon tubing with a plug in the end and attach it to this return fitting. Be sure to use clamps or zip ties on the carb fitting and the carb to prevent leaks.
Whether your engine is equipped with a primer bulb or not, you will now use your finger over the carb intake to prime the engine just like with a standard hard tank. There's no need to push the primer bulb. Slowly pull the starter cord until your finger is wet, then remove your finger and pull start the engine.
Step 6: Preventative maintenance of your new Bag fuel cell.
It is recommended that you always keep a small amount of gas in the bag when you store the boat, or when you remove the bag from the boat for storage. This keeps the Bag soft and pliable. If you drain the bag for storage, be sure to store it flat, and do not fold or crease the bag, since they will tend to get hard and stiff when they are empty. A fold or crease may cause a crack or tear in the bag that will leak when refilled. Bags will last for years with the right care and maintenance.
The first time you put gas in the Bag, you may notice that it will get very soft and almost feel like it will not hold up. This is really not a problem because the bag will toughen back up within a day or two. You may want to pump some gas into the bag a day or two before performing the install just to ease your mind.
Enjoy your new Bag gas tank!
ed. Brad Mahs


