How-to Article ...by Brad Mahs

Learn how to make your own driver figurines...

Like
the look of a helmeted driver piloting your open mono, cat, hydro or crackerbox,
but don't want to spend $25 (or more) for one? Worse – dropping over $75 for
three?!? Well here's a simple, inexpensive option using a 1/6 scale figurine and
a plastic racing helmet Christmas ornament. Cost is less than $10 per
driver!
There are two ways to mount these drivers: permanent or
"removable". I mounted mine removable with o-rings. The permanent method option
is highlighted by asterisks (*) below.
Here is the material list to build
one driver:
 1/6
scale figurine (I used Ken; GIJoe would probably work too)
Helmet christmas
ornament (I used a Jeff Burton Nascar 2001 Dated Collectible Mini Helmet by
Trevco; you can find these on Ebay)
Brass eyehook screw
1" o-ring
* 2
stainless steel pan head sheet metal screws
scrap plywood, plastic or
aluminum
CA, silicone or epoxy adhesive
 Start by ripping Ken's head off ("take that, Barbie!")
and cut off his torso about belly-button level. If you have young kids, I'd
suggest they not be around when you do this! You can take the legs and attach
them poking out under your R/C monster truck if you like. I threw mine
away.
Make a mounting plug for the helmet by cutting a round piece of ¼"
thick scrap plywood or plastic (I used a piece of aluminum rod stock cut to ¼"
thick) to fit snugly inside the neck of the body. Drill a clearance hole in the
plug for the brass eyehook screw (* or a machine screw) to fit
through.
 Break
off the hanging ring on the helmet ornament. Drill a small hole in the base to
accept the brass eyehook screw (*or machine screw). Now attach the plug to the
base of the helmet with a drop of CA, silicone or epoxy, and secure the eye or
machine screw into the helmet base.
While the helmet dries, position the
torso in its proper mounting place and trace around it.
Cut and shape a
plywood or plastic plate to fit inside the cutout in the torso.
*If you
want to secure him permanently, glue the torso plate permanently in the torso,
and glue the helmet plug into the neck hole. Now attach the dude with a
stainless steel sheet metal screw up through the mount location and into the
torso plate (I'd also use a drop of adhesive so he doesn't rotate). You're
done!
 Back
to the removable version:
Drill a ¼" hole in the torso plate and through the
mounting area on the deck. Bond the torso plate to the deck with silicone, CA,
or epoxy.
Bend a retaining clip from a 2-56 pushrod wire as shown and attach
it to the o-ring. Attach the o-ring to the helmet eyehook. Thread the o-ring and
clip through the torso neck hole and fish it out the bottom of the torso. Now
poke the retaining clip through the mounting hole and grab it with pliers from
below; pull the o-ring taught until the clip turns perpendicular and hooks under
the deck. Position the dude over the torso plate, turn his head any which way
you want and you're done!
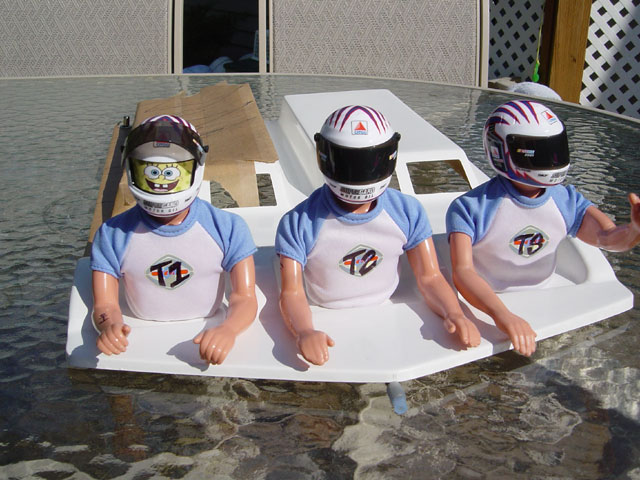
My 3 dudes don't have life jackets 'cuz they
are really good swimmers; but there are sites that sell 1/6 scale life
jackets.
With the removable construction, I was able to tuck their shirts up
into the torso, then snap them over the torso mount plate.
Ken's not manly
enough for tattoos, but with helmets on, my drivers are studs who needed them –
so I used paint markers.
 If you
want or need to bend their arms, use a heat gun, mini-torch, or boiling water to
warm the appendage, bend to the desired position and quench in cold water while
holding the proper position. Wear some work gloves when you do this, since the
plastic does need to be pretty hot to bend without cracking. Again, if you have
small children, I'd advise you don't torch the dude, or stick him in boiling
water while they're around – they have enough traumas in their lives!
If you
use a flame, clean up any soot marks with thinner or
alcohol.
Enjoy!

