
- Thank you received: 0
Pictures, videos, questions and/or comments about MGB products. Share your builds and feedback.
MGB Warpath ... Gas Rigger / rigging and set up info
- Scott
-
Topic Author
Less
More
15 years 7 months ago - 15 years 7 months ago #15217
by Scott
MGB Warpath ... Gas Rigger / rigging and set up info was created by Scott
This is just complimentary to Marcs outstanding Warpath builders instructions.
Being fortunate in having a pre-built hull, what I am sharing here is just my rigging and set up tricks etc ....
Will make note the engine compartment of the Warpath is tight so MAKE SURE you place engine as far forward as mount & starter clearance allows.
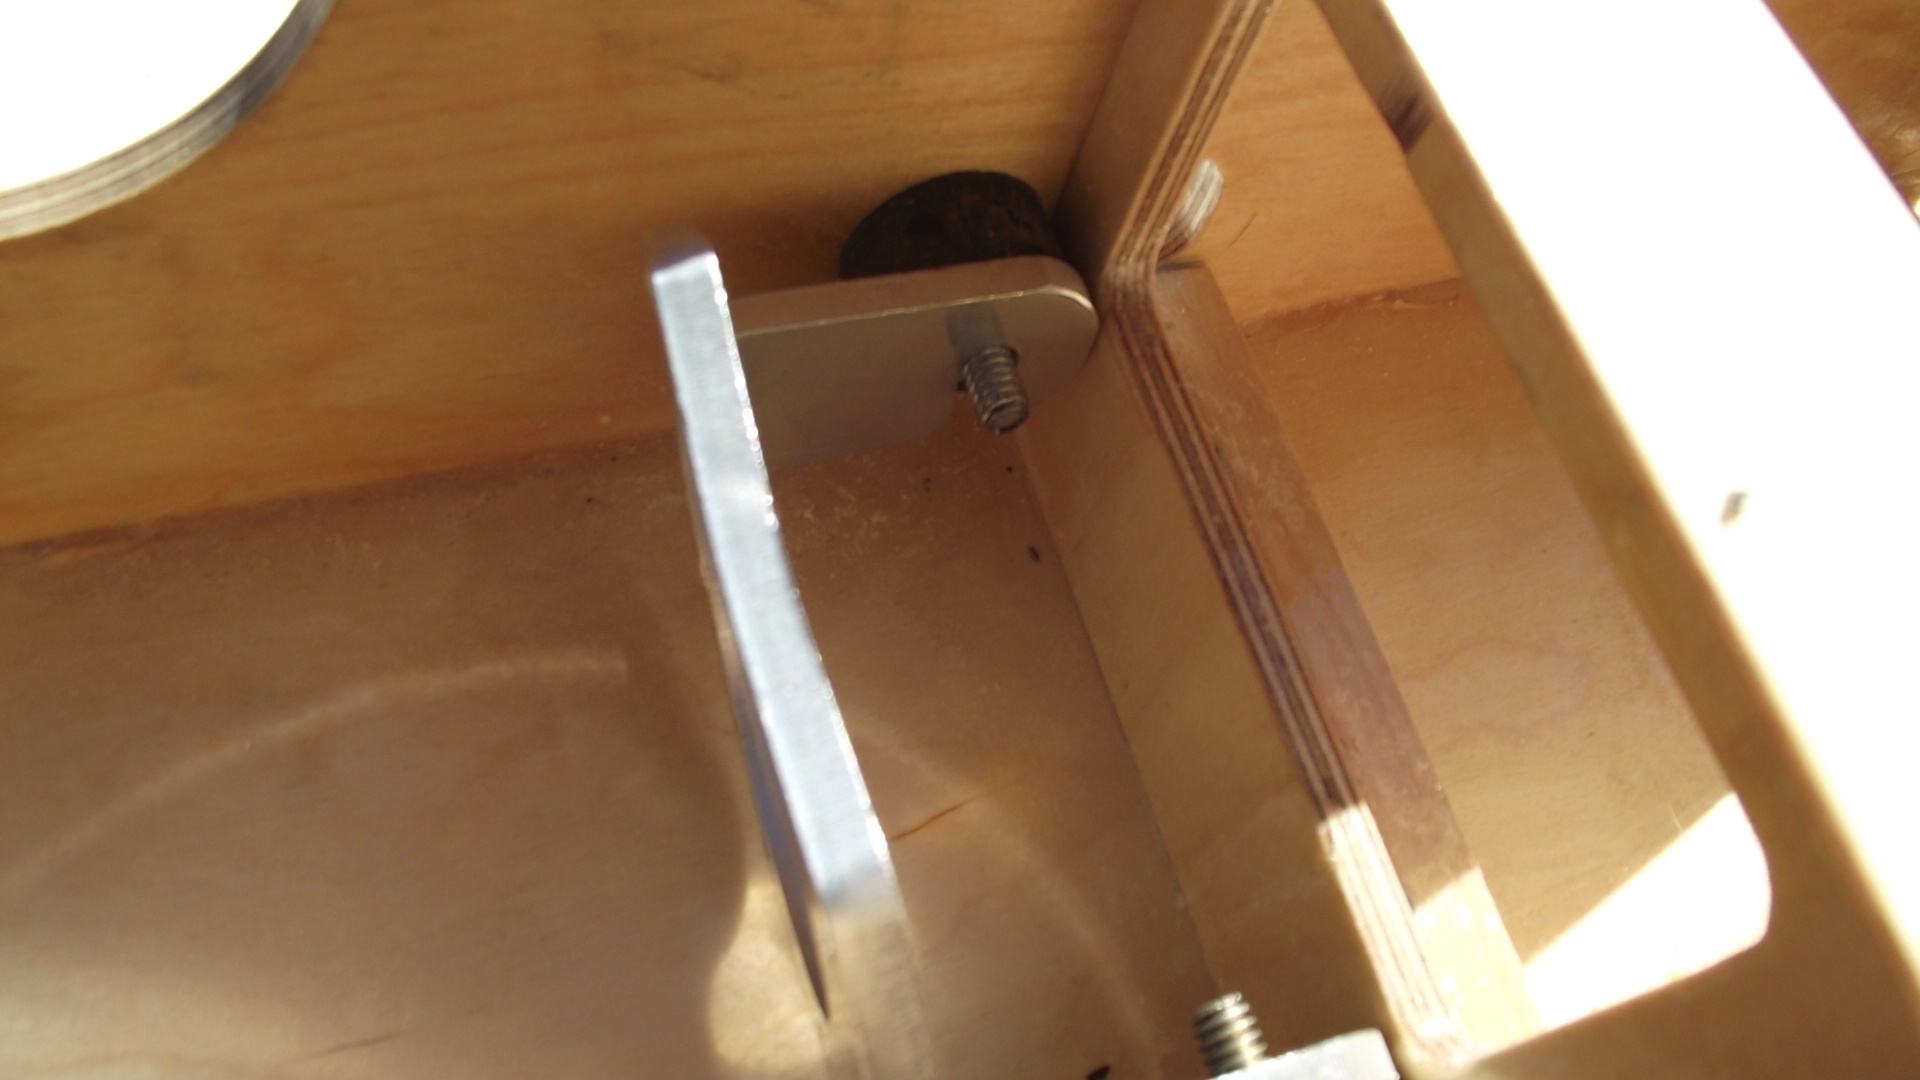
*Using Gizmo/CC type hyperr torque mounts found that some mount trimming was necessary on the starter side mount. Material was belt sanded away so metal was equal in length to diameter of A/V rubbers. ( this allowed me to place A/V rubbers within @ 1/8" of forward bulkhead )
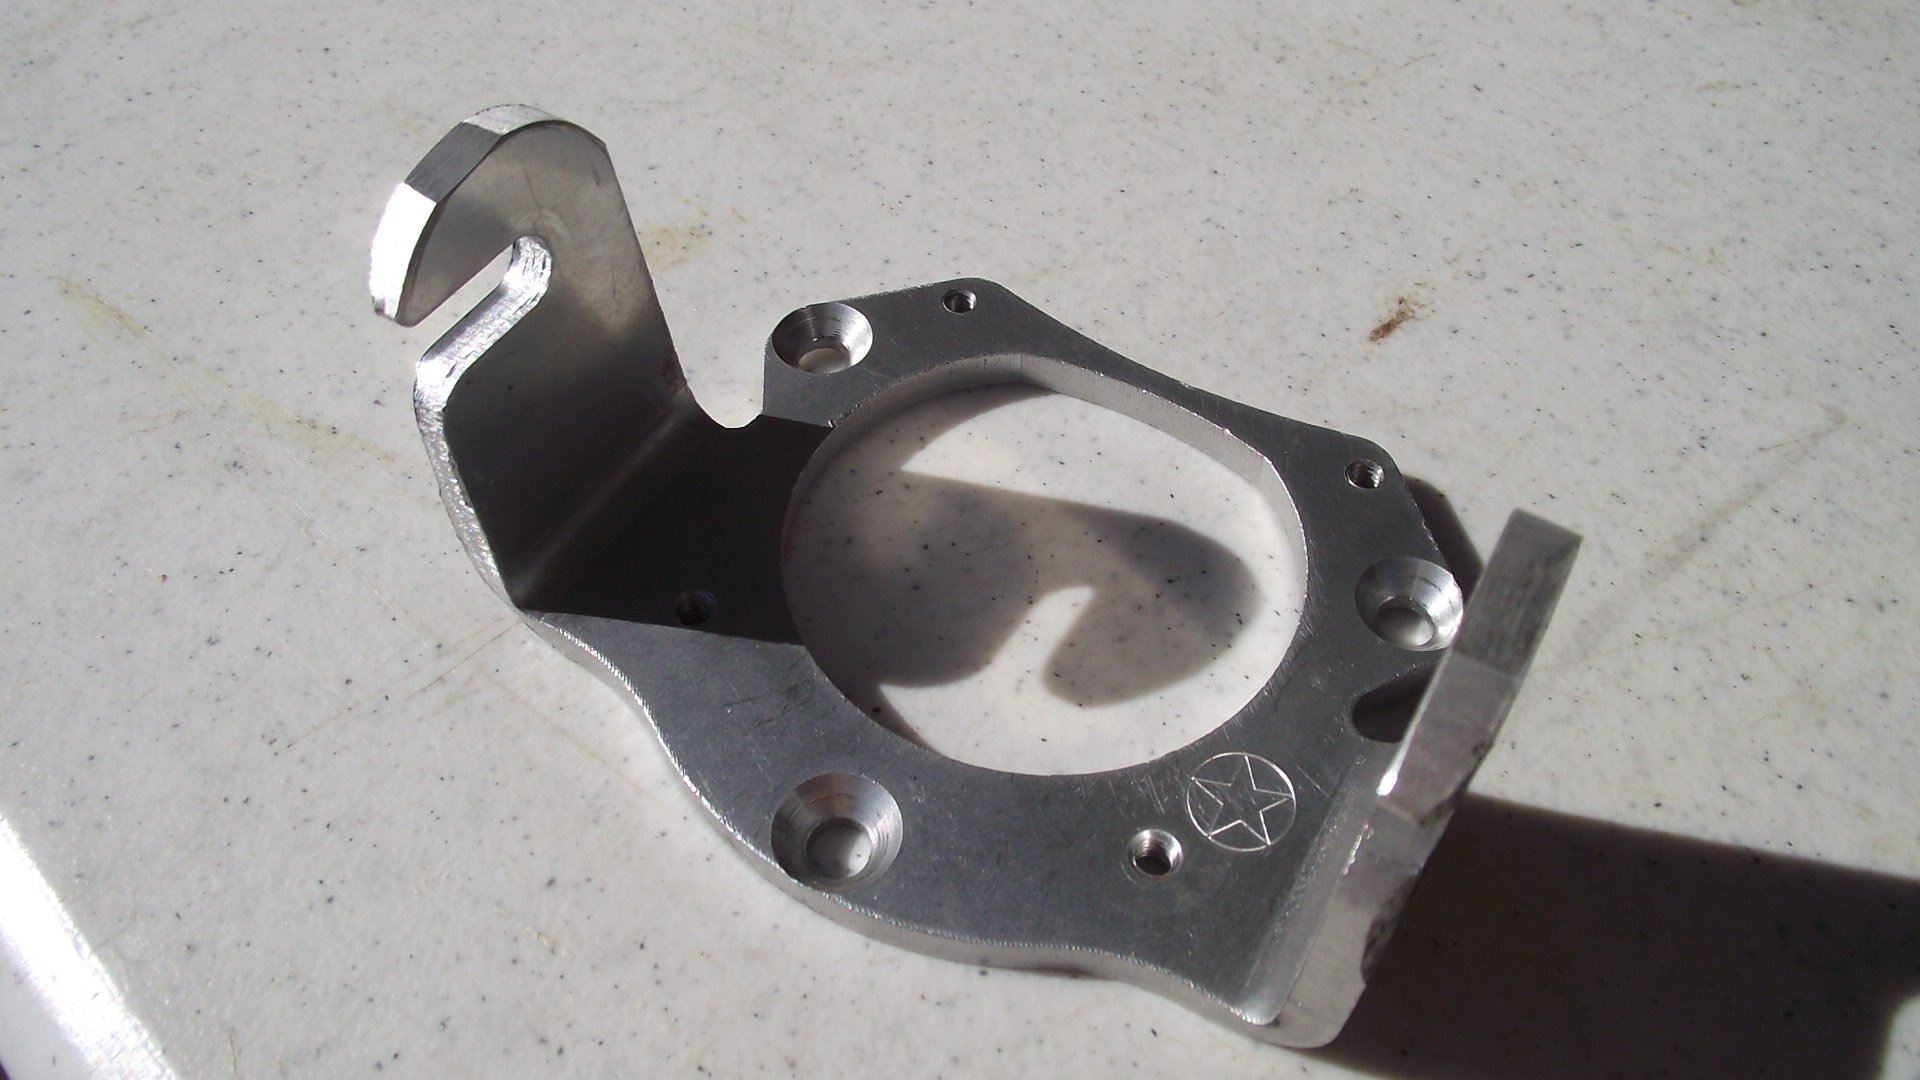
[img]http://www.modelgasboats.com/media/kunena/attachments/legacy /images/DSCF0413-20110220.JPG[/img]
[img]http://www.modelgasboats.com/images /fbfiles/images/DSCF0416.JPG[/img]
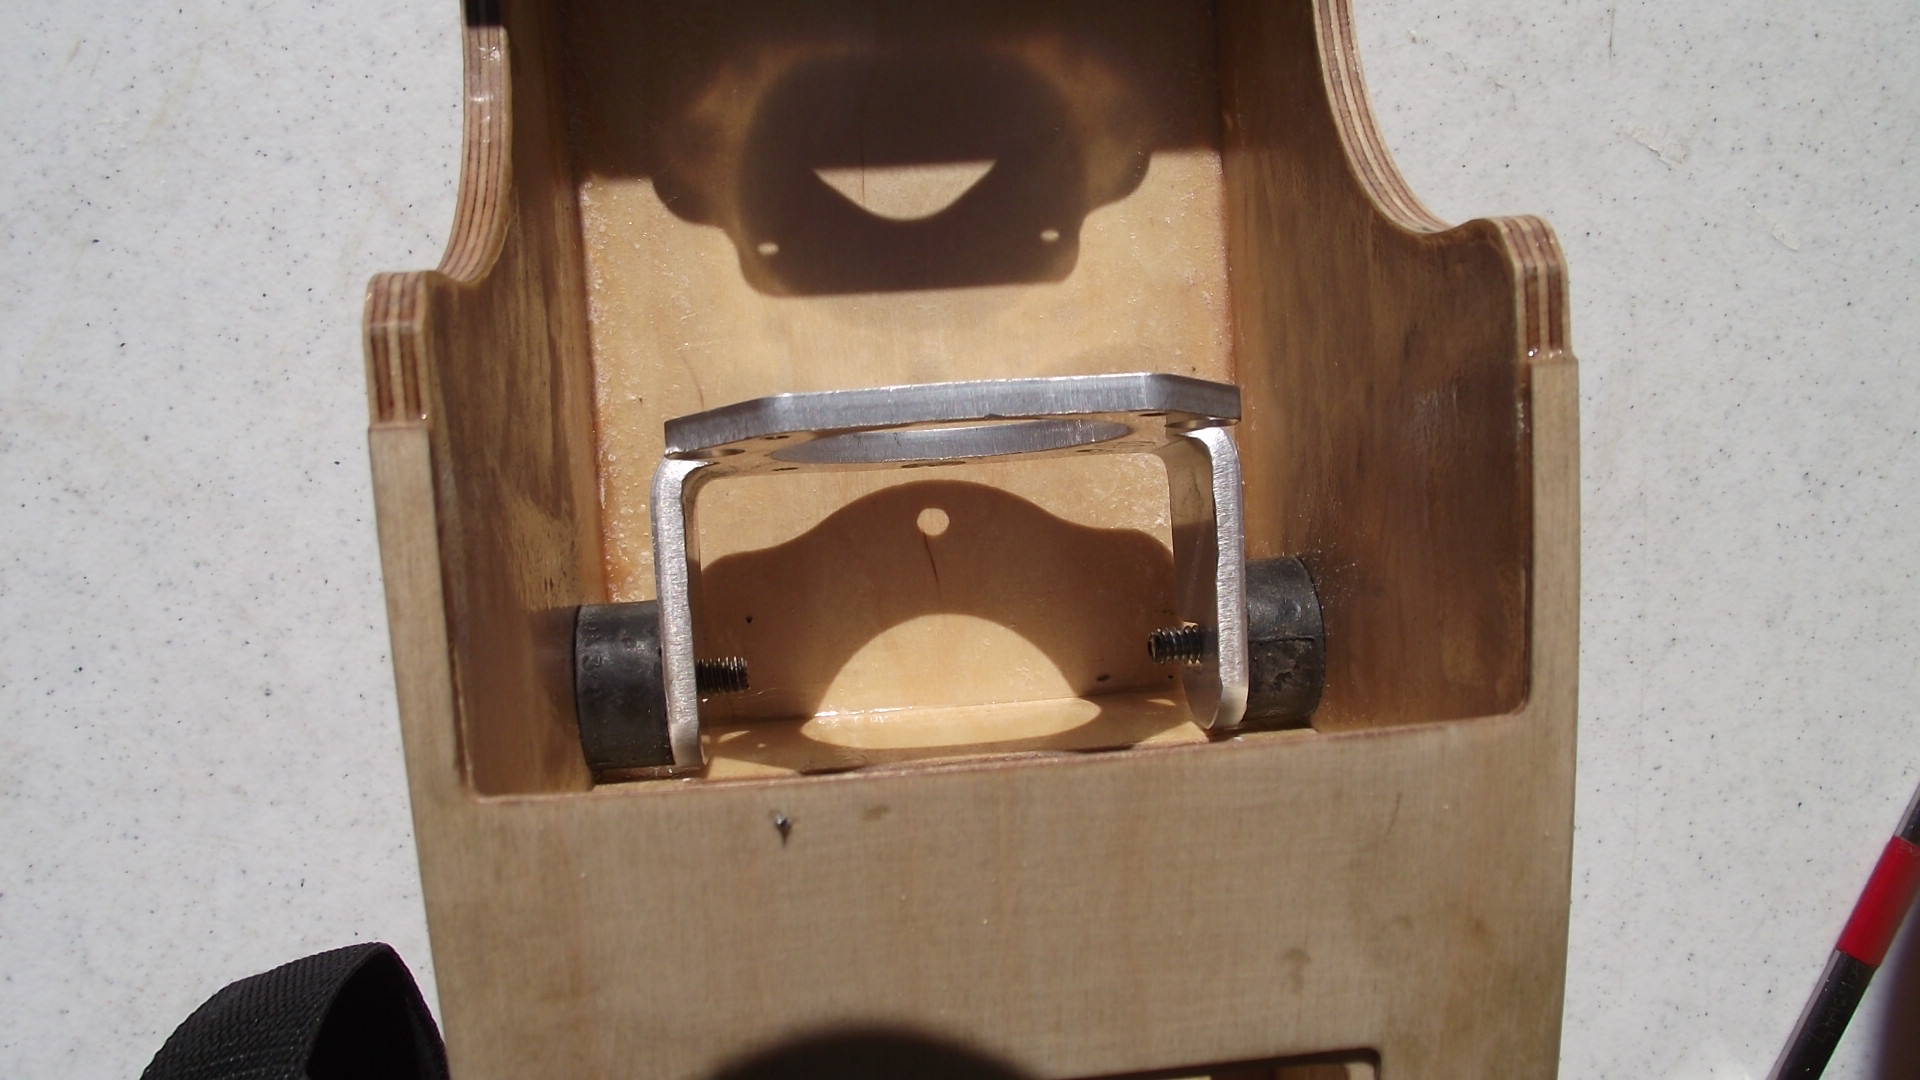
When first setting and finding engine location simply placed engine with A/V's onto mounts lightly tightening them down.
Drew a line just behind the dowel pins set in bulkhead on tub so I knew from the outside where it's edge was at.
Then on the outside of tub set engine against it and looking down upon it set spacing of engine off bottom skin, made sure starter side mounts were as forward as practical and drive angle wanted. Then took a pencil and drew circles around A/V mounts drawing onto tubs side. ( Note line shown in pic below )
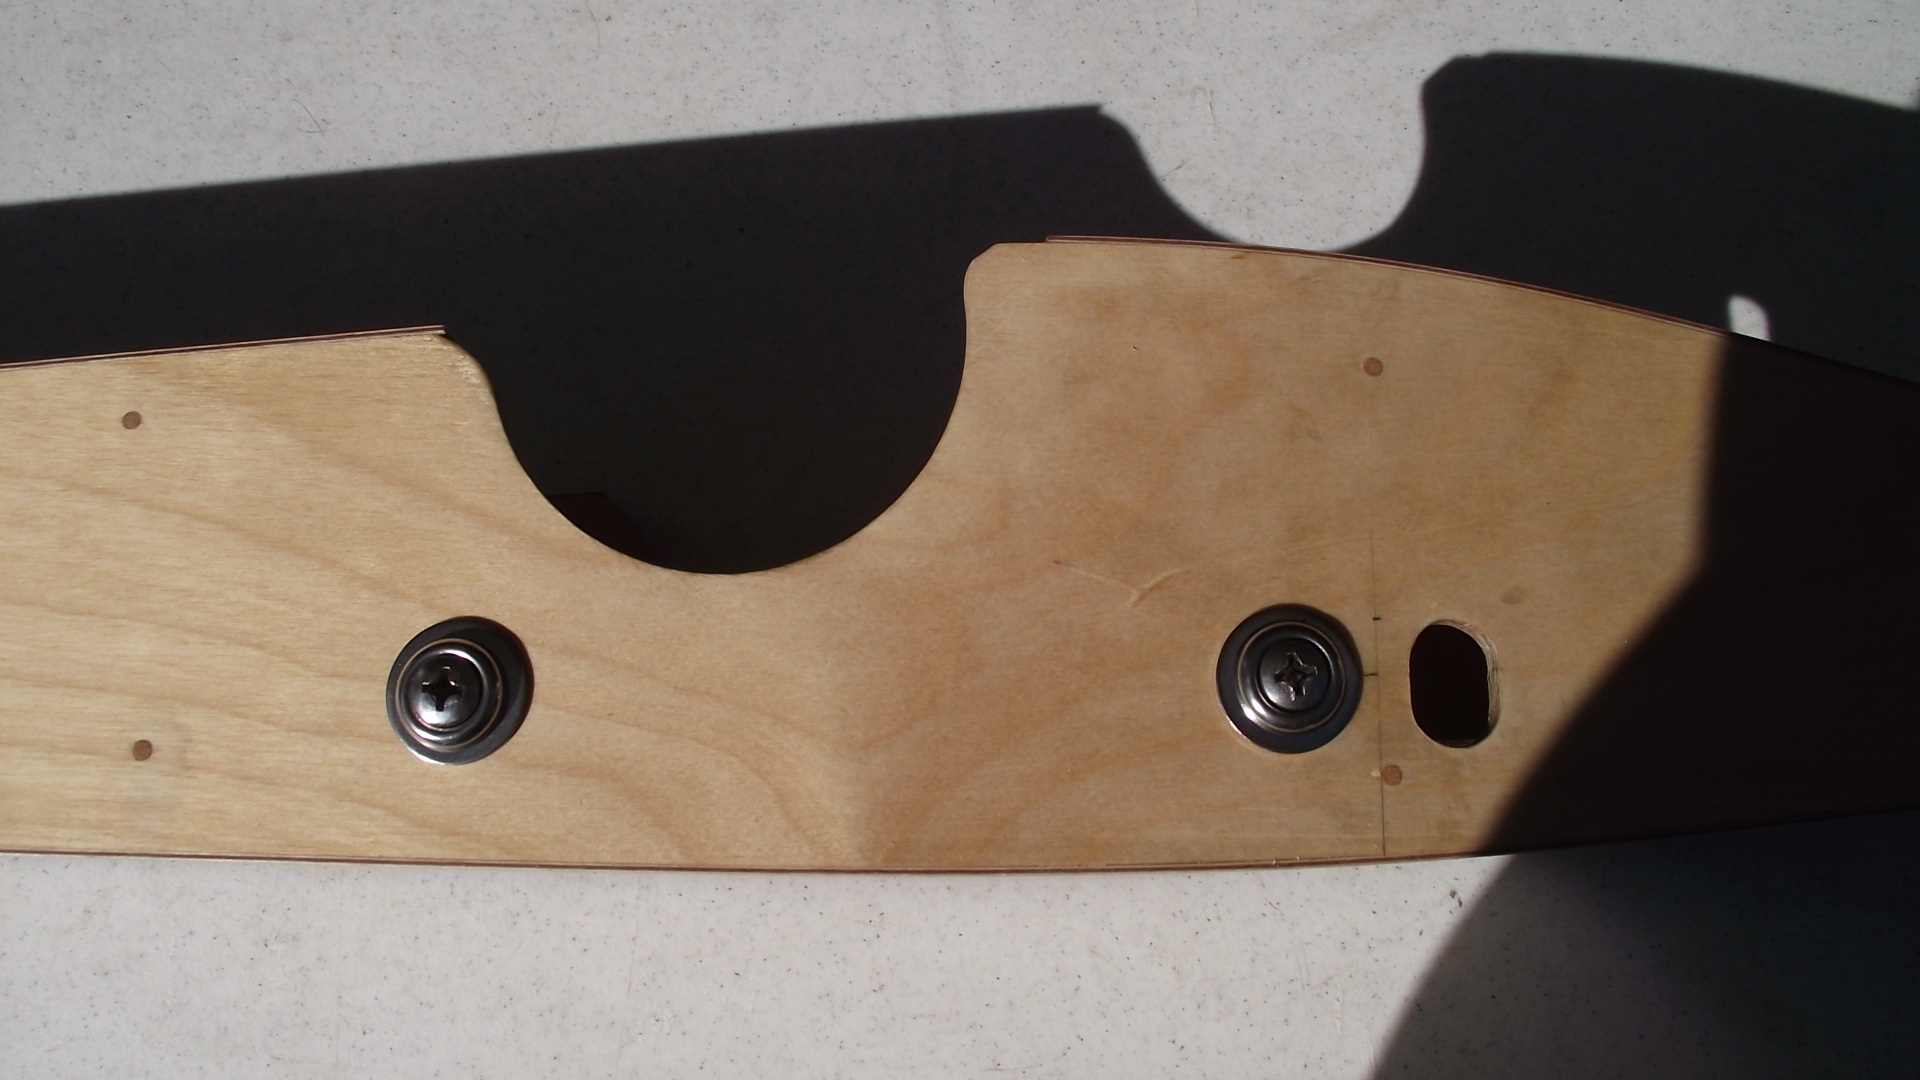
Measured 3 times making sure position chosen was correct and spacing distance of A/V mounts was correct front to back before drilling any holes.
That done placed A/V rubbers into hull doing a trial fit .... Got lucky with a perfect fit :woohoo:
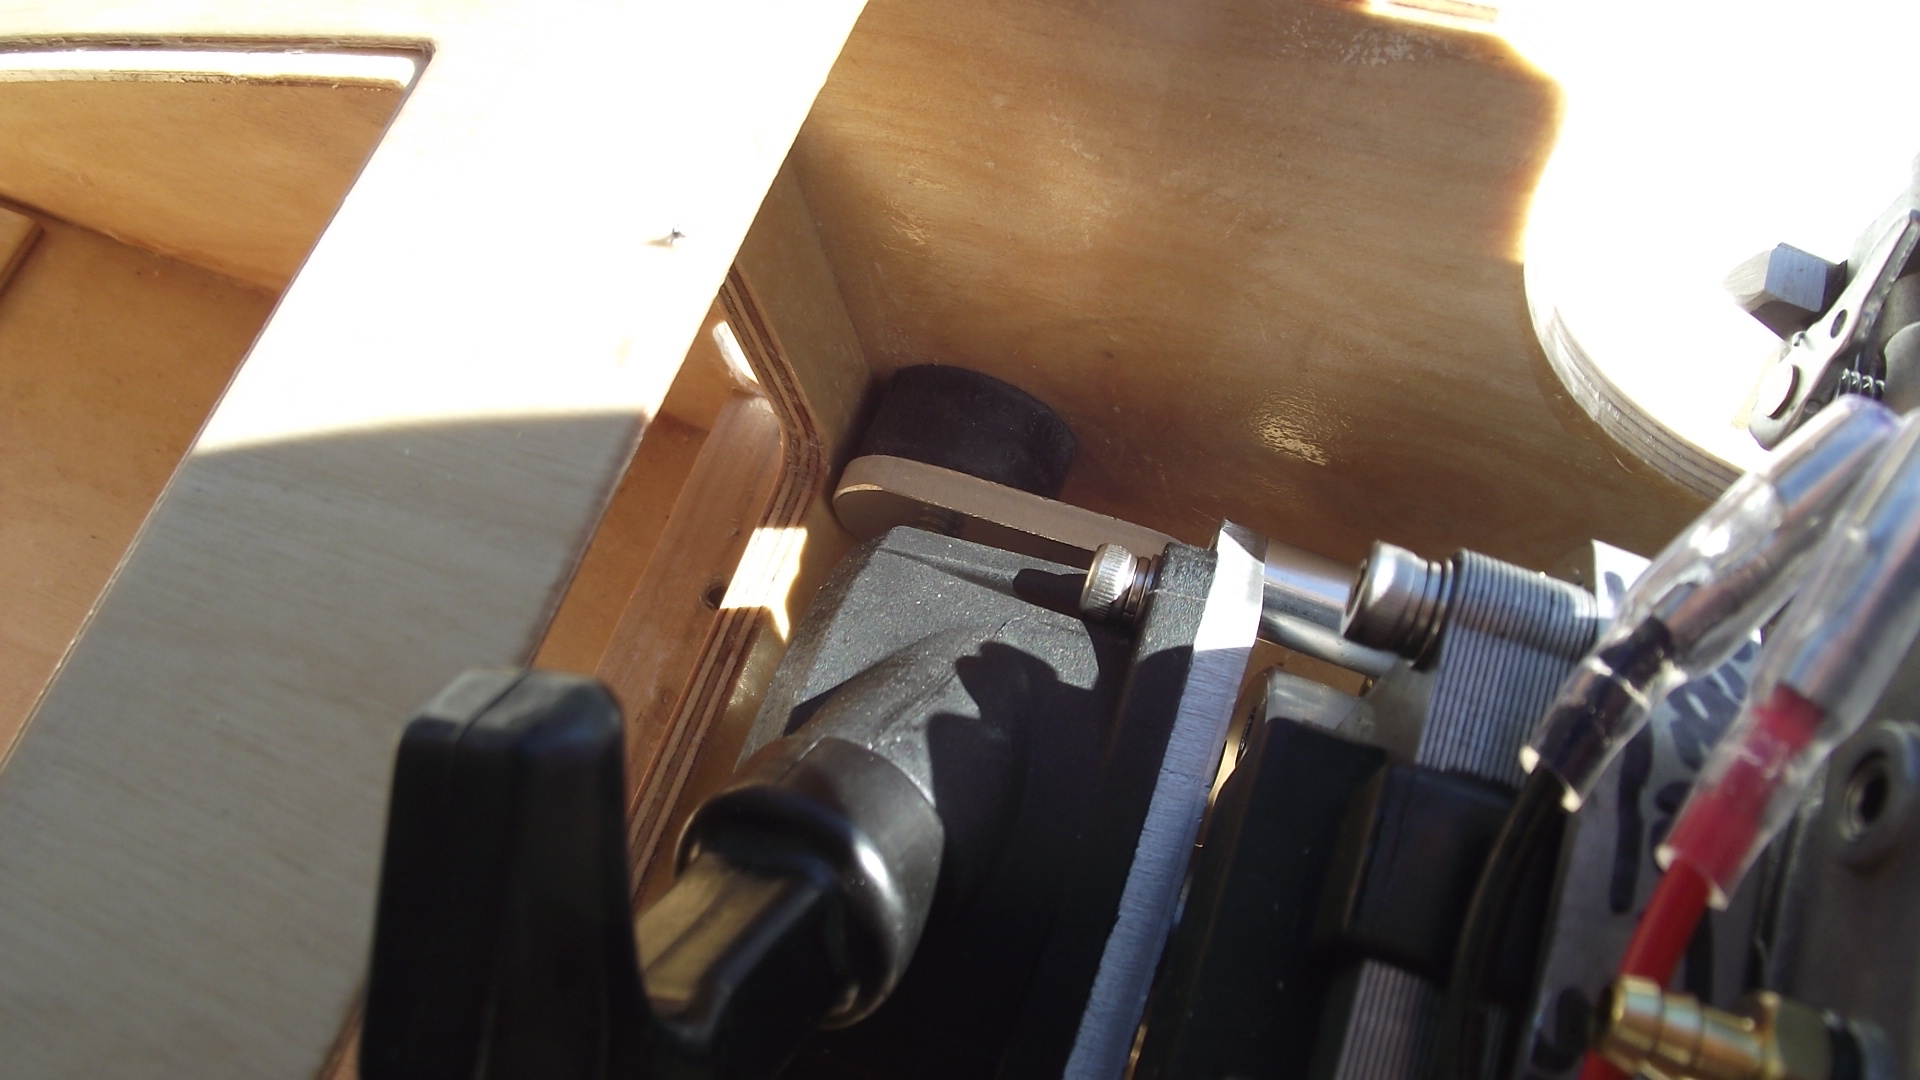
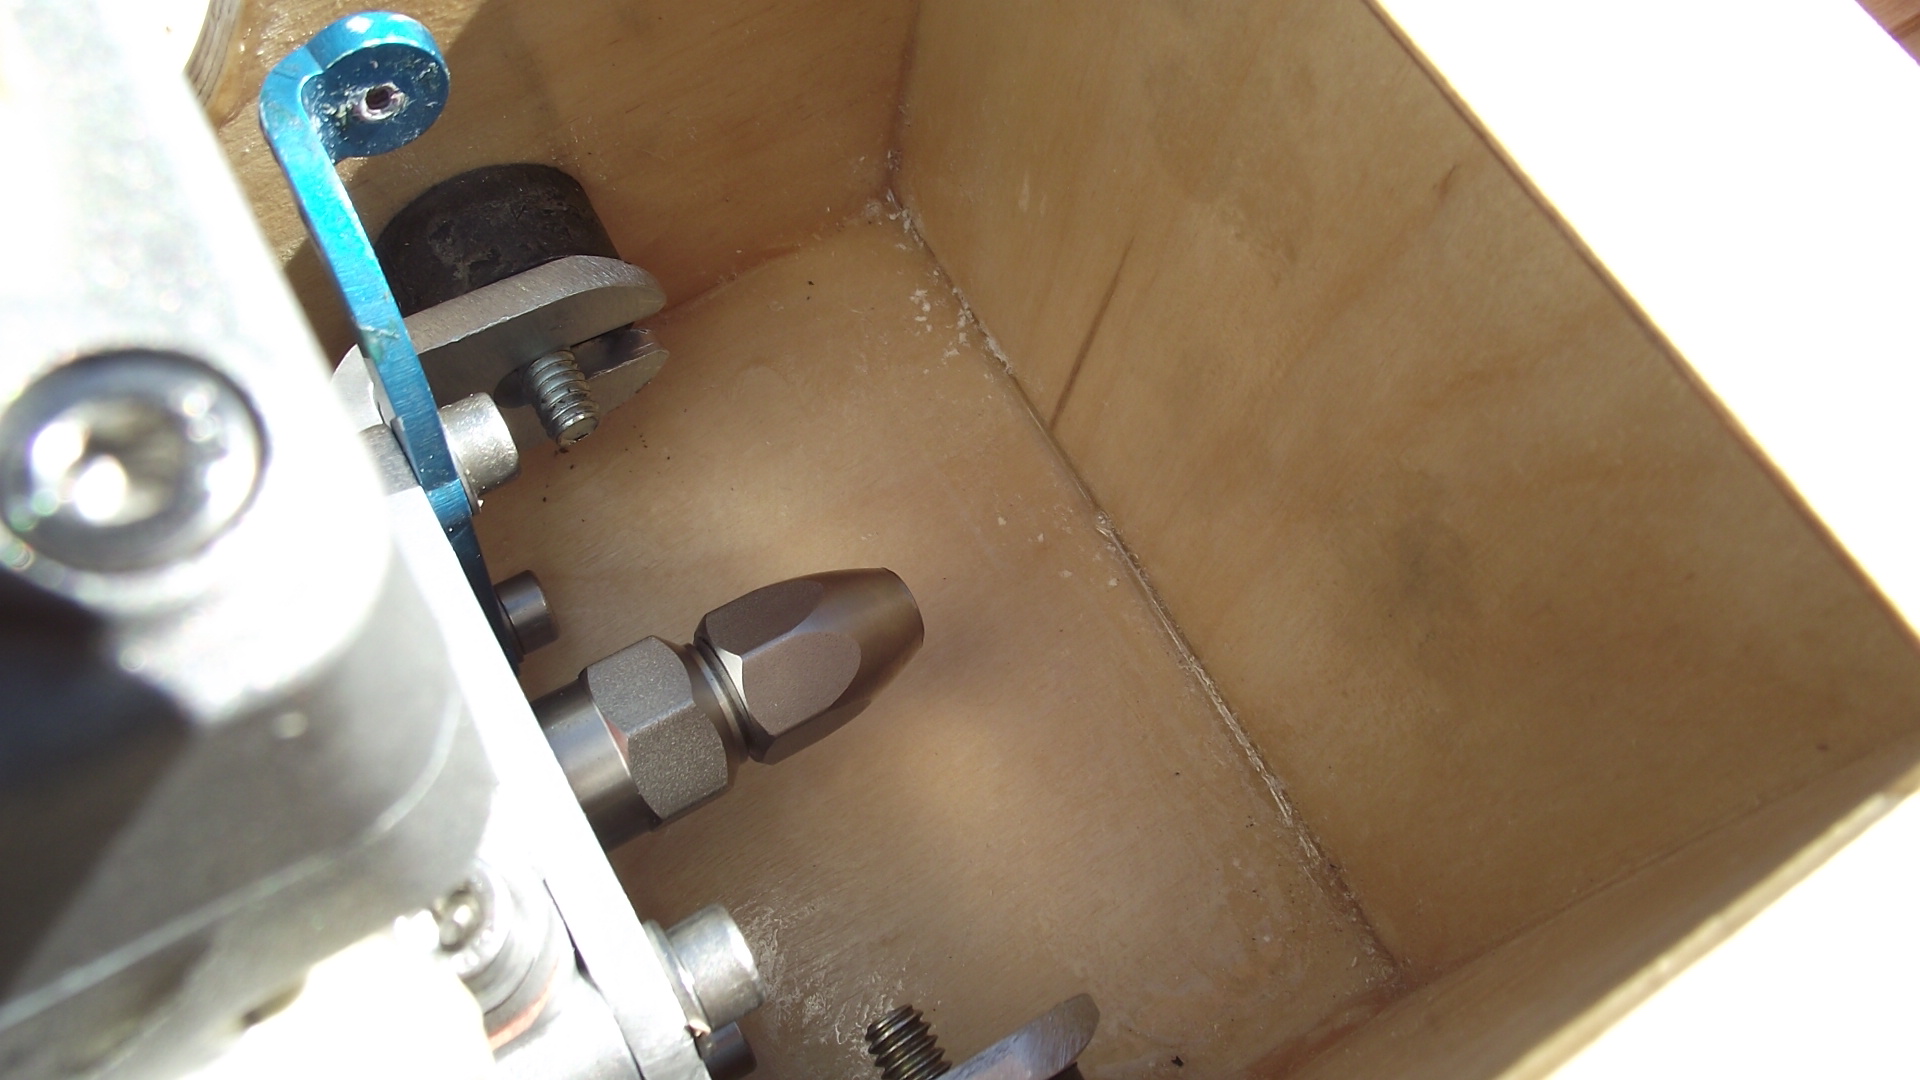
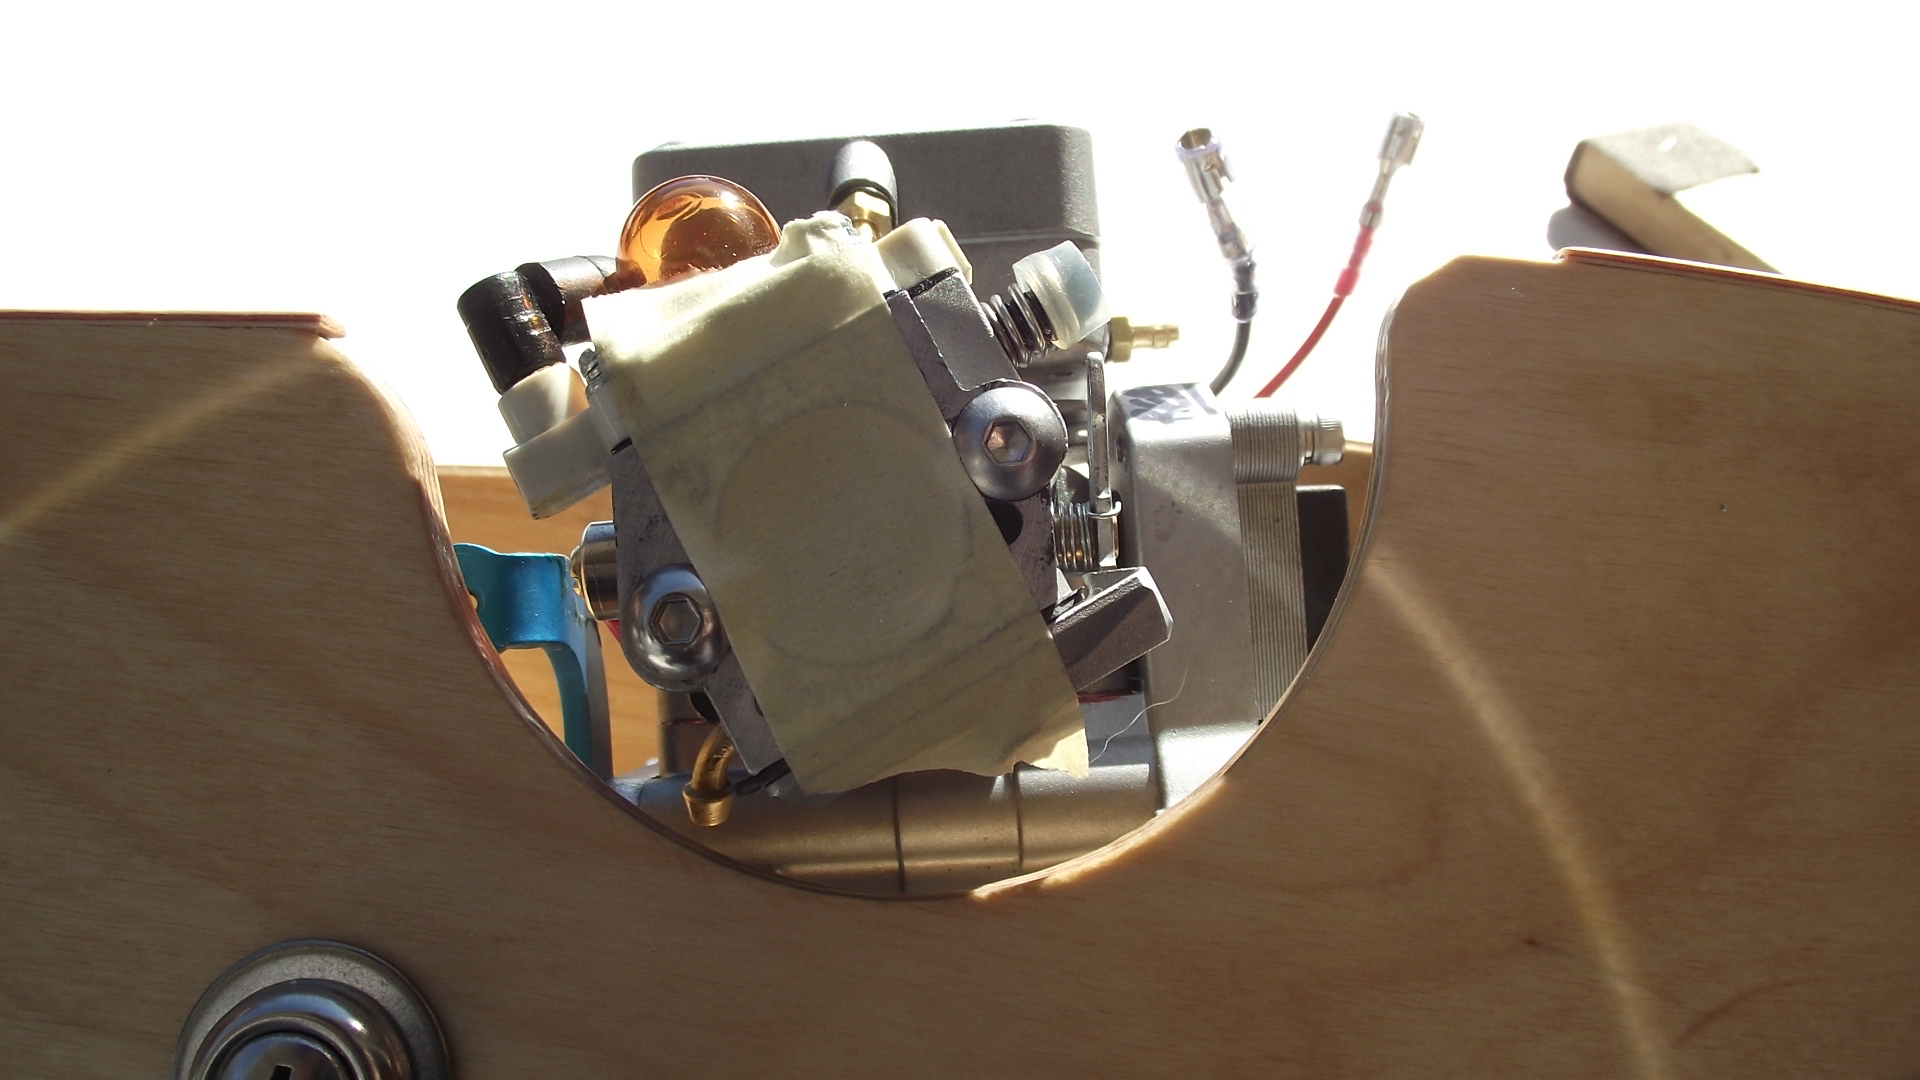
Next was getting stuffing tube and log fitted into the bare hull.
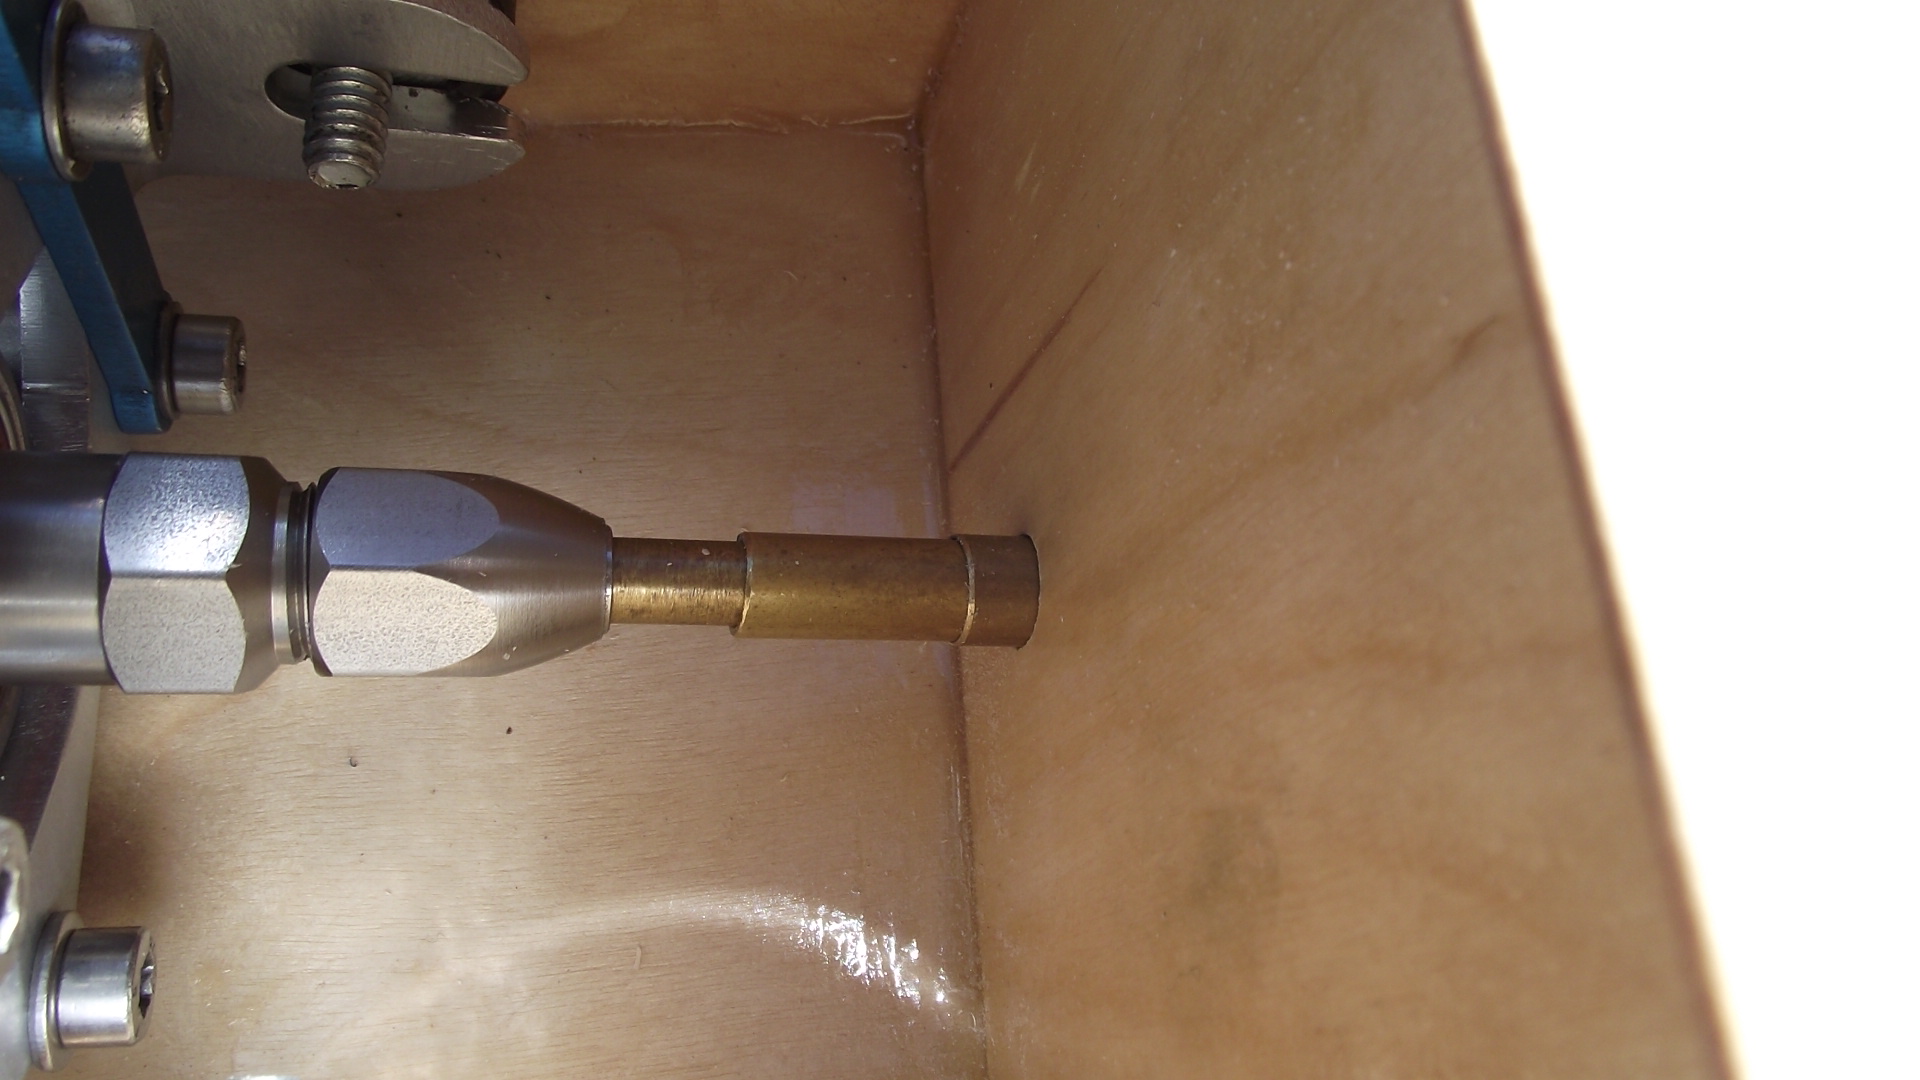
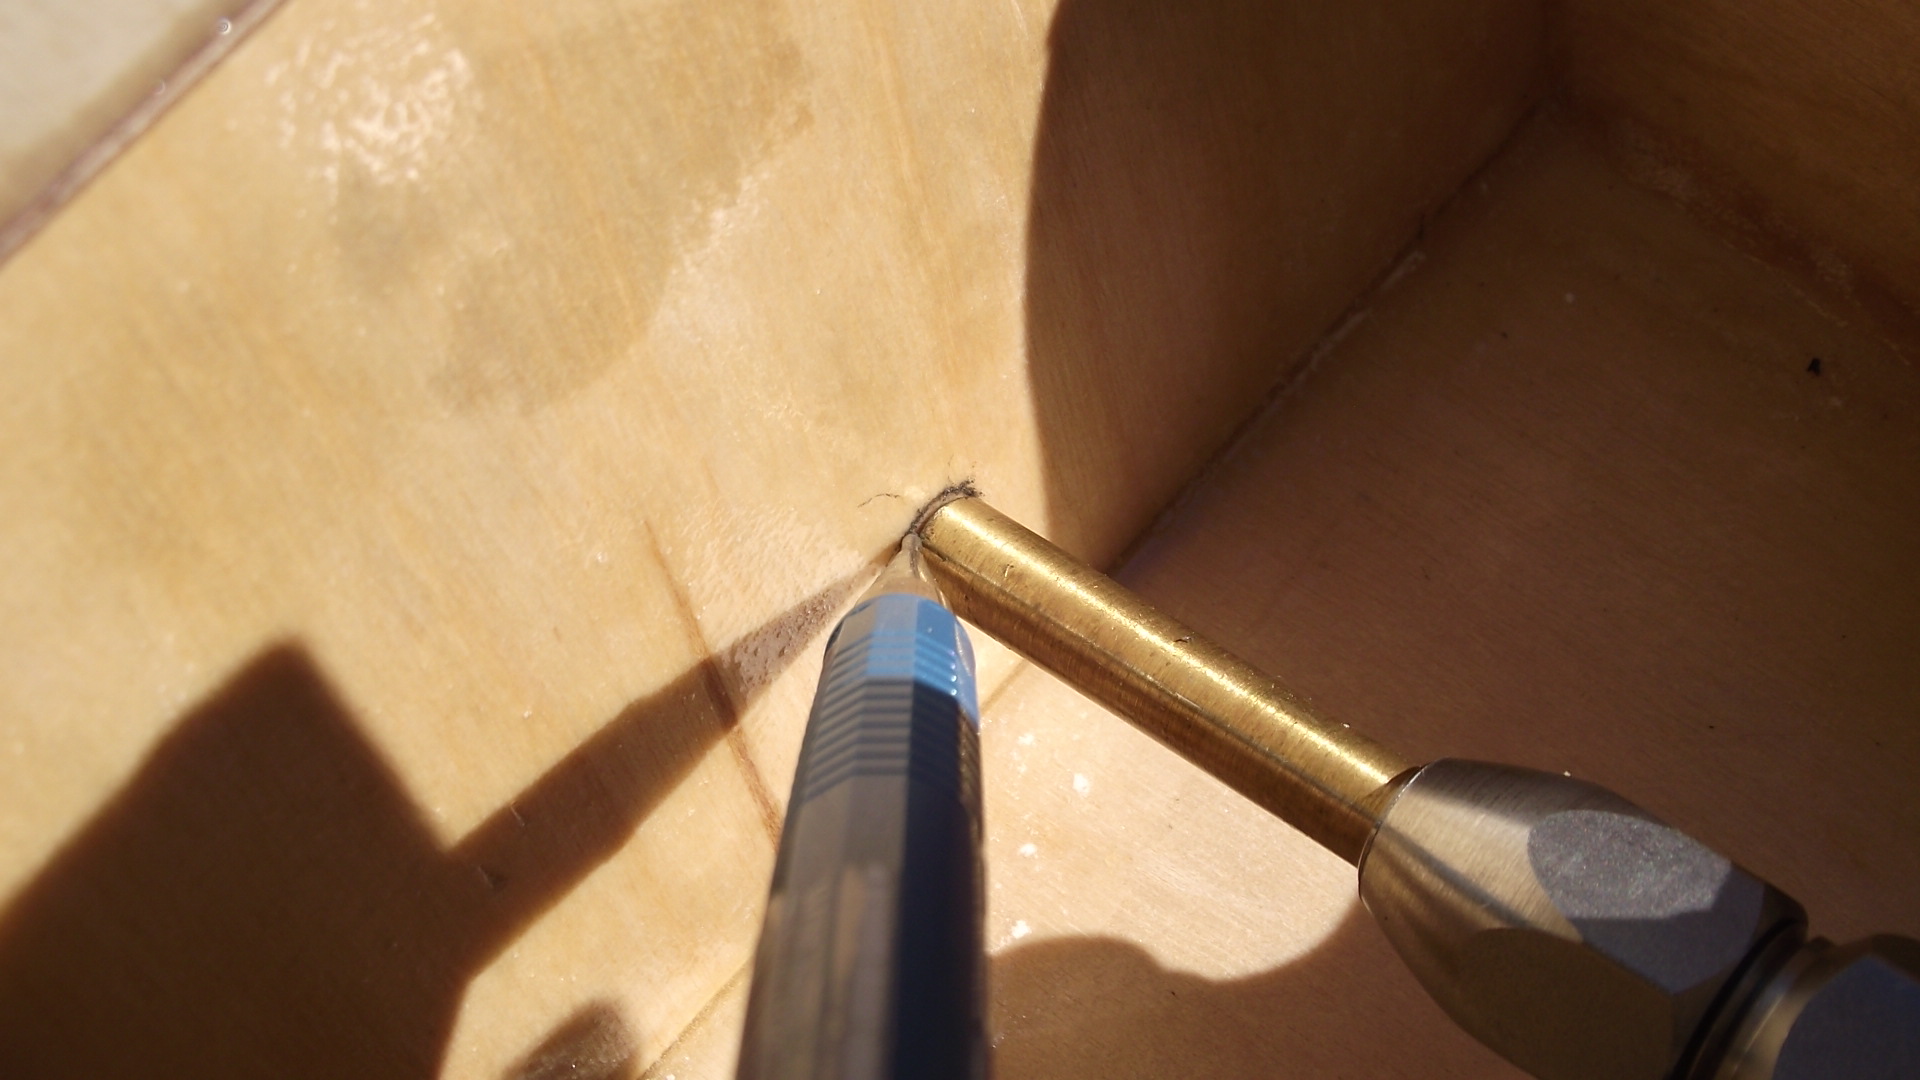
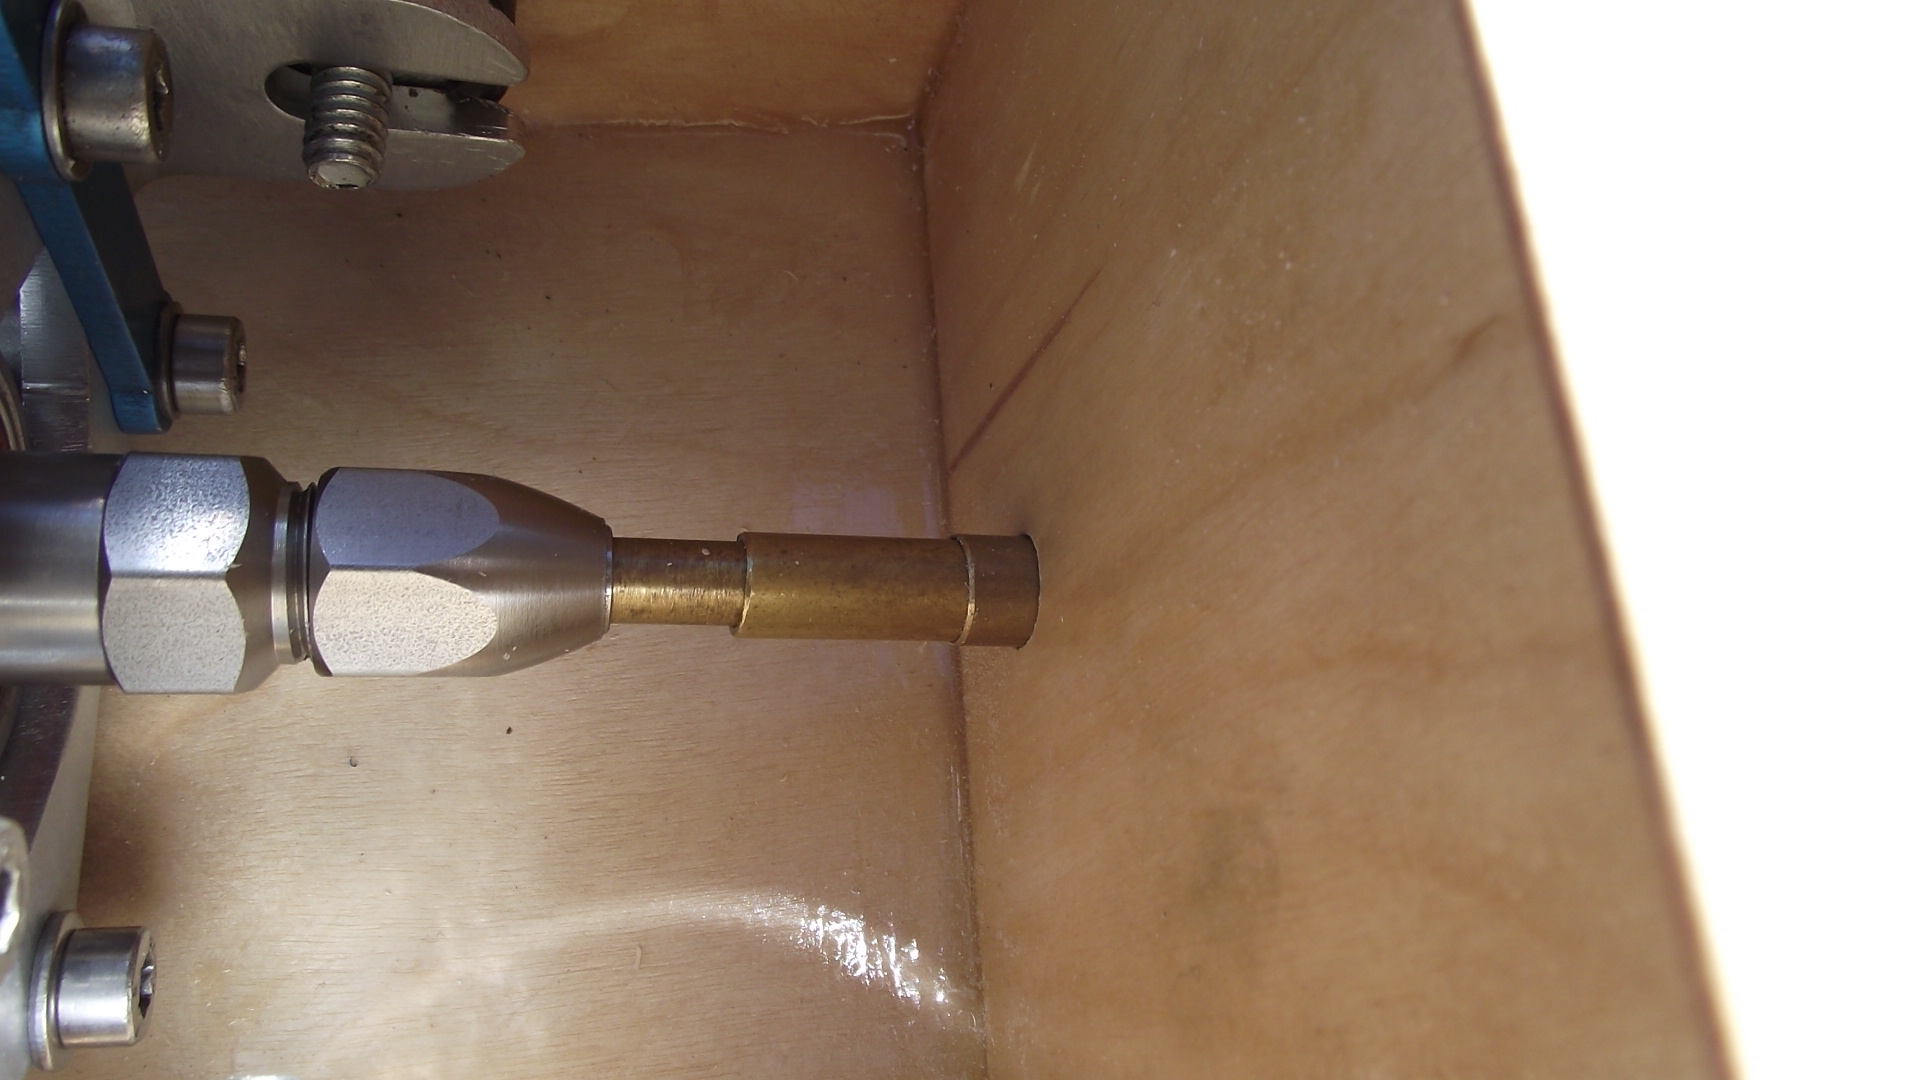
*Taking a short piece of 1/4" brass tubing placed it into cable collet then slid it out slightly so it was just shy of contacting bulkhead. Rotated engine slowly making sure adjusting run out so tube rotated with engine having no wobble.
Once satisfied drew a pencil line around most of the tube.
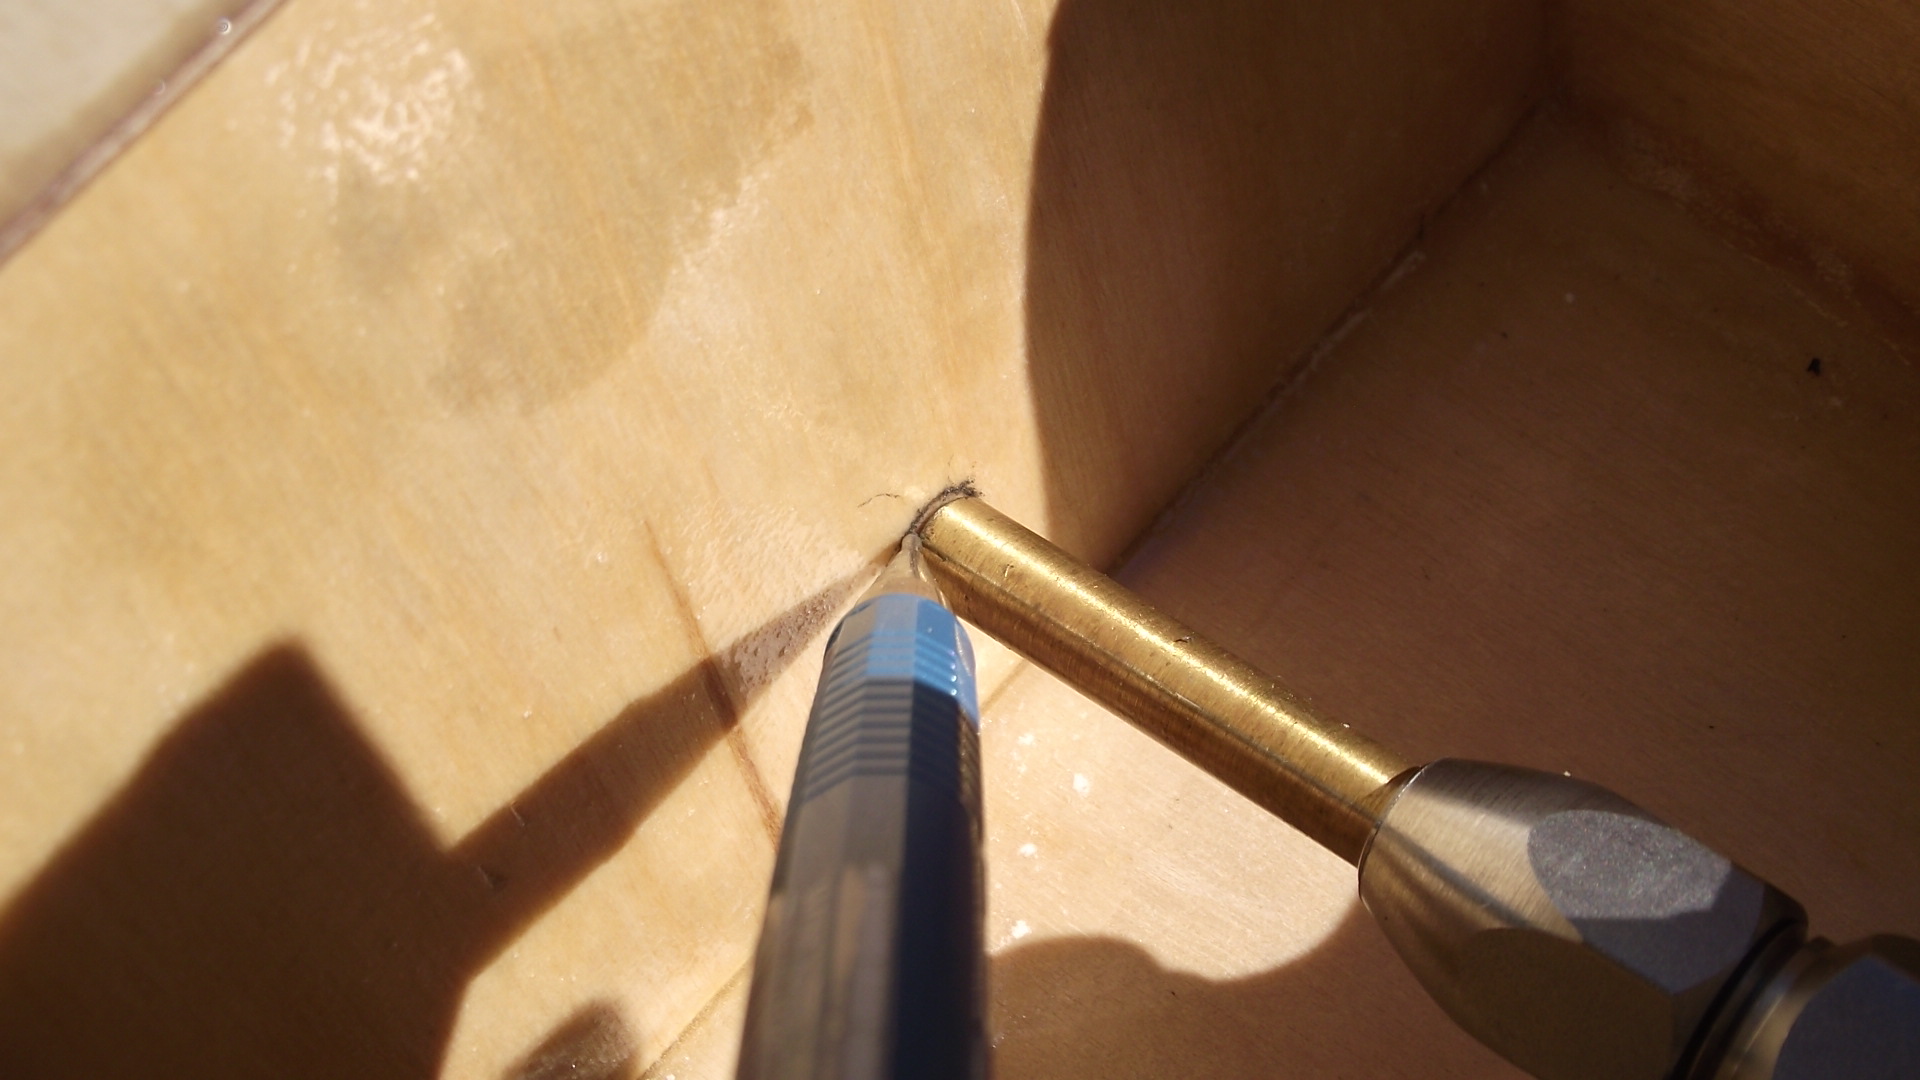
[img]http://www.modelgasboats.com/media/kunena/attachments/legacy/images /DSCF0428-20110220.JPG[/img]
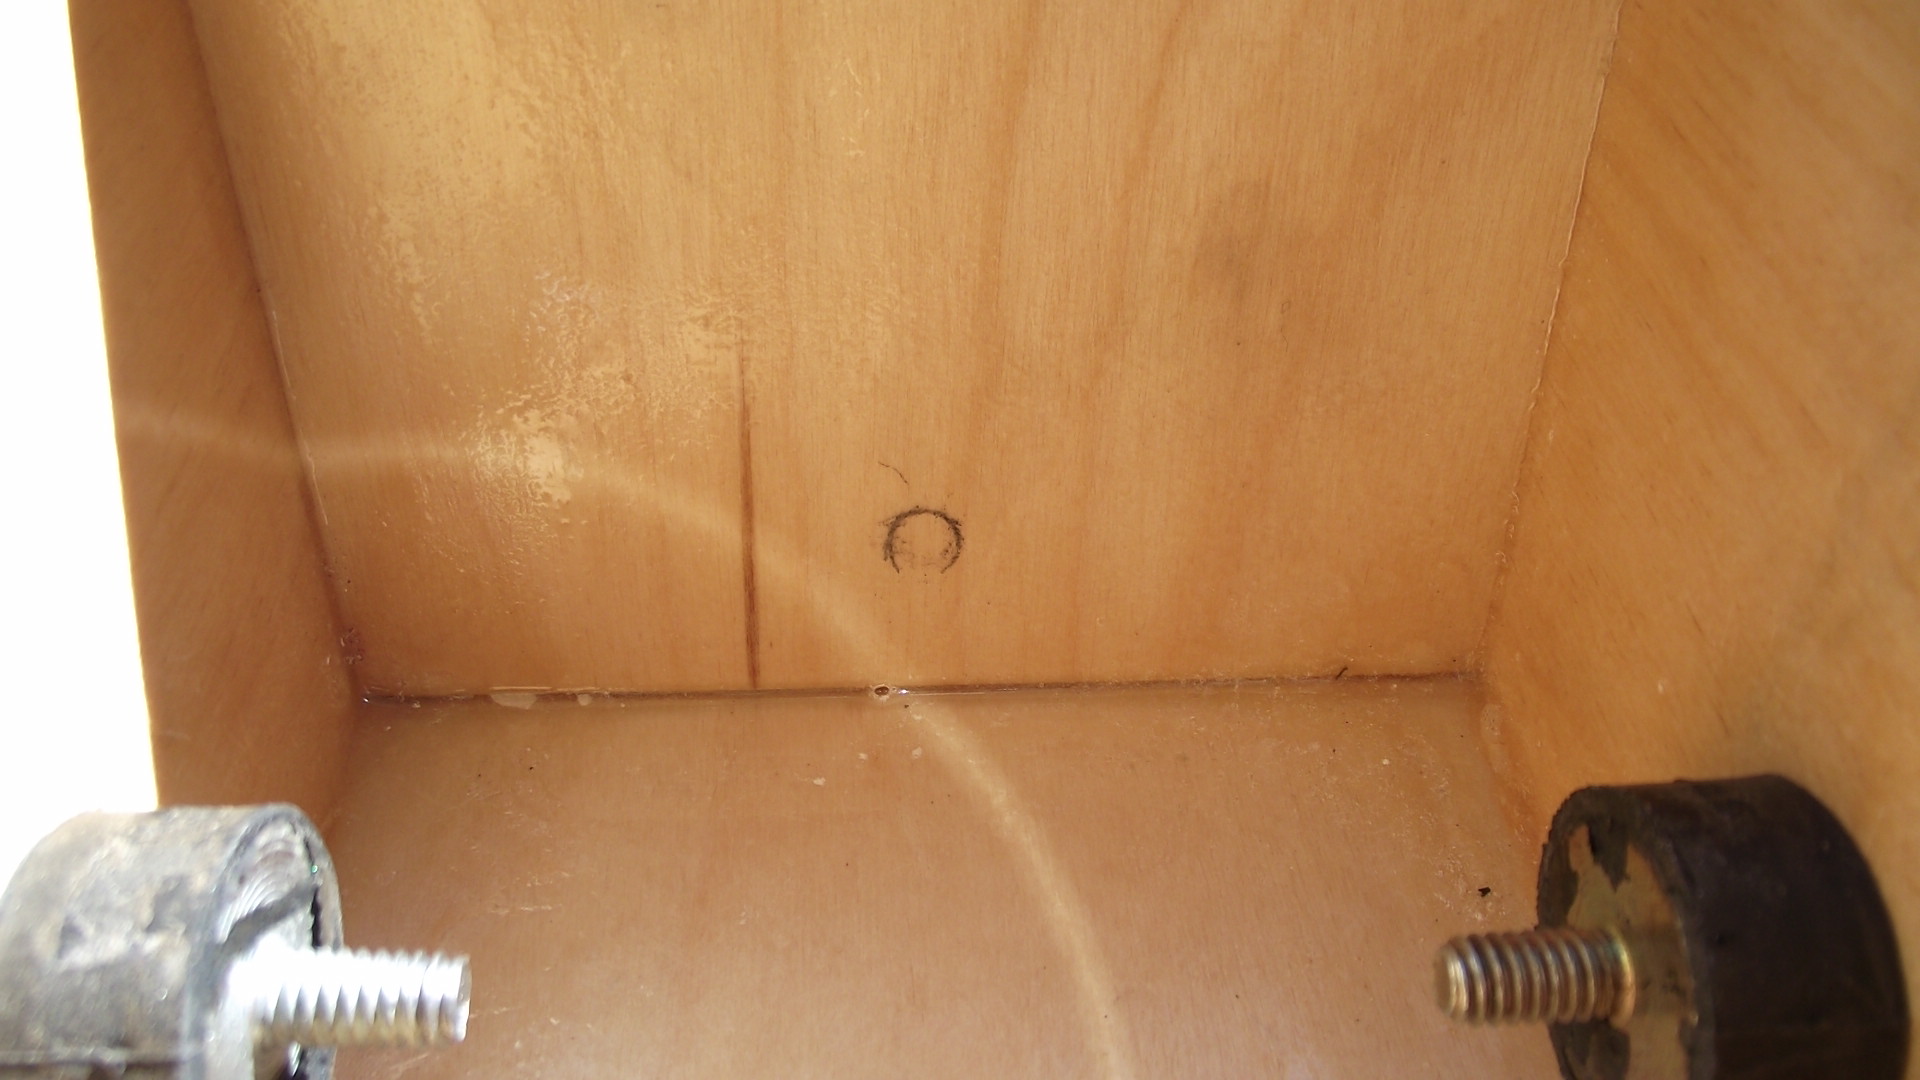
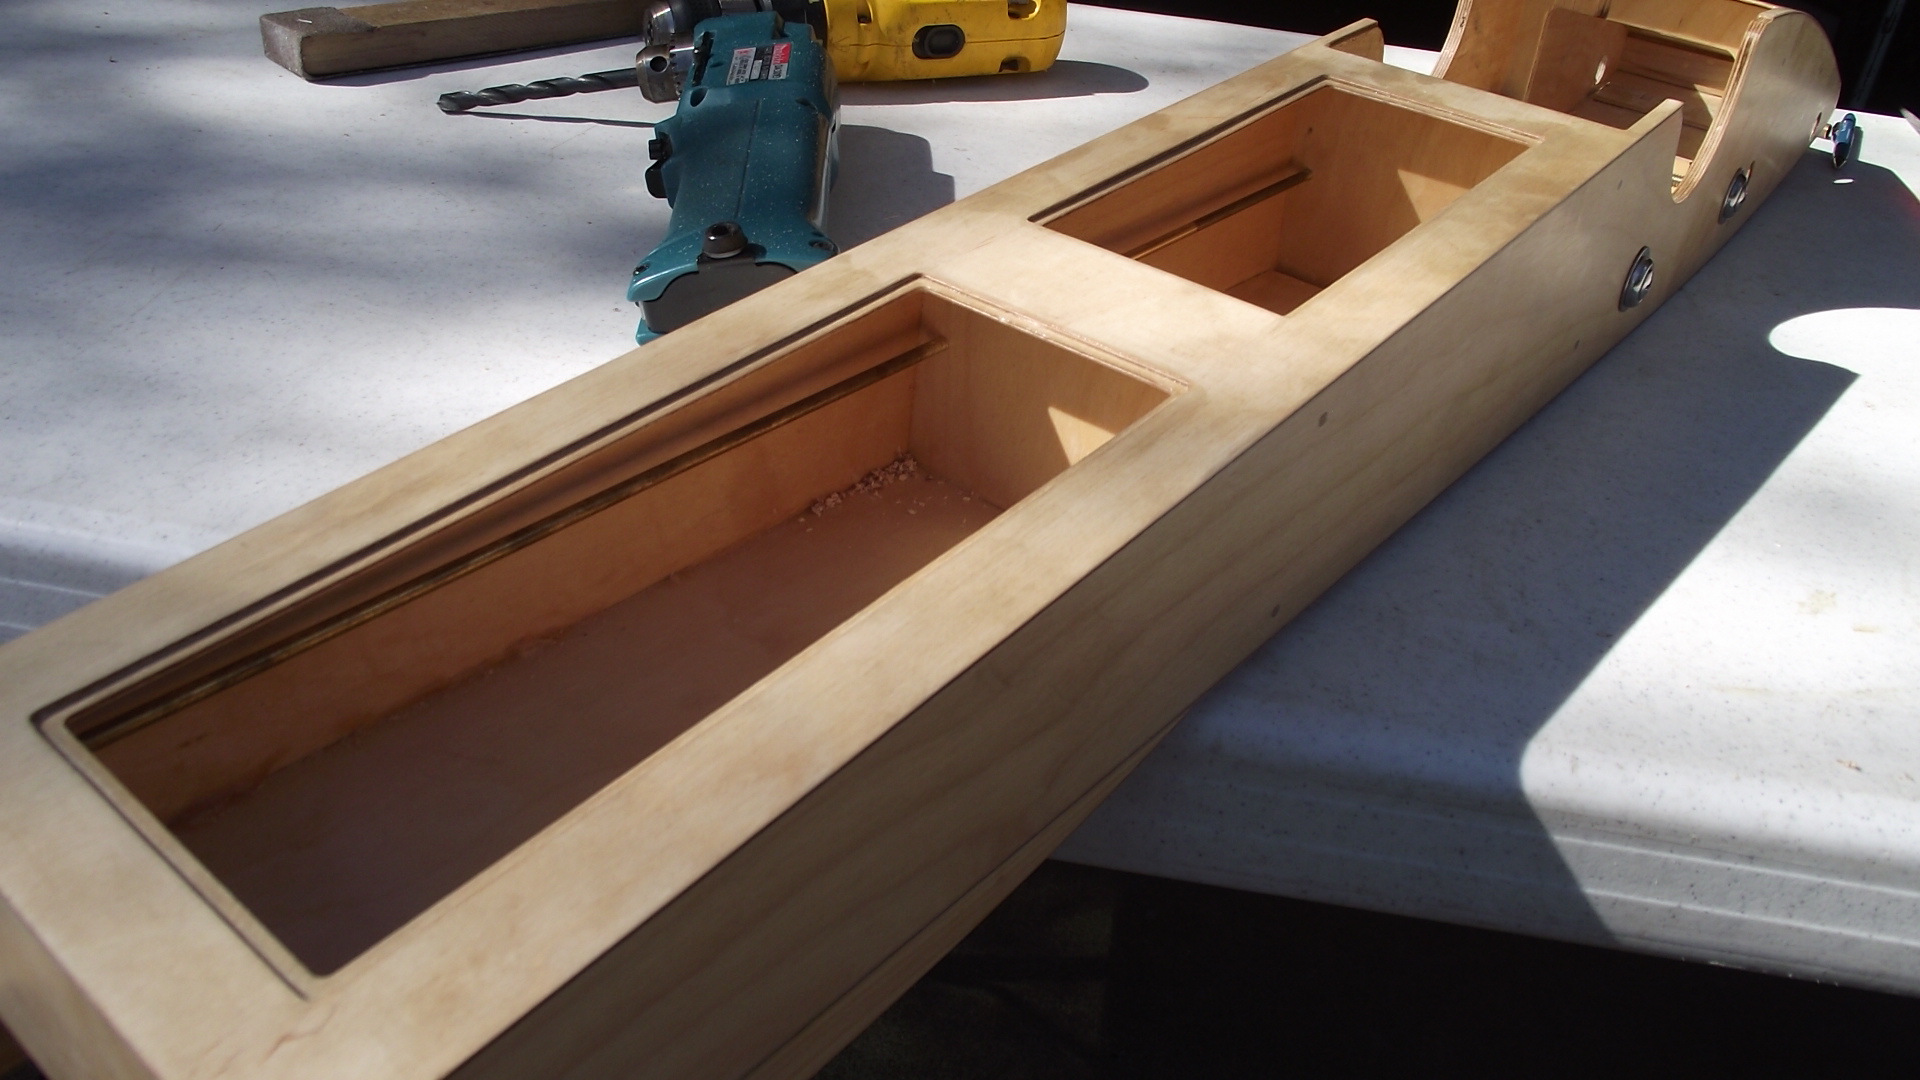
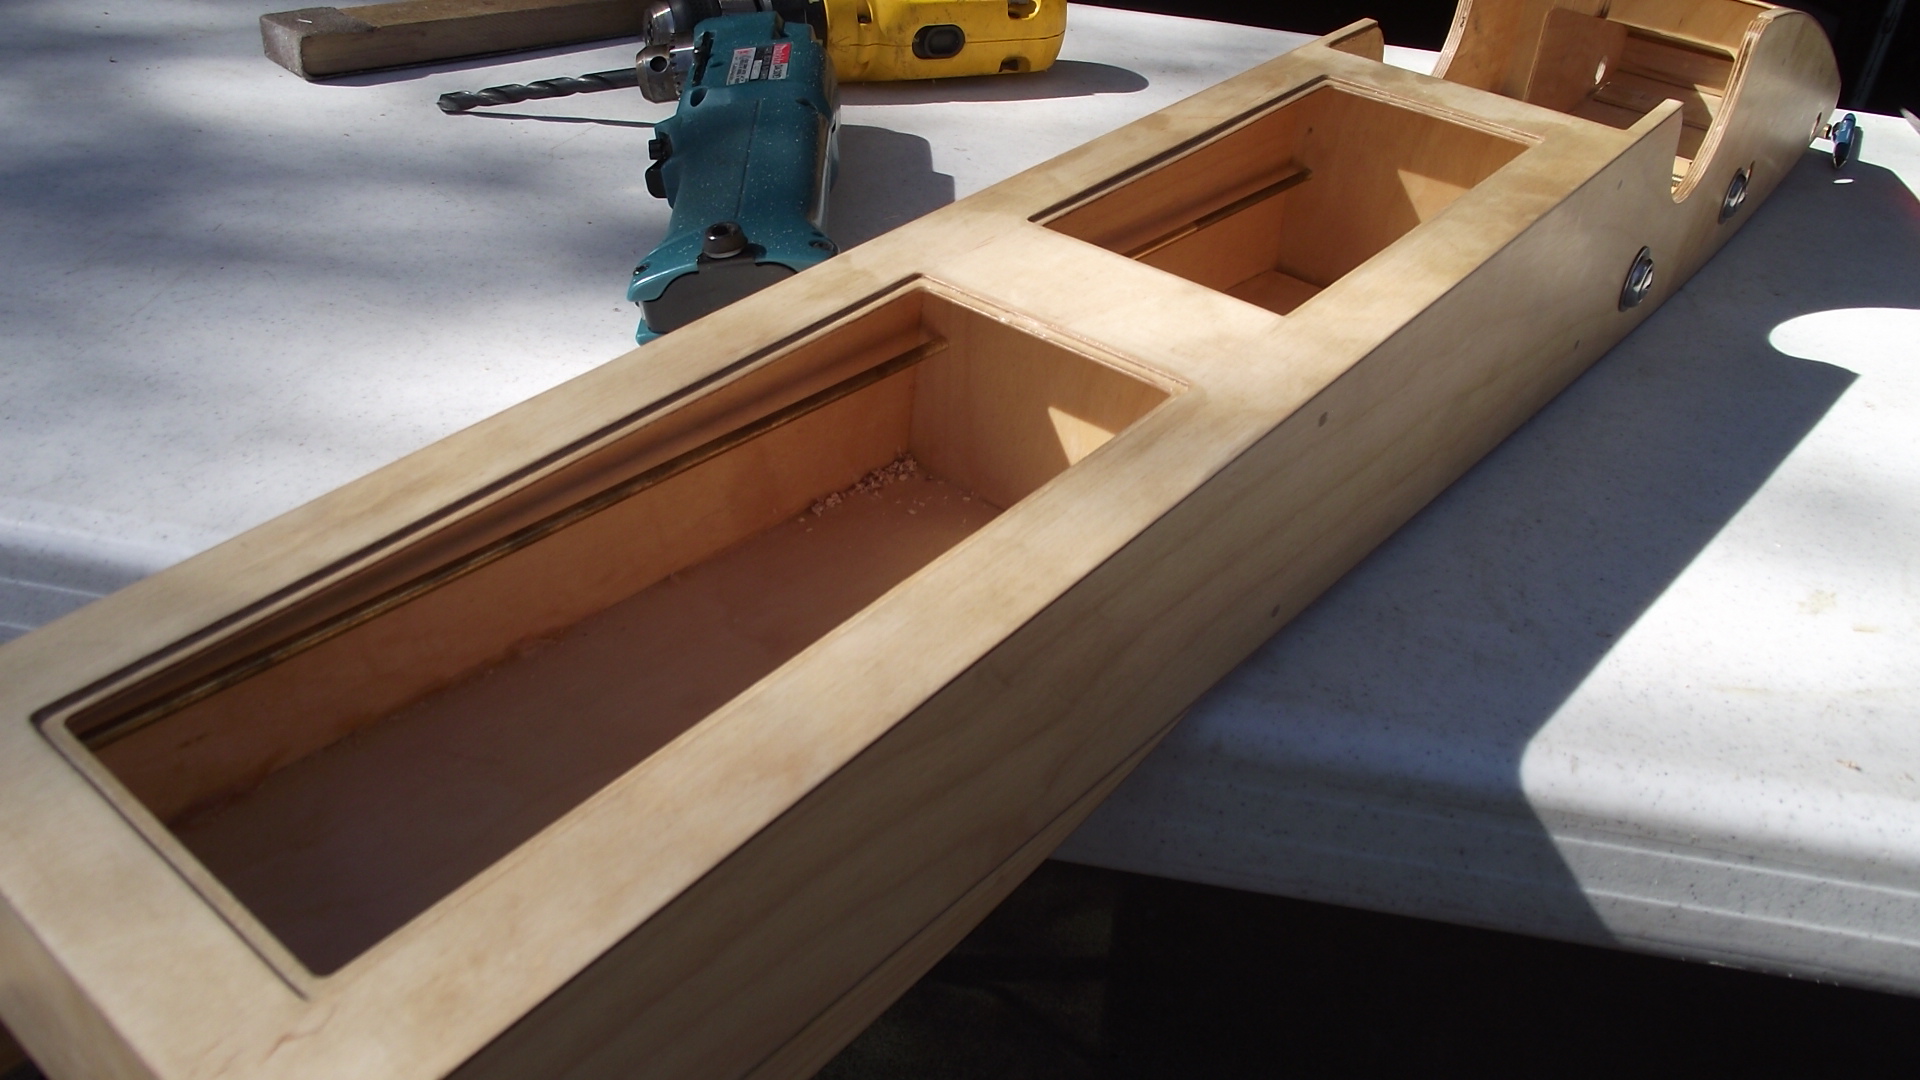
Taking a 90* drill and starter bit drilled the pilot hole followed up by a 11/32" hole which is the O.D. of the log tube that be epoxied into hull permanently.

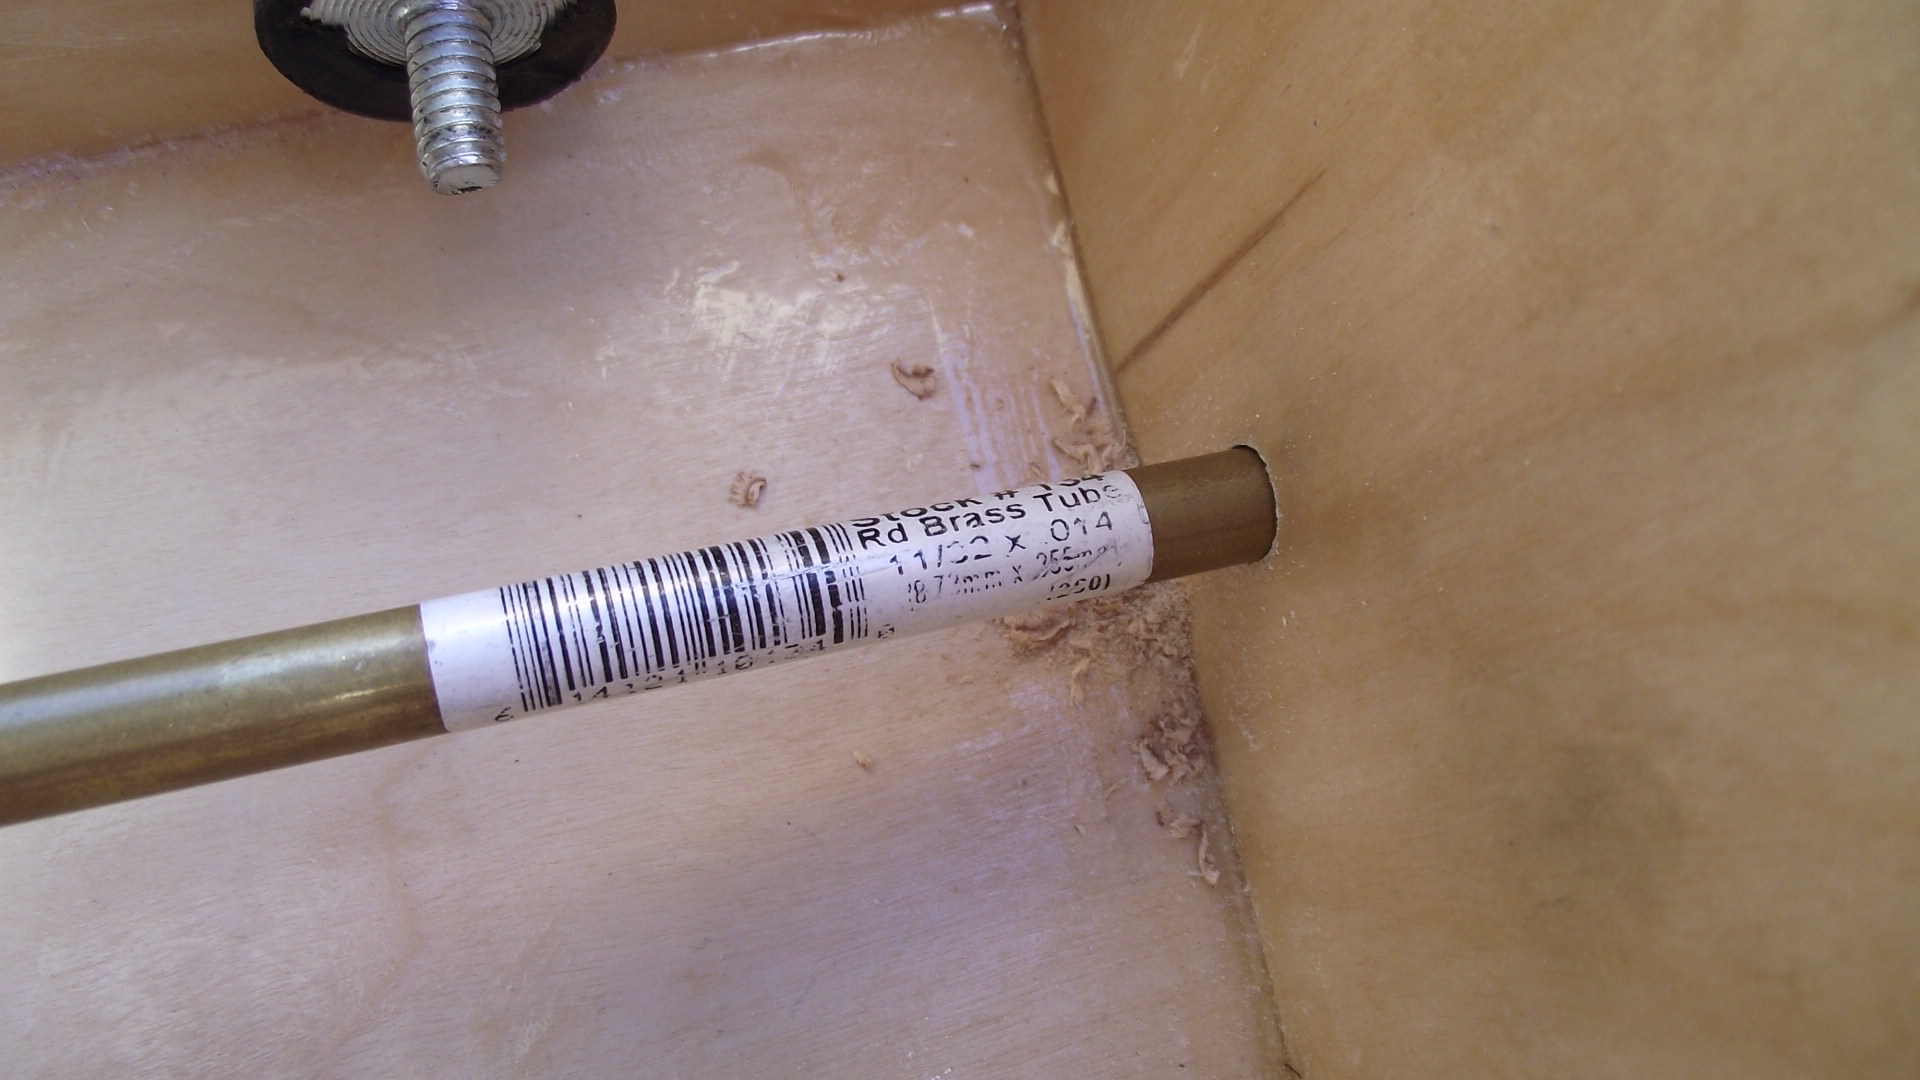
** Now here you need to pay attention to what your doing because next we are making a SLOT out the tubs bottom :S
In this process I use misc short lengths of the same diameters of K&S brass that will make up the final parts. 1/4" shorty used on engine collet, 5/16" .029 wall shorty that is the stuffing tube, then a piece of the 11/32" which is the log.
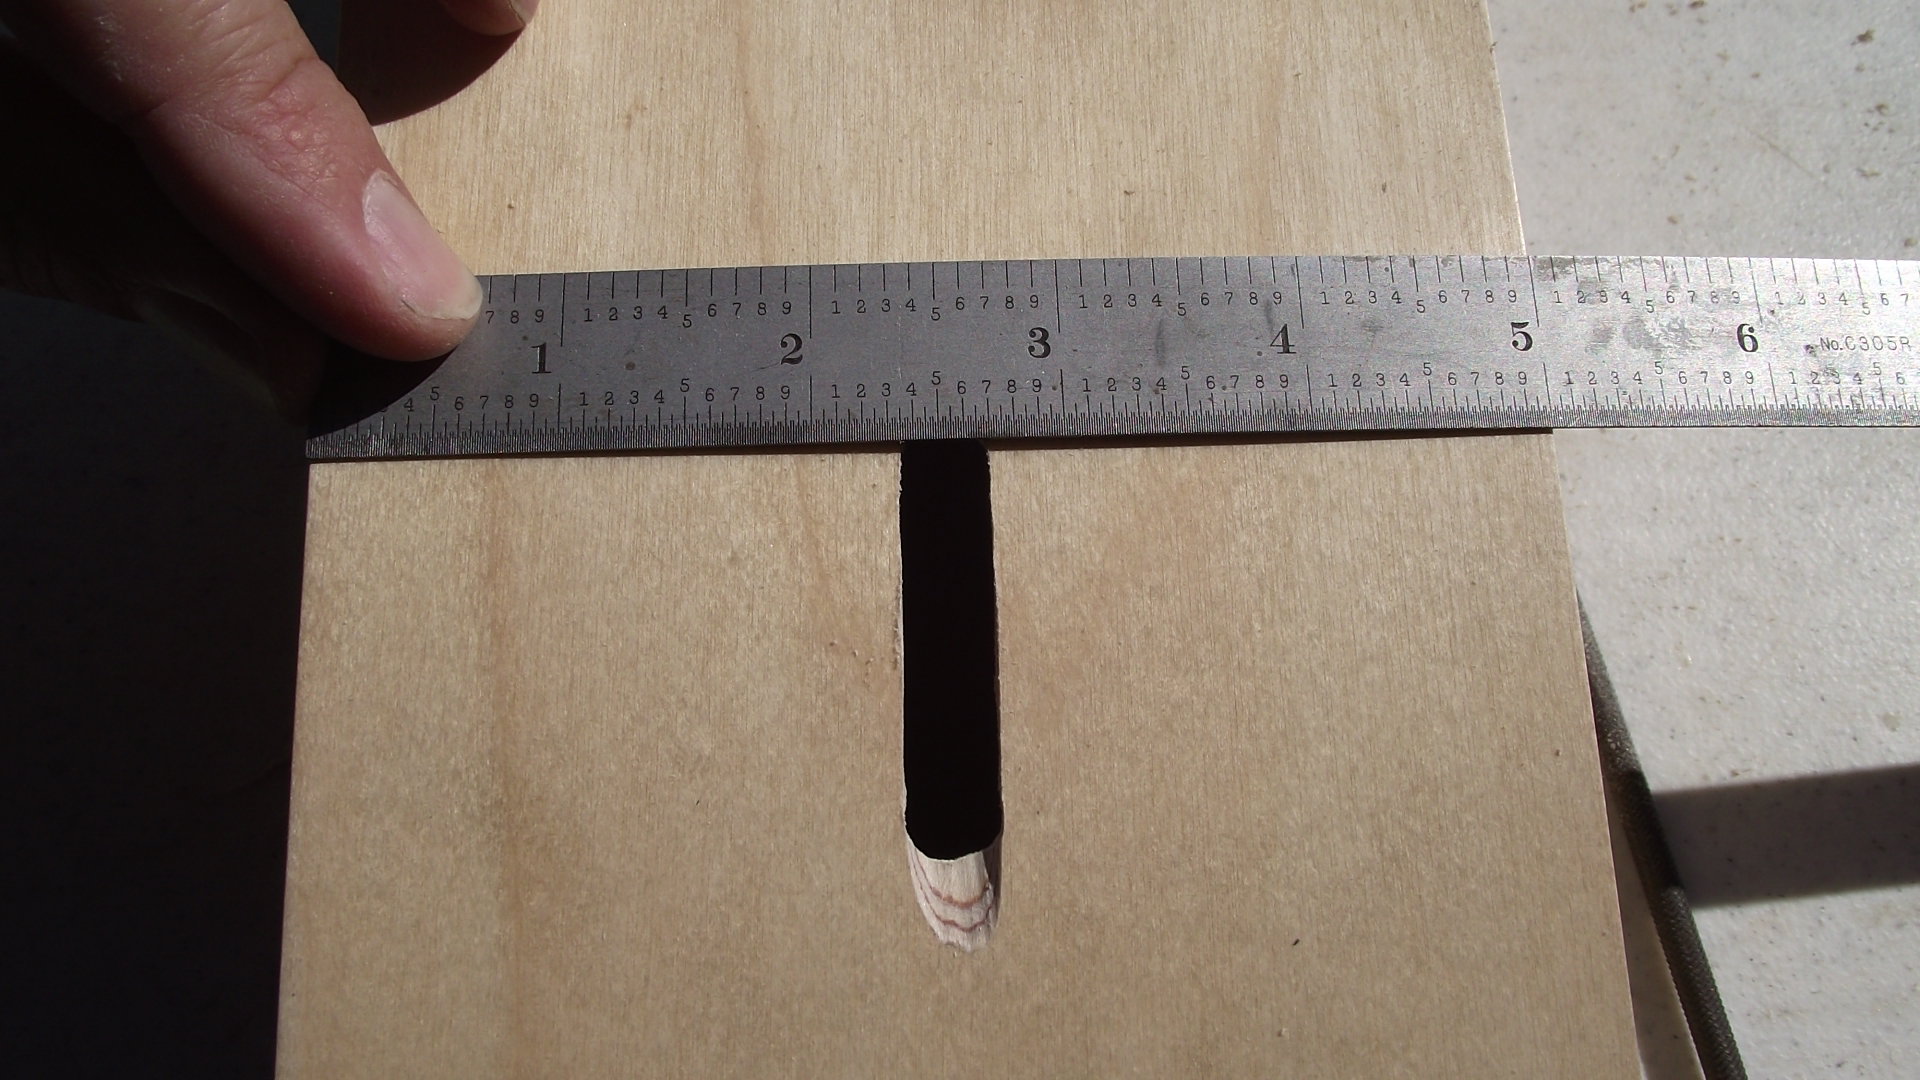
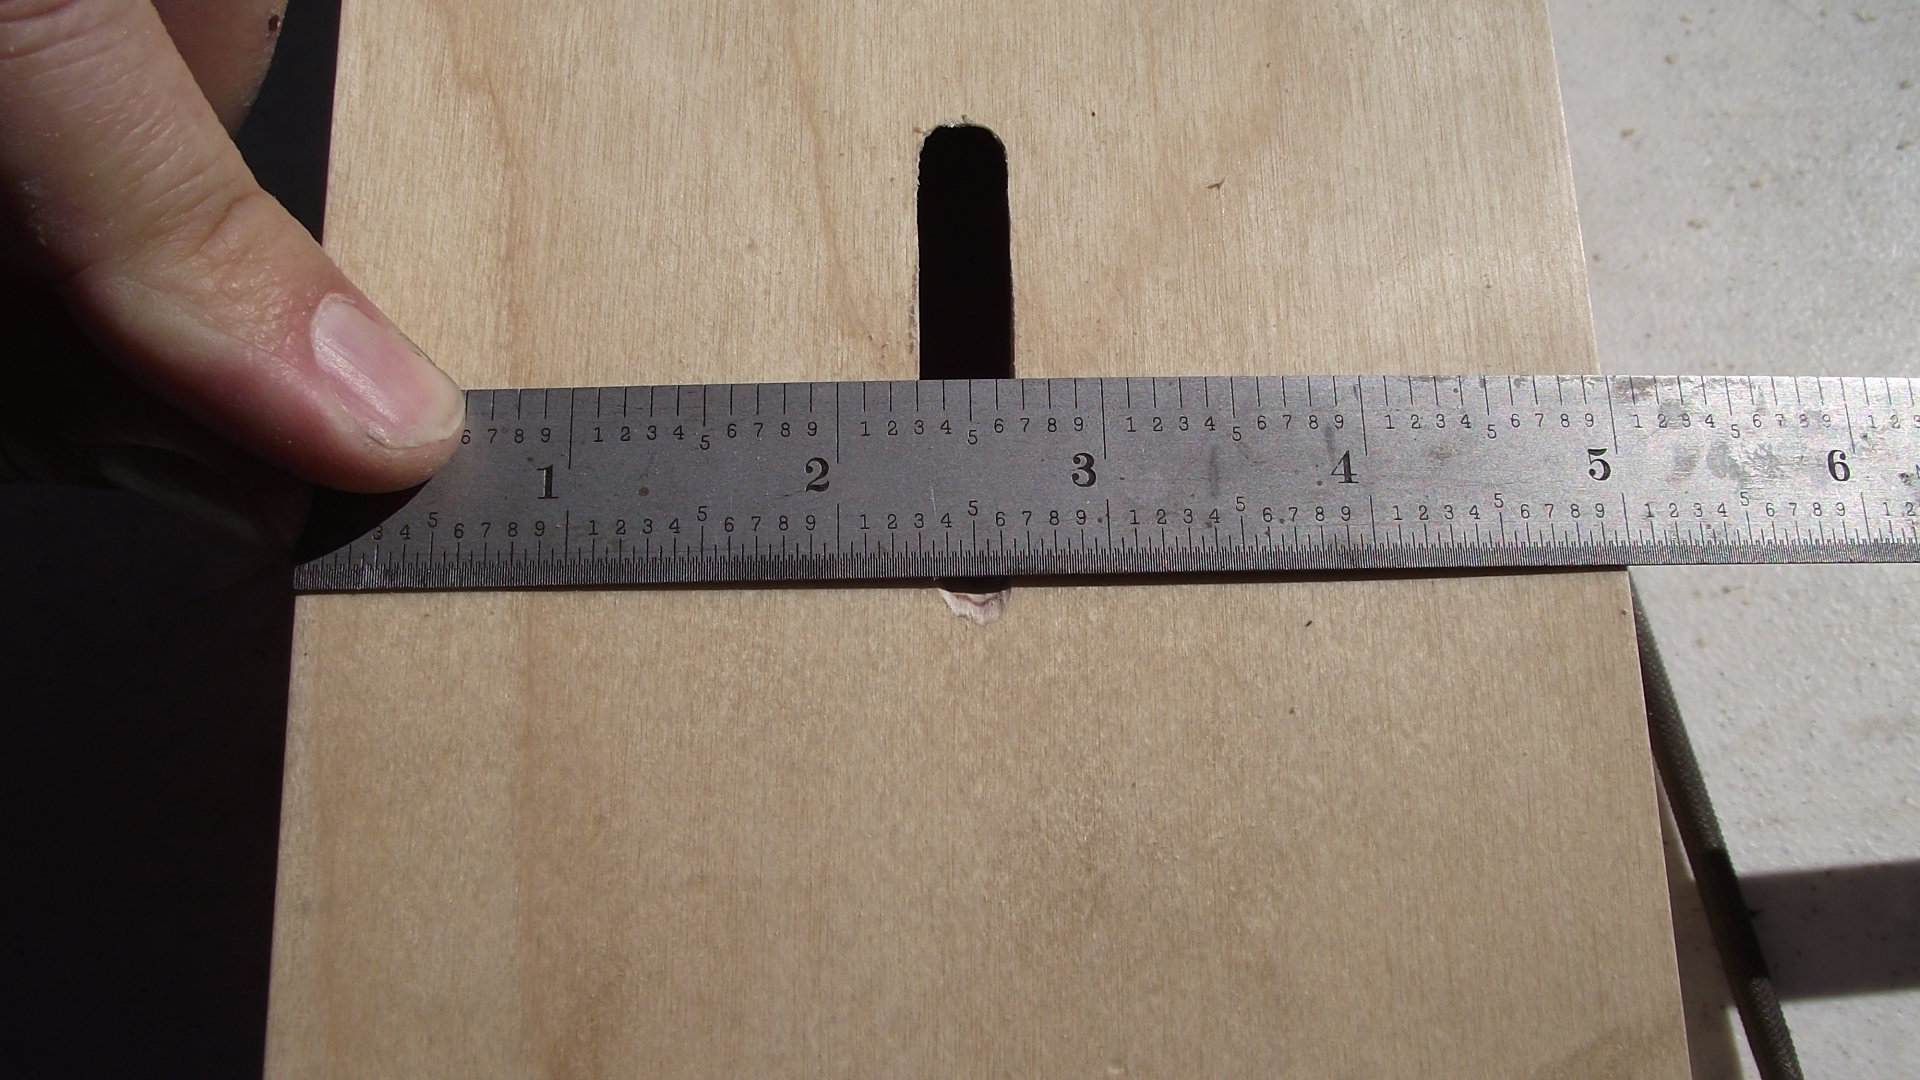
*Now I slide a piece of stuffing tube onto 1/4" having it pass threw hole in bulkhead. sliding the tube down a bit has it hit floor of tub ( DRAW A LINE )where it hits. Then with short straight edge or anything straight, set it on top of tube and takes it's top edge down until it hits floor of tub ( DRAW A LINE ) *This is the APPROXIMATE starting and ending position of slot :lol:
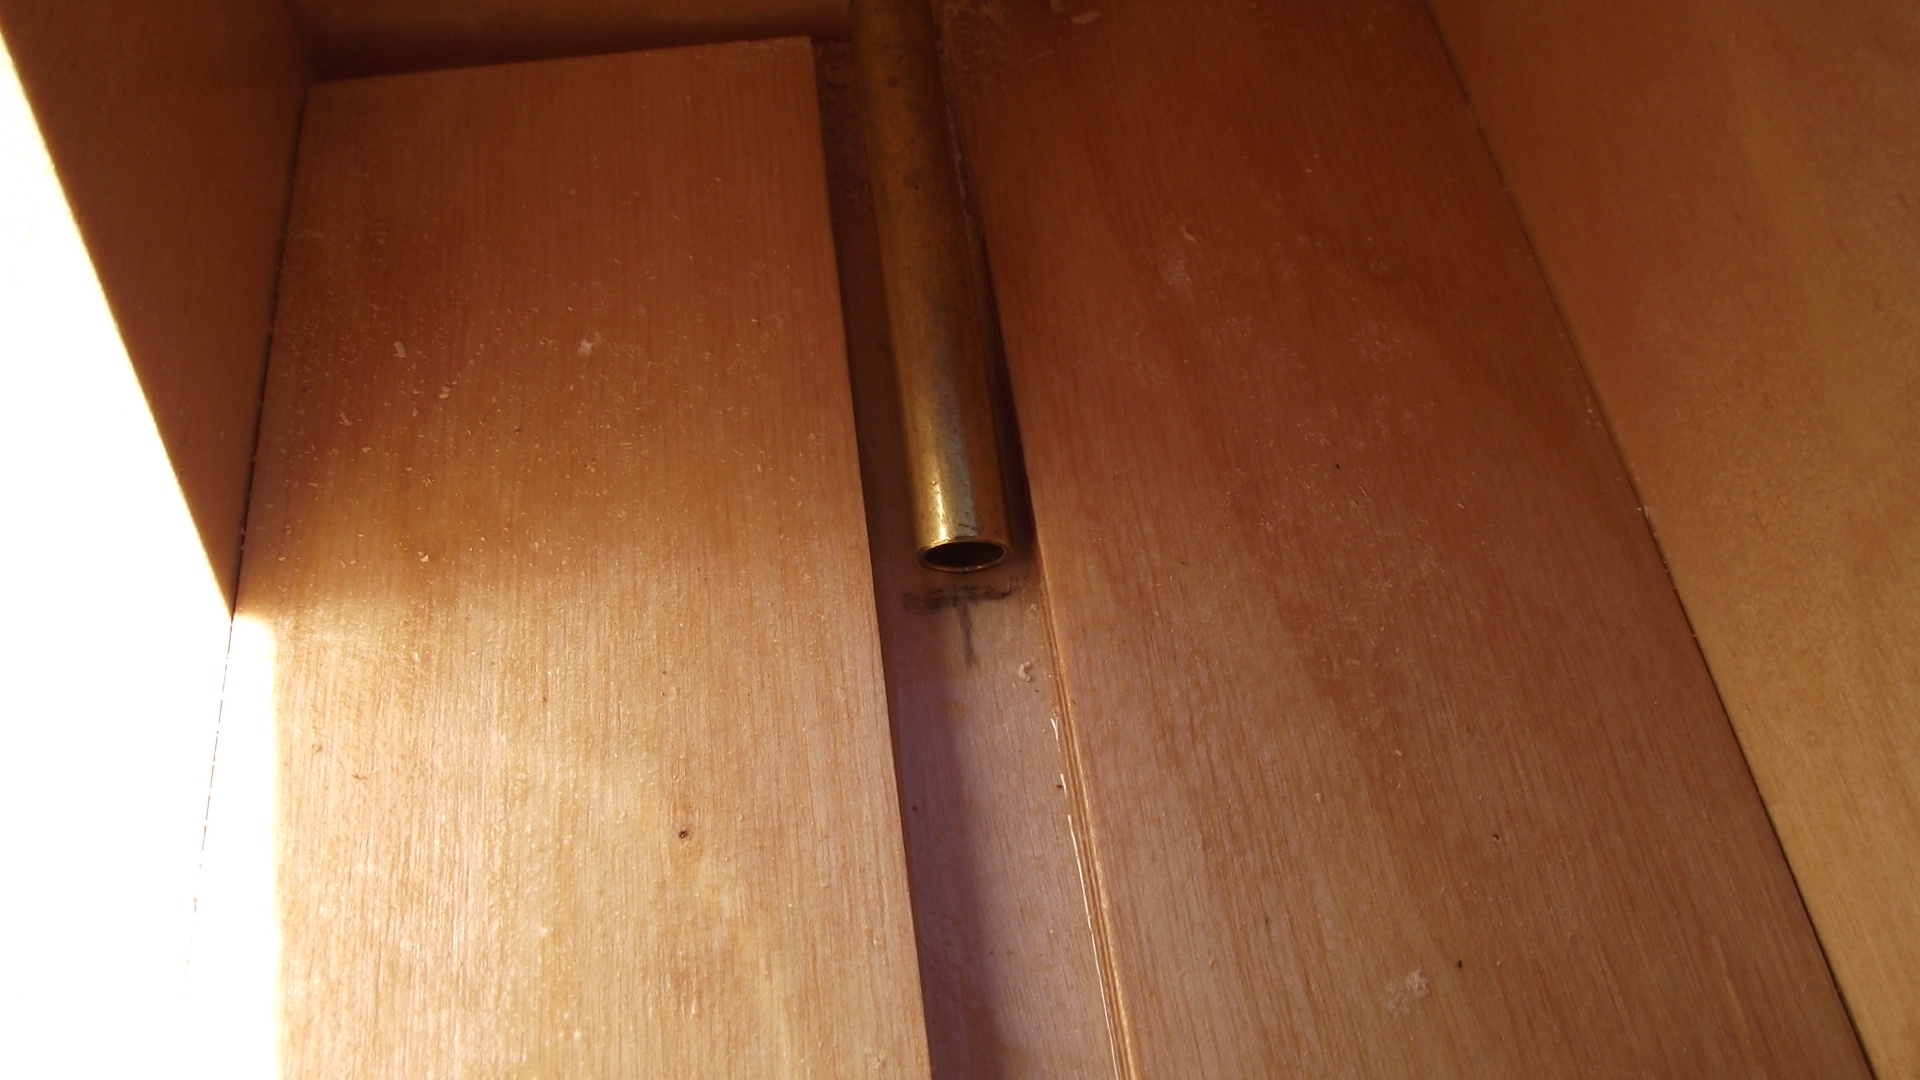
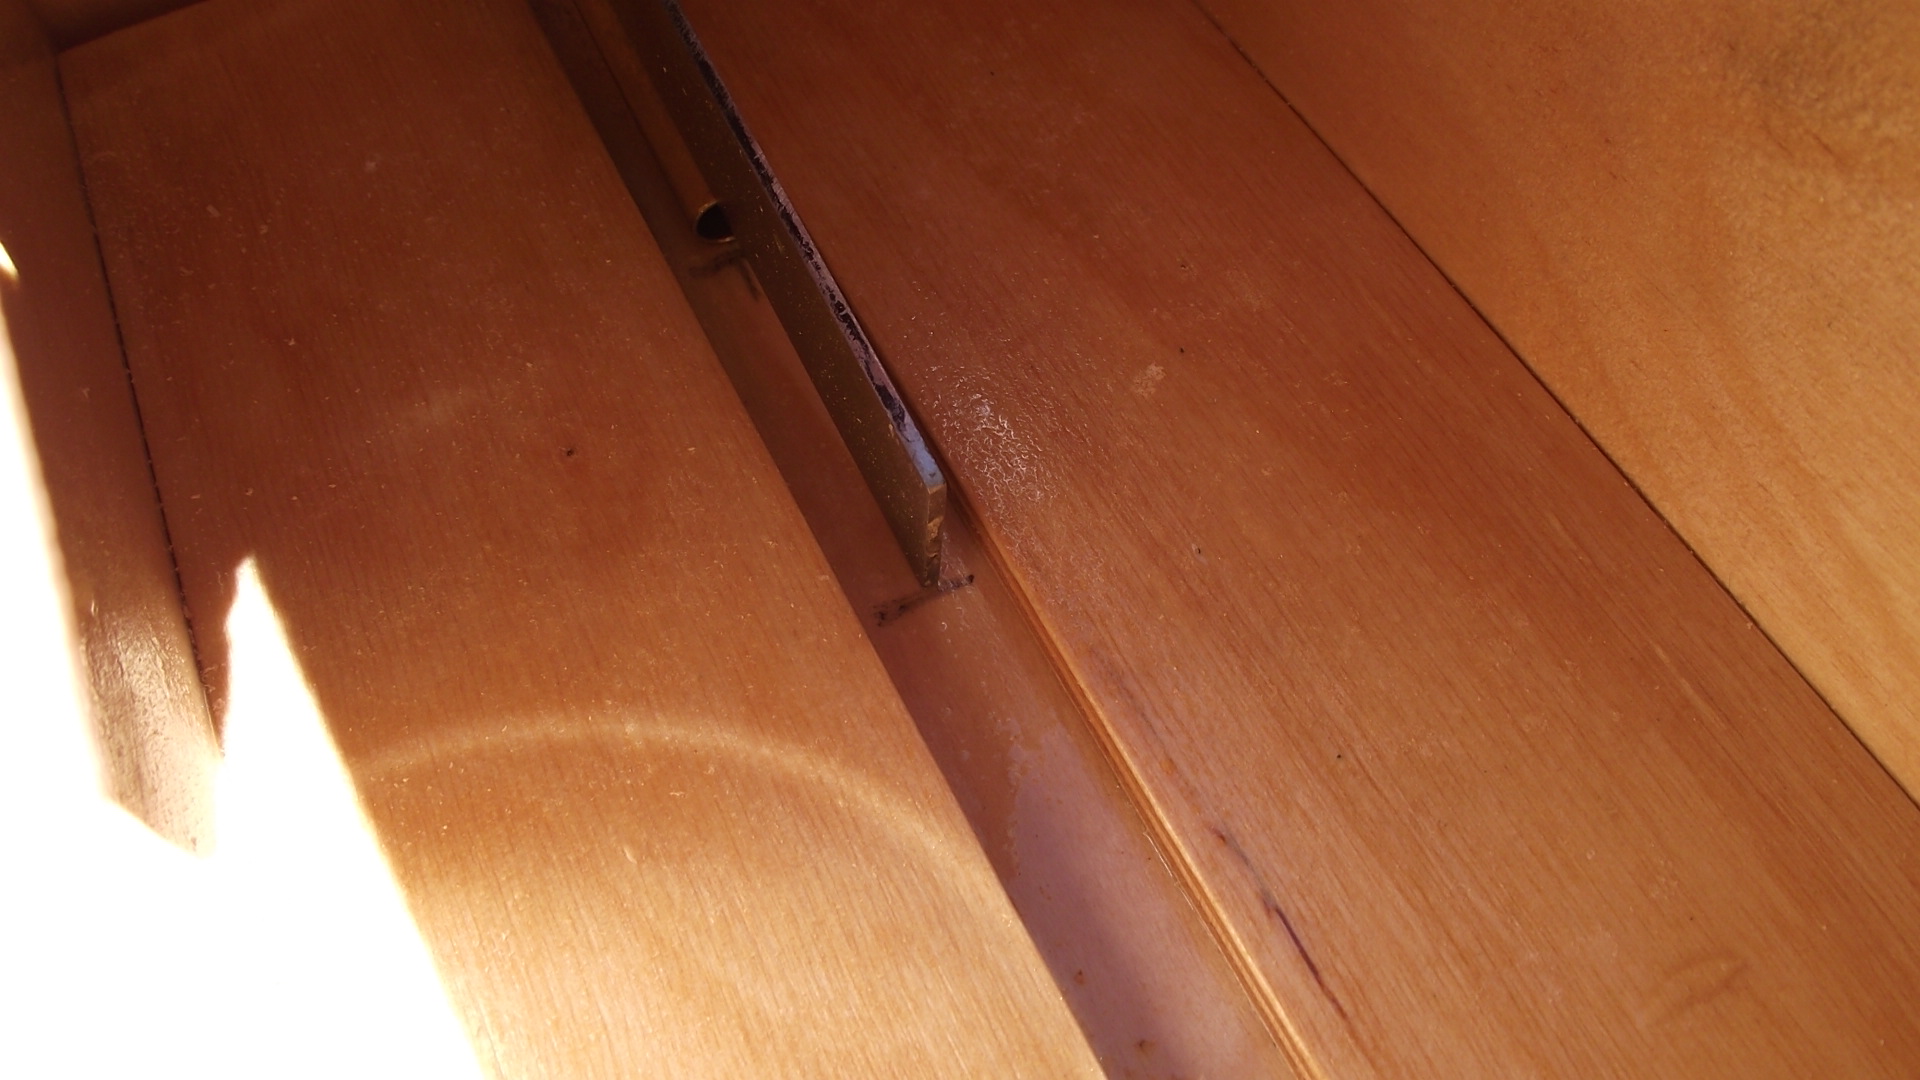
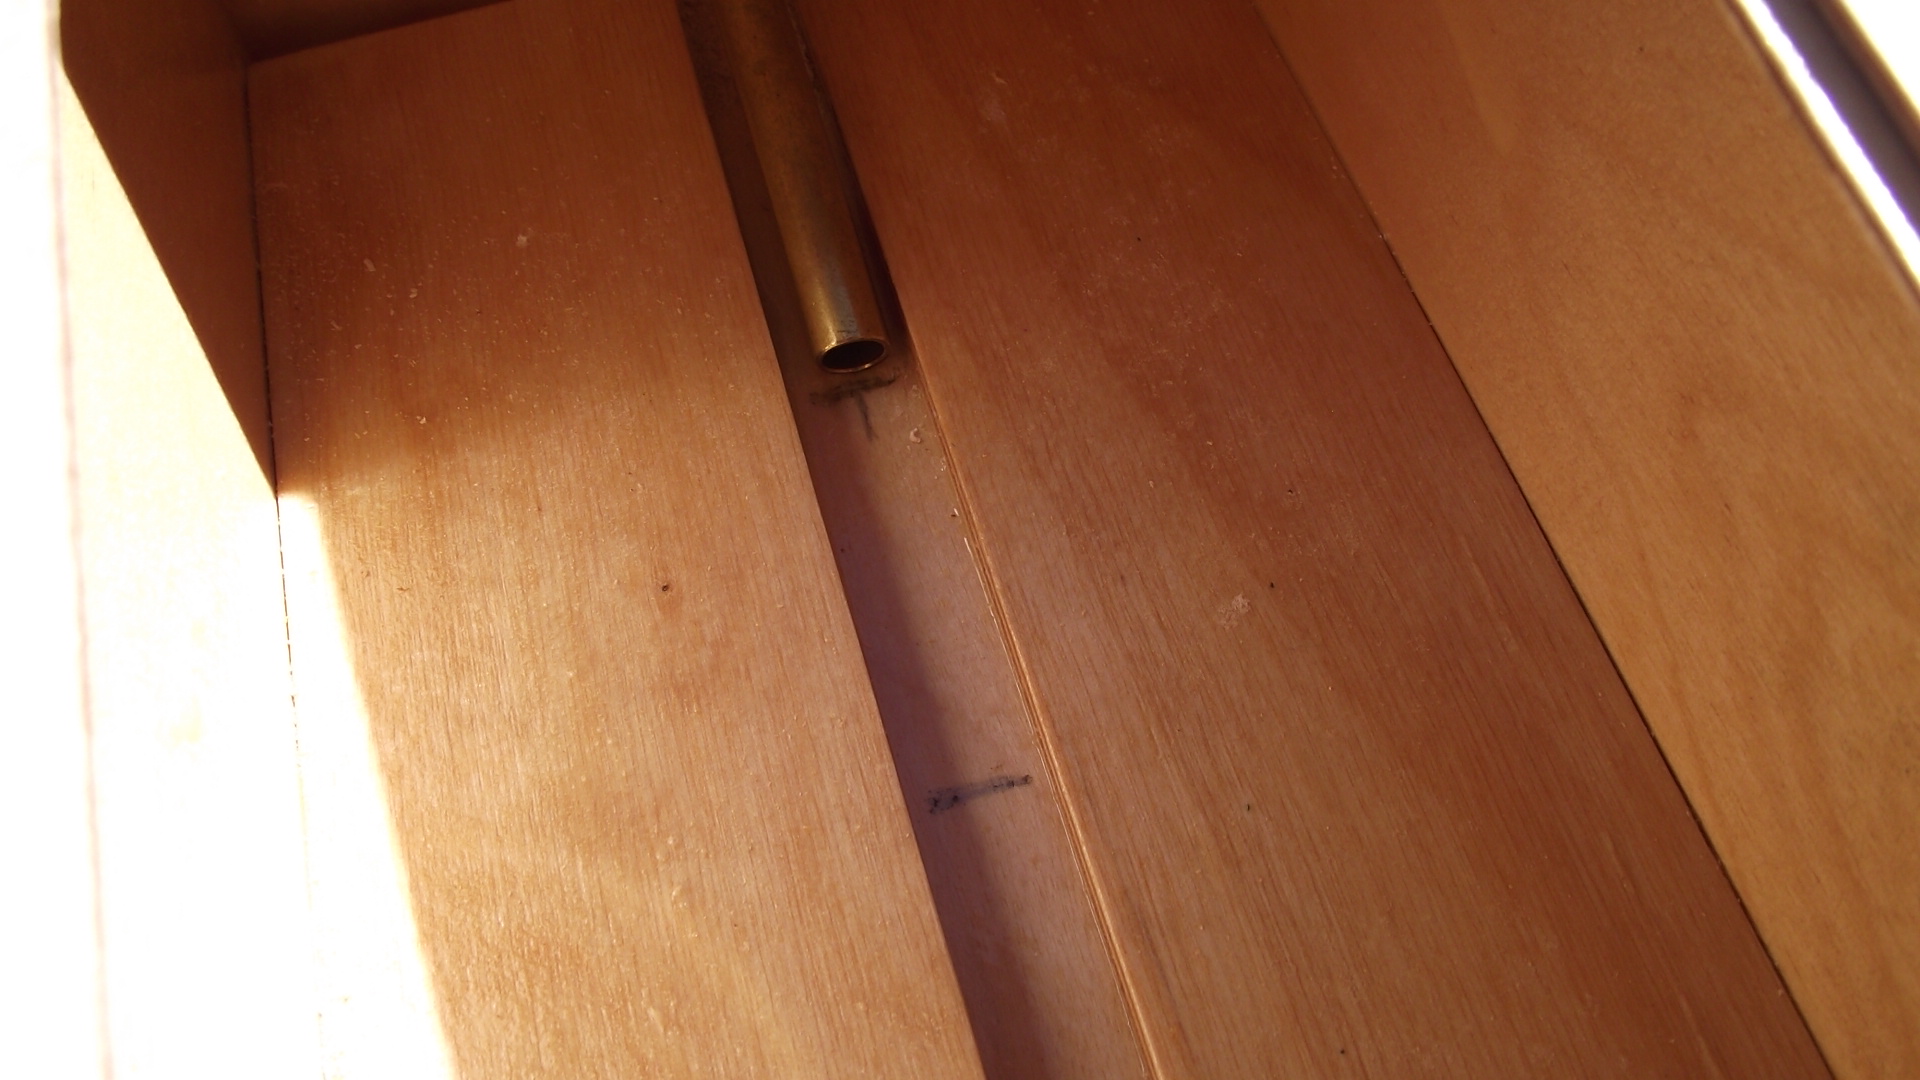
I just use a 1/4 diameter burr in a die grinder and plunge out the forward and reward positions then cut between them roughening out the slot.
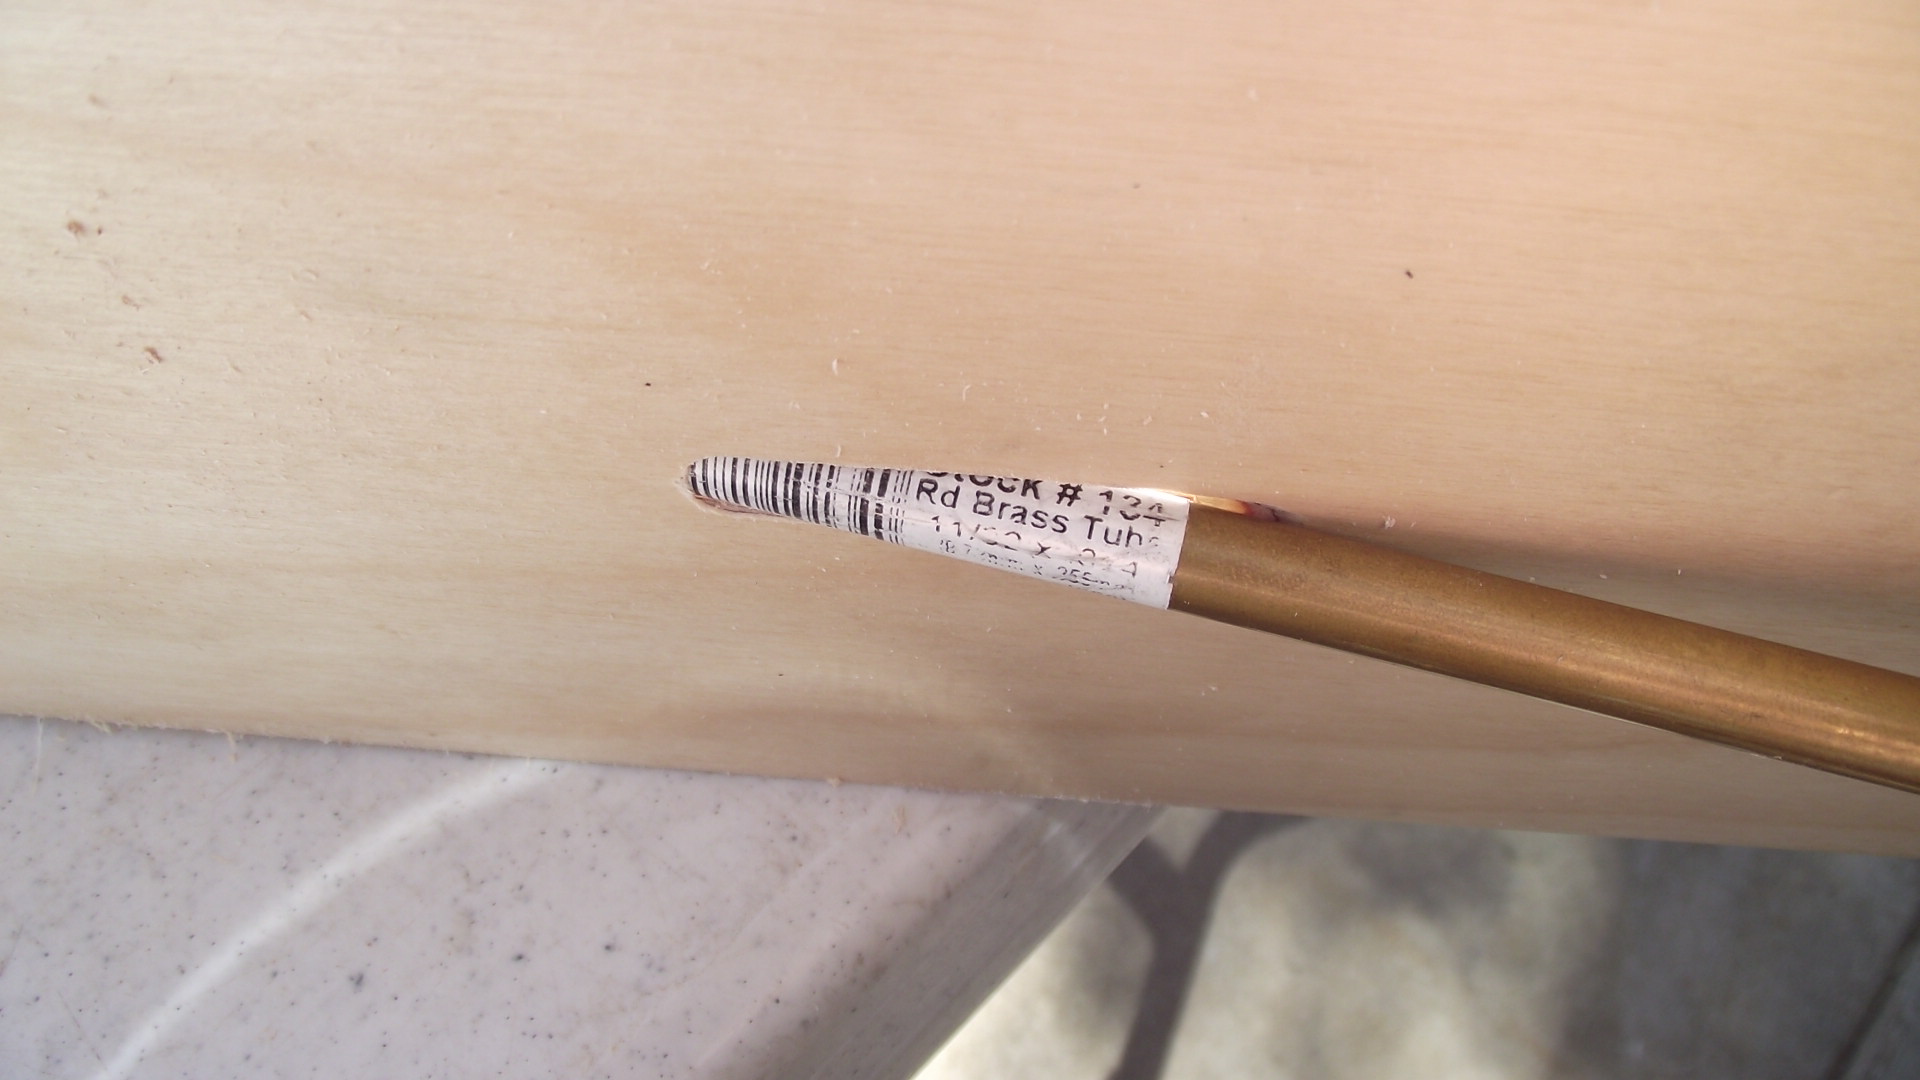
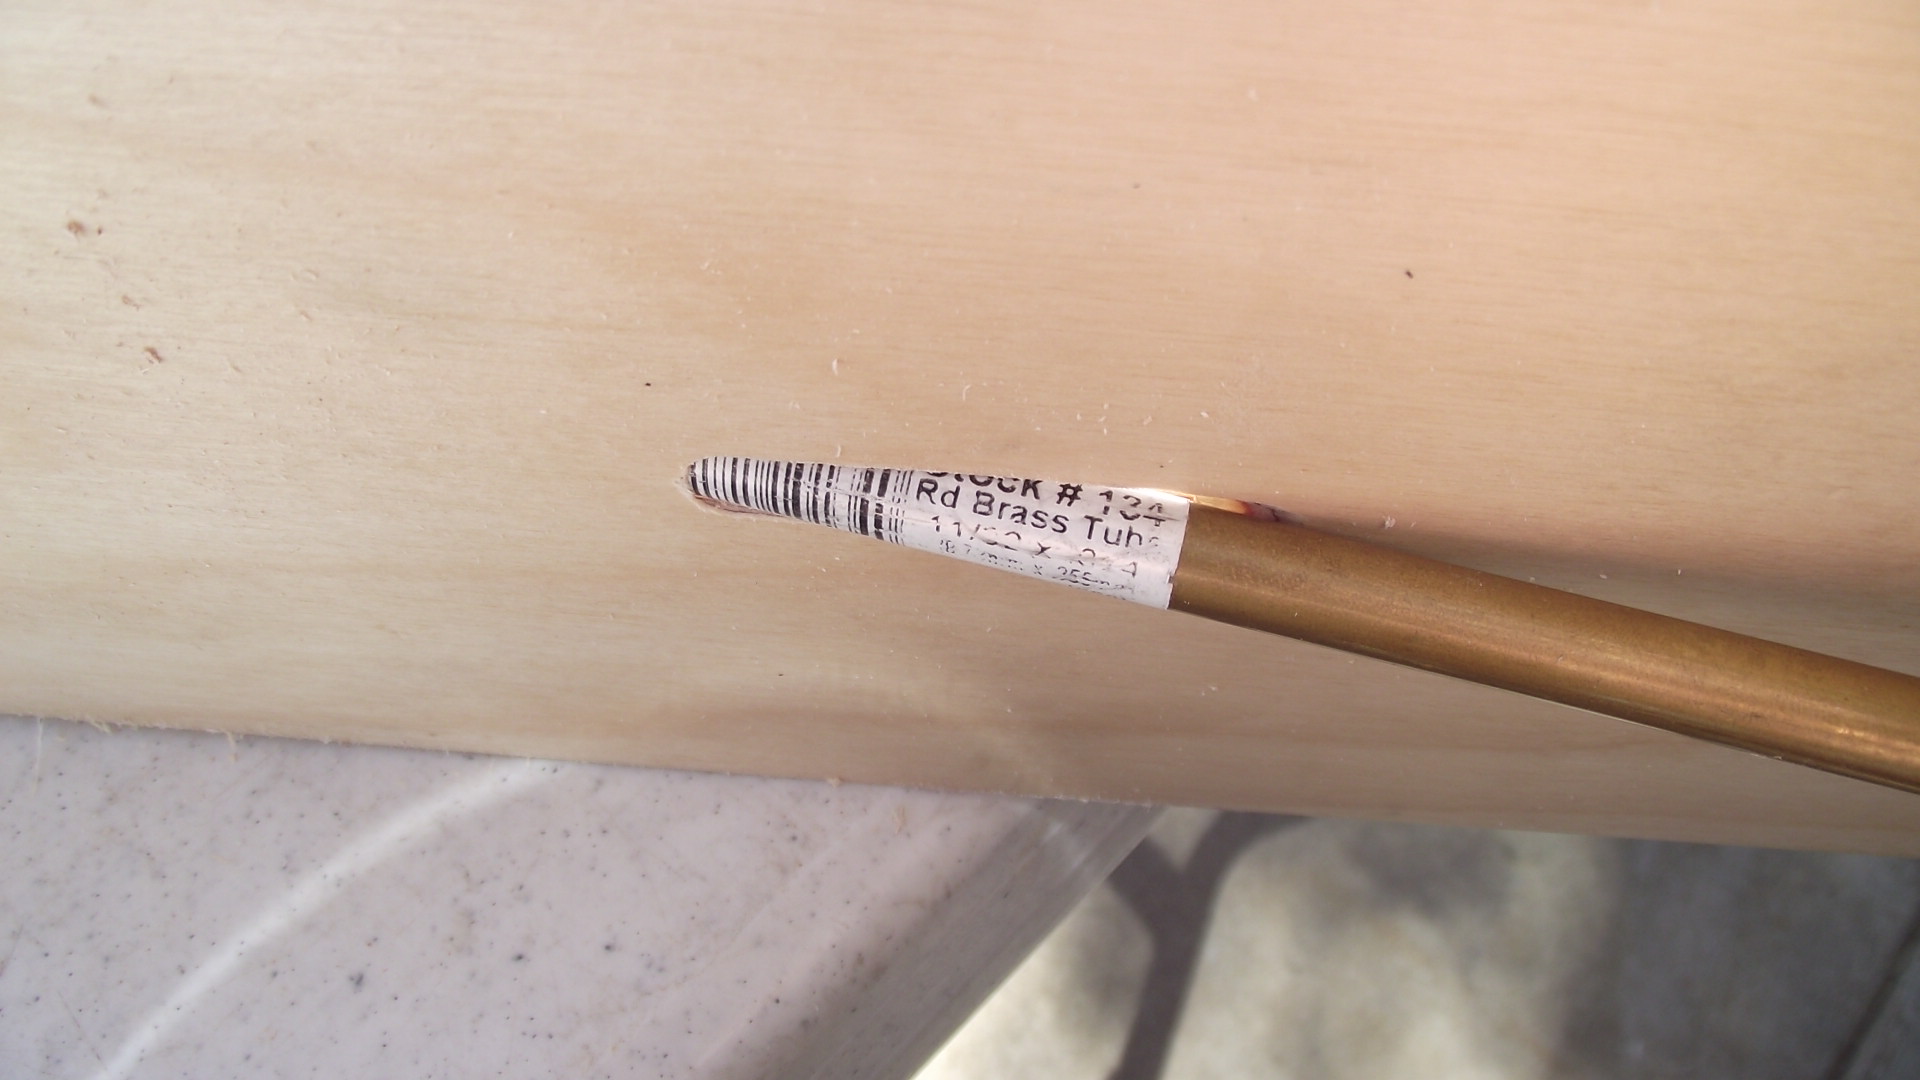
Then using a ratt tail file slowly widen the slot to 11/32" making sure slot stays on tubs center line. I do trial fit the 11/32" tube time too time getting width just right. Length of slot fine tuned until the 11/32" tube go's threw the slot and slides over the 5/16" stuffing tube shorty still on the 1/4" shaft in engines collet. Once done it is a PERFECTLY ALIGNED straight shot for cable.
[img]http://www.modelgasboats.com/media/kunena/attachments/legacy /images/DSCF0442.JPG[/img]
[img]http://www.modelgasboats.com/media/kunena/attachments/legacy/images /DSCF0444-20110220.JPG[/img]
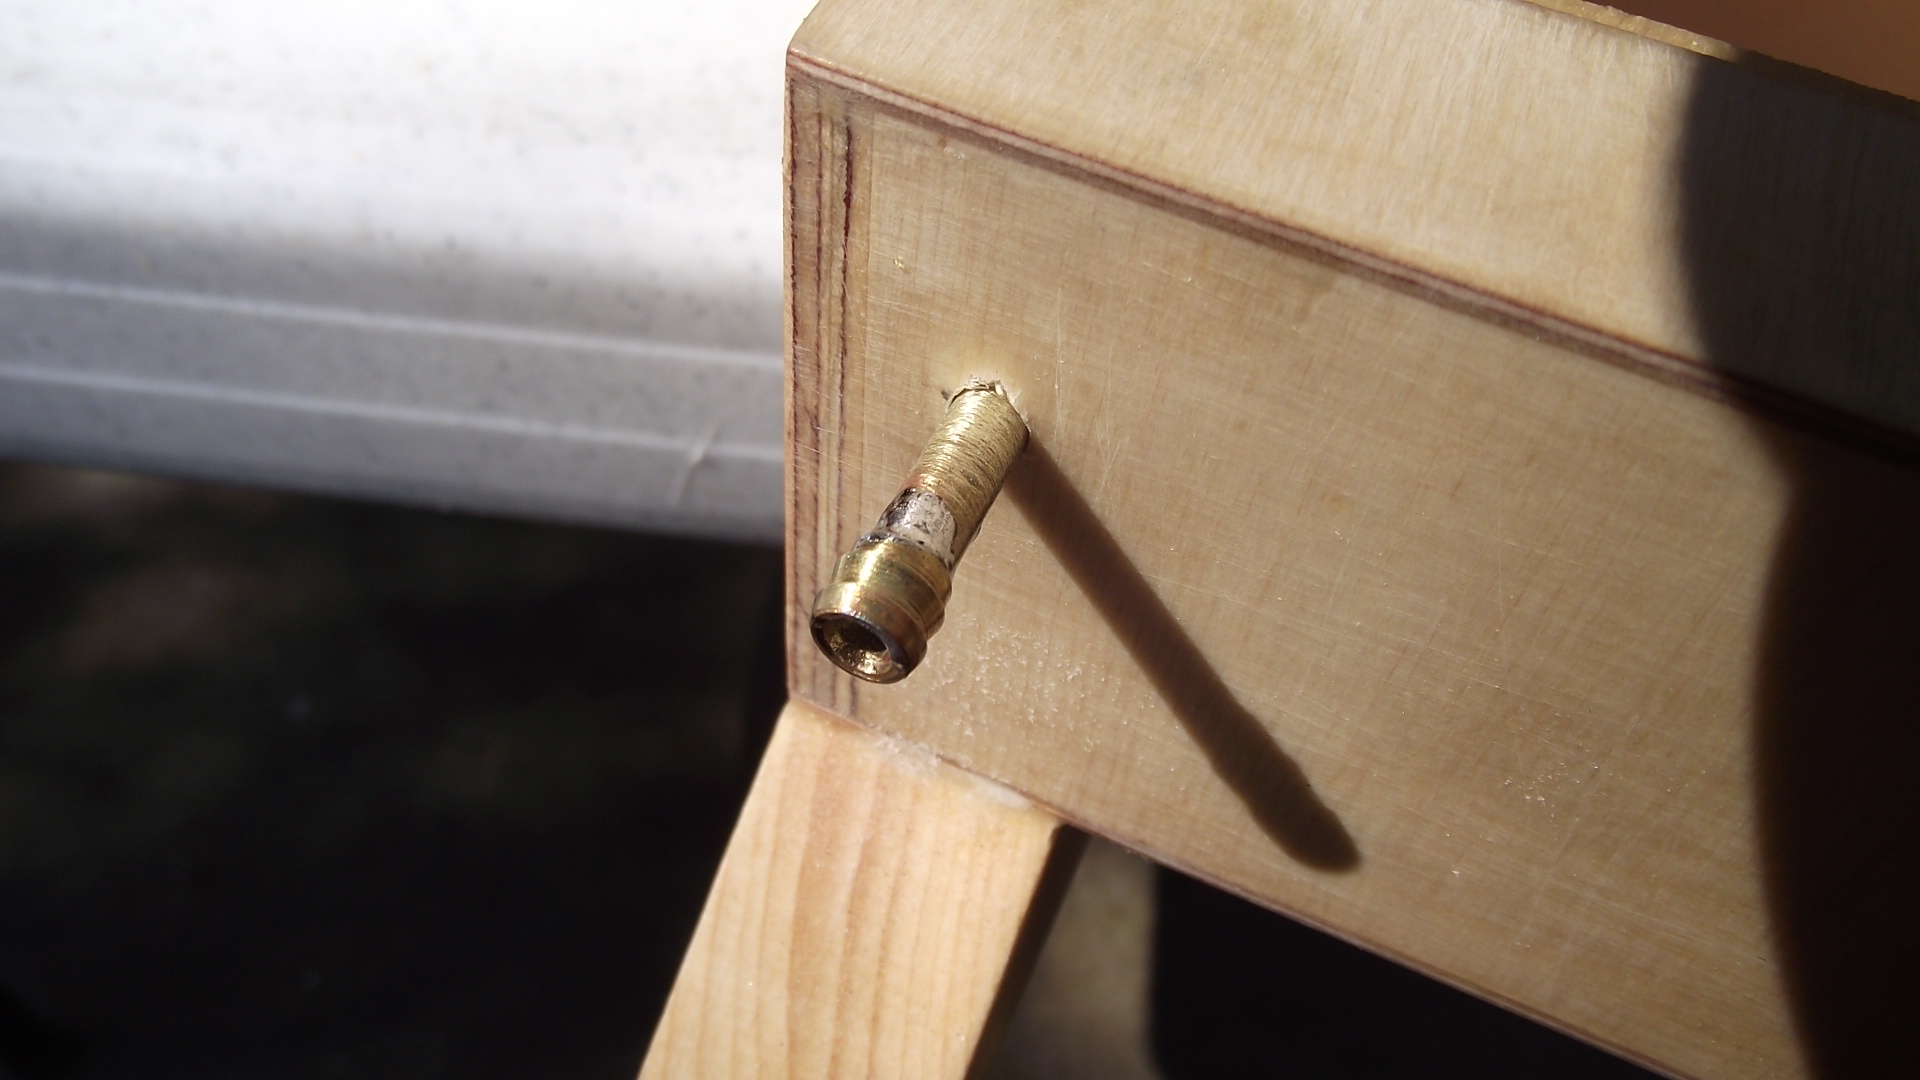
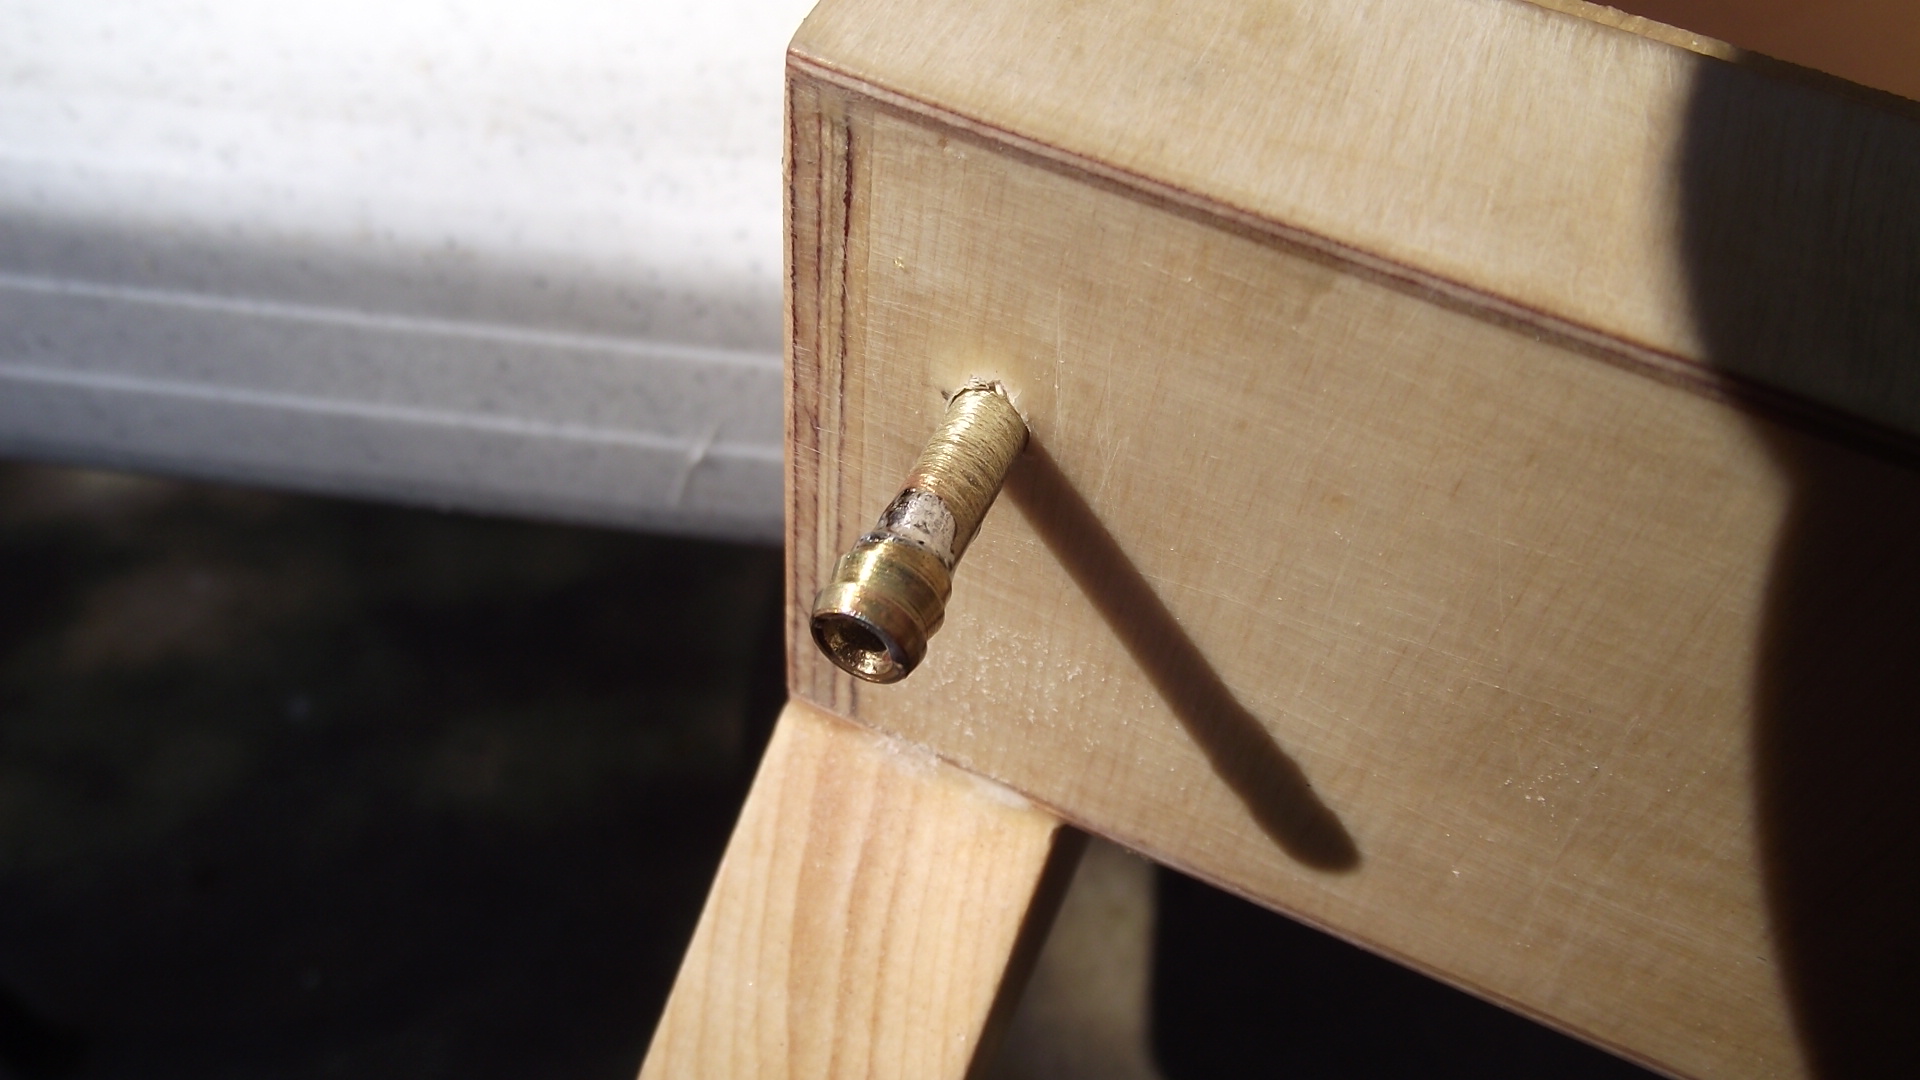
Next cut the 11/32" log tube at length required, roughen it up with some 50/80 grit sand paper and epoxy it into position ..... Done !!
( I do mix chopped up fiberglass into the epoxy adding strength )
Bottom of tub around log once positioned sealed with some masking tape while doing epoxy inside, then a finger blended in fillet of epoxy added as last step on outside of tub where shaft log exits.
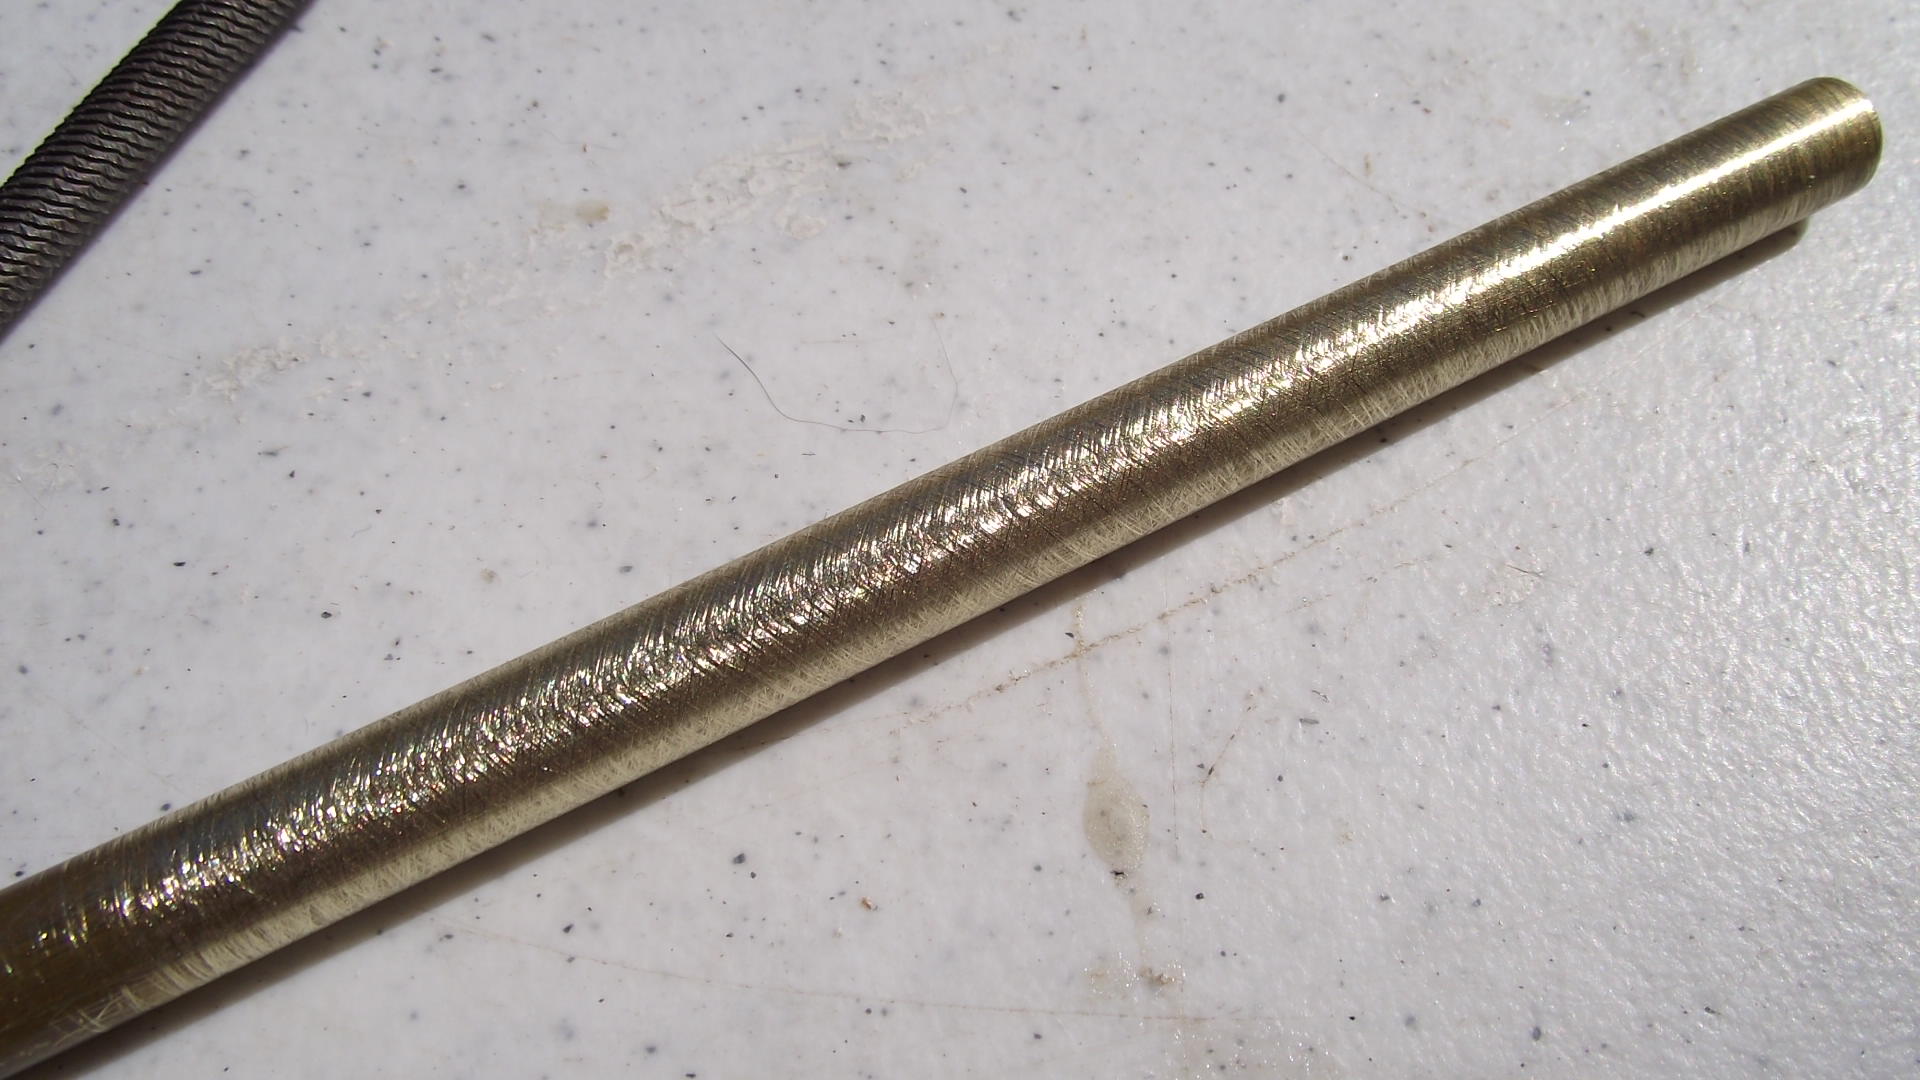
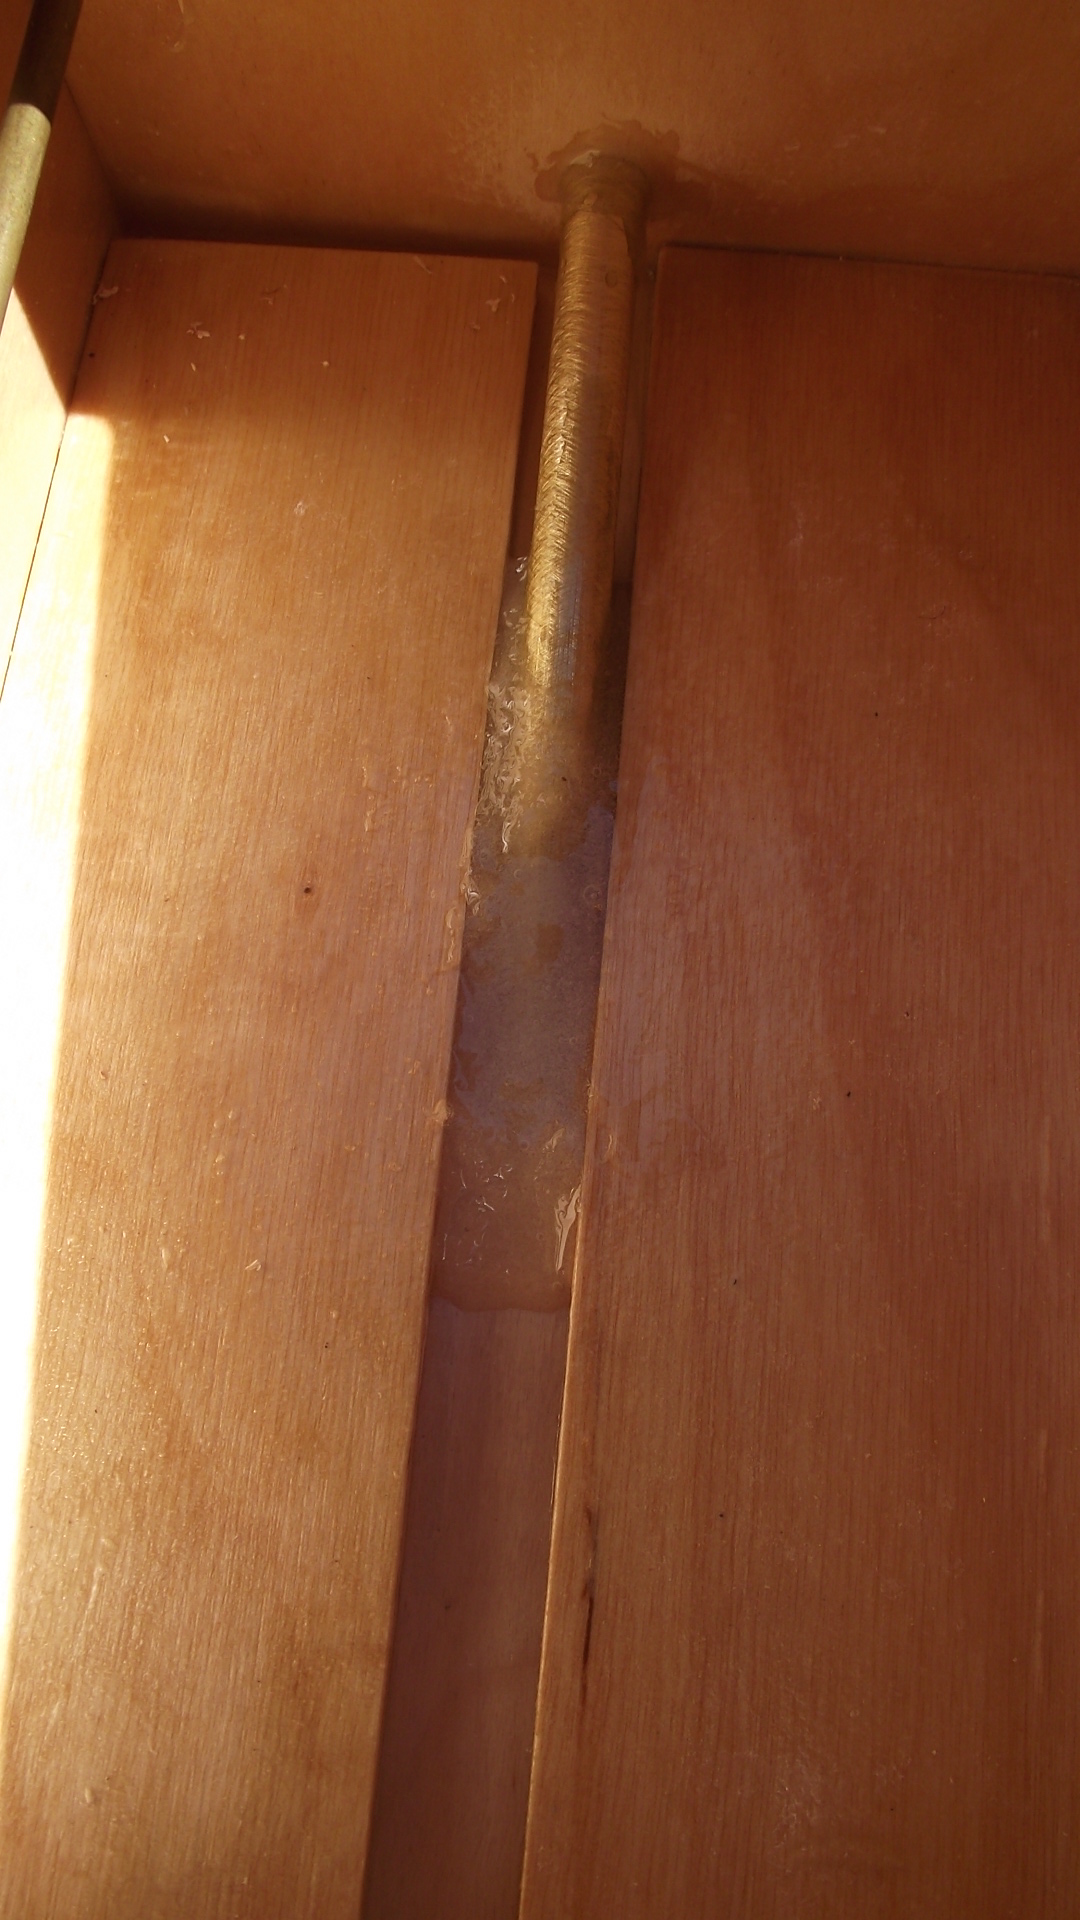
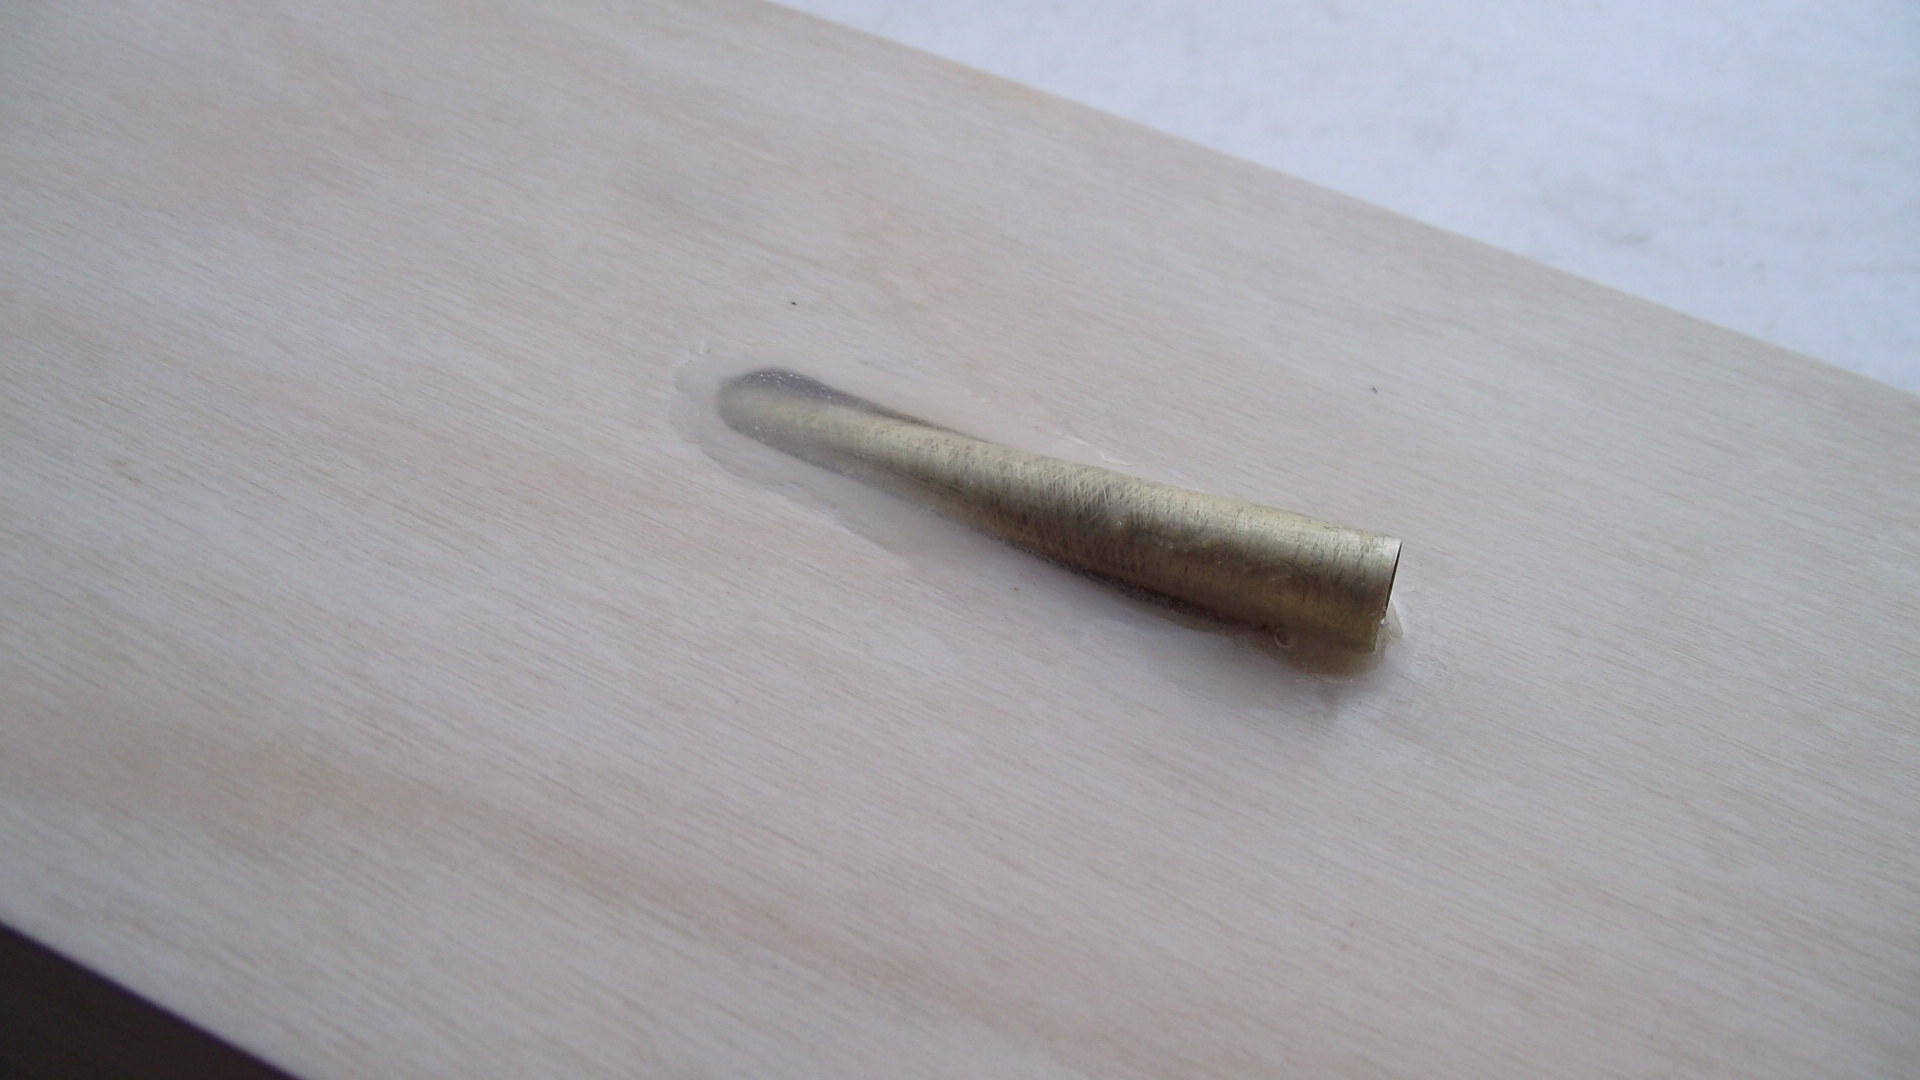
Next using a 5/32" extension drill placed holes threw the transom and 2 bulkheads for the 5/32" water line. (I'm using a right ride rudder so placed water down left side ) Dubro barb ends soldered on both ends once tube epoxied in place.

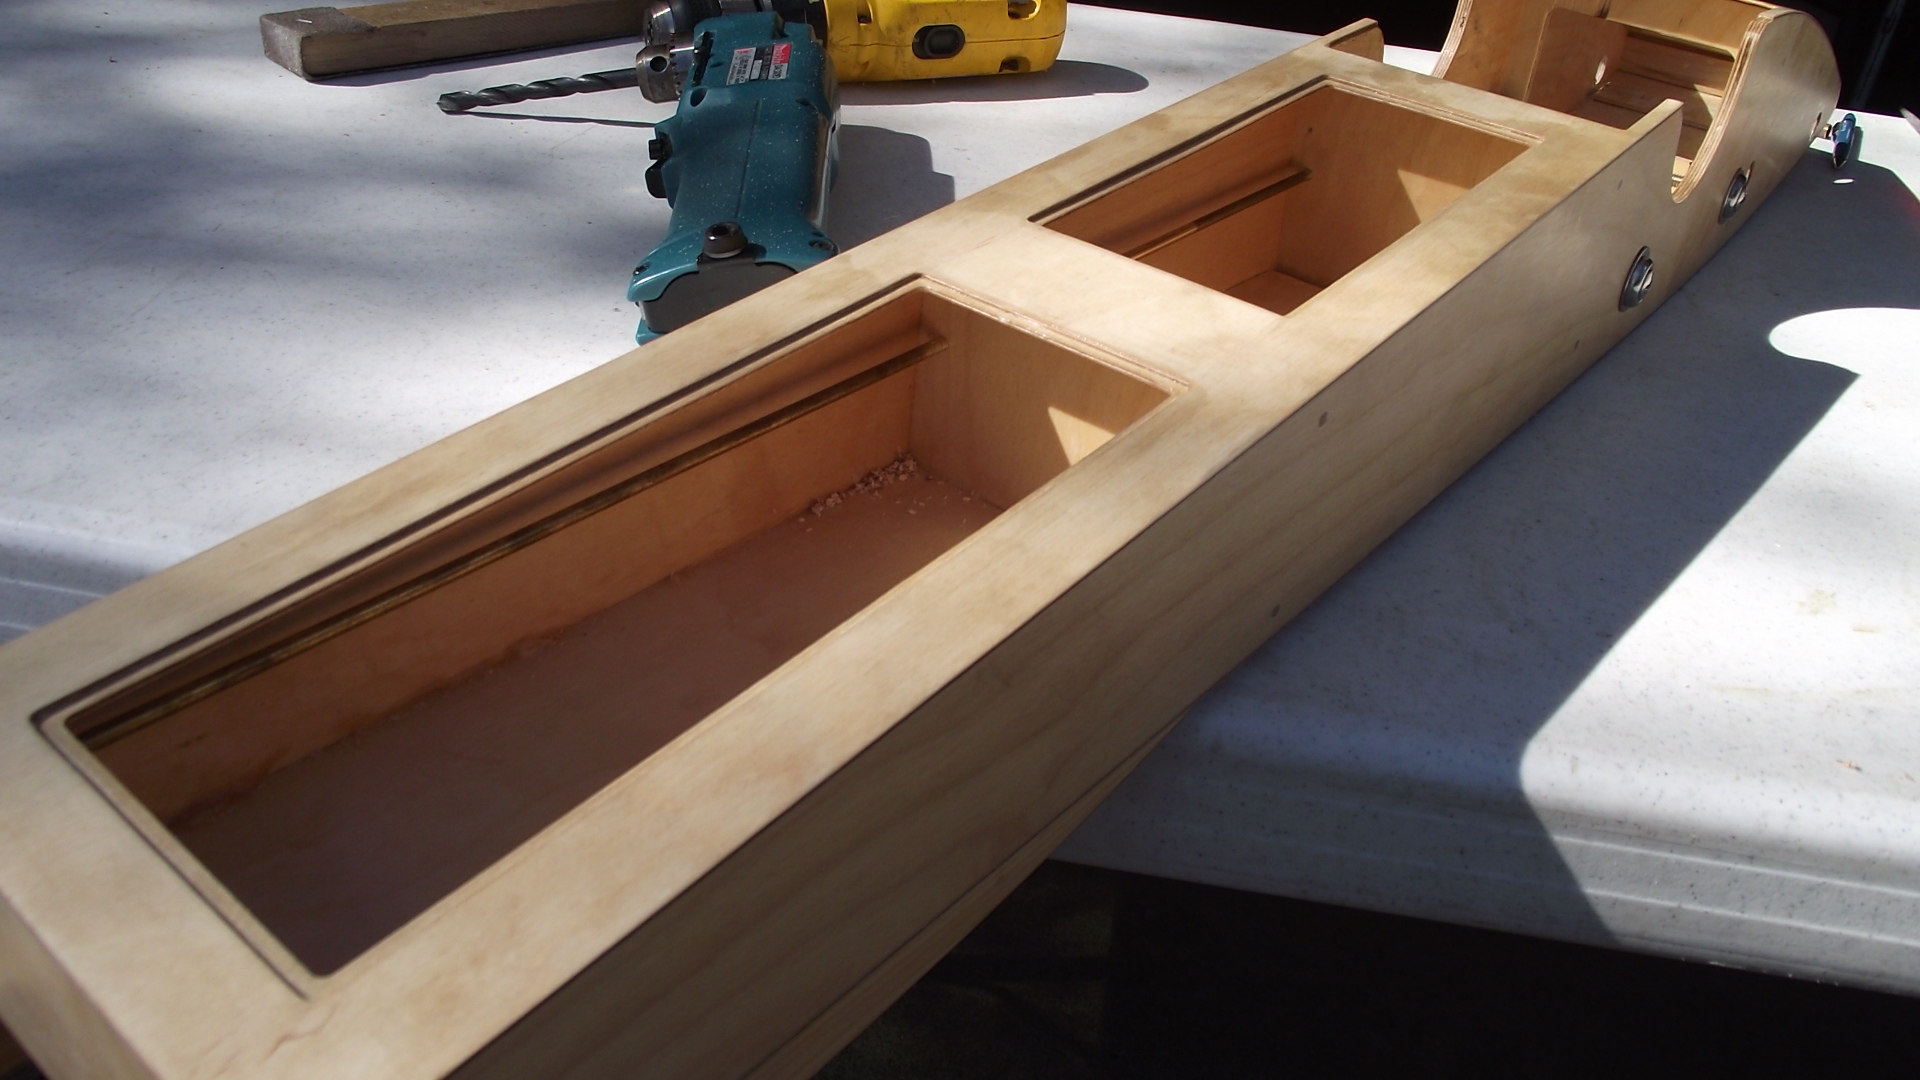
Being fortunate in having a pre-built hull, what I am sharing here is just my rigging and set up tricks etc ....
Will make note the engine compartment of the Warpath is tight so MAKE SURE you place engine as far forward as mount & starter clearance allows.
*Using Gizmo/CC type hyperr torque mounts found that some mount trimming was necessary on the starter side mount. Material was belt sanded away so metal was equal in length to diameter of A/V rubbers. ( this allowed me to place A/V rubbers within @ 1/8" of forward bulkhead )
[img]http://www.modelgasboats.com/media/kunena/attachments/legacy /images/DSCF0413-20110220.JPG[/img]
[img]http://www.modelgasboats.com/images /fbfiles/images/DSCF0416.JPG[/img]
When first setting and finding engine location simply placed engine with A/V's onto mounts lightly tightening them down.
Drew a line just behind the dowel pins set in bulkhead on tub so I knew from the outside where it's edge was at.
Then on the outside of tub set engine against it and looking down upon it set spacing of engine off bottom skin, made sure starter side mounts were as forward as practical and drive angle wanted. Then took a pencil and drew circles around A/V mounts drawing onto tubs side. ( Note line shown in pic below )
Measured 3 times making sure position chosen was correct and spacing distance of A/V mounts was correct front to back before drilling any holes.
That done placed A/V rubbers into hull doing a trial fit .... Got lucky with a perfect fit :woohoo:
Next was getting stuffing tube and log fitted into the bare hull.
*Taking a short piece of 1/4" brass tubing placed it into cable collet then slid it out slightly so it was just shy of contacting bulkhead. Rotated engine slowly making sure adjusting run out so tube rotated with engine having no wobble.
Once satisfied drew a pencil line around most of the tube.
[img]http://www.modelgasboats.com/media/kunena/attachments/legacy/images /DSCF0428-20110220.JPG[/img]
Taking a 90* drill and starter bit drilled the pilot hole followed up by a 11/32" hole which is the O.D. of the log tube that be epoxied into hull permanently.
** Now here you need to pay attention to what your doing because next we are making a SLOT out the tubs bottom :S
In this process I use misc short lengths of the same diameters of K&S brass that will make up the final parts. 1/4" shorty used on engine collet, 5/16" .029 wall shorty that is the stuffing tube, then a piece of the 11/32" which is the log.
*Now I slide a piece of stuffing tube onto 1/4" having it pass threw hole in bulkhead. sliding the tube down a bit has it hit floor of tub ( DRAW A LINE )where it hits. Then with short straight edge or anything straight, set it on top of tube and takes it's top edge down until it hits floor of tub ( DRAW A LINE ) *This is the APPROXIMATE starting and ending position of slot :lol:
I just use a 1/4 diameter burr in a die grinder and plunge out the forward and reward positions then cut between them roughening out the slot.
Then using a ratt tail file slowly widen the slot to 11/32" making sure slot stays on tubs center line. I do trial fit the 11/32" tube time too time getting width just right. Length of slot fine tuned until the 11/32" tube go's threw the slot and slides over the 5/16" stuffing tube shorty still on the 1/4" shaft in engines collet. Once done it is a PERFECTLY ALIGNED straight shot for cable.
[img]http://www.modelgasboats.com/media/kunena/attachments/legacy /images/DSCF0442.JPG[/img]
[img]http://www.modelgasboats.com/media/kunena/attachments/legacy/images /DSCF0444-20110220.JPG[/img]
Next cut the 11/32" log tube at length required, roughen it up with some 50/80 grit sand paper and epoxy it into position ..... Done !!
( I do mix chopped up fiberglass into the epoxy adding strength )
Bottom of tub around log once positioned sealed with some masking tape while doing epoxy inside, then a finger blended in fillet of epoxy added as last step on outside of tub where shaft log exits.
Next using a 5/32" extension drill placed holes threw the transom and 2 bulkheads for the 5/32" water line. (I'm using a right ride rudder so placed water down left side ) Dubro barb ends soldered on both ends once tube epoxied in place.











Last edit: 15 years 7 months ago by Scott.
- Canadian Hot Rod RC Boats
-
Less
More
- Thank you received: 0
15 years 7 months ago #15218
by Canadian Hot Rod RC Boats
Replied by Canadian Hot Rod RC Boats on topic Re: MGB Warpath ... Gas Rigger / rigging and set up info
Snug fit
How wide is the tub at the rear (outside measurement, please) can't find any measurements in build booklet
Insane said rudder kit is quote "around 2 1/2" wide
I finally found some pics of a finished 1 (Marc's) on Jims
Thanks keep posting
How wide is the tub at the rear (outside measurement, please) can't find any measurements in build booklet
Insane said rudder kit is quote "around 2 1/2" wide
I finally found some pics of a finished 1 (Marc's) on Jims
Thanks keep posting
- Scott
-
Less
More
- Thank you received: 0
15 years 7 months ago #15219
by Scott
Replied by Scott on topic Re: MGB Warpath ... Gas Rigger / rigging and set up info
Canadian Hot Rod RC Boats wrote:
Tub has 5" OUTSIDE width tip too tail
Snug fit
How wide is the tub at the rear (outside measurement, please) can't find any measurements in build booklet
Insane said rudder kit is quote "around 2 1/2" wide
I finally found some pics of a finished 1 (Marc's) on Jims
Thanks keep posting
Tub has 5" OUTSIDE width tip too tail
- INEEDSPOTS
-
Less
More
- Thank you received: 0
15 years 7 months ago #15220
by INEEDSPOTS
Replied by INEEDSPOTS on topic Re: MGB Warpath ... Gas Rigger / rigging and set up info
lookin good Scott. Hopefully my parts will be here this week and i can start building mine.
- Scott
-
Less
More
- Thank you received: 0
15 years 7 months ago #15221
by Scott
Replied by Scott on topic Re: MGB Warpath ... Gas Rigger / rigging and set up info
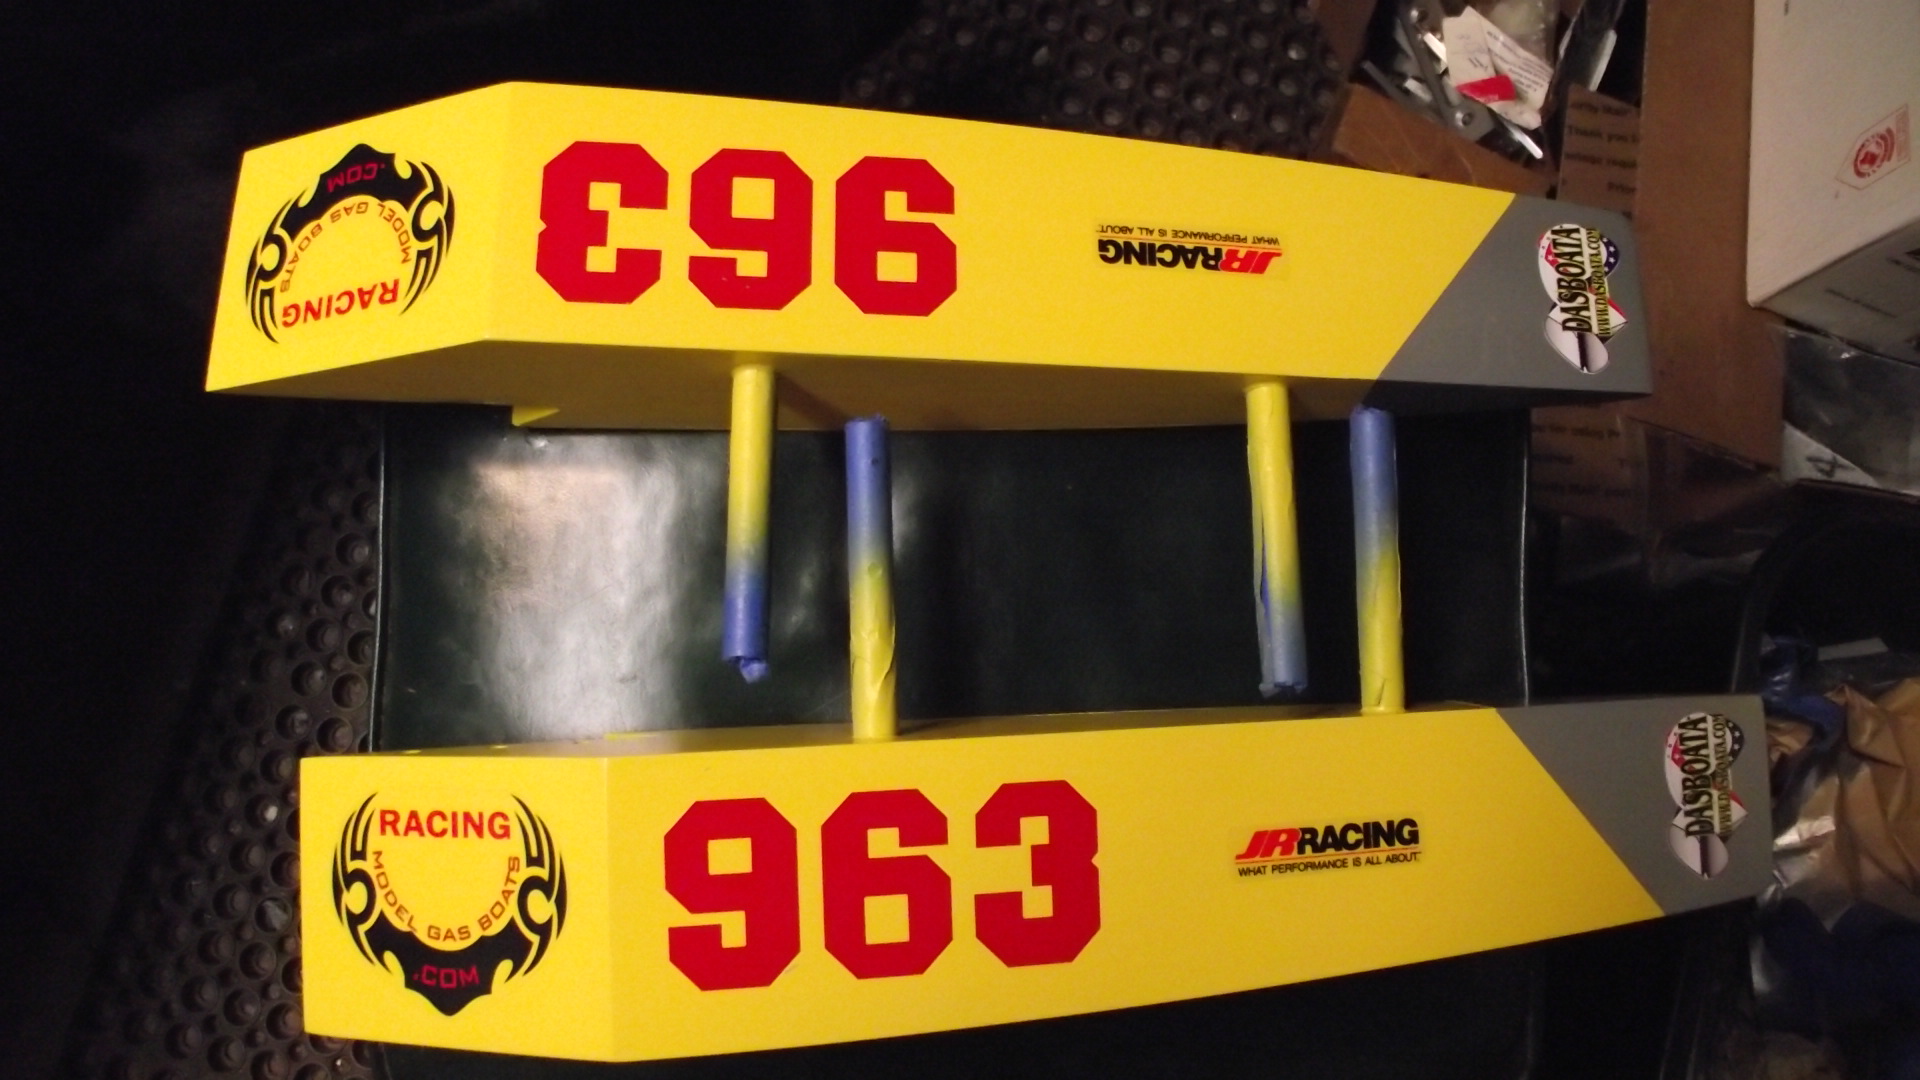
Sponsons got simple paint and some stickers ....

- marc
-
- Offline

Less
More
- Posts: 2379
- Thank you received: 54
15 years 7 months ago #15229
by marc
test Sig
Replied by marc on topic Re: MGB Warpath ... Gas Rigger / rigging and set up info
Awesome thread Scott!!! I just arrived in Florida for a little vacation and just got a chance to see this. I love it! Keep up the great work! Really looking forward to seeing her completed!
test Sig
- JUICR
-
Less
More
- Thank you received: 0
15 years 7 months ago #15252
by JUICR
Replied by JUICR on topic Re: MGB Warpath ... Gas Rigger / rigging and set up info
Thanks for the build thread Scott. I will be using it to do mine when it gets here. Keep it going. 
- Scott
-
Less
More
- Thank you received: 0
15 years 7 months ago - 15 years 7 months ago #15253
by Scott
Replied by Scott on topic Re: MGB Warpath ... Gas Rigger / rigging and set up info
Little more done these past couple days ...
Personal choice on using the forward or rear compartment for radio gear ?
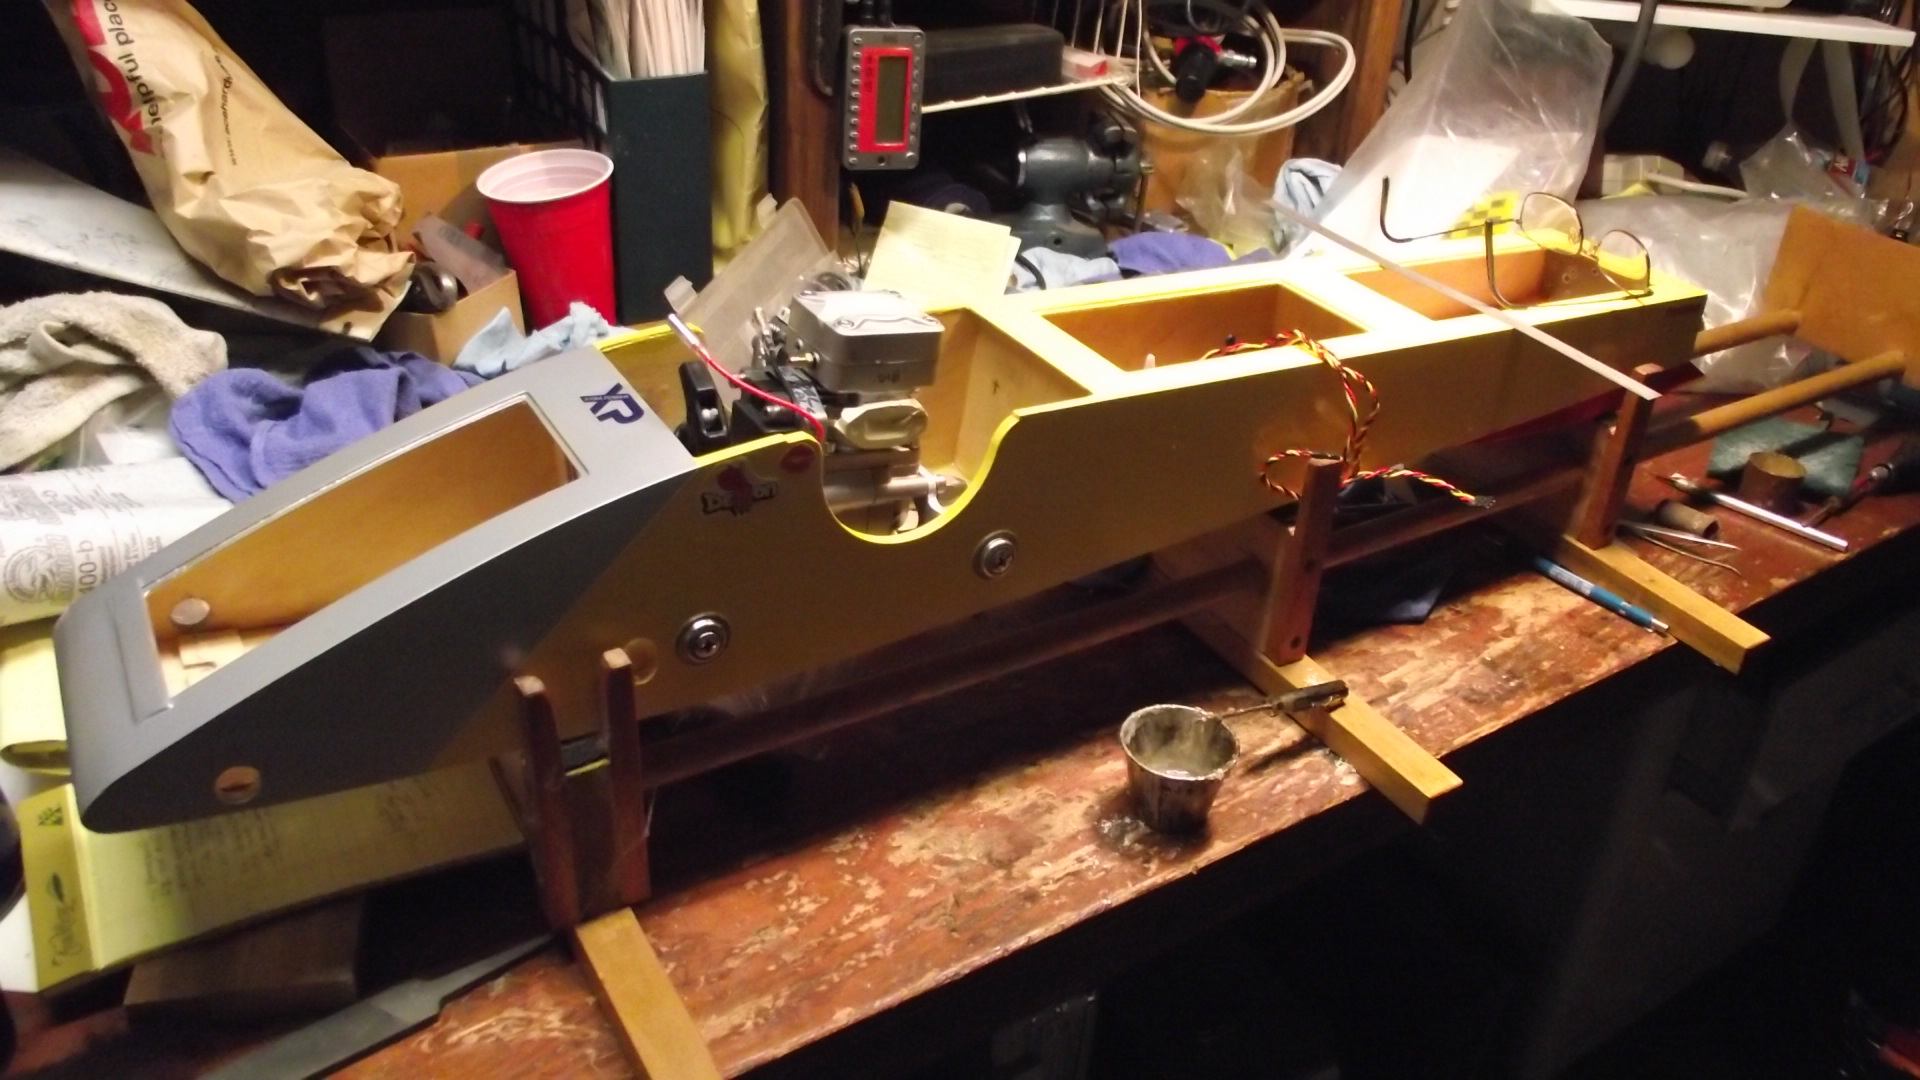
Have chosen to use forward box because sealing up and having unobstructed bulkheads to mount push rod seals and on/off switch access made it the better choice IMO. Also if hull runs tail light with higher lift props best to have access to rear box so weight if added / required would be closest the prop
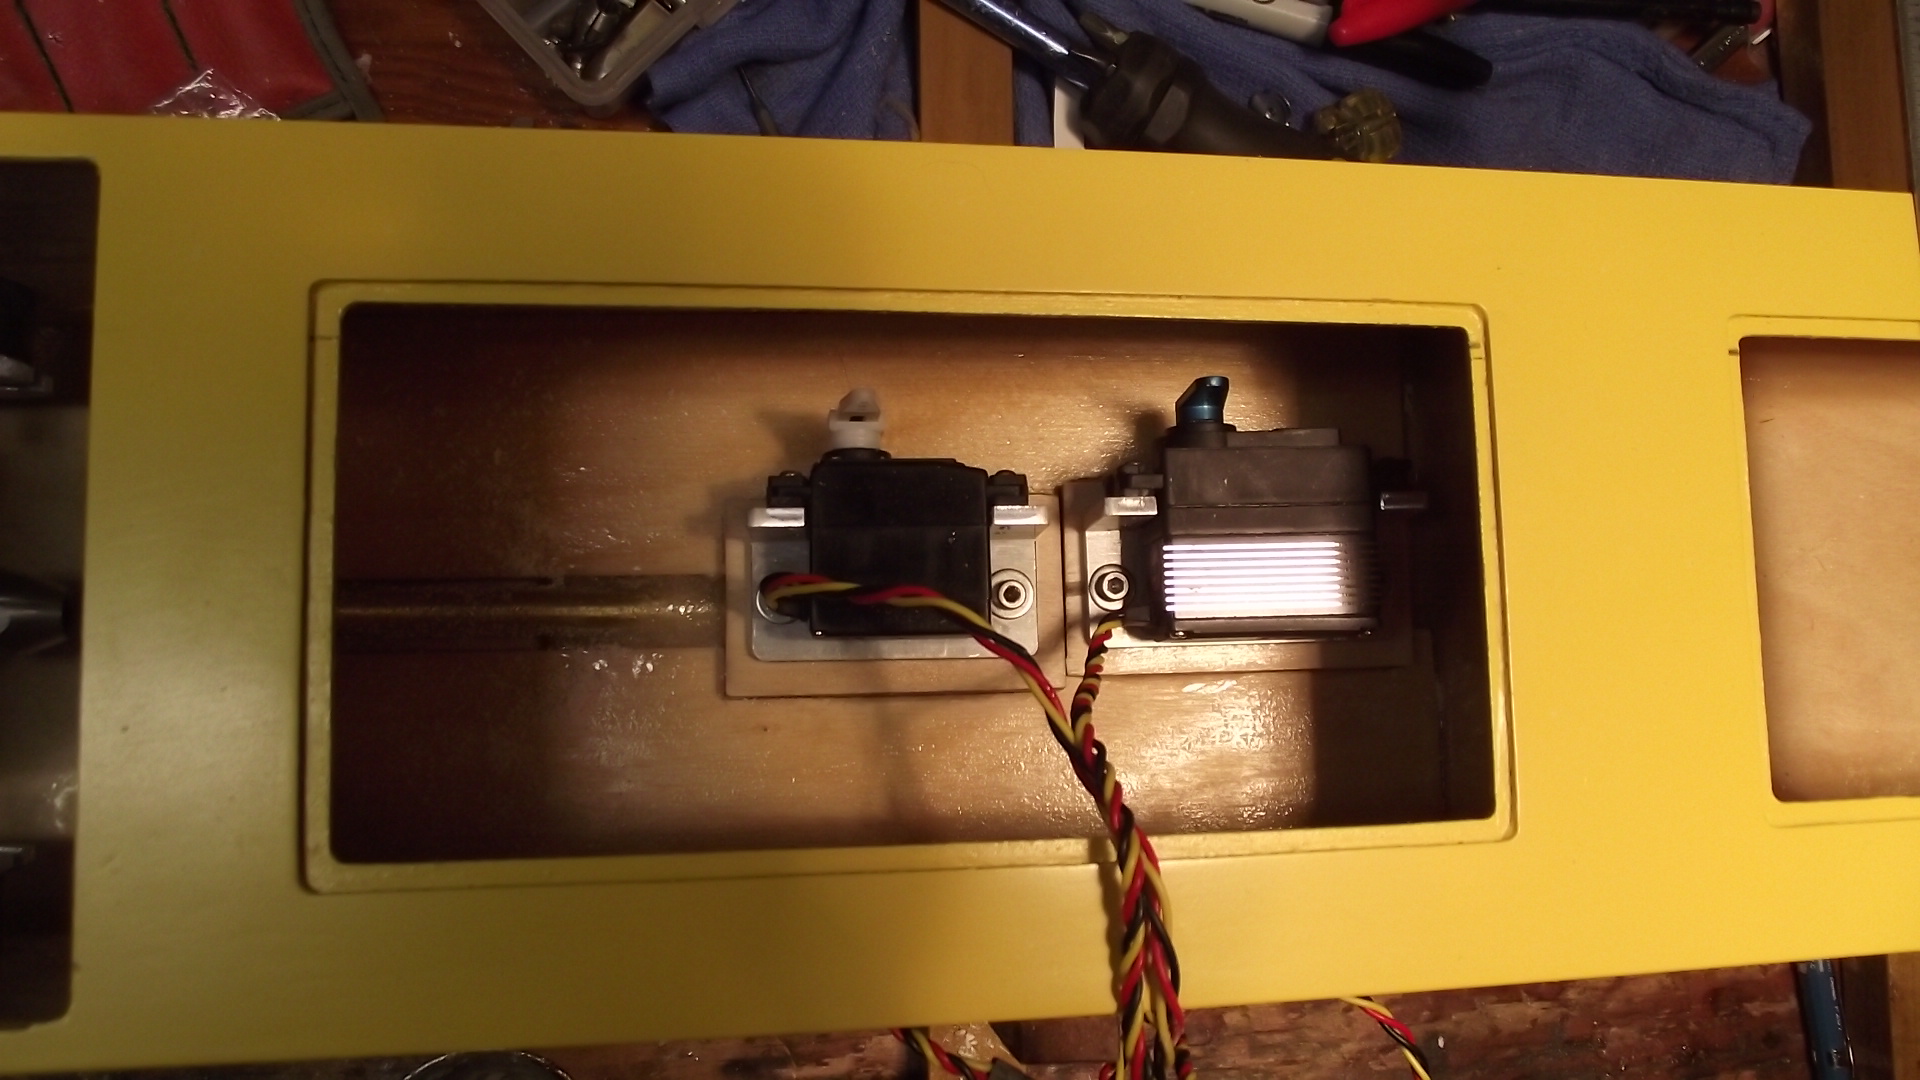
Made up some 1" X 1" angle aluminum servo mounts set upon 3/16" ply bases with 6-32 blind nuts underneath.
** Cut/grind screw length the brackets will need prior to attaching bases.
*Position of servos location is based upon Rudder & Throttle rod that needs to be determined PRIOR to epoxying bases in place.
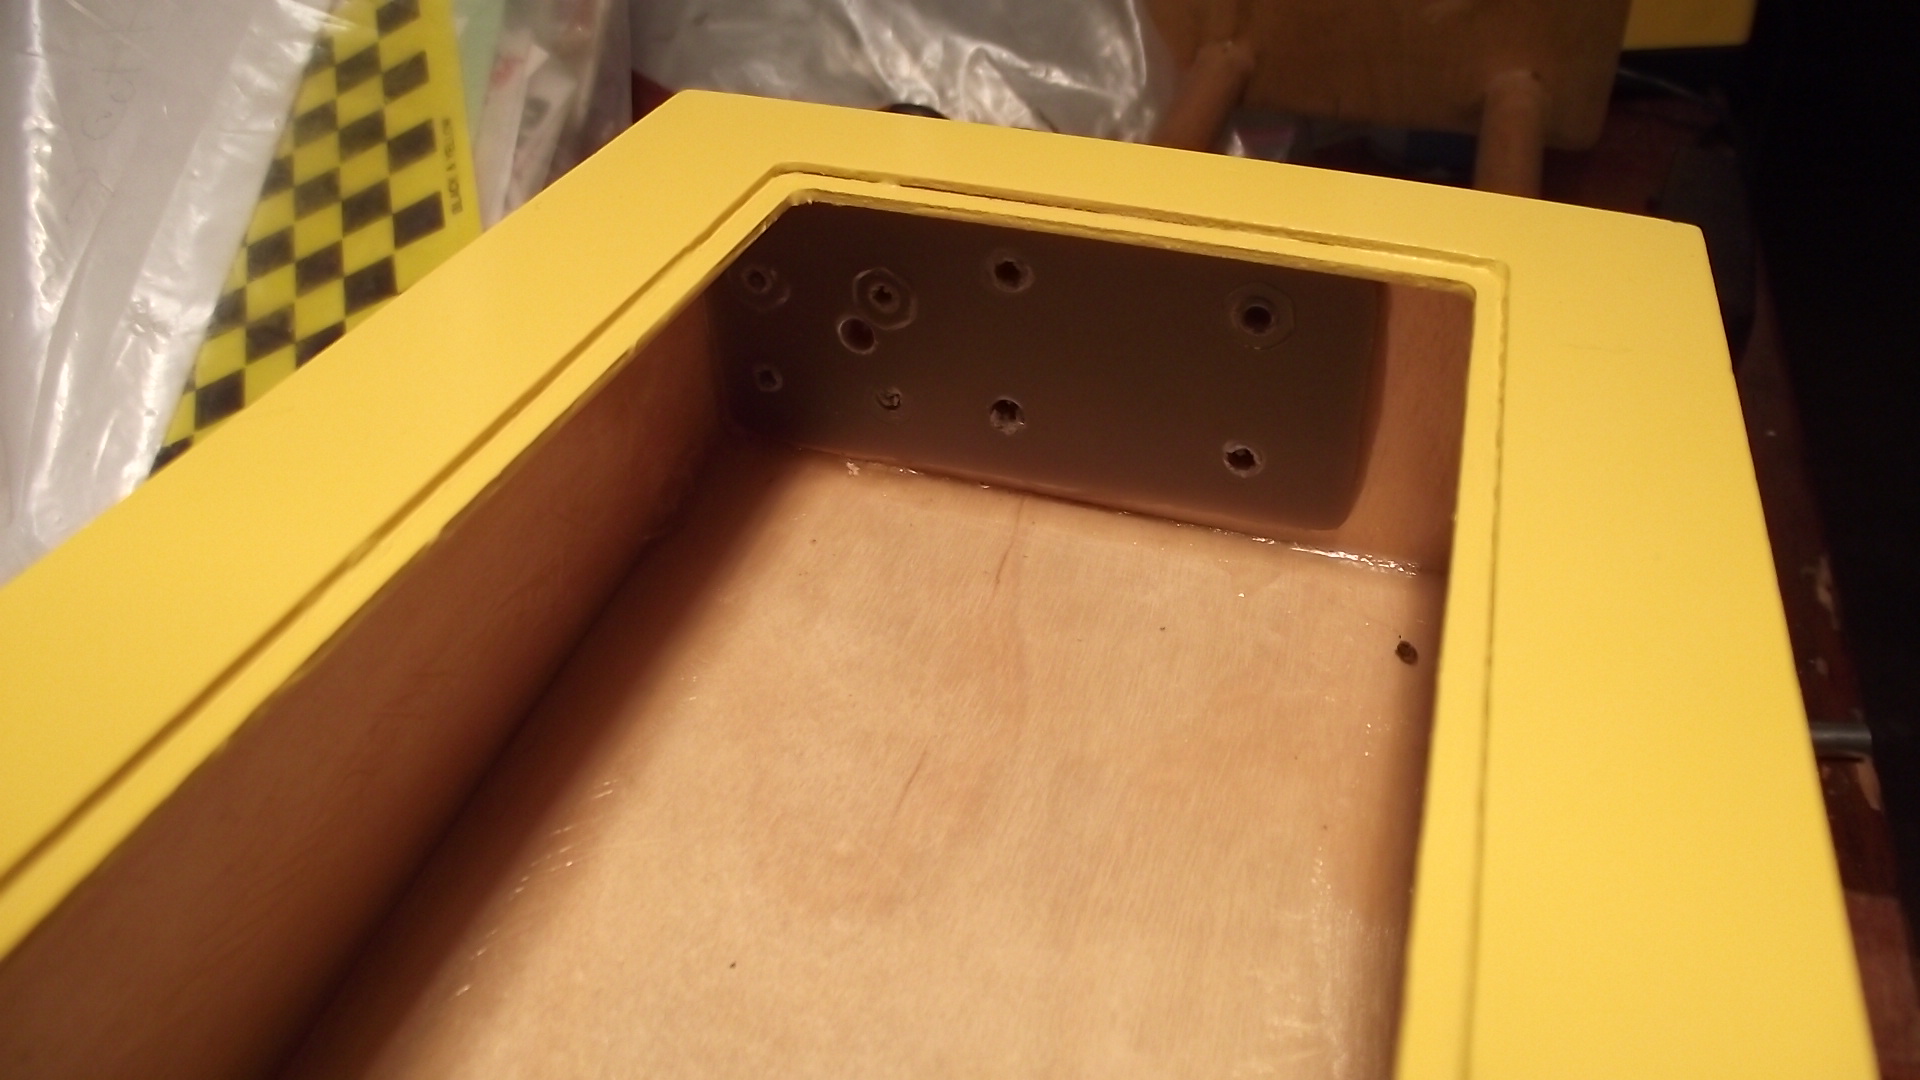
On interior of rear box had epoxied a small piece of 1/16" G-10 or use 1/16 aluminum. Then drilled threw it from transom side when mounting hardware. ( this will keep wood crush minimal and no washers required, just 6-32 & 8-32 screws and nuts holding hardware in place. )
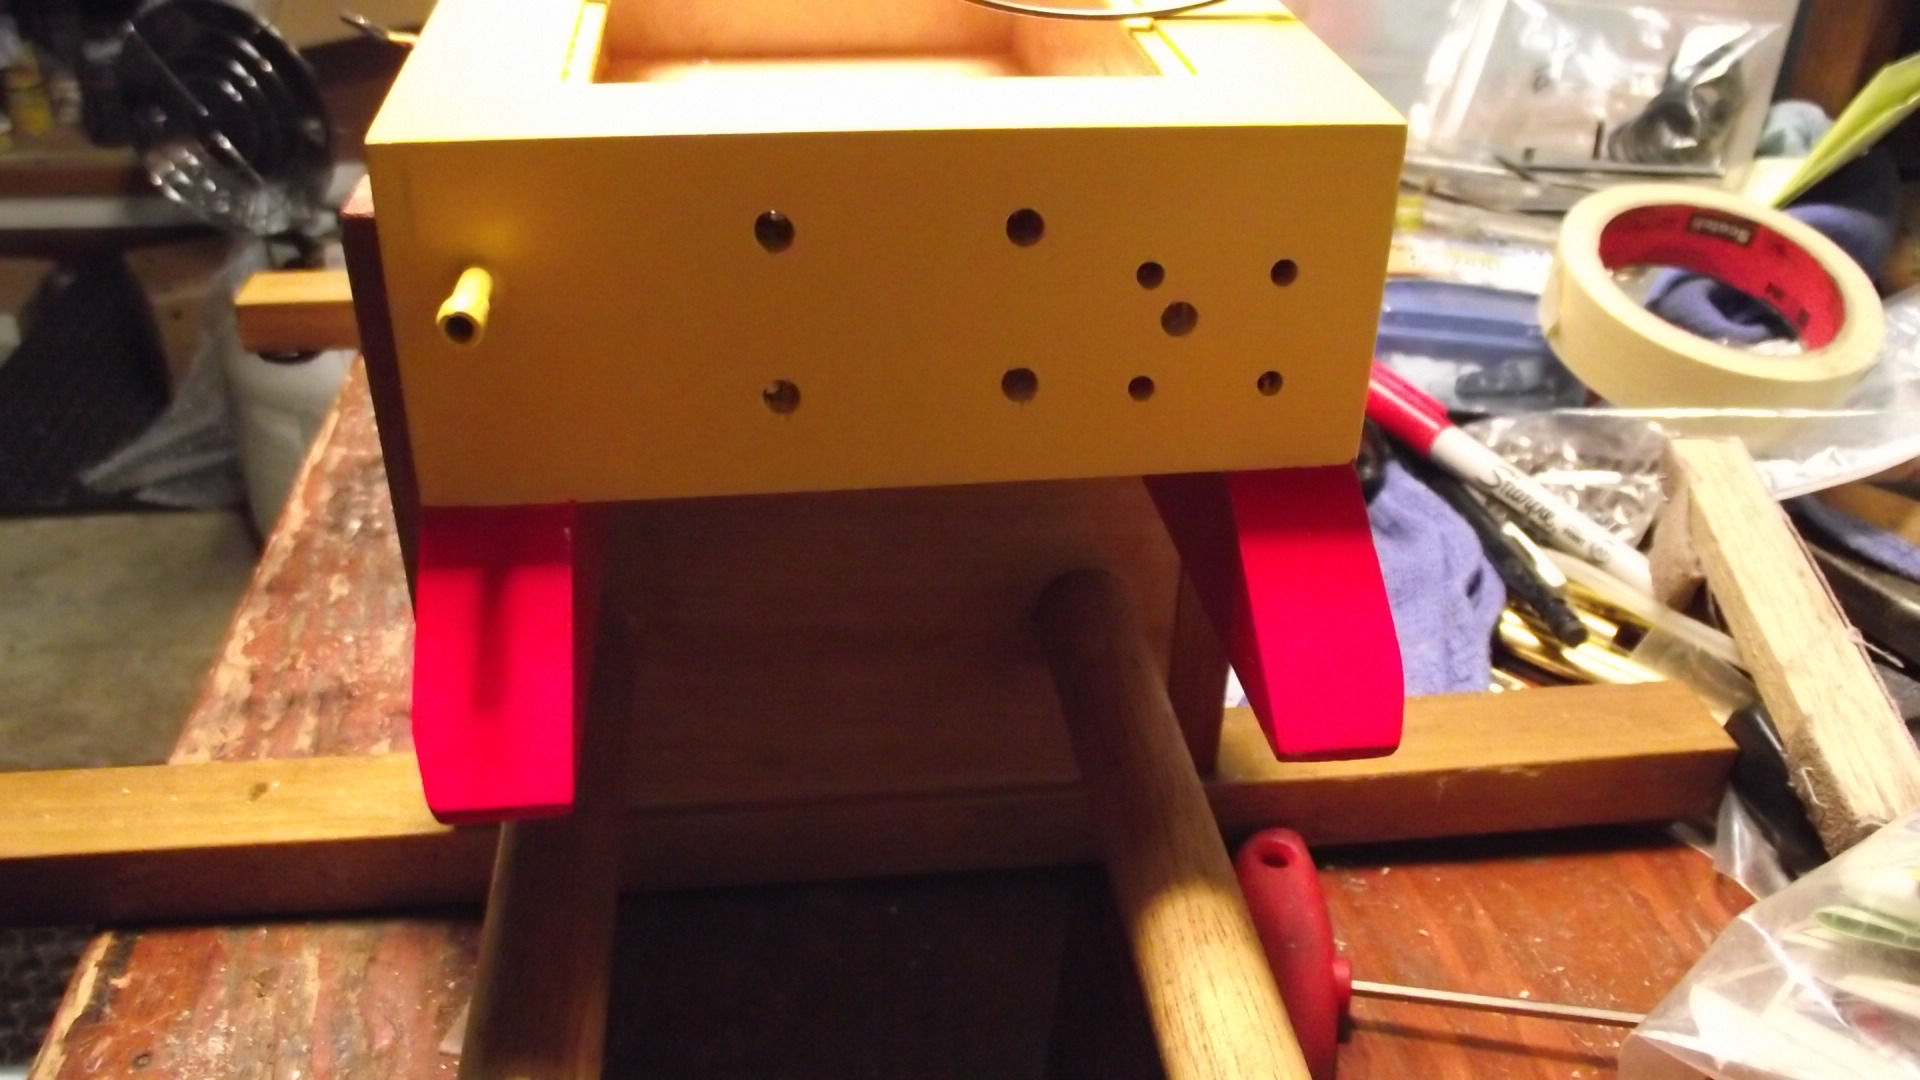
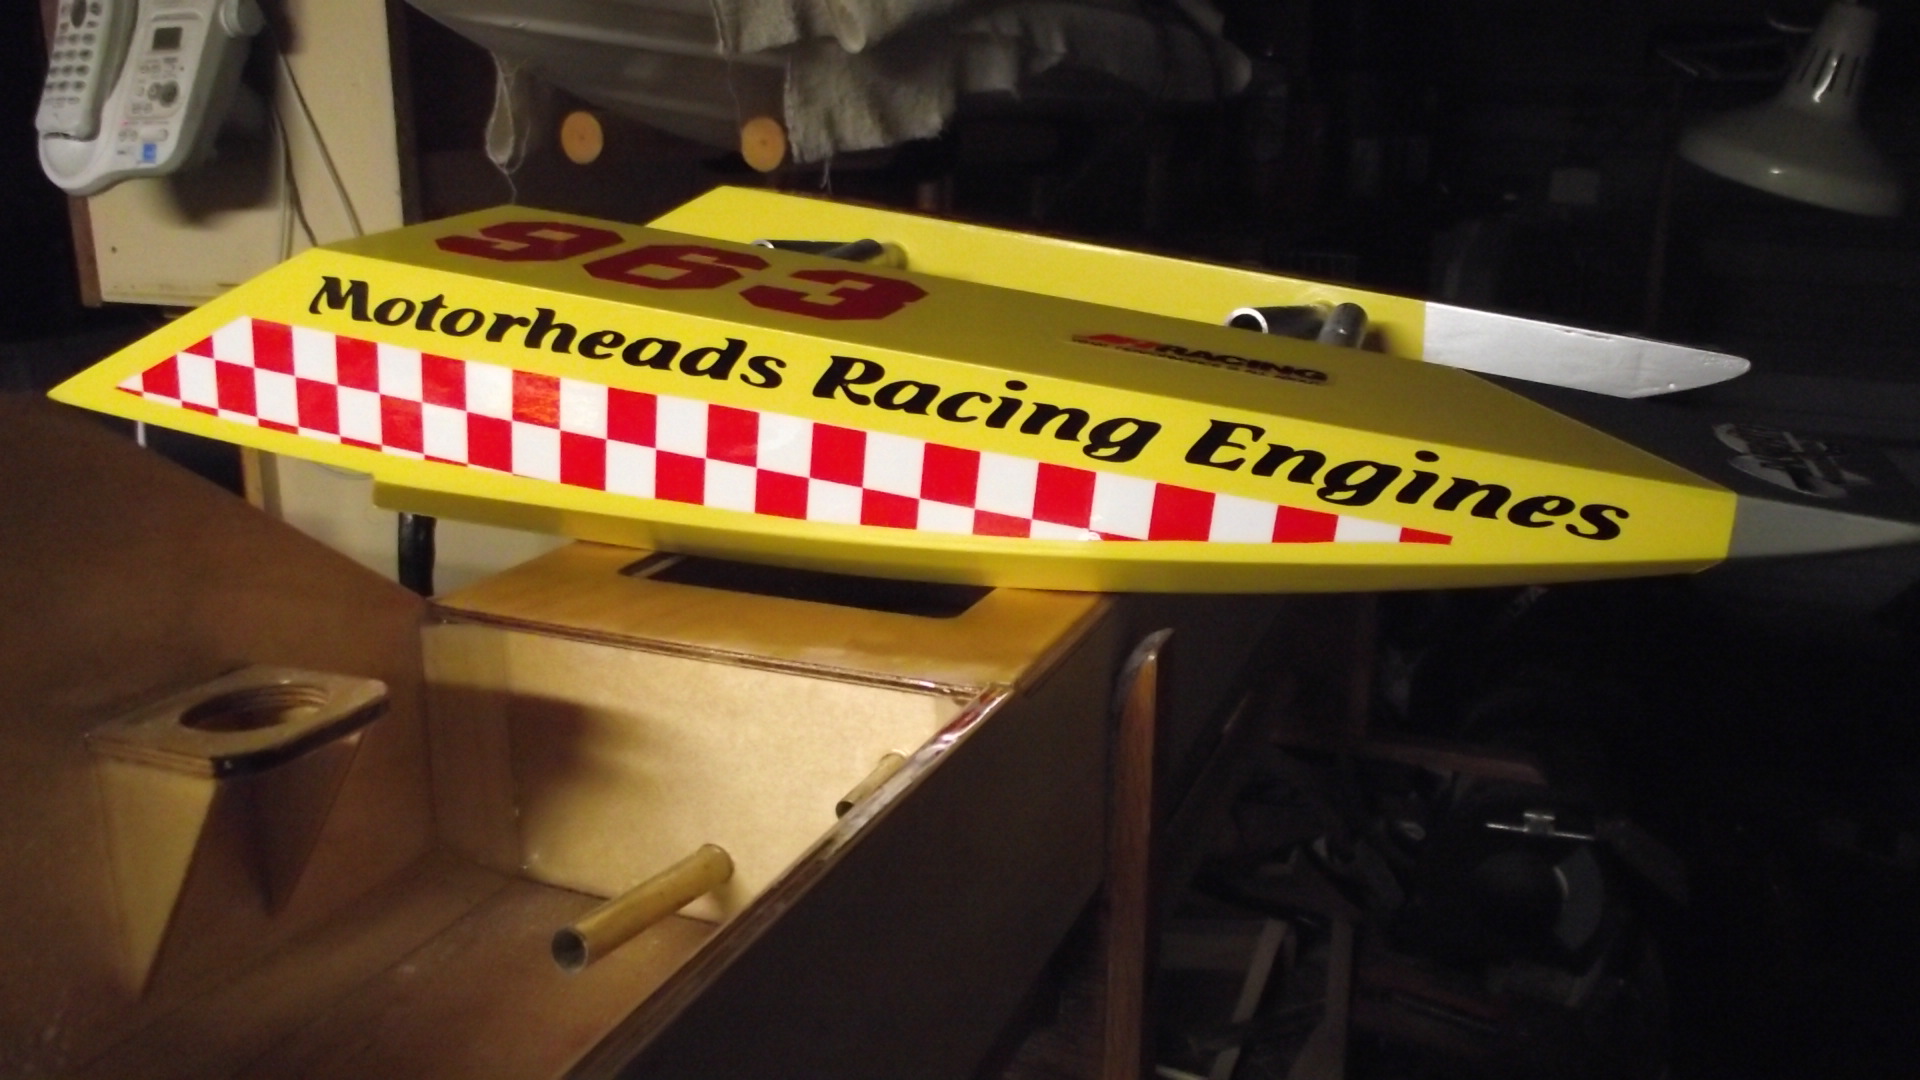
Finished graphics on front sponsons, Tub painted as well. Clear lacquer in a couple days to seal it all up keeping vinyl from peeling.
That's it for now
Personal choice on using the forward or rear compartment for radio gear ?
Have chosen to use forward box because sealing up and having unobstructed bulkheads to mount push rod seals and on/off switch access made it the better choice IMO. Also if hull runs tail light with higher lift props best to have access to rear box so weight if added / required would be closest the prop
Made up some 1" X 1" angle aluminum servo mounts set upon 3/16" ply bases with 6-32 blind nuts underneath.
** Cut/grind screw length the brackets will need prior to attaching bases.
*Position of servos location is based upon Rudder & Throttle rod that needs to be determined PRIOR to epoxying bases in place.
On interior of rear box had epoxied a small piece of 1/16" G-10 or use 1/16 aluminum. Then drilled threw it from transom side when mounting hardware. ( this will keep wood crush minimal and no washers required, just 6-32 & 8-32 screws and nuts holding hardware in place. )
Finished graphics on front sponsons, Tub painted as well. Clear lacquer in a couple days to seal it all up keeping vinyl from peeling.
That's it for now


Last edit: 15 years 7 months ago by Scott.
- isuzudude
-
Less
More
- Thank you received: 0
15 years 7 months ago #15271
by isuzudude
Replied by isuzudude on topic Re: MGB Warpath ... Gas Rigger / rigging and set up info
Fantastic Job!!!!!!!!!!!!!!!  MAJOR APPLAUSE!!!!!!!!!!!!!!!!
MAJOR APPLAUSE!!!!!!!!!!!!!!!! - twohottyracing
-
Less
More
- Thank you received: 0
15 years 7 months ago #15274
by twohottyracing
Replied by twohottyracing on topic Re: MGB Warpath ... Gas Rigger / rigging and set up info
scott
that looks absolutlety awesome!!!!!hope to get mine when marc gets back from vacation,i will let him do the build as my woodworking skills are not so great,,,this will be one of my babies so off to dean werges it will go for some awesome paint,,,,,yours is not even together all the way and you can already tell that it is gonna be one sweet ride,,,,,,thanks a bunch for the thread,and looking foward to some video,,,really cant wait to see it finished
scotty
that looks absolutlety awesome!!!!!hope to get mine when marc gets back from vacation,i will let him do the build as my woodworking skills are not so great,,,this will be one of my babies so off to dean werges it will go for some awesome paint,,,,,yours is not even together all the way and you can already tell that it is gonna be one sweet ride,,,,,,thanks a bunch for the thread,and looking foward to some video,,,really cant wait to see it finished
scotty