
Product Review Article...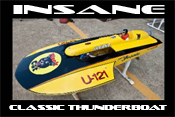
Our review of the Classic Thunderboat from Insane Boats...
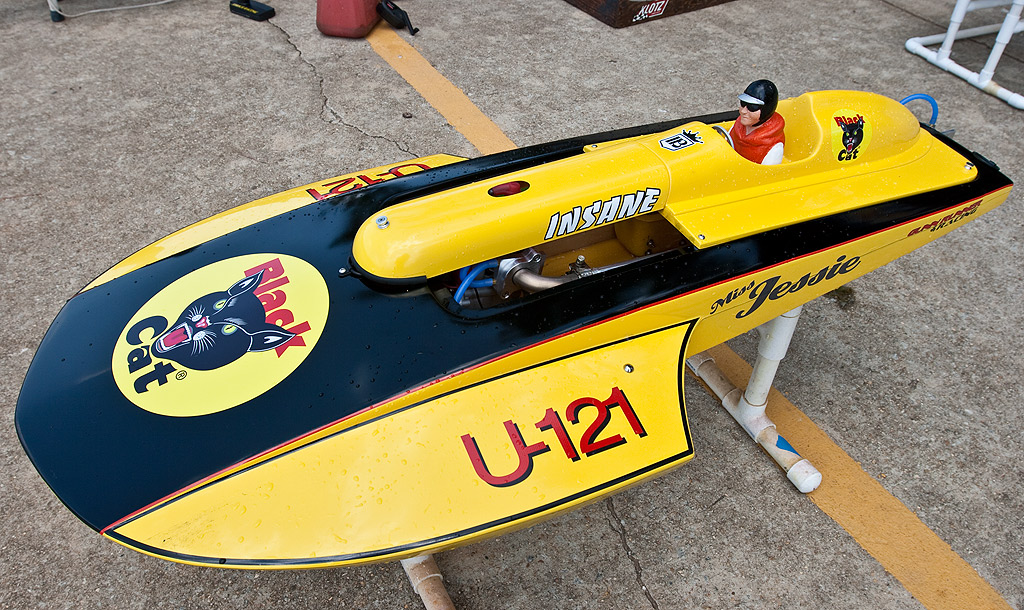
The Insane Boats Classic Thunderboat is one of only a handful of fiberglass round-nose hydros available on the market. And for those faced with the decision of building one from a box of laser-cut wood or installing a motor and hardware on a built-up hull, the choice is usually an easy one. I've built a few wood kits but the ease of assembly that a fiberglass boat offers wins hands down in my book. The Insane Classic Thunderboat is just such a boat - easy to finish and even easier to set up. In fact, a few evenings of work can have you ready for the weekend and winning races to boot.
The monstrous brown box arrived at my door containing the hull, cowl, radio box, and assembly instructions. I opted for all the additional Insane Thunderboat hardware which consisted of the turn fin, strut, rudder assembly, classic driver, steering wheel and gauge cluster, and transom exhaust package. In addition I got the Insane Dominator pro pipe with header and flange. The pipe comes as a zero band with a steel header. It uses a clamp with no o-rings to eliminate water leaks and burned o-ring issues. It also features a no-leak header with offset bolts that make removing and installing the pipe a lot easier than vertical bolts.
 After unpacking everything and giving the instructions a quick read-through, I began by installing the strut on the center of the transom. An easy way to center the strut is to lay down some blue painter’s tape, measure the width and mark the transom
 centerline with a pen. Simple instructions dictate mounting the strut so that the top of the bracket is 1/2" down from the seam in the transom. Mounting the rudder is the same except you mount it on the right side of the strut. Install the rudder bracket so it touches the strut bracket. In preparation for the rudder pushrod, I drilled a hole through the middle of the rudder bracket. Next was the turn fin installation, and I began by placing the turn fin bracket against the back of the right sponson. Slide it to the outside so it's almost against the edge. Turn the fin so it’s roughly at a 20 degree angle and make sure the bottom of the bracket is 1/4" off the bottom of the sponson, then mark your holes and drill them out. There's plywood on the inside of the sponsons which makes using the included blind nuts the best choice. Reach into the hull and place a blind nut over the hole you drilled and sink it into the wood by turning the bolts on the outside. Make sure you use a washer between the bolt and the surface to avoid cracking the glass or damaging the aluminum bracket.
 Now it's time to install the stuffing tube. The ideal outlet through the hull has already been located thanks to a recess in the bottom of
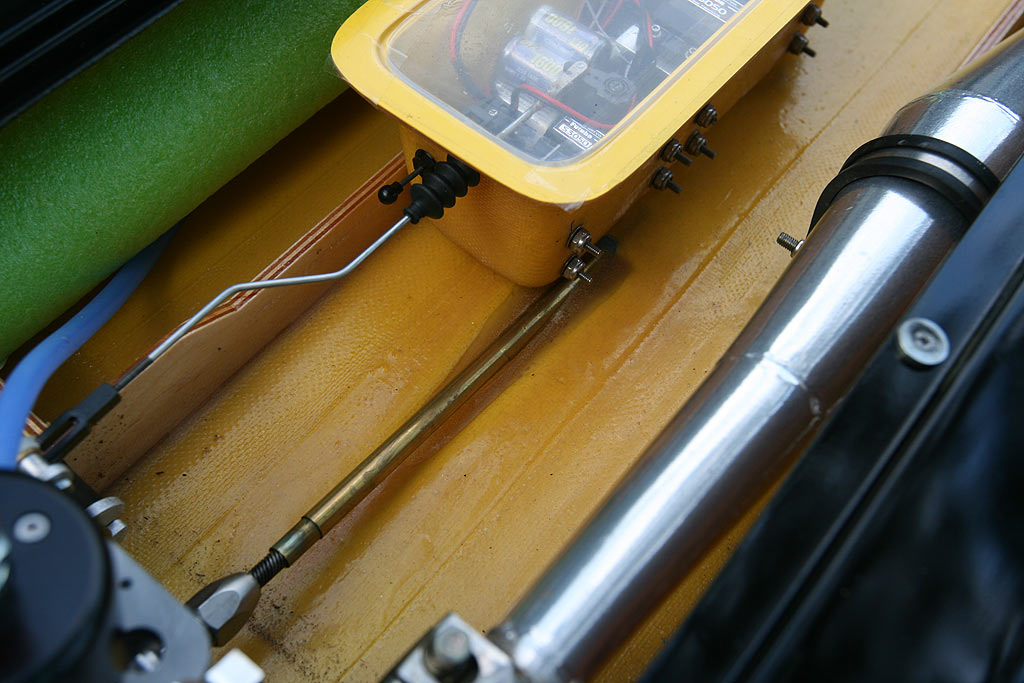 the thunderboat. Drill a hole at the back of this indentation and slide the tube through. Before you fill in the area around the tube with epoxy, you'll want to lay the engine in the boat at 28" from the transom to the spark plug. Line the stuffing tube up with the collet so the flexshaft geometry will be straight. This will involve tilting the motor and adjusting the stuffing tube length until they are perfect. You can raise and lower the engine if needed but your goal is to keep it as low as possible in the hull without actually touching. I slide a piece of Lexan between the engine and the hull to keep the distance close. Once everything is lined up, mix up some 2-part epoxy and fill in the area around the stuffing tube where it exits the hull. Put some painter’s tape around the tube on the outside to prevent any epoxy from seeping through. The use of fiberglass cloth and microbeads is fine but I don't see it as being absolutely necessary. The resin holds the tube in place quite well. Once the epoxy has dried, put a slight bend in the tube so it lines up with the strut. Slide the strut over the end of the tube and bolt it to the transom. Make sure to trim any excess tubing that extends past the end of the strut.
 Let’s install the engine next. In order to be legal in the Classic Thunderboat class in IMPBA, I used a stock Zenoah G260PUM. Since the motor mounts have already been installed during our stuffing tube placement, mark the engine rails with a pen at the point where the rubber isolators meet the wood rails. I just trace around the iso-pad, remove the motor, and drill out the center, just enough to get the screw through. It's a tight fit inside the 5" rails so you'll need a 90-degree drill or Dremel attachment to make the holes. Once you've got the holes drilled, test fit the engine and set it aside... we will need the space for the next steps.
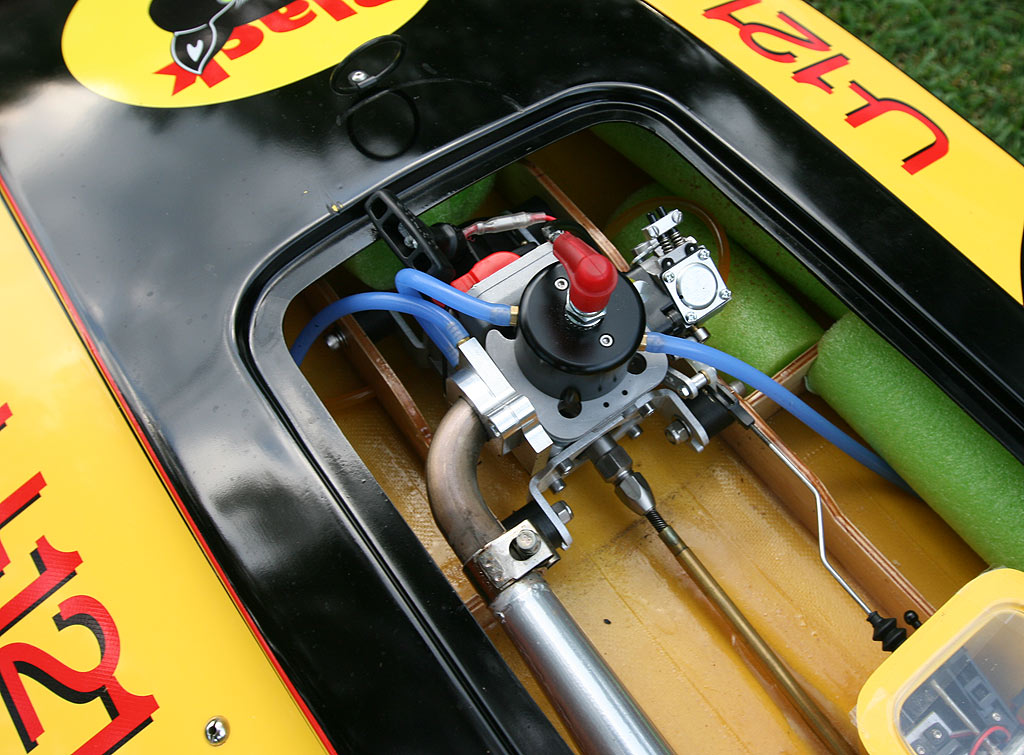
I went with a 500ml gas bag instead of a hard tank for this build. The objective is to place the tank off to the left in front of the engine.  There is plenty of room on the left side of the engine rail and the sponson to fit any type of fuel container, but the actual mounting part is a little more involved. I epoxied a wooden block to the inside of the hull up near the nose as an anchor for the bag. Before I installed the block, I drilled a hole and threaded a bolt in with a large stainless washer. That way, all you need to do is epoxy in the block, slide the bag up to the left front and screw it down tight. The washer will act as a clamp and prevent the bag from moving around. Now, drill a hole through both engine rails in front of the motor to run the fuel lines. I didn't bother to secure the front of the bag because the fuel tube, making a 90-degree turn from the outlet and through the engine rail, holds the bag down and prevents it from bouncing around.
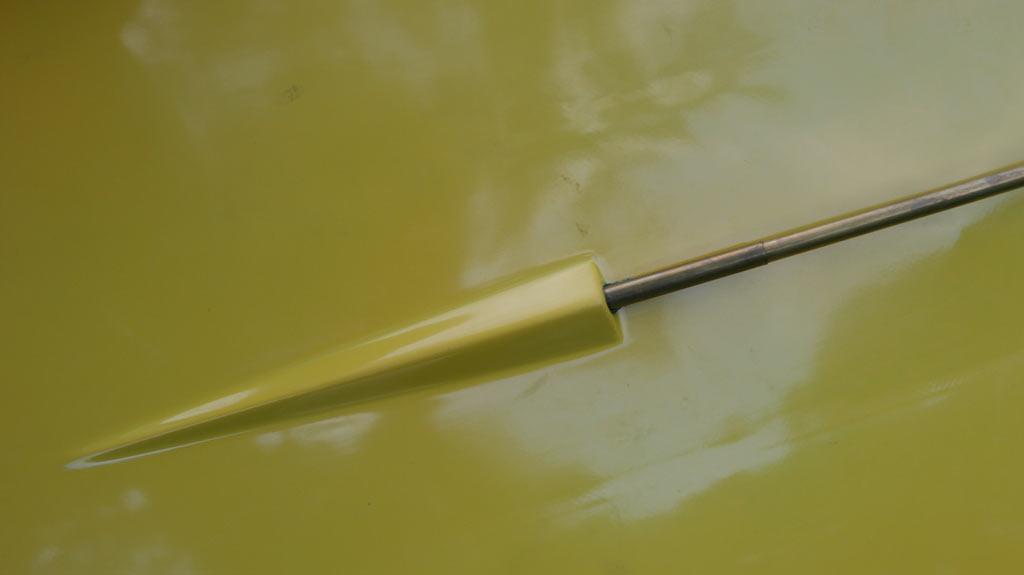
There are no instructions given to install the radio box but that doesn't mean you need to stare at it for a few hours scratching your 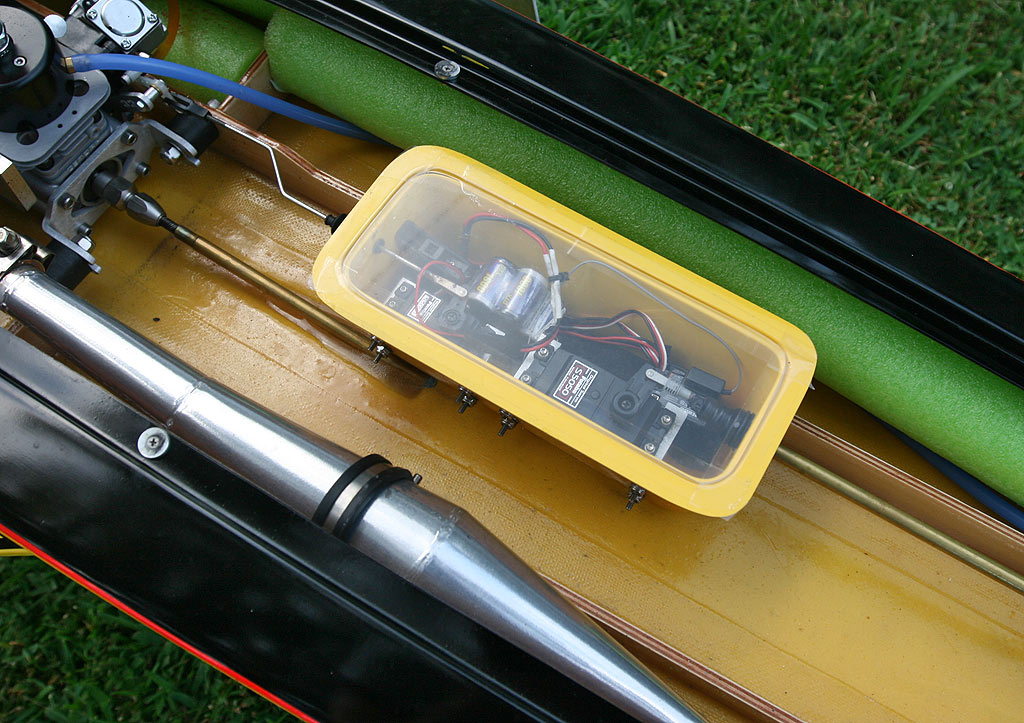 head. I positioned the box against the right rail about 5" back from the carburetor. To secure the box to the hull, I drilled two holes through the side of the box near the bottom. I then positioned it where I wanted and marked through the holes onto the engine rail, drilled the holes, and bolted the box to the rail with stainless fasteners. A dab of silicone on the inside will prevent any leaks. That's really all you need to attach the radio box to the boat. Some people will use rubber bands, wooden blocks, and lite ply to create another box just to hold it. That's just too much added weight if you ask me... two simple bolts through the box and engine rail hold it very tight. Now everyone is going to have their own way of mounting the servos, and I used two TopSecretBoats servo mounts bolted to the left side of the box. Once the servos are in place, running the pushrods is a piece of cake. Drill your holes in the box for the 4-40 rods and connect the servo to the rudder. I used Dubro rods that were threaded on one side. This allowed me to install a threaded link on the servo, cut the rod to length, and solder a link on the rudder side. It's a considerable distance from the rudder to the steering servo, and a 4-40 rod won't hold up to the forces exerted on it without bowing. To combat this, I ran an 11/32" bronze tube from the transom to the radio box. That way, the 4-40 rod won’t bend when I make a right turn. The throttle was run using a bellcrank and a small z-bend in the pushrod.
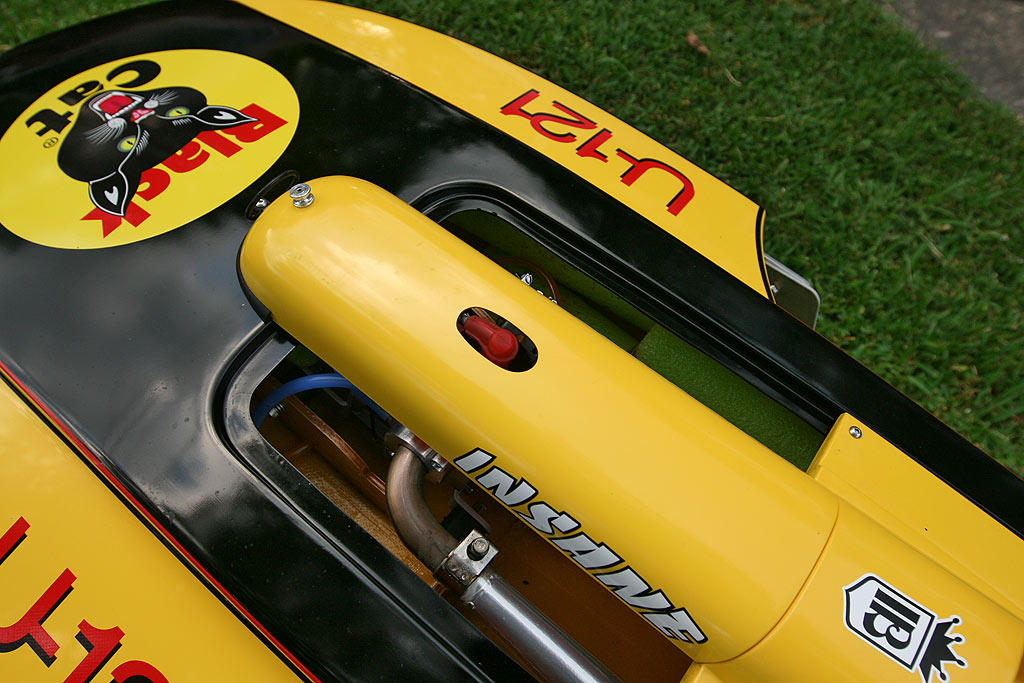
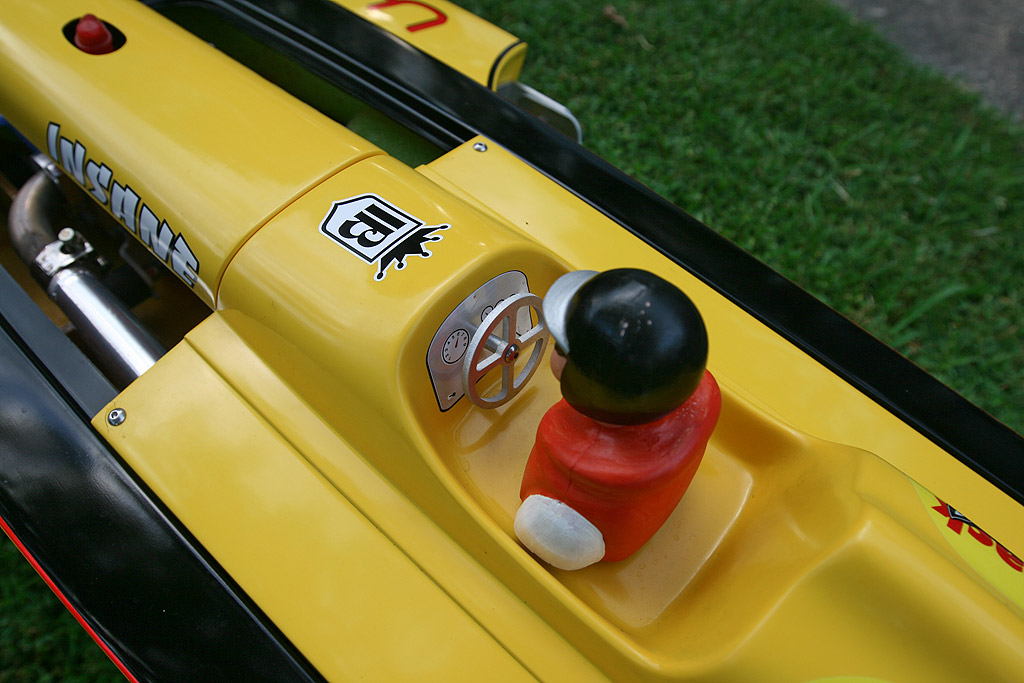 The cowl comes as two separate pieces, and from searching around the forums and looking at the races, I've found that everyone mounts their cowl in their own unique way. I chose to attach the two pieces together using stainless bolts and create a one-piece cowl and use rubber cowl locks from TopSecretBoats to secure it to the deck. One lock at the front of the cowl and two at the transom hold it securely in place even during a blow-off. When mounting the driver, I used some industrial Velcro so he can bail out if the boat stuffs hard. Even though the drivers are durable, I've seen them crack as they impact the water going 50+mph. Its best to have them break away. Since the interior of the hull is exposed due to the cowl design, it isn't necessary to cut any holes in the rear of the cowl, although doing so wouldn't hurt.
In order to balance the boat, Insane Boats recommends adding 12oz of weight to the right sponson. I made a cube of lead with stick-on weights and taped it together, then added some Velcro to the bottom and another piece on the inside of the sponson. Make sure to use industrial Velcro if you use my method as regular stuff won't hold the lead for very long. I ran the interior piece of Velcro the length of the sponson so I could move the lead forward or aft if needed to balance the boat. Placing it 2 inches from the back of the sponson seemed to do the trick on my hull.
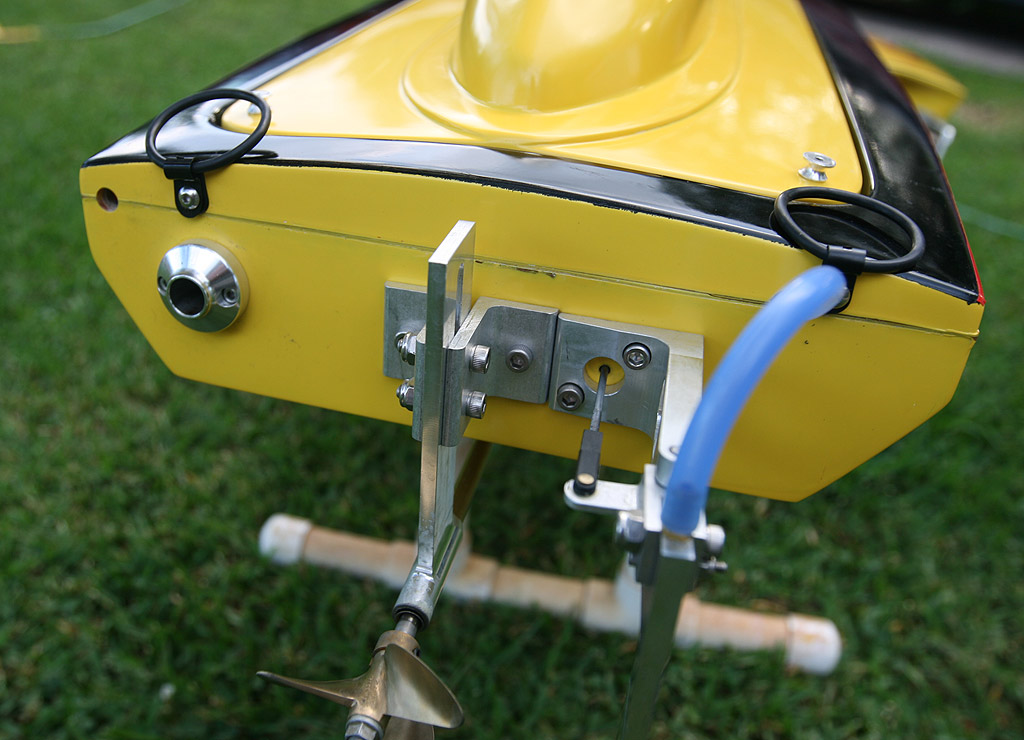
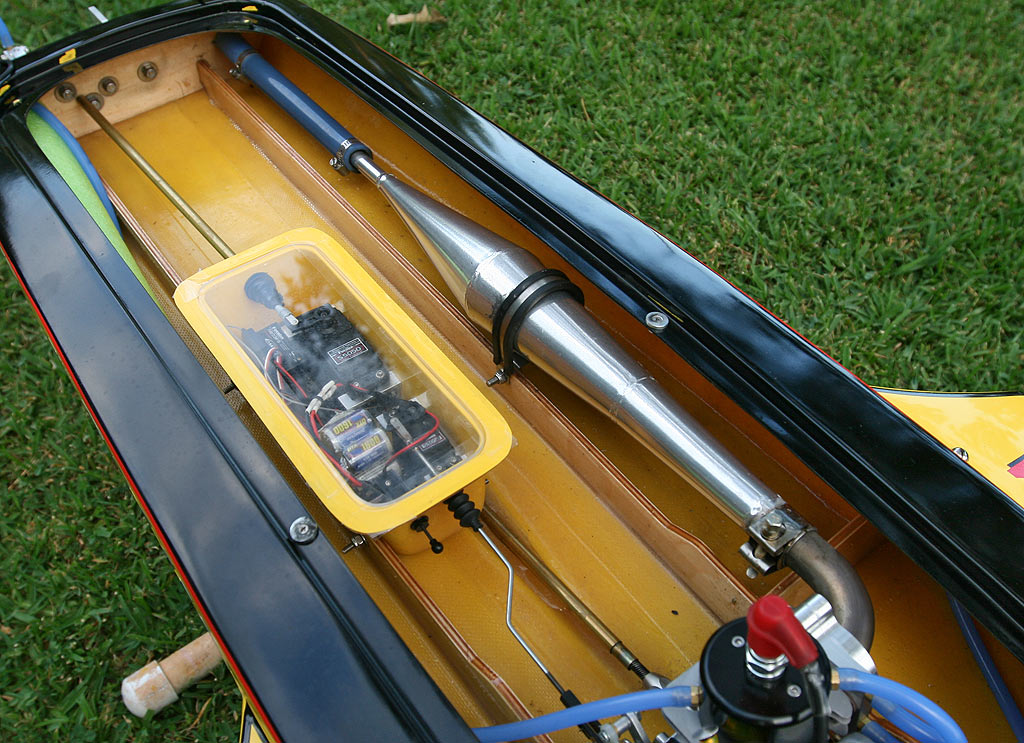 With the engine mounted, install your pipe and drill a hole for the transom exhaust exit. You're on your own as far as securing the pipe, and I used a stainless rubber clamp bolted to the engine rail, which is available through McMaster Carr. The offset no-leak flange is a nice addition to the Dominator Pro pipe. There's no need for close-quarters hex wrenches anymore because both fasteners are exposed and easy to get to. I set the pipe at 11" from exhaust window to the band as a starting point and so far it's been right on...no need for adjustments.
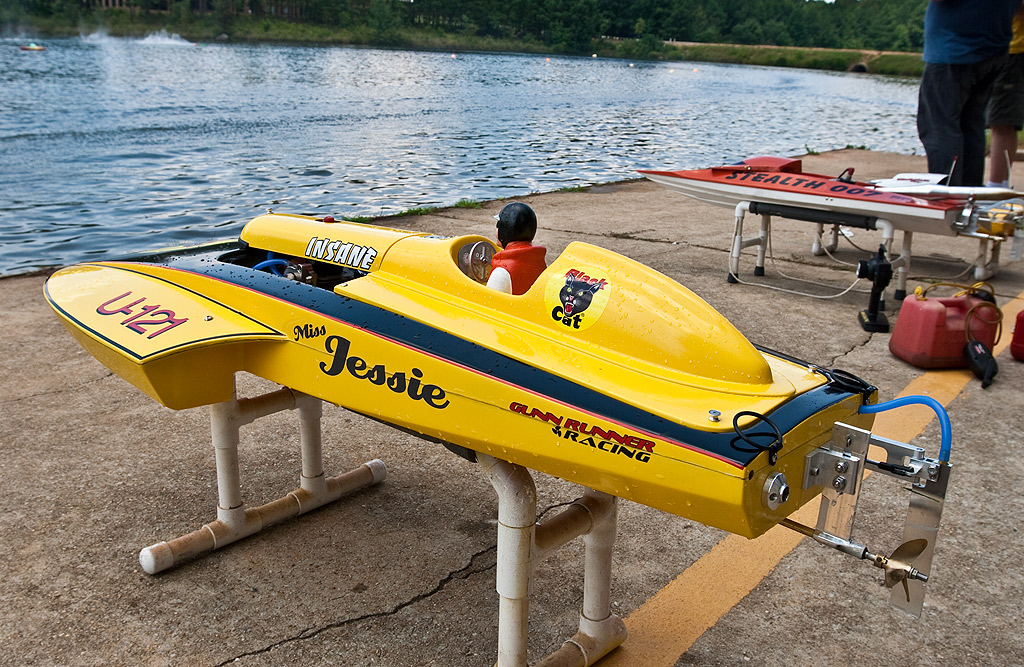
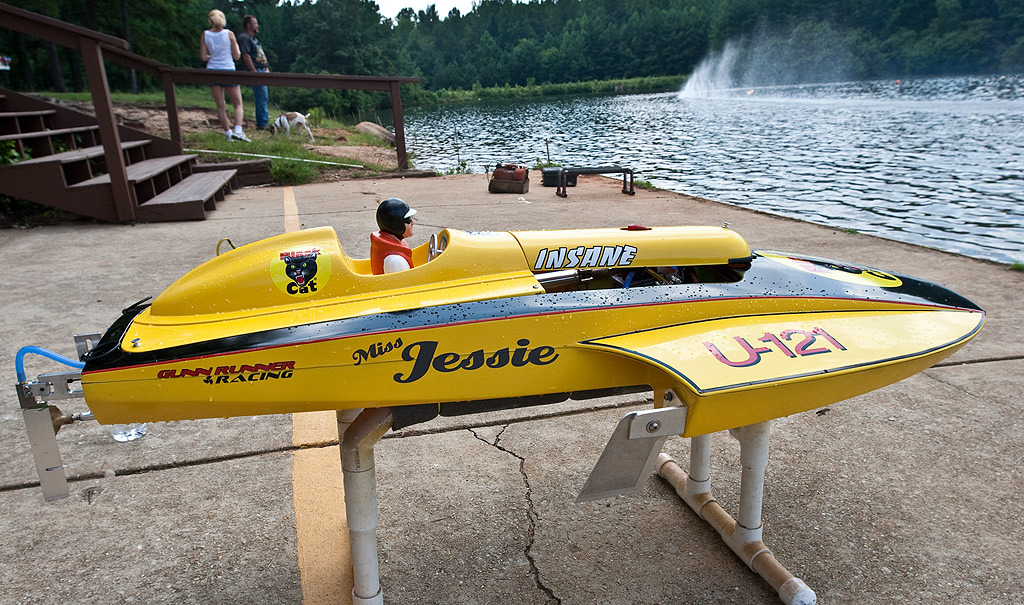
Now that the hard work is done, make sure to stuff the hull with pool noodles just in case she fills with water. Don't forget the cowl too - it will sink like a brick without it. Now is the time to apply your paint and decals. I went with the Black Cat Fireworks logos because, well, that just one mean looking cat! One coat of black on the deck is all I needed and the whole boat was finished off with some automotive pin-stripes.
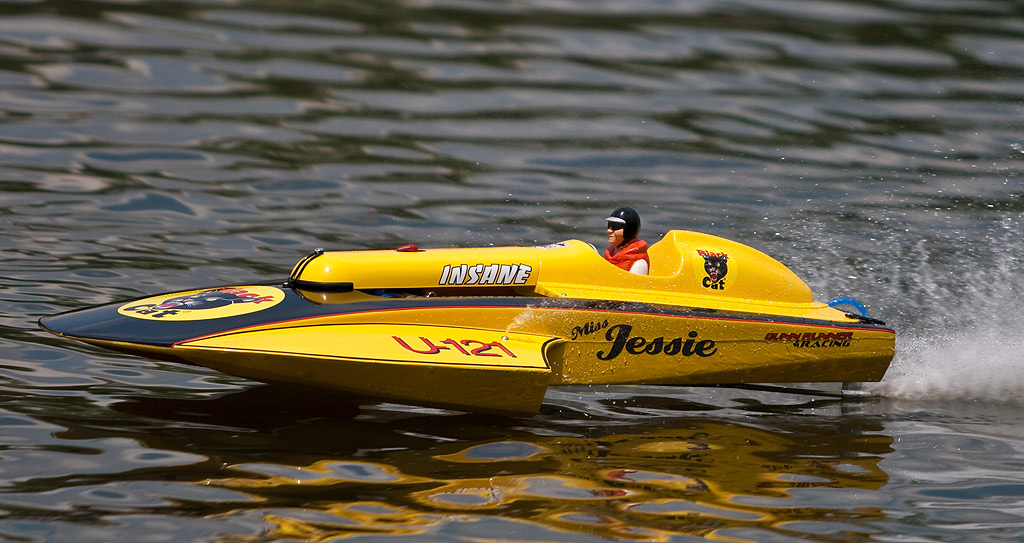
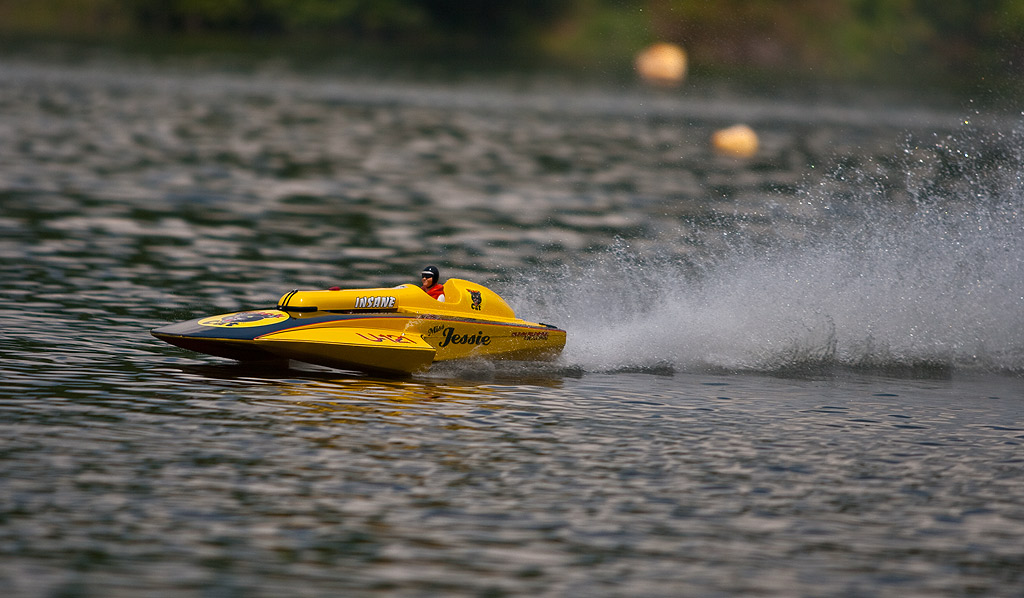
On the water...
To set the classic thunderboat up for its maiden, I angled the turn fin to 20-degrees and made sure the bottom of the fin was parallel with the bottom of the boat. The strut was given 1 degree of negative and set at a depth of 1 3/4" from the bottom of the transom to the center of the prop shaft.
The prop used was a PropWorks West #395 Classic Thunderboat. I would highly recommend this prop as it is perfect in every way. The finish is spectacular, the balance was right on, and the blades were very sharp. This prop was designed specifically for the classic thunderboat and has proven to be a great match for the Insane.
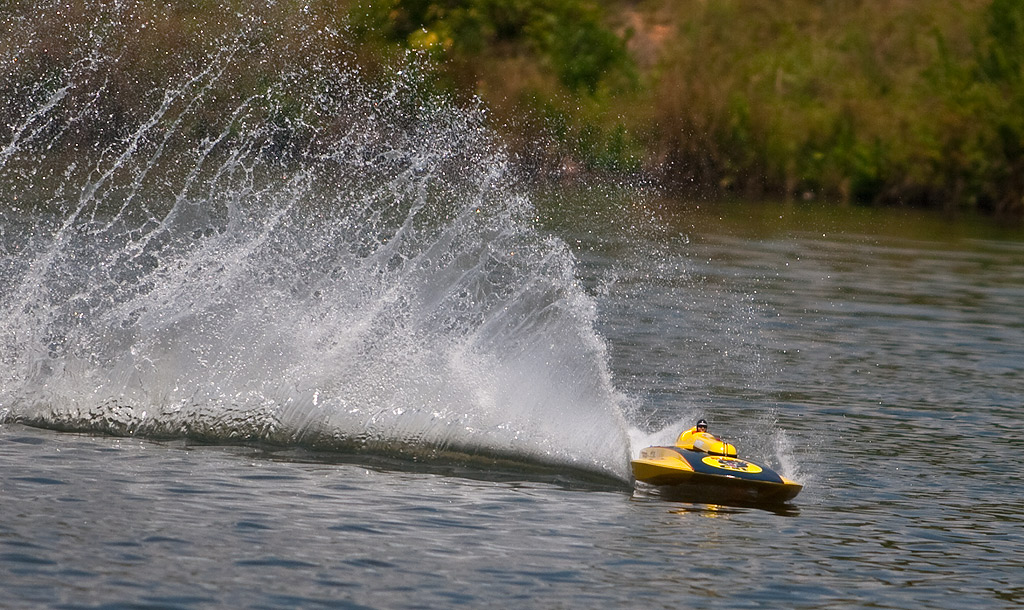
I broke the engine in for a few laps and then began to dial the thunderboat in. I was surprised at the lack of needing any further adjustments. I'm really not kidding either, aside from adjusting the needles the boat was running 54mph on its maiden voyage without any adjustments to the strut or turn fin. I did have the turn fin bracket come loose on me which straightened the fin out and made the boat really lift in the turns. A little thread locking compound on the bolts solved this problem and I was back to running. The thunderboat is exactly what I've been wanting for my intro into the IMPBA class. It’s fast with no bad habits and handles the chop very well. Minimal setup is required to get it running very fast as long as you follow the included building/setup instructions. The boat comes in a multitude of colors and is fully customizable as far as level of detail. I chose to keep it as light as possible for flat out racing. On its first race, the Insane Classic Thunderboat scored 3rd overall and I'm sure would have done batter had I not lost the carburetor arm due to a loose screw. I'm looking forward to many more seasons of racing with my Insane Thunderboat.

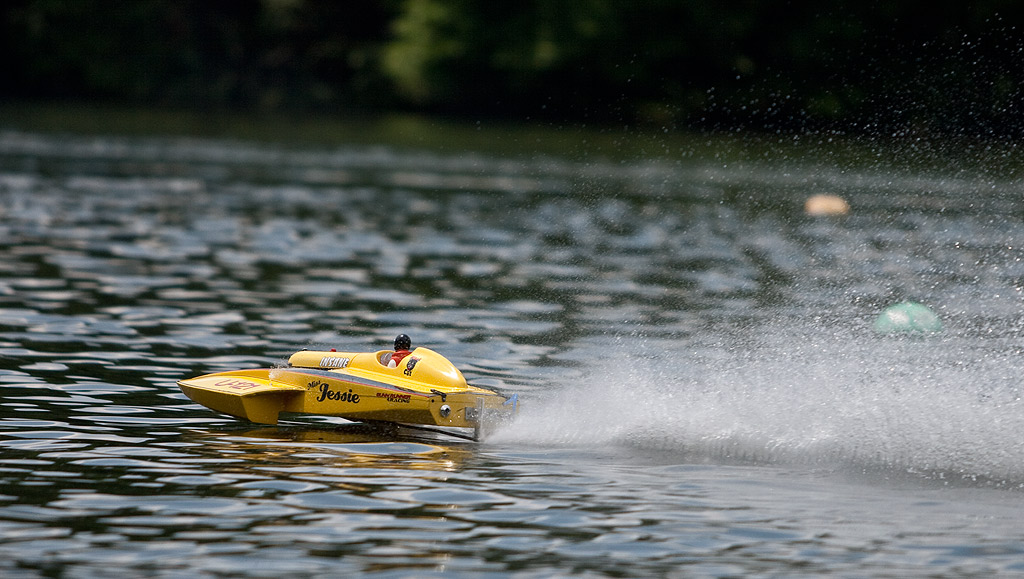
Here is a short video clip of the boat running...

Contact Information: